
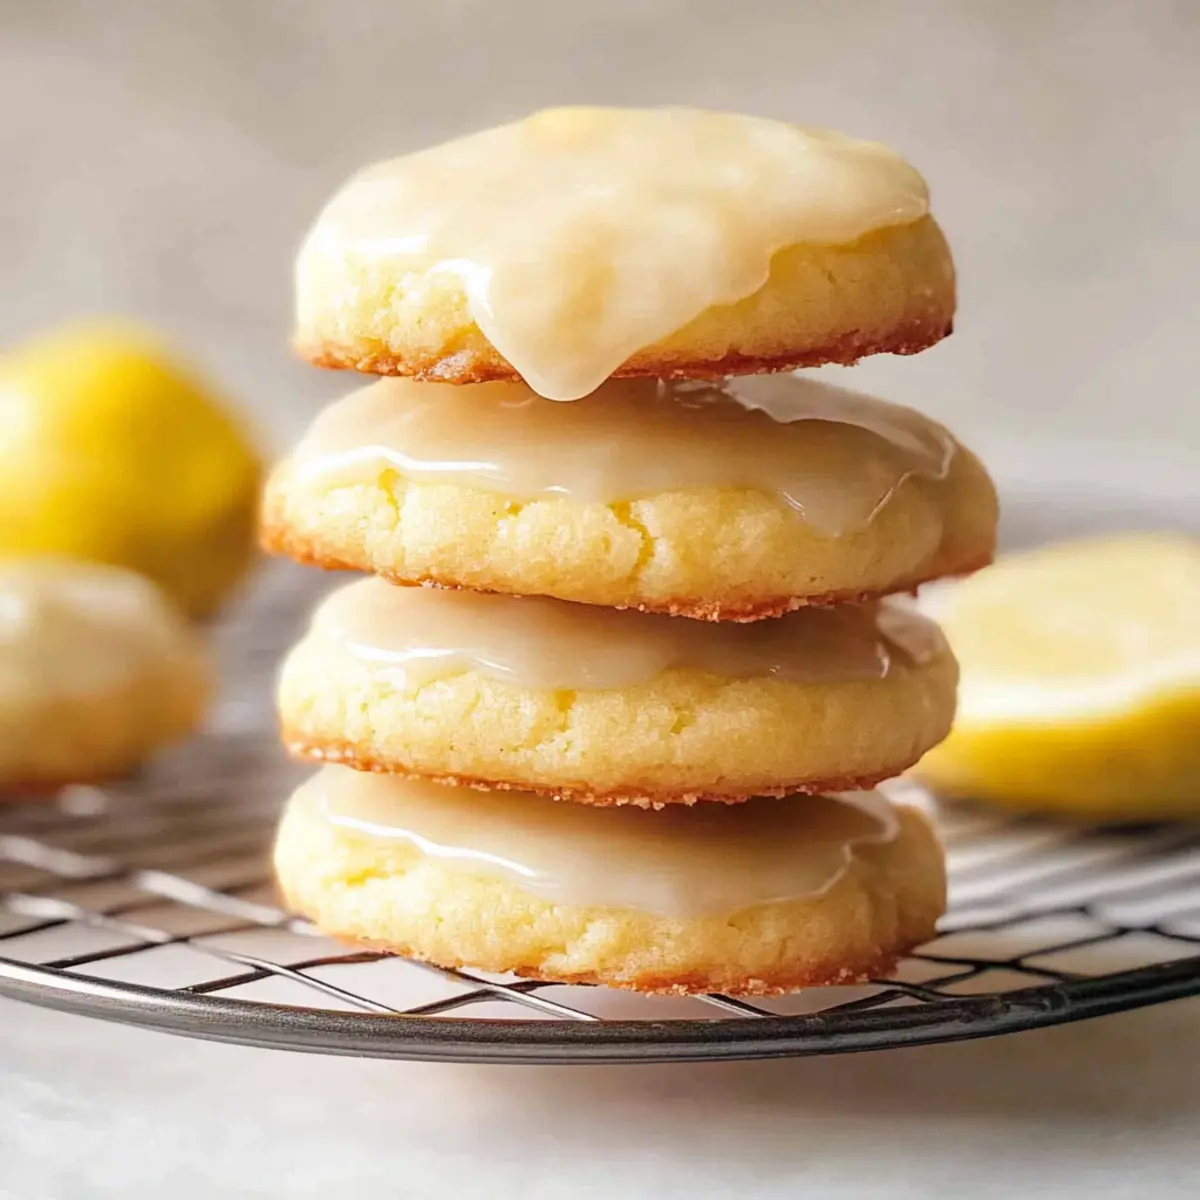
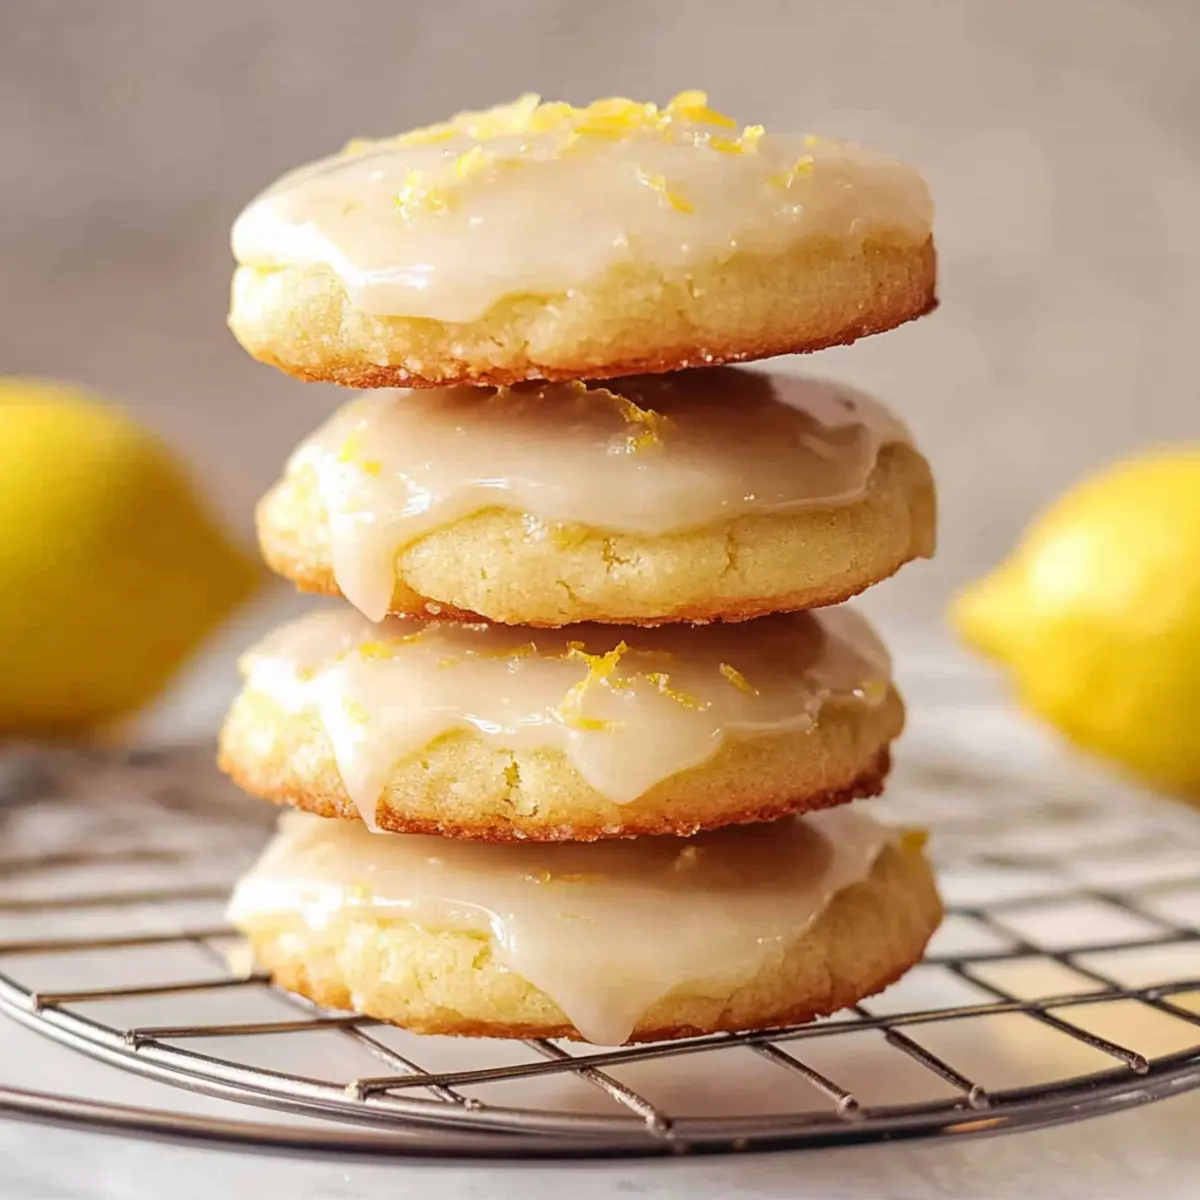
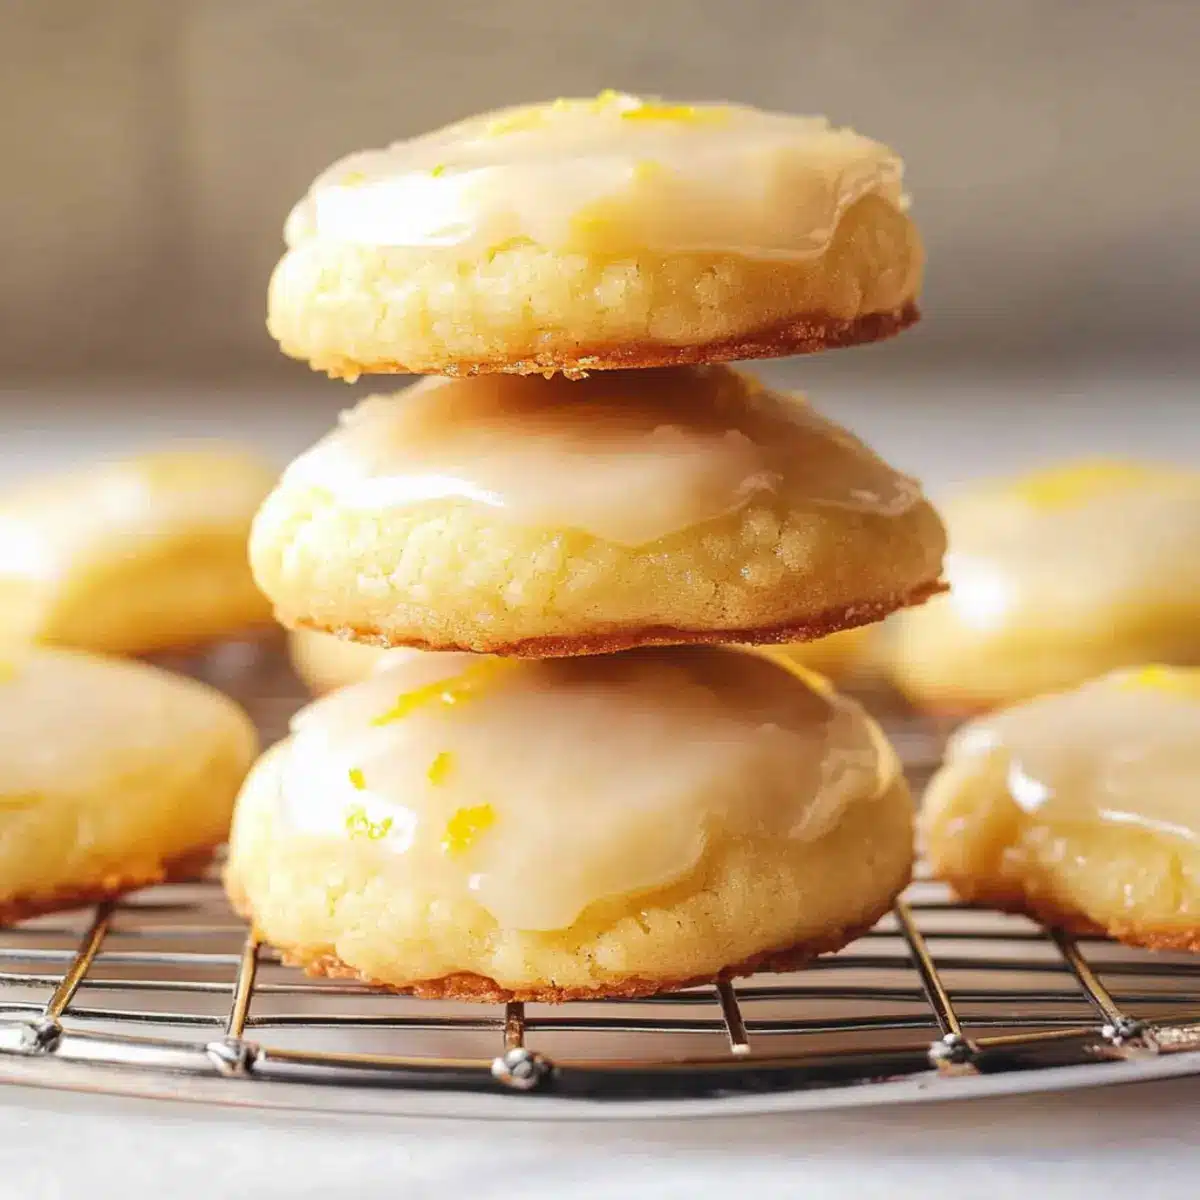
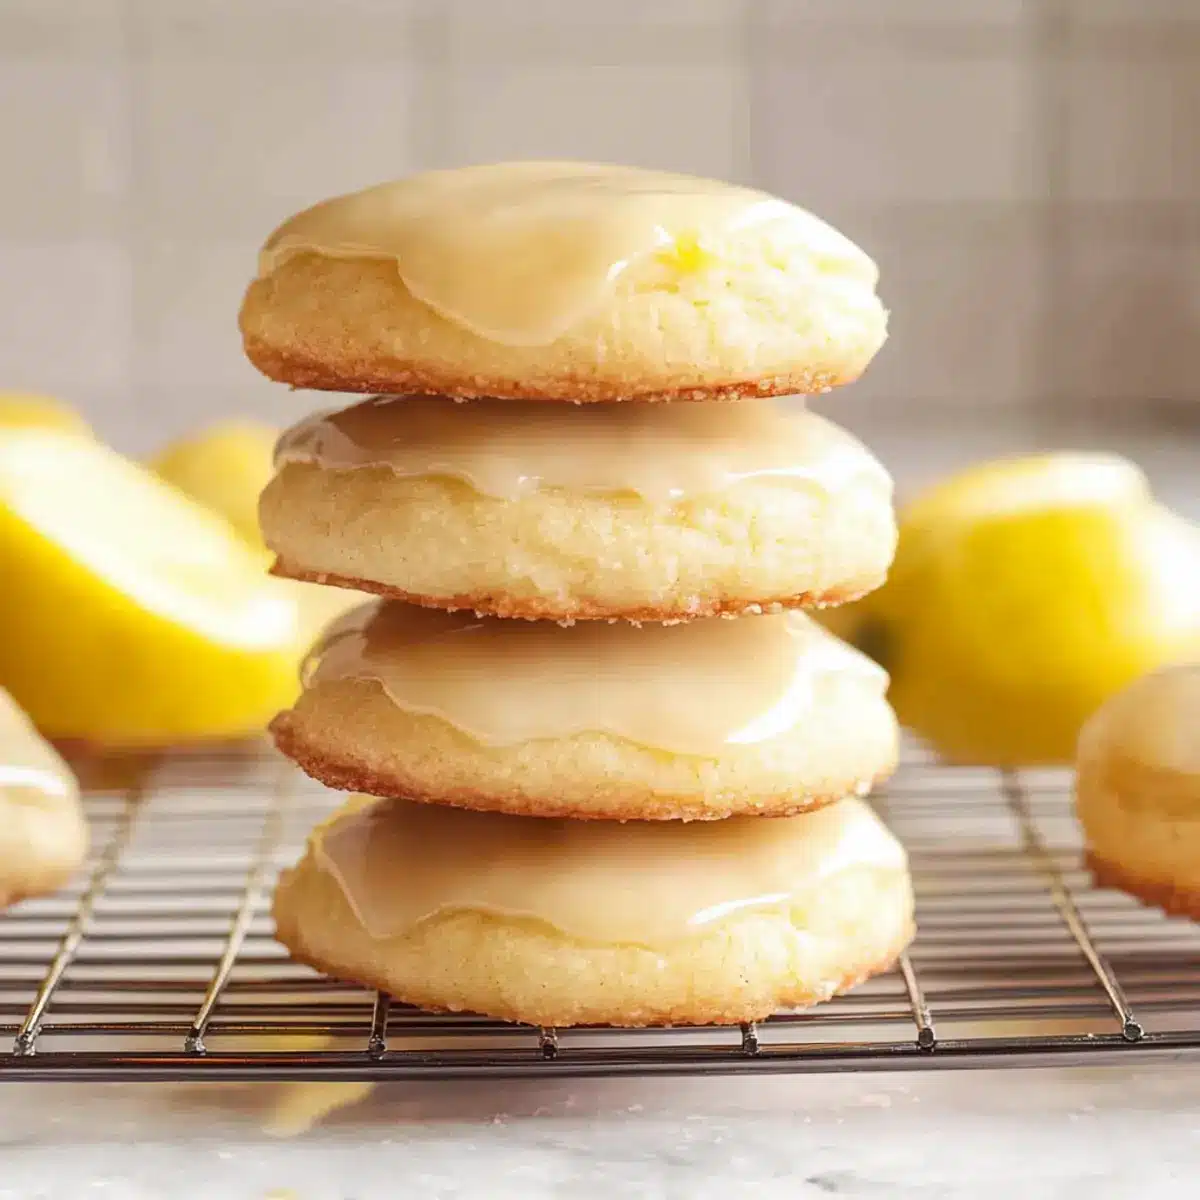
As I stood in my kitchen, the delightful scent of citrus wafting through the air, I couldn’t help but smile. These Zesty Glazed Lemon Cookies are my go-to when I want to share a taste of sunshine with friends and family. They’re not just incredibly easy to whip up in under 30 minutes; they also bring a vibrant brightness to any gathering, from casual coffee catch-ups to festive holiday parties. Each cookie is perfectly soft with a crisp edge and topped with a smooth lemon glaze, making them a wonderfully refreshing treat. Whether you decide to indulge or share them as gifts, these Glazed Lemon Cookies are bound to become a favorite. Curious how to create this zesty delight? Let’s dive into the recipe!
Why Are These Cookies So Irresistible?
Bright Citrus Flavor: These Glazed Lemon Cookies are packed with zesty lemon zest and juice, providing a refreshing taste that pairs perfectly with any drink. Quick and Easy: With a prep time of under 30 minutes, you can whip these up on a whim, making them an ideal choice for unexpected guests. Crowd-Pleasing Treats: They’re a hit at gatherings and make for delightful gifts, brightening everyone’s day. Soft Yet Chewy: The perfect balance of textures with a soft, chewy center and crispy edges keeps you reaching for more. Try serving them alongside a cup of tea or coffee for a delightful experience, and don’t forget to check out our recipes for Light Choux Pastries for more citrus-inspired delights!
Glazed Lemon Cookies Ingredients
For the Cookie Base
• All-Purpose Flour – Provides structure and texture; ensure it’s spooned and leveled for accuracy.
• Salt – Enhances flavor; use kosher or sea salt for the best results.
• Baking Powder – The leavening agent for a light texture; do not substitute with baking soda.
• Lemon Zest – Adds vibrant lemon flavor and aroma; use a microplane for fine zesting while avoiding the bitter white pith.
• Sugar – Adds sweetness and aids in browning; granulated sugar is recommended, but you can use coconut sugar for a darker flavor.
• Unsalted Butter – Provides richness and moisture; should be at room temperature for proper creaming.
• Vanilla Extract – Adds depth of flavor; homemade vanilla can enhance the taste even further.
• Lemon Juice – Brings acidity and additional lemon flavor; freshly squeezed juice is preferable for the best taste.
• Egg – Provides moisture and structure; use large eggs, and room temperature enhances incorporation.
For the Glaze
• Confectioners’ Sugar – Ensures a sweet and smooth glaze; make sure to sift for a lump-free finish.
• Lemon Juice – Adds a tangy kick to the glaze; freshly squeezed is always best for that vibrant taste.
• Lemon Zest – Incorporate into the glaze for a lovely lemony aroma and flavor boost.
These Glazed Lemon Cookies are a perfect treat to brighten up your day!
Step-by-Step Instructions for Zesty Glazed Lemon Cookies
Step 1: Preheat the Oven
Start by preheating your oven to 350°F (175°C). While the oven heats up, prepare two baking sheets by lining them with parchment paper. This will prevent the cookies from sticking and ensure even baking. Make sure to have all your ingredients within reach for a smooth baking process.
Step 2: Mix Dry Ingredients
In a mixing bowl, whisk together 2 cups of all-purpose flour, ½ teaspoon of salt, and 1 teaspoon of baking powder. Set this dry mixture aside as it will provide the necessary structure and texture for your Glazed Lemon Cookies. The whisking will help to incorporate air, giving your cookies a light and fluffy texture.
Step 3: Create Lemon-Sugar Mixture
In a separate small bowl, combine the zest of 1 lemon with 1 cup of granulated sugar. Use your fingers to rub the zest into the sugar until it’s fragrant and well-combined. This step infuses the sugar with vibrant lemon flavor, ensuring every cookie is delightfully zesty.
Step 4: Cream Butter and Sugar
In your stand mixer, cream together ½ cup of unsalted butter and the lemon-sugar mixture until light and fluffy, about 3-5 minutes on medium speed. The mixture should be smooth and pale in color. Make sure your butter is at room temperature for the best texture—the creamy blend is crucial for soft and chewy cookies.
Step 5: Combine Wet Ingredients
Add 1 teaspoon of vanilla extract, 2 tablespoons of freshly squeezed lemon juice, and 1 large egg to the butter mixture. Mix on low speed until everything is just combined, avoiding overmixing. You want a homogenous batter that still retains some air for that delightful softness in your Glazed Lemon Cookies.
Step 6: Incorporate the Dry Ingredients
Gradually add the dry flour mixture to the wet ingredients on low speed, mixing until just incorporated. Be careful not to overmix to keep those cookies tender. The dough will be slightly sticky but should hold its shape well. This is the blend that will yield the perfect soft and chewy texture.
Step 7: Shape the Cookies
Using a tablespoon, scoop out portions of the dough and place them on the prepared baking sheets, spacing them about 2 inches apart. Flatten each ball of dough gently with the palm of your hand. This helps them spread evenly while baking, allowing for that ideal texture in your Zesty Glazed Lemon Cookies.
Step 8: Bake the Cookies
Place the baking sheets in the preheated oven and bake for 11-14 minutes. Keep an eye on them—the edges should turn lightly golden, while the centers remain soft and delicate. Once they’re baked, remove them from the oven and let them sit on the sheets for a few minutes to firm up.
Step 9: Transfer to Cooling Racks
After a few minutes, carefully transfer the cookies to wire racks to cool completely. This cooling step is essential; if you glaze them too soon, the glaze may melt away. Letting them cool ensures that your cookies maintain their lovely shape and texture.
Step 10: Prepare the Glaze
While your cookies cool, whisk together 1 cup of sifted confectioners’ sugar, 2 tablespoons of lemon juice, and the zest of half a lemon in a small bowl until the mixture is smooth and lump-free. The glaze should be thick yet pourable, perfect for creating that beautiful finish on your Glazed Lemon Cookies.
Step 11: Glaze the Cookies
Once cooled, dip the tops of each cookie into the glaze, allowing any excess to drip off. Place them back on the wire racks to set. This step adds that delightful sweet and tangy element, making the cookies a vibrant treat that everyone will love.
Step 12: Let the Glaze Firm Up
Allow the glaze to set for about 20-30 minutes at room temperature. This will create a lovely sheen and a slightly hardened texture on top of your cookies. Your Zesty Glazed Lemon Cookies are now ready to be enjoyed, either as a sweet treat for yourself or shared with friends and family!
Make Ahead Options
These Zesty Glazed Lemon Cookies are perfect for meal prep, saving you valuable time during busy weeks! You can prepare the cookie dough up to 24 hours in advance; simply cover the bowl tightly with plastic wrap and refrigerate. If you want to go a step further, you can scoop the dough into balls and freeze them; they’ll keep for up to 3 months. When ready to bake, transfer the dough to the fridge for a few hours to thaw before baking as directed. For the glaze, it’s best to make it fresh, as it maintains its delightful texture and flavor—just whisk it together while the cookies cool after baking. With these make-ahead strategies, you’ll enjoy fresh, zesty cookies anytime with minimal effort!
How to Store and Freeze Glazed Lemon Cookies
Room Temperature: Keep your Glazed Lemon Cookies in an airtight container at room temperature for up to 5 days to maintain their freshness and flavor.
Fridge: If you live in a warmer climate, consider storing them in the fridge for up to a week. Just be sure to let them come to room temperature before serving for that delightful softness!
Freezer: Unglazed cookies can be frozen for up to 2 months. Place them in a single layer on a baking sheet until firm, then transfer to an airtight container or freezer bag.
Reheating: When you’re ready to enjoy, simply let the cookies thaw at room temperature. For a warm treat, pop them in the microwave for about 10 seconds—just be careful not to overdo it!
Glazed Lemon Cookies Variations
Feel free to add your personal twist to these delightful cookies for an even more refreshing treat!
-
Citrus Swap: Substitute lemon with orange or lime zest/juice for a different citrusy flavor profile that brightens up your batch.
-
Flavor Boost: Add poppy seeds to the dough for a unique texture and nutty flavor, enriching the overall experience.
-
Gluten-Free: Use a gluten-free flour blend instead of all-purpose flour to accommodate gluten sensitivities while still enjoying that soft, chewy texture.
-
Sweetener Switch: Replace granulated sugar with honey or maple syrup for a natural sweetness that will enhance the flavor.
-
Fruity Burst: Mix in dried cranberries or blueberries for a fruity surprise, creating a lovely contrast with the lemon.
-
Nutty Touch: Fold in finely chopped almonds or walnuts for an added crunch, complementing the soft cookie base beautifully.
-
Spice It Up: Add a pinch of cardamom or ground ginger for an aromatic twist that pairs perfectly with the lemony goodness.
-
Chocolate Drizzle: Top with a drizzling of melted dark chocolate for an indulgent contrast that takes these cookies to the next level.
Remember, exploring variations is part of the fun in baking; each twist brings a new taste adventure! And if you’re ever in the mood for another citrus-inspired treat, don’t miss out on our delightful recipe for Light Choux Pastries. Enjoy baking!
What to Serve with Zesty Glazed Lemon Cookies
Indulging in a batch of Zesty Glazed Lemon Cookies is a delightful experience, and pairing them with the right companions can elevate your gathering even further.
-
Refreshing Iced Tea: A chilled glass of lemon or herbal iced tea complements the cookies’ citrusy notes, enhancing their zesty flavor.
-
Rich Vanilla Ice Cream: The creamy sweetness of vanilla ice cream balances the tangy lemon glaze brilliantly, creating a heavenly dessert combo.
-
Cheese Platter: A selection of mild cheeses, like brie or gouda, adds a rich creaminess that pairs wonderfully with the cookie’s brightness, offering a delightful contrast in flavors.
-
Fruit Salad: A colorful mix of berries and citrus adds freshness and a splash of color to your dessert table. The juicy fruits harmonize beautifully with the cookies.
-
Sparkling Water: A glass of sparkling water with a twist of lime or lemon cleanses the palate, making each bite of cookie feel refreshing and light.
-
Chocolate Fondue: For a fun and interactive dessert, serve these cookies with a side of rich, melted chocolate for dipping, allowing guests to personalize their treat.
Embrace these pairings to create a memorable dessert experience that brings joy and sunshine to your table!
Expert Tips for Glazed Lemon Cookies
- Room Temperature Butter: Ensure your butter is at room temperature; cold butter will not cream well, affecting your cookie texture.
- Avoid Overmixing: Mix your cookie dough just until combined after adding the flour. Overmixing can result in tough cookies instead of tender, Glazed Lemon Cookies.
- Cool Before Glazing: Allow the cookies to cool completely before dipping them in glaze. Glazing too soon will cause the glaze to melt into the cookie, losing that beautiful finish.
- Use Fresh Ingredients: Fresh lemon juice and zest make a noticeable difference in flavor. Avoid bottled lemon juice for the best taste adventure.
- Sift Confectioners’ Sugar: Sift the sugar for your glaze to avoid lumps and achieve a smooth texture, making your cookies consistently delightful to look at and eat.
Glazed Lemon Cookies Recipe FAQs
How do I choose ripe lemons for my Glazed Lemon Cookies?
Absolutely! Look for lemons that are firm and bright yellow with a slight sheen. They should feel heavy for their size, indicating juiciness. Steer clear of any with dark spots or a dull appearance, as these may not be as flavorful.
What is the best way to store my Glazed Lemon Cookies?
To keep your cookies fresh, store them in an airtight container at room temperature for up to 5 days. If you want them to last a little longer, ungrazed cookies can be frozen for up to 2 months. Just ensure they are completely cooled before sealing them up to lock in flavor and texture!
Can I freeze Glazed Lemon Cookies? If so, how?
Very! To freeze ungrazed cookies, first arrange them in a single layer on a baking sheet and freeze until firm, about 1-2 hours. Once solid, transfer them to an airtight container or freezer bag, squeezing out as much air as possible. When you’re ready to enjoy, simply let them thaw at room temperature. If you prefer them warm, a quick microwave for 10 seconds will do the trick!
What should I do if my cookie dough is too sticky?
If you find your dough is overly sticky, don’t panic! A sprinkle of flour can help you achieve a better consistency. You can also chill the dough in the fridge for about 15-30 minutes, which can make it easier to handle. Just be careful not to add too much flour, as it can alter the texture!
Are there any dietary considerations I should keep in mind for Glazed Lemon Cookies?
Yes, definitely! If you’re making these cookies for someone with allergies, check the label on the ingredients. For nut allergies, simply ensure no nuts are used in the butter or any optional mix-ins. Additionally, for those watching their sugar intake, consider substituting granulated sugar with coconut sugar for a slightly lower glycemic impact, though it may affect the cookies’ color and texture.
Sweet & Tangy Glazed Lemon Cookies for Instant Joy
Ingredients
Equipment
Method
- Preheat your oven to 350°F (175°C) and line two baking sheets with parchment paper.
- Whisk together the flour, salt, and baking powder in a bowl, and set aside.
- Combine lemon zest and sugar in a small bowl, rubbing the zest into the sugar until fragrant.
- Cream together unsalted butter and the lemon-sugar mixture until light and fluffy.
- Add vanilla extract, lemon juice, and egg to the butter mixture and mix until just combined.
- Gradually add the dry mixture to the wet ingredients, mixing until just incorporated.
- Scoop portions of the dough onto prepared baking sheets, flattening each ball slightly.
- Bake for 11-14 minutes until edges are lightly golden and centers remain soft.
- Allow cookies to cool on the baking sheets for a few minutes before transferring to a wire rack.
- Whisk together glaze ingredients until smooth and dip the tops of cooled cookies.
- Let the glaze firm up for about 20-30 minutes before serving.
Leave a Reply