
As I was preparing for our annual 4th of July barbecue, I stumbled upon a delightful idea: why not create Red, White, and Blue Mini Cheesecakes? These charming treats not only capture the spirit of the holiday but also come together in a breeze, making them a perfect addition to any summer celebration. With a buttery graham cracker crust and a velvety filling, each mini cheesecake is a fun and festive way to impress your guests. Plus, they’re an easy make-ahead option, ensuring you have more time to enjoy the fireworks and festivities. So, are you ready to bring a splash of color and sweetness to your summer gatherings? Let’s dive into this cheerful recipe!
Why Are These Cheesecakes So Irresistible?
Festive and Fun: These Red, White, and Blue Mini Cheesecakes are the ultimate patriotic dessert, perfect for summer gatherings.
Easy to Make: With simple ingredients and straightforward steps, baking them is a breeze, making you look like a pro without the stress.
Make-Ahead Friendly: Prepare them in advance for your 4th of July BBQ, so you can focus on other festivities.
Flavor Explosion: The creamy cheesecake coupled with fresh berries creates a delightful flavor that will have your guests coming back for seconds.
Visually Stunning: Their colorful layers not only taste delicious but also make a gorgeous centerpiece for your dessert table.
Whether you serve them at a summer barbecue or enjoy them during a cozy evening in, these mini cheesecakes are bound to steal the show!
Red White and Blue Mini Cheesecakes Ingredients
For the Crust
• Graham Crackers – These form a deliciously buttery base; substitute with gluten-free crackers for a gluten-free option.
• Granulated Sugar – Sweetens both the crust and cheesecake filling; coconut sugar can be used for a healthier touch.
• Melted Butter – Binds the crust together beautifully; vegan margarine works for a dairy-free version.
For the Cheesecake Filling
• Cream Cheese – Provides that rich, creamy texture; opt for vegan cream cheese for a plant-based alternative.
• Heavy Cream – Adds creaminess to the filling; replace with coconut cream for a dairy-free option.
• Sour Cream – Contributes a hint of tanginess; Greek yogurt is a great substitute.
• Vanilla Extract – Enhances the overall flavor; use pure vanilla extract for best results.
• Eggs – Essential for structure; chia seeds or applesauce can be used for a vegan adaptation.
• Flour – Helps firm up the cheesecake; gluten-free flour blends work well for a gluten-free version.
• Salt – Balances sweetness perfectly; sea salt is a cleaner tasting option.
For the Topping
• Heavy Cream – Whipped into a cloud-like topping; adds a luxurious finish to your mini cheesecakes.
• Blueberries – Fresh fruit that adds color and a burst of flavor; any seasonal berry can work as a substitution.
• Strawberries – Deliciously sweet and vibrant; use mixed berries for even more color on your dessert table.
This Red White and Blue Mini Cheesecakes recipe creates a sensational patriotic dessert that will not only satisfy your sweet tooth but also impress your guests with its beautiful presentation!
Step‑by‑Step Instructions for Red White and Blue Mini Cheesecakes
Step 1: Preheat the Oven
Preheat your oven to 350°F (175°C) and prepare your muffin tins by lining them with 14-16 paper liners. This will allow for easy removal of your Red White and Blue Mini Cheesecakes after baking. Once your oven is ready, gather your ingredients and tools to create the perfect base for your delicious cheesecakes.
Step 2: Prepare the Crust
In a food processor, pulse graham crackers until they form fine crumbs. Combine these crumbs with granulated sugar and melted butter in a medium bowl, mixing until the mixture resembles damp sand. This buttery blend will create a delightful crust, so ensure all the crumbs are coated before moving to the next step.
Step 3: Form the Crusts
Press about 1 tablespoon of the crumb mixture into the bottom of each paper liner in your muffin tin. Use the back of a measuring spoon to pack the crumbs tightly, creating a solid base. Bake the crusts in the preheated oven for 6 minutes until they’re set and slightly golden, then allow them to cool while you prepare the filling.
Step 4: Mix the Cheesecake Filling
In a large mixing bowl, combine the softened cream cheese, granulated sugar, heavy cream, sour cream, and vanilla extract. Use a hand mixer on medium speed and beat the mixture until it is smooth and creamy, about 2-3 minutes. This step is crucial for achieving the luscious consistency of your Red White and Blue Mini Cheesecakes, so be sure to scrape down the sides for an even blend.
Step 5: Incorporate the Eggs
Gradually add the eggs to the cheesecake filling, mixing on low speed until just combined each time. Be careful not to overbeat, as this can lead to cracks during baking. After incorporating the eggs, add flour and salt, and stir gently until no streaks remain. The filling should now be perfectly fluffy and ready for the next step.
Step 6: Color the Filling
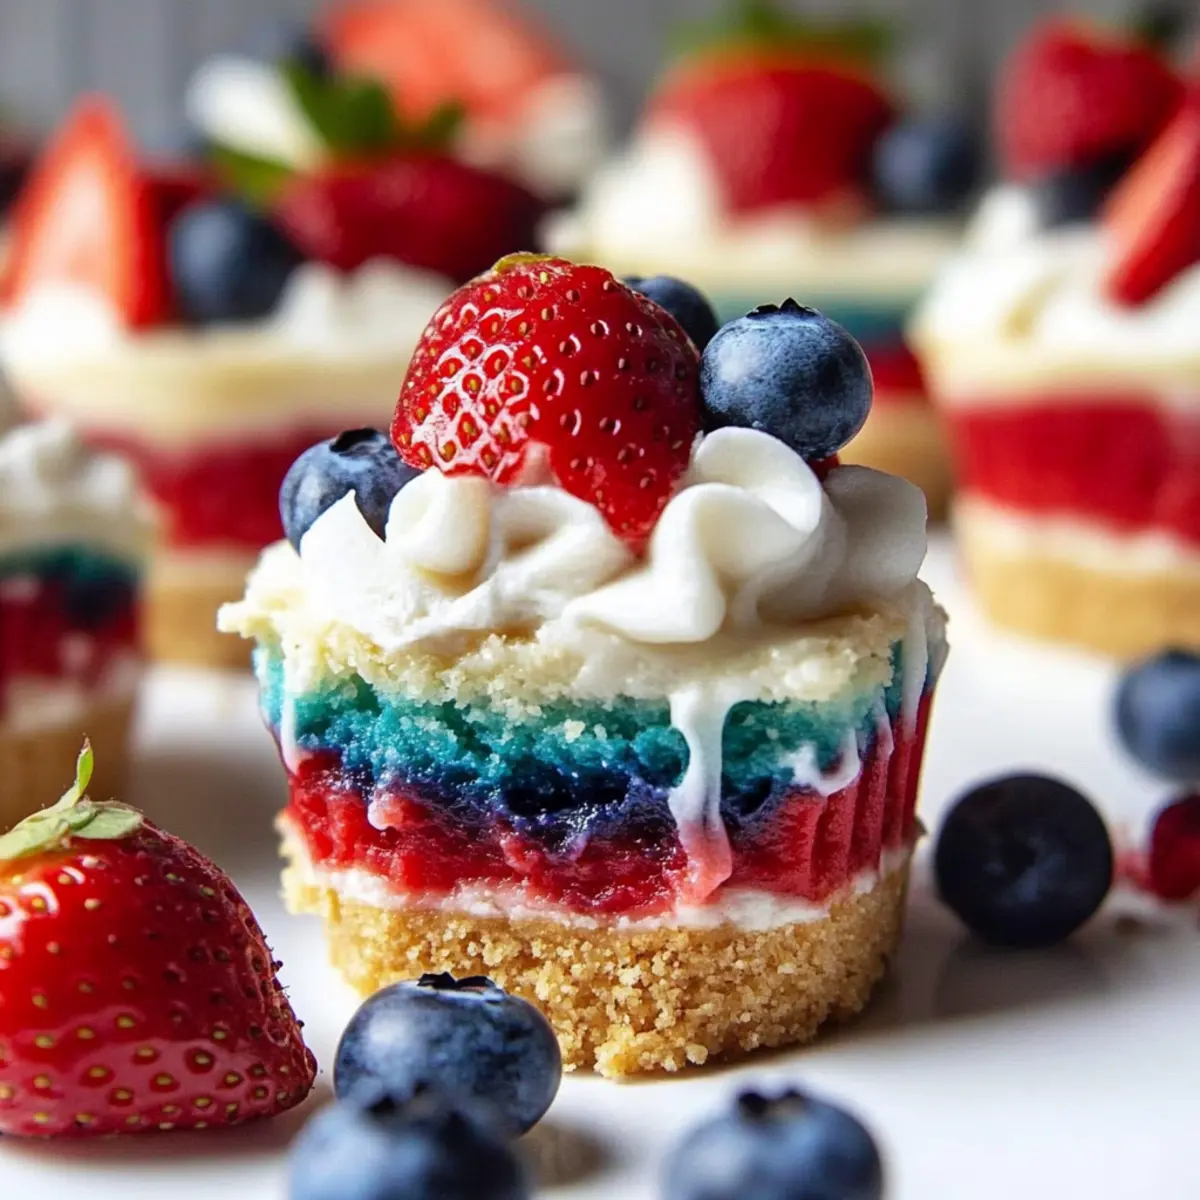
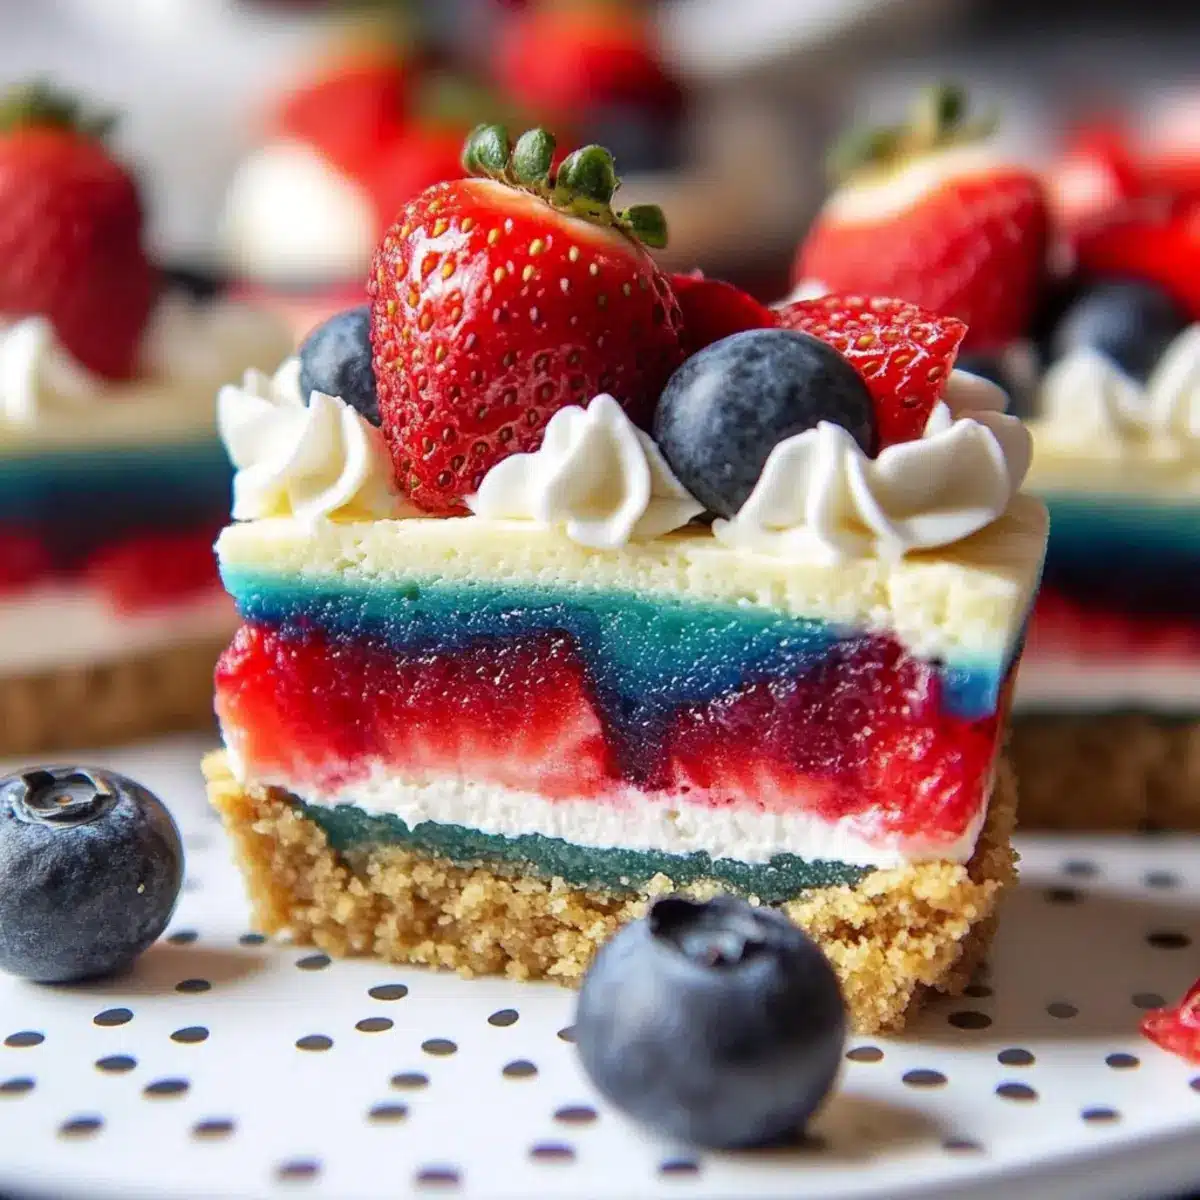
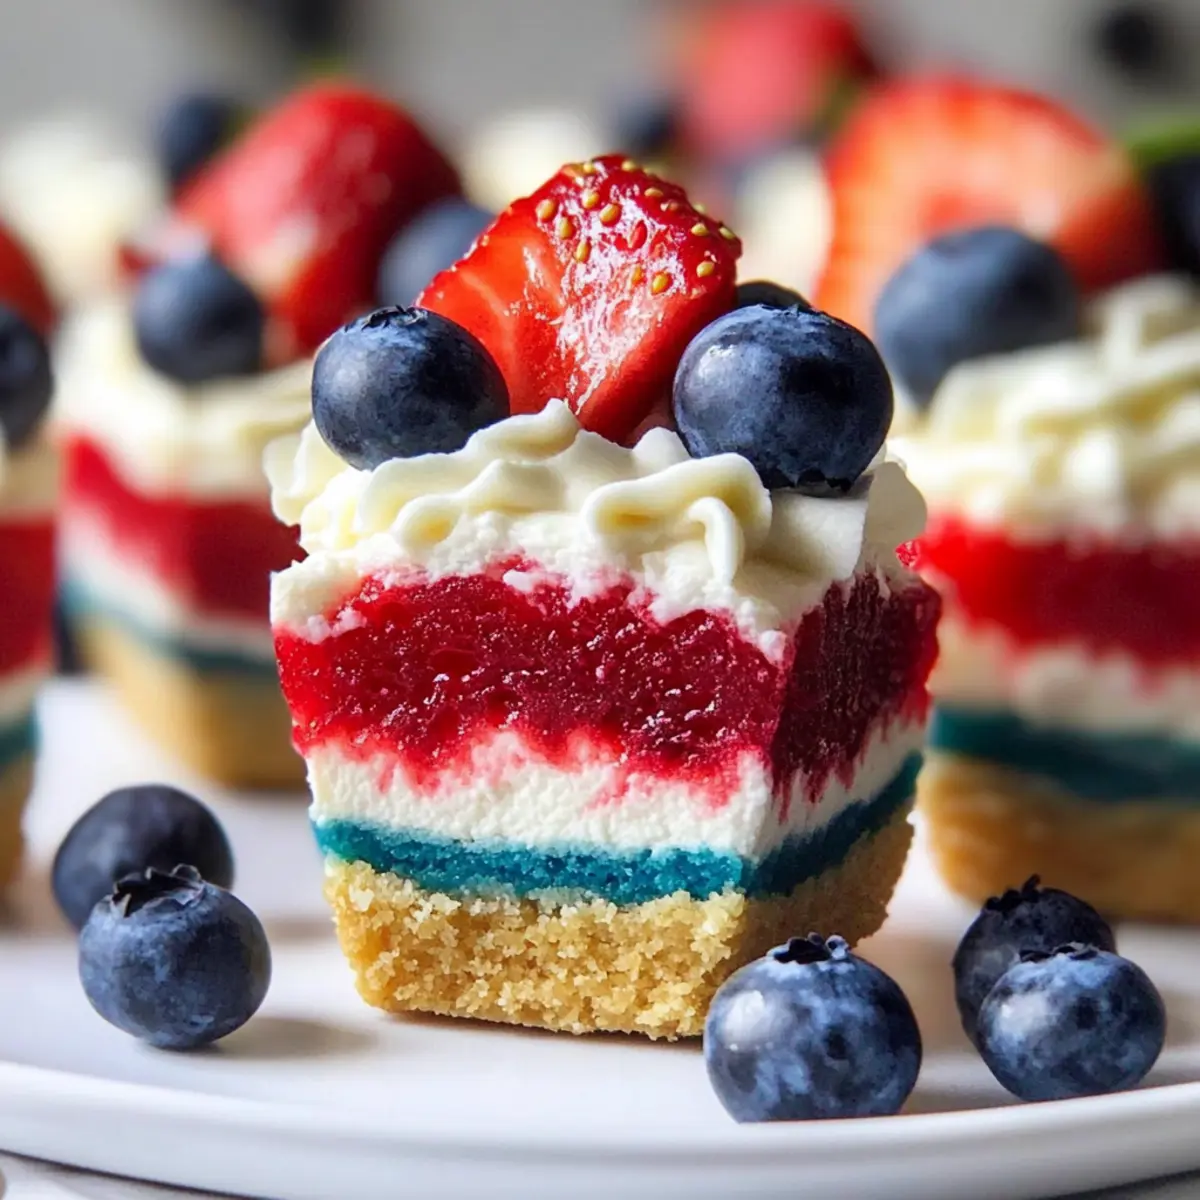
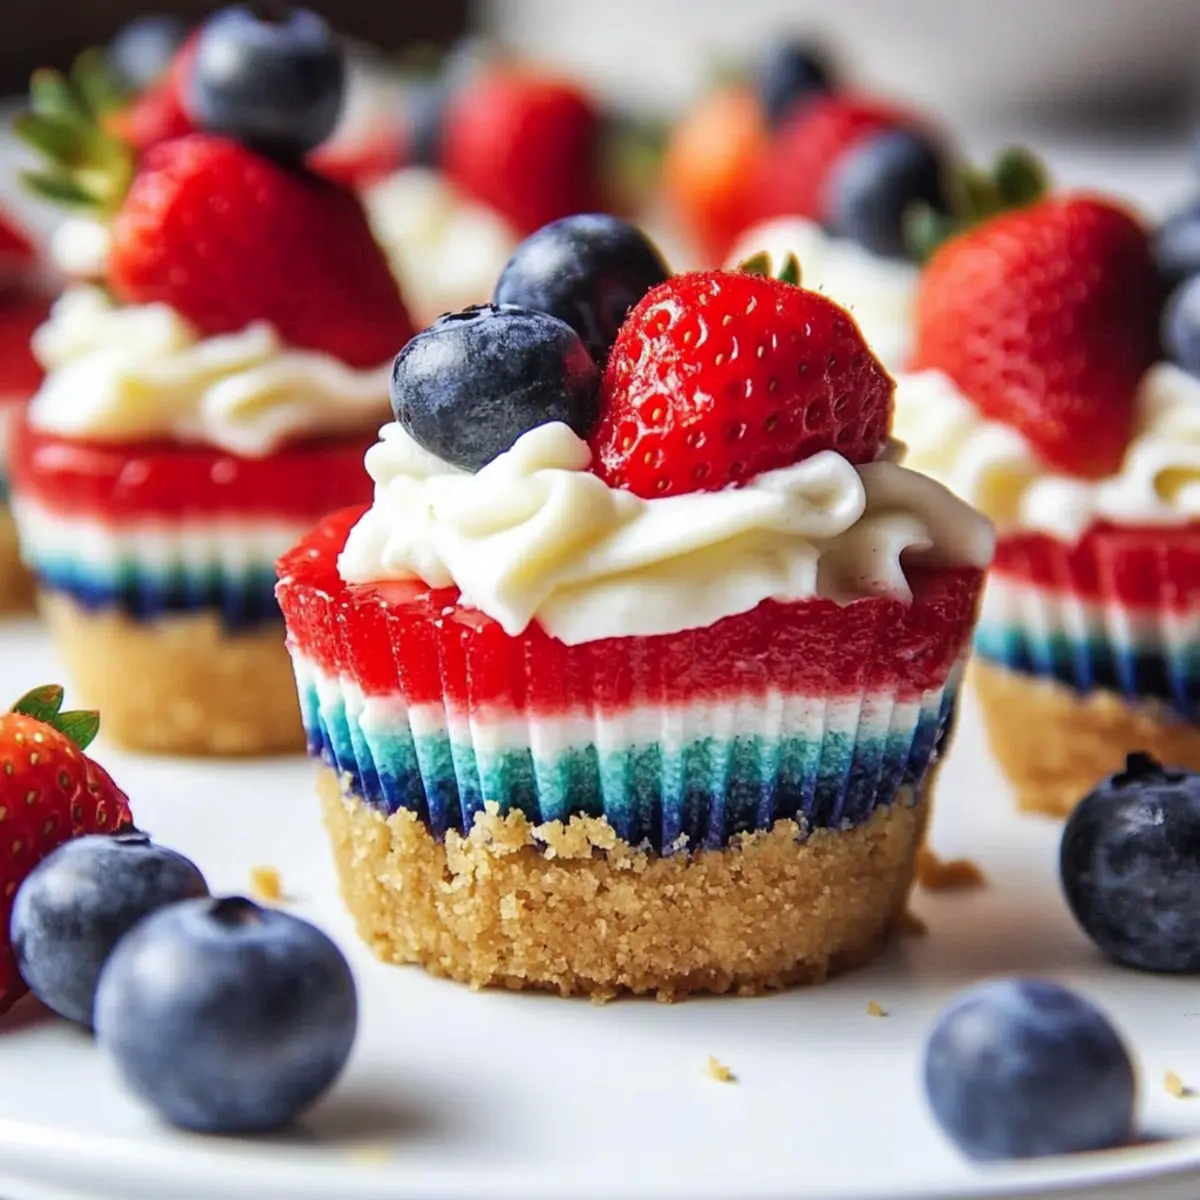
Divide the cheesecake mixture evenly into three separate bowls. Color one bowl with red food coloring, another with blue, and leave the last one plain white. Stir the colors in gently until you get vibrant shades that represent your Red White and Blue Mini Cheesecakes beautifully. This colorful layering will provide a festive touch when served.
Step 7: Layer the Fillings
Carefully spoon the white cheesecake mixture into the prepared crusts, filling each cup about a third of the way. Follow with the red mixture and then the blue, ensuring to fill them to the top. This layering will create a stunning effect as the colors rise beautifully, making each cheesecake visually appealing at your 4th of July celebration.
Step 8: Bake the Cheesecakes
Place the muffin tin in the oven and bake the cheesecakes for 18-20 minutes, or until they are set but still slightly jiggly in the center. This jiggly texture indicates perfect doneness; they will firm up as they cool. After baking, allow them to cool on the counter for 1 hour before placing them in the refrigerator to chill for at least 1 hour.
Step 9: Prepare the Whipped Cream Topping
In a mixing bowl, whip the remaining heavy cream with sugar and vanilla extract until stiff peaks form. This creamy topping adds an extra layer of indulgence to your Red White and Blue Mini Cheesecakes. Ensure your heavy cream is cold for the best results, as this helps achieve a glossy, thick consistency.
Step 10: Decorate and Serve
Once the mini cheesecakes are fully chilled, remove them from the muffin tin and carefully peel off the liners. Top each cheesecake with a generous dollop of whipped cream and garnish with fresh blueberries and strawberries for a burst of flavor and color. Your delightful cheesecakes are now ready to shine as the star of your summer festivities!
Make Ahead Options
These Red, White, and Blue Mini Cheesecakes are perfect for busy cooks looking to save time on festive occasions! You can prepare the crusts and the cheesecake filling up to 24 hours in advance; simply store the crusts in an airtight container and the filling in the refrigerator. When you’re ready to serve, layer the colored fillings in the crusts, bake them, and chill for an hour before topping with whipped cream and fresh berries. This make-ahead strategy ensures every bite remains just as delicious and visually stunning, letting you enjoy your summer celebrations instead of being tied to the kitchen!
What to Serve with Red White and Blue Mini Cheesecakes?
Indulging in these festive mini cheesecakes is just the start; let’s build the perfect summer spread to elevate your gathering!
-
Grilled Peaches: Juicy grilled peaches bring a caramelized sweetness, perfectly contrasting the creamy cheesecakes while adding a summer twist.
-
Fresh Fruit Salad: A vibrant mix of seasonal fruits not only complements the cheesecakes visually but also adds a refreshing brightness to your plate.
-
Sparkling Lemonade: Serve this fizzy and zesty drink alongside your mini cheesecakes for a refreshing sip that rounds out the indulgence.
-
Chocolate-Dipped Pretzels: The crunchy, salty pretzels coated in rich chocolate provide a delightful salt-sweet balancing act to your charming sweet treat.
-
Minted Cucumber Salad: A light and refreshing salad with a hint of mint can cleanse the palate and elevate the whole dining experience, making every bite of cheesecake even more enjoyable.
-
Vanilla Ice Cream: A scoop of creamy vanilla ice cream beside your mini cheesecakes offers a classic combination that delights in both flavor and texture.
-
Patriotic Berry Skewers: Thread strawberries and blueberries onto skewers for a playful and colorful finger food that echoes the cheesecake’s theme. They are a visual treat and a nutritious addition to your spread.
-
Iced Tea with Mint: A refreshing iced tea, perhaps with a sprig of mint, complements the sweetness of the cheesecakes while keeping your guests cool and refreshed.
With these pairing ideas, your dessert table will be the talk of the celebration, ensuring that each bite of your Red White and Blue Mini Cheesecakes is even more enjoyable!
Red White and Blue Mini Cheesecakes Variations
Feel free to explore these delightful twists and substitutions to make this recipe truly your own!
-
Dairy-Free: Use vegan cream cheese and coconut cream for those who prefer a plant-based option, while still keeping the richness intact.
-
Gluten-Free: Swap out the graham crackers for gluten-free crackers to ensure everyone can join the tasty fun without worry.
-
Fruit Flavor Burst: Add lemon zest to the cheesecake filling for a bright, citrusy twist that complements the creamy filling beautifully. It’s like summer in a bite!
-
Mixed Berry Topping: Instead of just strawberries and blueberries, use a mix of seasonal berries to top your cheesecakes, adding pops of flavor and color.
-
Flavoring Extracts: Think beyond vanilla! Incorporate almond or coconut extract for a unique flavor profile that elevates your mini cheesecakes to the next level.
-
Seasonal Colors: Change up the colors by using green and yellow food coloring for a St. Patrick’s Day treat or any festive occasion. The possibilities are endless!
-
Chocolate Drizzle: For an extra indulgence, drizzle melted dark or white chocolate over the whipped cream topping. It adds a delightful touch of decadence.
-
Crunchy Layer: Mix chopped nuts or crushed cookies into the crust for an unexpected crunchy texture that contrasts deliciously with the creamy filling.
Feel free to check out our other recipes like Iced Blueberry Cheesecake for more dessert inspiration or spice things up with our Pepper Steak Bell dish for a complete meal!
How to Store and Freeze Red White and Blue Mini Cheesecakes
Fridge: Keep leftover mini cheesecakes in an airtight container in the refrigerator for up to 4 days to maintain their freshness and flavor.
Freezer: For longer storage, place the cheesecakes in a single layer in a freezer-safe container. They can be frozen for up to 2 months.
Thawing: When ready to enjoy, transfer frozen mini cheesecakes to the fridge overnight to thaw gently.
Serving: Add whipped cream and fresh berries just before serving for the best presentation and flavor.
Expert Tips for Red White and Blue Mini Cheesecakes
-
Room Temperature Ingredients: Ensure all dairy ingredients, especially cream cheese, are at room temperature for a smoother filling and easy mixing.
-
Egg Mixing Caution: Mix in the eggs just until combined; overbeating can introduce air, leading to cracks in your mini cheesecakes during baking.
-
Layering Technique: When layering the colored fillings, use a piping bag to prevent the colors from blending; this keeps your Red White and Blue Mini Cheesecakes visually striking.
-
Cooling Gradually: After baking, allow cheesecakes to cool gradually at room temperature for one hour, then refrigerate to finalize their perfect texture without cracks.
-
Whipping Cream Tips: Chill your mixing bowl and beaters before whipping the cream to achieve a stable, fluffy texture for the topping.
Red White and Blue Mini Cheesecakes Recipe FAQs
What type of cream cheese should I use for the filling?
It’s best to use full-fat cream cheese for the richest and creamiest texture. Make sure it’s at room temperature before mixing to avoid lumps in your filling. If you’re looking for a plant-based alternative, vegan cream cheese works wonderfully and will give you a similar creamy consistency.
How should I store leftover cheesecakes?
Store any leftover Red White and Blue Mini Cheesecakes in an airtight container in the refrigerator for up to 4 days. This ensures they stay fresh while maintaining their delightful flavor. If you plan on enjoying them later, simple place them in the fridge to keep their creamy texture intact!
Can I freeze these mini cheesecakes?
Absolutely! To freeze the cheesecakes, first, place them in a single layer in a freezer-safe container, ensuring they’re not touching to prevent sticking. They can be frozen for up to 2 months. When you’re ready to enjoy them, simply transfer the frozen cheesecakes to the refrigerator the night before to thaw gently.
What can I do to prevent the cheesecakes from cracking?
To avoid cracks in your mini cheesecakes, be sure to mix in the eggs just until combined—overmixing can introduce too much air. Also, gradually cool the cheesecakes at room temperature for about an hour after baking before refrigerating. This slow cooling process helps prevent sudden temperature changes that can lead to cracks.
Are there any allergy considerations for your recipe?
Yes, this recipe contains dairy and eggs, which can be allergenic for some people. To make it dairy-free, you can substitute cream cheese and heavy cream with vegan alternatives. For the eggs, you can use chia seeds or applesauce as a binding vegan option. Always check the labels on packaged ingredients for any potential allergens.
Red White and Blue Mini Cheesecakes for Summer Celebrations
Ingredients
Equipment
Method
- Preheat your oven to 350°F (175°C) and prepare your muffin tins by lining them with 14-16 paper liners.
- In a food processor, pulse graham crackers until they form fine crumbs. Combine with granulated sugar and melted butter.
- Press about 1 tablespoon of the crumb mixture into each paper liner. Bake the crusts for 6 minutes and allow to cool.
- In a large mixing bowl, combine softened cream cheese, granulated sugar, heavy cream, sour cream, and vanilla extract. Beat until smooth.
- Gradually add eggs, mixing on low speed until just combined. Add flour and salt, stirring gently until no streaks remain.
- Divide the cheesecake mixture into three bowls. Color one bowl red, another blue, and leave the last white.
- Spoon the white cheesecake mixture into the prepared crusts, then follow with the red and then the blue.
- Bake the cheesecakes for 18-20 minutes until set but slightly jiggly in the center. Cool on the counter for 1 hour.
- Whip remaining heavy cream with sugar and vanilla extract until stiff peaks form.
- Remove cheesecakes from muffin tin, top with whipped cream, and garnish with blueberries and strawberries.
Leave a Reply