
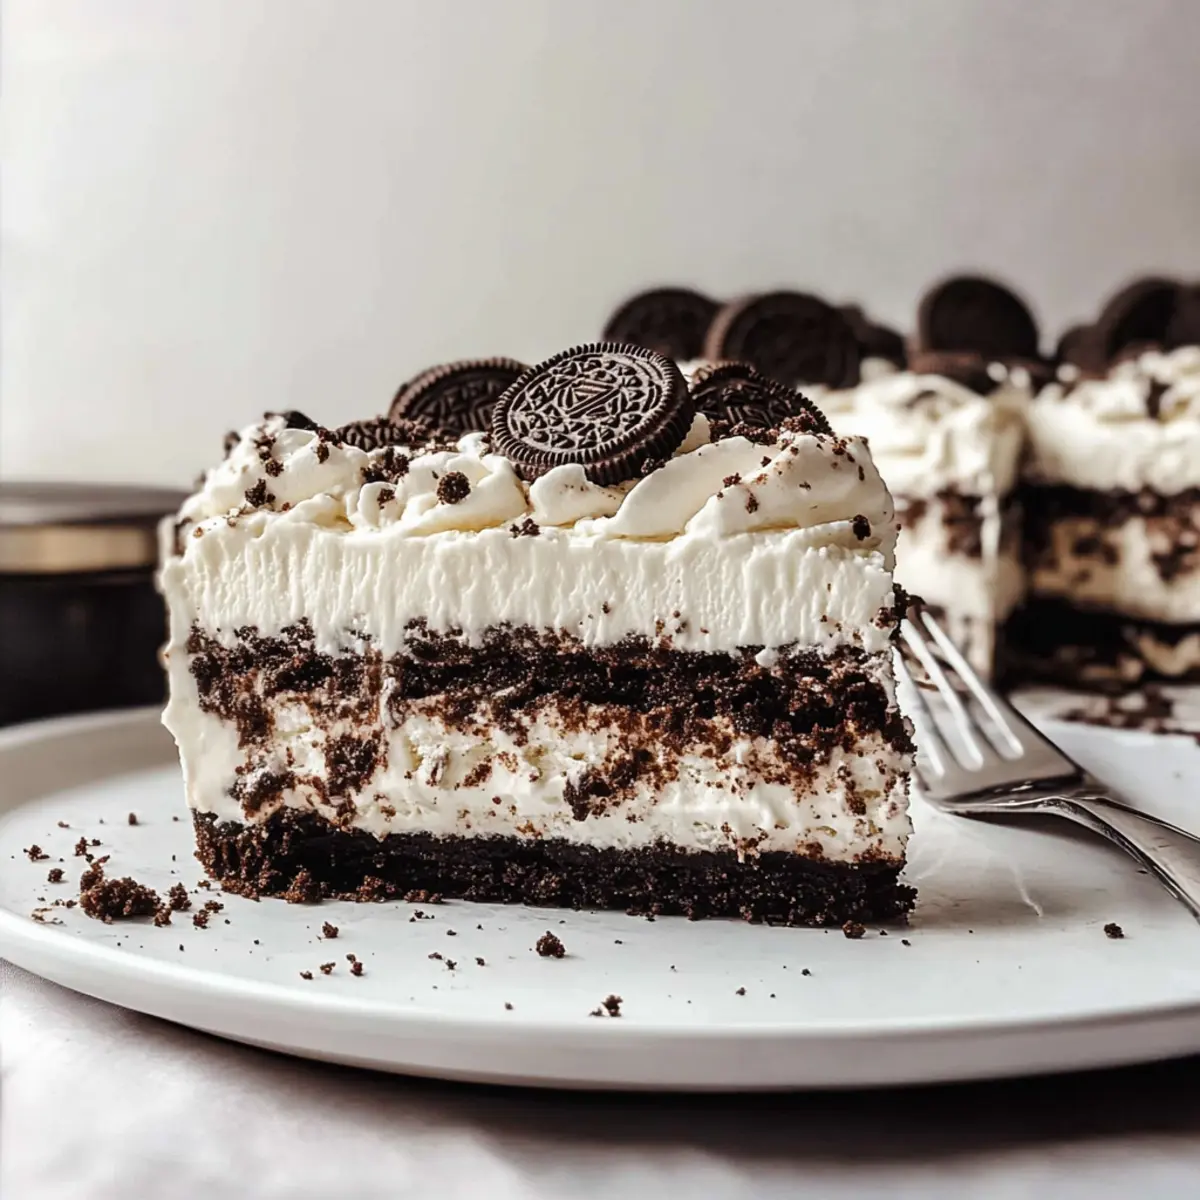
“Chocolate ice cream cake” might sound like a sweet dream to many, but when you swap in crisp Oreo cookies for a delightful no-bake creation, you’ve unlocked a whole new level of dessert magic. My Oreo Ice Cream Cake brings together layers of velvety cookies and cream ice cream, a rich hot fudge sauce, and a crunchy Oreo crust that will have your taste buds cheering. The best part? This showstopper requires zero oven time, making it the ultimate summer treat or party centerpiece. Imagine delighting friends and family with a dessert that’s not only a crowd-pleaser but also incredibly easy to assemble. Whether you’re an experienced home chef or just starting your culinary journey, this quick dessert will charm anyone tired of fast food indulgence. Are you ready to dive into layers of ice cream goodness? Let’s get started!
Why Is This Ice Cream Cake A Must-Try?
Simplicity at its finest: This no-bake dessert comes together effortlessly, requiring no baking skills and minimal time investment.
Decadent layers: The combination of creamy cookies and cream ice cream, rich hot fudge, and a crunchy Oreo crust creates a heavenly bite every time.
Versatile options: Feel free to swap ingredients; try different ice cream flavors or even drizzles like chocolate syrup to make it uniquely yours.
Perfect for gatherings: This impressive dessert is sure to wow guests, making it an ideal choice for parties or summer gatherings.
Quick prep: With just a few simple steps, you’ll have this indulgent treat ready to chill in no time. Elevate your next dessert game with this Oreo Ice Cream Cake; it’s a delightful way to satisfy your sweet tooth without the fuss!
Oreo Ice Cream Cake Ingredients
Unlock the flavors of this delightful dessert with these simple ingredients!
For the Crust
- Oreo Cookies – Create a crunchy base for the cake; feel free to swap for chocolate wafer cookies if you like.
- Unsalted Butter – Binds the cookie crumbs together for a sturdy crust; margarine works as a substitute in a pinch.
For the Filling
- Cookies and Cream Ice Cream – This main filling delivers that classic flavor; any brand will do, so choose your favorite!
- Hot Fudge Sauce – Adds a rich, gooey layer; using store-bought sauce saves time, but homemade is always a treat.
For the Whipped Topping
- Heavy Whipping Cream – Whip it until fluffy for a light topping; swap in Cool Whip if you prefer a quicker option.
- Powdered Sugar – Smoothes and sweetens the whipped topping; granulated sugar works too, but it won’t blend as seamlessly.
- Vanilla Extract – Enhances the flavor of your whipped cream; skip it if you’re using flavored whipped topping.
For the Decoration
- Chopped Oreos – Sprinkle these on top for an extra touch of crunch and visual appeal, highlighting your Oreo Ice Cream Cake.
Step‑by‑Step Instructions for Oreo Ice Cream Cake
Step 1: Prepare the Crust
Crush 24 Oreo cookies in a food processor until fine crumbs form, resembling wet sand, and transfer to a mixing bowl. Melt 5 tablespoons of unsalted butter and combine with the crumbs, mixing thoroughly. Press this mixture firmly into a 9-inch springform pan to create an even crust. Chill the crust in the refrigerator for 30 minutes to set.
Step 2: Ice Cream Layer
Remove 1.5 quarts of cookies and cream ice cream from the freezer and let it soften for about 10-15 minutes until slightly melty but still firm. Stir the ice cream until smooth and creamy, then spread it evenly over the chilled Oreo crust in the springform pan. Smooth the top with a spatula and freeze for at least 1 hour for the layer to firm up.
Step 3: Hot Fudge Layer
While the ice cream sets, warm 1 cup of hot fudge sauce in the microwave for about 30-45 seconds or until it reaches a pourable consistency; stir well to ensure it’s smooth. Once the ice cream layer has set, pour the warm fudge sauce gently over the ice cream, spreading it evenly. Return the pan to the freezer for an additional 30 minutes to let the fudge layer set.
Step 4: Whipped Cream Topping
In a large mixing bowl, combine 2 cups of heavy whipping cream, 1/2 cup of powdered sugar, and 1 teaspoon of vanilla extract. Using an electric mixer, whip the mixture on high speed until stiff peaks form, which should take about 3-5 minutes. Once ready, carefully spread the whipped cream over the chilled hot fudge layer with a spatula for a smooth finish.
Step 5: Final Touch
To elevate your Oreo Ice Cream Cake, sprinkle a handful of coarsely chopped Oreo cookies on top of the whipped cream layer, adding crunch and visual appeal. Cover the cake with a lid or plastic wrap and freeze for 4-6 hours, or preferably overnight, to allow all layers to meld beautifully and set together.
Step 6: Serve
Before serving your delightful Oreo Ice Cream Cake, let it sit at room temperature for 15-20 minutes to soften slightly, which will make slicing easier. Run a warm knife around the edge of the springform pan to loosen the cake, then carefully release the sides. Slice into wedges and enjoy this rich, creamy treat with family and friends!
Expert Tips for Oreo Ice Cream Cake
-
Pan Choice: Use a springform pan for effortless cake removal, allowing you to showcase those beautiful layers once it’s set!
-
Chill Time: Ensure each layer chills adequately for at least 1 hour for the ice cream and 30 minutes for the fudge and whipped cream to achieve a clean slice.
-
Crumb Storage: Save some crushed Oreos to sprinkle on individual servings just before serving, adding a delightful crunch and visual appeal to your Oreo Ice Cream Cake.
-
Flavor Variations: Experiment with different ice cream flavors, like mint chocolate or strawberry, to make the cake uniquely yours.
-
Slicing Tips: Employ a warm knife to cut through the cake smoothly, especially helpful for the frozen layers, ensuring every slice looks perfect!
Storage Tips for Oreo Ice Cream Cake
Fridge: Store any leftover slices in an airtight container or tightly wrapped in plastic wrap for up to 3 days.
Freezer: For longer preservation, cover the cake with plastic wrap and keep it in the freezer for up to 1 month.
Reheating: Allow the Oreo Ice Cream Cake to soften for 10-15 minutes at room temperature before serving for easier slicing and optimal texture.
Serving Leftovers: Whenever you’re ready to enjoy your cake again, ensure you re-slice with a warm knife to keep those layers intact and beautiful!
What to Serve with Oreo Ice Cream Cake?
Imagine the joy of sharing layers of creamy goodness that can be complemented by these delightful accompaniments!
- Chocolate Sauce: Drizzle over each slice for an indulgent touch that enhances the dessert’s richness.
- Fresh Berries: Strawberries or raspberries provide a tart contrast to the sweetness, adding a pop of freshness.
- Crunchy Nuts: Toasted almonds or walnuts offer a delightful texture that complements the creamy layers perfectly.
- Whipped Cream: A dollop of homemade or store-bought whipped cream brings an airy balance to this indulgent treat.
- Milkshakes: Pair it with a classic cookies and cream milkshake for a dessert duo that’ll take you back to childhood.
For a truly memorable dessert experience, consider serving this cake alongside a robust coffee or hot chocolate. The contrasting warmth of a drink elevates the cold creaminess!
Make Ahead Options
This Oreo Ice Cream Cake is perfect for meal prepping, making it a delightful option for busy weeknights or gatherings! You can prepare the crust and ice cream layer up to 24 hours in advance — simply crush the cookies, mix with butter, and press into the pan before chilling. Allow the ice cream layer to set after spreading it over the crust. For best results, keep the hot fudge layer and whipped cream topping prepped separately, assembling them just before serving for optimal freshness. When ready to finish, simply pour the warmed fudge and spread the whipped cream, then freeze for at least 4 hours or overnight. Your delicious cake will remain just as decadent, saving you time and hassle while keeping flavors vibrant!
Oreo Ice Cream Cake Variations
Feel free to add your own twist to this delightful dessert, allowing your creativity to flow with each layer!
-
Flavor Swap: Use mint chocolate chip ice cream for a refreshing twist that complements the Oreo crust well. Rich and refreshing, it makes for a fun and festive dessert.
-
Nutty Crunch: Add a handful of chopped pecans or walnuts into the crust for an added crunch and nutty flavor. The combination of Oreo and nuts brings a new level of texture that your guests will adore.
-
Different Drizzles: Enhance the cake by drizzling caramel or white chocolate over the whipped cream topping. This not only adds flavor but also a visually appealing touch for presentation.
-
Vegan Alternative: Replace traditional ingredients with vegan cookies and dairy-free ice cream for a delicious plant-based treat. It’s a great way to accommodate different dietary needs while keeping the flavor intact.
-
Fun Toppings: Get creative with toppings by adding sprinkles or mini chocolate chips on the whipped cream layer for a celebratory feel. Kids (and adults!) will love the festive pop of color and fun.
-
Fruit Fusion: Add layers of fresh raspberries or strawberries between the ice cream and fudge layers to introduce a fruity flavor contrast. The burst of fruitiness complements the rich layers beautifully.
-
Cookie Crust Variation: Swap out Oreos for crushed peanut butter cookies for a unique flavor profile that will surprise your taste buds. It’s a delightful take on the classic dessert!
-
Cheesecake Layer: Add a layer of no-bake cheesecake mixture made with cream cheese, sugar, and vanilla on top of the fudge layer for an extra creamy dimension. This alternative introduces a lovely tanginess to balance the sweetness.
Embrace these variations as opportunities to personalize your Oreo Ice Cream Cake, just like you would with any of your favorite desserts—perhaps alongside a slice of Carrot Cream Cake or a refreshing Iced Blueberry Cheesecake Latte.
Oreo Ice Cream Cake Recipe FAQs
How do I choose the right Oreos for the crust?
Absolutely! When selecting Oreos, look for cookies that are fresh, as stale ones won’t give you that delightful crunch. Check for dark spots all over the packaging, which could indicate age. If you’re feeling adventurous, try substituting with chocolate wafer cookies for a different twist!
What is the best way to store my Oreo Ice Cream Cake?
To keep your Oreo Ice Cream Cake fresh, cover it tightly with plastic wrap or store it in an airtight container and place it in the freezer for up to 1 month. If you’re planning on enjoying it within a few days, you can also store it in the fridge for up to 3 days. Just remember to let it sit at room temperature for 10-15 minutes before slicing for the best texture.
Can I freeze my Oreo Ice Cream Cake?
Yes, indeed! To freeze your Oreo Ice Cream Cake, simply wrap it tightly in plastic wrap and place it in the freezer. It will stay delicious for up to 1 month. When you’re ready to serve, allow it to thaw at room temperature for about 10-15 minutes, then use a warm knife for easy slicing.
What if my ice cream layer doesn’t set properly?
Very good question! If your ice cream layer isn’t setting, it might be due to it being too warm when you added it to the crust. Always ensure the crust is thoroughly chilled before adding the ice cream layer. If you find that it’s not freezing as expected, put it back in the freezer for an extended period—up to a few hours might be necessary. Patience is key for that gorgeous, layered look!
Is this recipe suitable for people with allergies?
Definitely! However, you’ll want to be cautious. This Oreo Ice Cream Cake contains dairy ingredients, so it’s not suitable for lactose-intolerant individuals. For a dairy-free version, consider using dairy-free ice cream, coconut whipped cream, and checking your Oreo cookies, as some might contain milk. Always check labels to ensure safety for those with allergies!
Can I use a different type of whipped topping?
Of course! If you’re looking for a quicker option, Cool Whip works beautifully in this recipe as a substitute for heavy whipping cream. Just remember to adjust the sweetness slightly since Cool Whip already contains sugar. If you’re going for homemade, the heavy cream whipped to stiff peaks creates a lovely texture that perfectly complements the cake. The more the merrier!
Decadent Oreo Ice Cream Cake – No Bake Bliss for All!
Ingredients
Equipment
Method
- Crush 24 Oreo cookies in a food processor until fine crumbs form, resembling wet sand. Transfer to a mixing bowl. Melt 5 tablespoons of unsalted butter and combine with the crumbs, mixing thoroughly. Press this mixture firmly into a 9-inch springform pan to create an even crust. Chill the crust in the refrigerator for 30 minutes to set.
- Remove 1.5 quarts of cookies and cream ice cream from the freezer and let it soften for about 10-15 minutes until slightly melty. Stir the ice cream until smooth and creamy, then spread it evenly over the chilled Oreo crust. Smooth the top with a spatula and freeze for at least 1 hour.
- Warm 1 cup of hot fudge sauce in the microwave for about 30-45 seconds until it reaches a pourable consistency. Stir to ensure it's smooth, then pour it gently over the ice cream, spreading it evenly. Freeze for an additional 30 minutes.
- In a large mixing bowl, combine 2 cups of heavy whipping cream, 1/2 cup of powdered sugar, and 1 teaspoon of vanilla extract. Whip the mixture on high speed until stiff peaks form, about 3-5 minutes. Spread the whipped cream over the chilled hot fudge layer.
- Sprinkle a handful of coarsely chopped Oreo cookies on top of the whipped cream layer. Cover the cake with a lid or plastic wrap and freeze for 4-6 hours, or preferably overnight.
- Before serving, let the cake sit at room temperature for 15-20 minutes to soften. Run a warm knife around the edge of the pan to loosen, then release the sides. Slice into wedges and enjoy!
Leave a Reply