
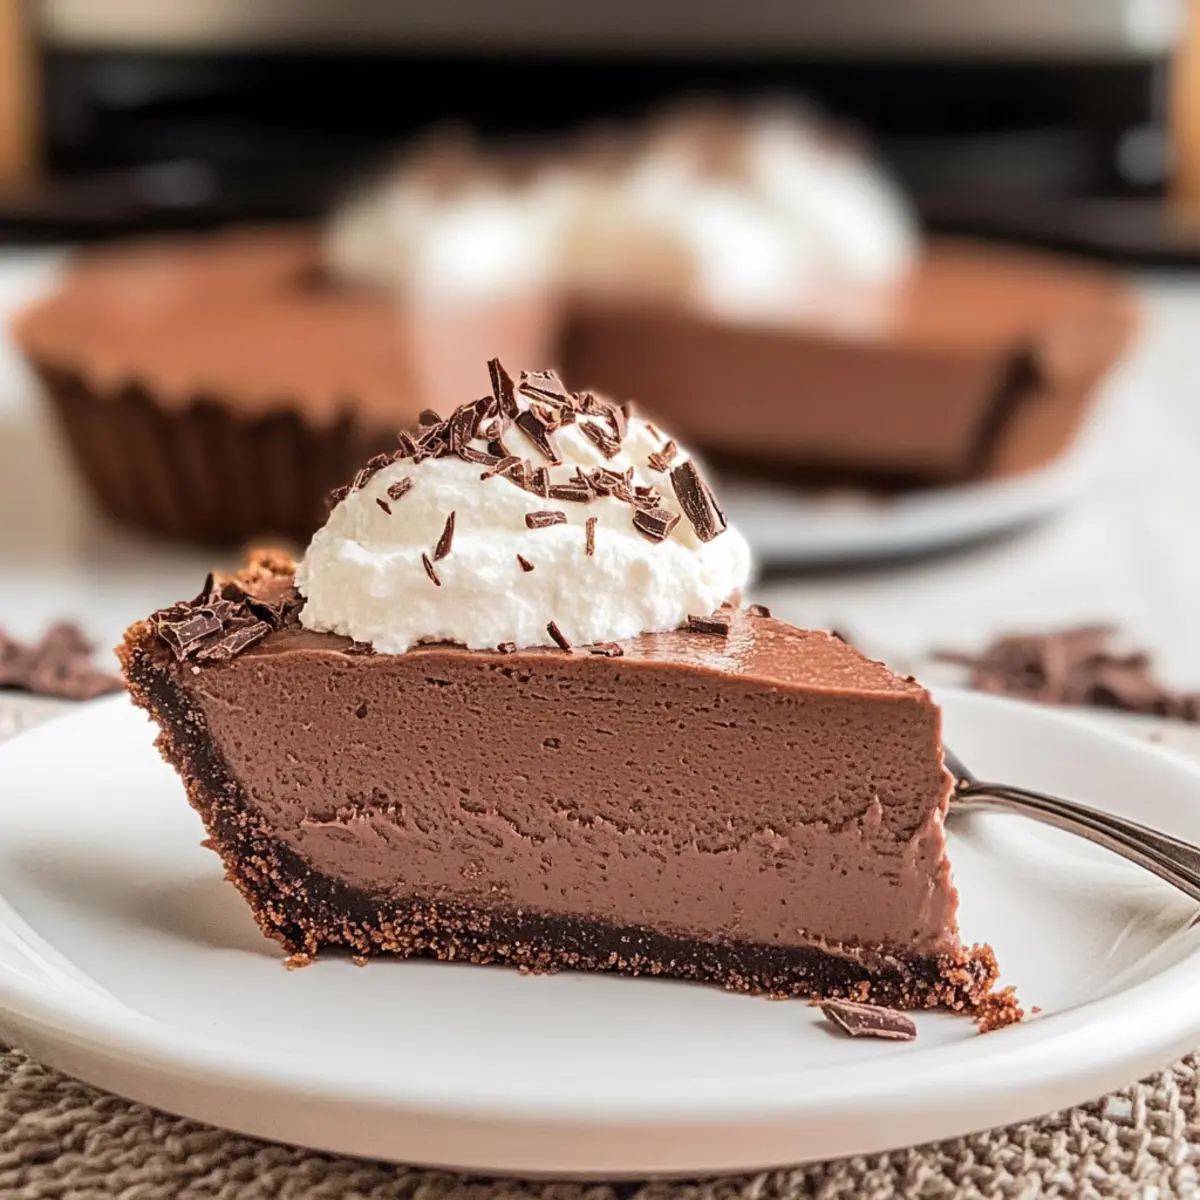
As the summer sun blazes outside, the idea of a rich, creamy dessert feels as tempting as a cool breeze on a hot day. Enter my Creamy Frozen Chocolate Pie—a no-bake delight ready to satisfy even the fiercest chocolate cravings. This dessert boasts a velvety texture and a rich chocolate flavor that magically complements any hearty meal. And the best part? It’s incredibly easy to whip up, requiring just a few simple ingredients. Perfect for gatherings, kids’ parties, or a cozy night in, this indulgent treat can be prepared without turning on the oven, helping you keep your kitchen cool. Who wouldn’t love to dive into a slice of this heavenly pie? Ready to get started on your new favorite frozen dessert? Let’s dig in!
Why is This Pie a Must-Have?
No-Bake goodness makes it a breeze! Ideal for those hot summer days when turning on the oven feels unbearable. Indulgent chocolate flavor that will impress friends and family alike, making it the perfect showstopper for gatherings. Versatile enough; you can create individual mini pies or substitute ingredients for a healthier twist. For an alternate treat, check out our Frozen Berry Yogurt for a lighter option! Dazzling presentation elevates your dessert game, whether topped with fresh fruit or chocolate shavings. Ultimately, it’s a dessert that caters to all cravings, offering a rich, creamy experience with every bite.
Creamy Frozen Chocolate Pie Ingredients
-
For the Crust
-
Chocolate Cookie Crumbs – Base for the pie, providing a chocolatey foundation. Substitution: Graham cracker crumbs or gluten-free cookies can be used for a different flavor profile.
-
Butter (melted) – Binds the cookie crumbs for a firm crust. Substitution: Coconut oil can be used for a dairy-free version.
-
For the Filling
-
Sugar – Sweetens the filling. Substitution: For a healthier option, consider using a sugar substitute like erythritol.
-
Water – Used to dissolve sugar and incorporate into chocolate mixture. No substitutions necessary; it’s a key part of the process.
-
Dark Chocolate (good quality) – Core flavor component of the filling, resulting in a rich taste. Tip: A chocolate bar with 70% cocoa or higher is recommended for depth without excessive sweetness.
-
Heavy Cream – Provides a rich, creamy texture to the filling. Substitution: Full-fat coconut cream can be used for a dairy-free version.
-
Mascarpone Cheese – Adds a silky and creamy texture, reminiscent of Tiramisu. Note: Cream cheese can be a substitute, but the taste will be slightly altered.
-
For the Topping
-
Whipped Cream – Enhances the pie’s presentation and texture. Optional: Sweeten with powdered sugar if desired.
-
Grated Chocolate – Provides visual appeal and an extra chocolate kick. No substitutions necessary.
Step‑by‑Step Instructions for Creamy Frozen Chocolate Pie
Step 1: Prep Crust
In a mixing bowl, combine chocolate cookie crumbs with melted butter, stirring until the mixture resembles wet sand. Firmly press this mixture into the bottom of a springform or lined pan, ensuring an even layer. Place the crust in the freezer for about 30 minutes, or until set and firm to the touch, creating the perfect base for your Creamy Frozen Chocolate Pie.
Step 2: Make Filling
In a small saucepan, bring sugar and water to a gentle simmer over medium heat, stirring for about 2 minutes until the sugar completely dissolves. Once dissolved, remove from heat and add in chopped dark chocolate. Stir until completely smooth. Allow the mixture to cool to room temperature, which ensures that it won’t melt the cream mixture when combined.
Step 3: Whip Cream
In a separate mixing bowl, use an electric mixer to beat heavy cream until soft peaks form. Add mascarpone cheese to the whipped cream and continue beating until thick and creamy. Carefully incorporate the cooled chocolate mixture into this whipped cream mixture, folding gently until fully combined and smooth, ensuring you maintain the light texture for your Creamy Frozen Chocolate Pie.
Step 4: Assemble Pie
Once the chocolate filling is prepared, pour it over the chilled crust you made earlier. Use a spatula to smooth the top for an even finish. Cover the pie tightly with plastic wrap and freeze it for at least 8 hours or overnight, allowing it to set perfectly and achieve that delightful frozen dessert texture.
Step 5: Serve
Before serving your Creamy Frozen Chocolate Pie, let it sit at room temperature for about 10-30 minutes to soften slightly for easier slicing. When ready, cut the pie into slices and top each piece with dollops of whipped cream and a sprinkle of grated chocolate for that stunning, indulgent touch.
Creamy Frozen Chocolate Pie Variations
Let your creativity shine and customize your Creamy Frozen Chocolate Pie with these delightful variations!
- Mini Pies: Create individual servings by using muffin tins for smaller crusts, making it perfect for parties or gatherings.
- Nutty Crust: Swap the chocolate cookie crumbs with ground nuts for a gluten-free crust that adds a crunchy texture.
- Sugar-Free: Use a sugar substitute like erythritol in the filling for a healthier, guilt-free treat that still satisfies chocolate cravings.
- Fruit Fusion: Top the pie with seasonal berries like raspberries or strawberries for a fresh burst of flavor that contrasts beautifully with the rich chocolate.
- Coffee Kick: Incorporate a tablespoon of instant coffee or espresso powder into the chocolate mixture for a delightful mocha twist.
- Spicy Chocolate: Add a pinch of cayenne pepper or cinnamon to the chocolate filling for a surprising and delicious heat that excites the palate.
- Custom Flavors: Experiment with flavored extracts, like peppermint or orange, to give your pie a unique twist- perfect for a holiday dessert!
- Dramatic Garnish: Serve with a drizzle of homemade chocolate sauce for a stunning finishing touch that elevates the whole dessert experience.
For even more delightful dessert ideas, don’t miss our rich Dark Chocolate Coffin or treat yourself to delicious Chocolate Chip Banana Bars. Enjoy creating your perfect pie!
Make Ahead Options
These Creamy Frozen Chocolate Pies are perfect for meal prep aficionados looking to save time! You can easily prepare the crust and filling up to 24 hours in advance; simply mix the cookie crumbs and melted butter, press into your pan, and freeze until set. Additionally, the chocolate filling can be made and refrigerated for up to 3 days before assembly—just allow it to cool fully before combining it with the whipped cream. To maintain quality, cover the crust tightly with plastic wrap and store the filling in an airtight container. When you’re ready to serve, simply assemble the pie and freeze for a few hours if needed, giving you a delicious, stress-free dessert!
What to Serve with Creamy Frozen Chocolate Pie
Looking to create an unforgettable meal experience that perfectly complements your delicious dessert?
- Fresh Berries: These add a burst of brightness and tartness, balancing the rich chocolate flavor beautifully. Consider serving strawberries or raspberries for a sweet yet tangy contrast.
- Chocolate Sauce: A drizzle of warm chocolate sauce enhances the indulgence of the pie, providing a delightful extra layer of richness that chocolate lovers will adore.
- Coffee or Espresso: A cup of robust coffee pairs wonderfully, offsetting sweetness and deepening the overall flavors. The warmth cuts through the creaminess, making it a perfect end to a meal.
- Nutty Biscotti: Crunchy biscotti offers a delightful textural contrast and nutty flavor, creating a wonderful pairing with each creamy, cold slice of pie.
- Mint Leaves: Fresh mint provides a refreshing herbal note to cleanse the palate between bites, elevating the overall dessert experience with a hint of vibrancy.
- Homemade Whipped Cream: A dollop of simple, lightly sweetened whipped cream adds a fluffy element that complements the pie’s velvety texture, enhancing its overall indulgence.
- After-Dinner Liqueur: A rich liqueur, like Irish cream or coffee-flavored spirits, serves as a delightful accompaniment, bringing warmth and complexity to your dessert course, making for a sophisticated touch.
How to Store and Freeze Creamy Frozen Chocolate Pie
- Fridge: Store slices in an airtight container for up to 3 days, ensuring they remain nice and chilled, but they’ll be best enjoyed fresh.
- Freezer: Wrap the entire pie tightly in plastic wrap or place it in an airtight container to prevent freezer burn. It can be stored for up to 2 months.
- Thawing: When ready to enjoy, transfer the pie to the fridge for 2-4 hours or let it sit at room temperature for about 10-30 minutes before slicing.
- Reheating: There’s no need—serve it directly from the freezer for an ice-cold treat, or allow it to soften slightly for a more creamy texture.
Expert Tips for Creamy Frozen Chocolate Pie
- High-Quality Chocolate: Using premium dark chocolate elevates the flavor of your Creamy Frozen Chocolate Pie, making it less sweet and more decadent.
- Avoid Overmixing: When combining the chocolate filling with the whipped cream, be gentle to maintain that light, airy texture. Overmixing can lead to a dense filling.
- Proper Chilling: Ensure your crust is firmly set in the freezer before adding the filling; a solid base prevents sogginess and keeps the pie intact for serving.
- Timing for Slicing: Letting the pie sit at room temperature for a while before slicing makes it easier to cut clean pieces—nobody wants a messy serving!
- Customize with Toppings: Get creative! Add seasonal fruits or a drizzle of chocolate sauce to enhance both flavor and presentation of your dessert.
Creamy Frozen Chocolate Pie Recipe FAQs
What type of chocolate is best for this pie?
Absolutely! For the best flavor, use high-quality dark chocolate with at least 70% cocoa. This gives your Creamy Frozen Chocolate Pie a rich taste without overpowering sweetness. Look for chocolate bars that are smooth and glossy—those are the signs of quality!
How should I store the leftover pie?
Very! To keep your leftover pie fresh, store it in an airtight container or wrap it tightly in plastic wrap. It can be kept in the fridge for about 3 days or in the freezer for up to 2 months. Just make sure it’s securely wrapped to avoid freezer burn!
Can I freeze individual slices of the pie?
Absolutely! To freeze individual slices, first, ensure they are well-wrapped in plastic wrap. Then, place them in an airtight container (or a zip-top freezer bag) for extra protection. You can enjoy these frozen slices for up to 3 months. When you’re craving a piece, simply thaw a slice in the fridge for a few hours!
What if my filling turns out too dense?
Oh dear! If your filling feels dense, it’s likely due to overmixing. Keeping your whipped cream mixture fluffy is key. In the future, gently fold the cooled chocolate mixture into the whipped cream until just combined, preserving that light, airy texture typical of a Creamy Frozen Chocolate Pie.
Are there any allergen considerations for this recipe?
Definitely! Be mindful of allergies, particularly if serving to guests. For a nut-free version, ensure your crumbs are from a nut-free cookie. If there’s a dairy allergy, substitute mascarpone and heavy cream with full-fat coconut cream. Always check ingredient labels to ensure they meet dietary restrictions.
Creamy Frozen Chocolate Pie: Your New Favorite No-Bake Delight
Ingredients
Equipment
Method
- In a mixing bowl, combine chocolate cookie crumbs with melted butter, stirring until the mixture resembles wet sand. Firmly press this mixture into the bottom of a springform or lined pan, ensuring an even layer. Place the crust in the freezer for about 30 minutes, or until set and firm to the touch.
- In a small saucepan, bring sugar and water to a gentle simmer over medium heat, stirring for about 2 minutes until the sugar completely dissolves. Once dissolved, remove from heat and add in chopped dark chocolate. Stir until completely smooth. Allow the mixture to cool to room temperature.
- In a separate mixing bowl, use an electric mixer to beat heavy cream until soft peaks form. Add mascarpone cheese to the whipped cream and continue beating until thick and creamy. Carefully incorporate the cooled chocolate mixture into this whipped cream mixture, folding gently until fully combined and smooth.
- Once the chocolate filling is prepared, pour it over the chilled crust you made earlier. Use a spatula to smooth the top for an even finish. Cover the pie tightly with plastic wrap and freeze it for at least 8 hours or overnight.
- Before serving your Creamy Frozen Chocolate Pie, let it sit at room temperature for about 10-30 minutes to soften slightly for easier slicing. When ready, cut the pie into slices and top each piece with dollops of whipped cream and a sprinkle of grated chocolate.
Leave a Reply