
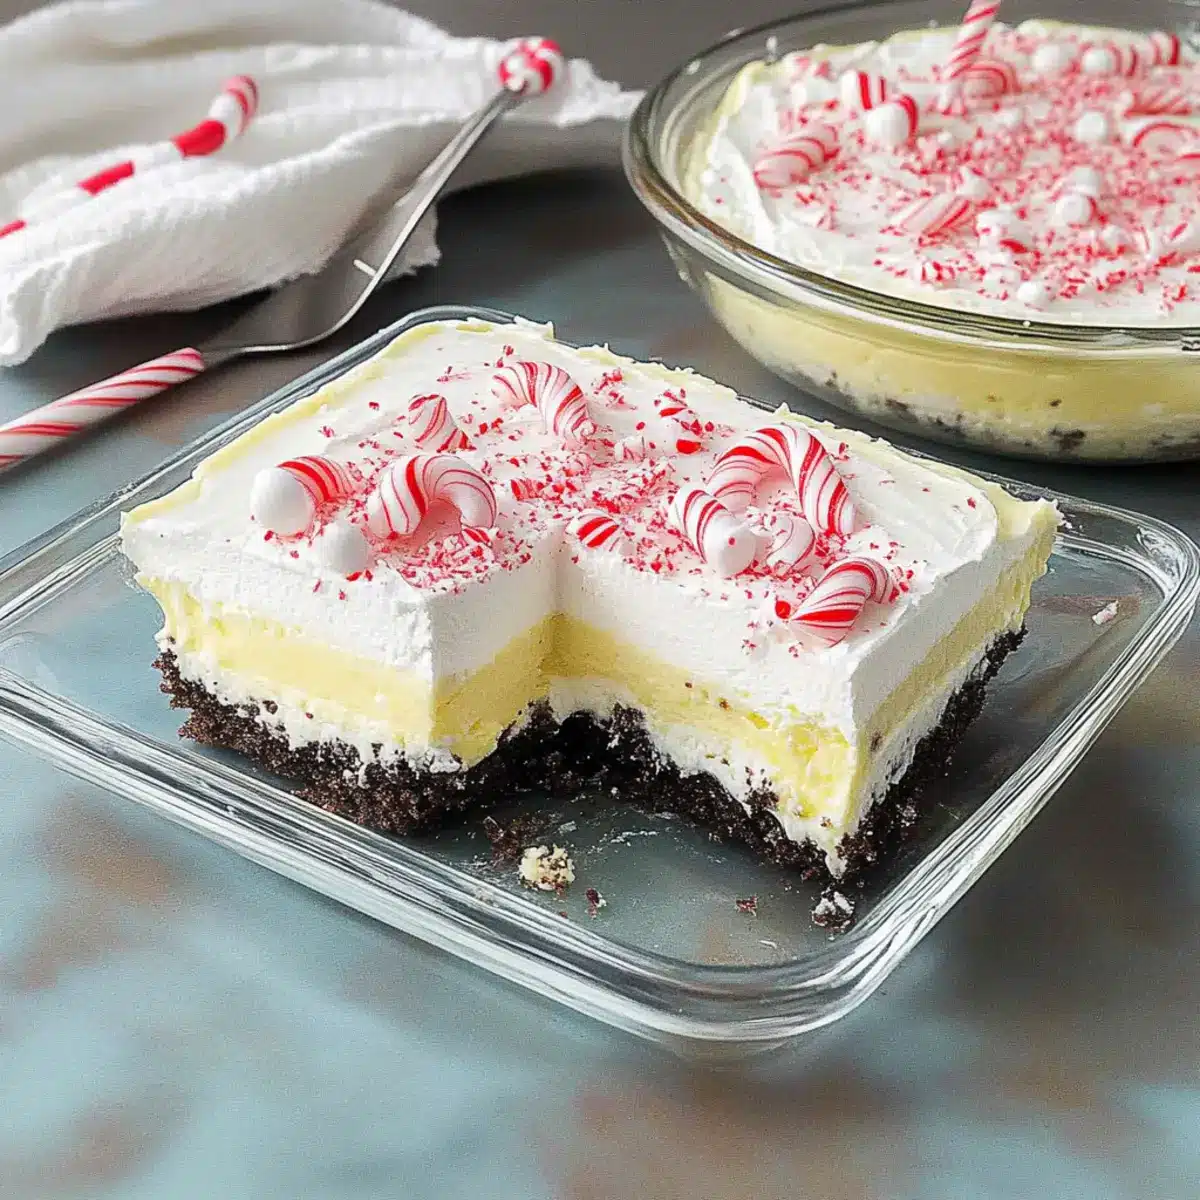
Stepping into my kitchen during the holiday season feels like entering a cozy wonderland, bustling with the spirit of warmth and celebration. One quick triumph that never fails to impress is my beloved No-Bake Layered Candy Cane Dessert. This festive delight combines a crunchy Oreo crust with velvety cream cheese filling, fluffy whipped topping, and a sprinkle of peppermint magic, making it not only an eye-catching centerpiece but also an instant crowd-pleaser. Best of all, this dessert is incredibly easy to whip up, allowing you to spend more time enjoying the festivities with your loved ones instead of fretting in the kitchen. Imagine slicing into that creamy layer, revealing the vibrant red and white from those candy canes—can you resist that holiday charm? Let’s dive into this festive recipe and make your gatherings even sweeter!
Why is this Candy Cane Dessert a Must-Try?
Easy to Prepare: This no-bake candy cane dessert is a breeze to make, requiring minimal time and effort—perfect for busy holiday schedules.
Festive Appeal: With its vibrant layers and festive flavors, it’s sure to impress both family and friends at any gathering.
Customizable Options: Feel free to substitute ingredients, like using graham crackers for the crust or light cream cheese for a healthier twist, similar to my delightful Monster Bark Candy.
Deliciously Creamy: The rich cream cheese frosting paired with the crunchy Oreo base and pop of peppermint creates a heavenly balance of textures and flavors.
Kid-Friendly Treat: This dessert is not only loved by adults; kids will love helping assemble this fun, festive treat!
Make-Ahead Convenience: Prepare it the day before for a hassle-free dessert that tastes even better after chilling overnight!
Candy Cane Dessert Ingredients
• Here’s what you need to create this festive no-bake treat!
For the Crust
- Oreo Cookies – The base structure for the crust; substitute with graham crackers or gingerbread cookies for a different flavor.
- Butter – Binds the crust ingredients together; use unsalted butter for better control of salt levels.
For the Cream Cheese Layer
- Cream Cheese – Provides creamy texture and tangy flavor; can be replaced with light cream cheese to reduce calories.
- Sugar – Sweetens the cream cheese layer; optionally substitute with a sugar alternative to modify sweetness.
- 2% Milk – Helps in achieving desired consistency in the cream cheese layer; any milk type can be used, including non-dairy versions.
- Whipped Topping – Lightens up the cream cheese layer while adding volume; use homemade whipped cream for a fresher taste.
For the Pudding Layer
- Instant White Chocolate Pudding Mix – Provides a creamy and sweet layer; vanilla pudding mix can be used if white chocolate isn’t available.
For the Topping
- Crushed Candy Canes – Adds flavor and crunch; adjust the amount based on personal preference; use chocolate sprinkles as an alternative for a less minty flavor.
- Additional Whipped Topping – To garnish the top layer and provide a fluffy finish; always add just before serving for the best texture.
Step‑by‑Step Instructions for No-Bake Layered Candy Cane Dessert
Step 1: Prepare the Crust
Begin by pulsing Oreo cookies in a food processor until they resemble fine crumbs, which should take about 30 seconds. In a mixing bowl, combine the crumbs with melted unsalted butter, ensuring everything is well-coated. Press this mixture firmly into the bottom of a 13×9-inch dish to form a sturdy crust. Chill the crust in the refrigerator for 15 minutes while you prepare the next layer.
Step 2: Make the Cream Cheese Layer
In a large bowl, beat softened cream cheese and sugar until smooth and creamy, about 2-3 minutes with a hand mixer. Gradually add in 2% milk and blend well until the mixture is fully incorporated. Carefully fold in half of the whipped topping along with half of the crushed candy canes until evenly mixed. Spread this fluffy cream cheese mixture evenly over the chilled Oreo crust, smoothing it out with a spatula.
Step 3: Prepare the Pudding Layer
In a separate medium bowl, whisk together the instant white chocolate pudding mix and cold milk until it thickens, approximately 2 minutes. This pudding layer adds an essential creamy texture to your Candy Cane Dessert. Gently spread the pudding mixture over the cream cheese layer, making sure to cover it completely for a lovely layered effect.
Step 4: Final Layers
Top your dessert with the remaining whipped topping, spreading it out evenly to create a smooth surface. For a festive touch, sprinkle the remaining crushed candy canes on top, making it visually appealing. Cover the dessert with plastic wrap and refrigerate for at least 4 hours, allowing it to set properly and letting the flavors meld together beautifully.
Step 5: Serve and Enjoy
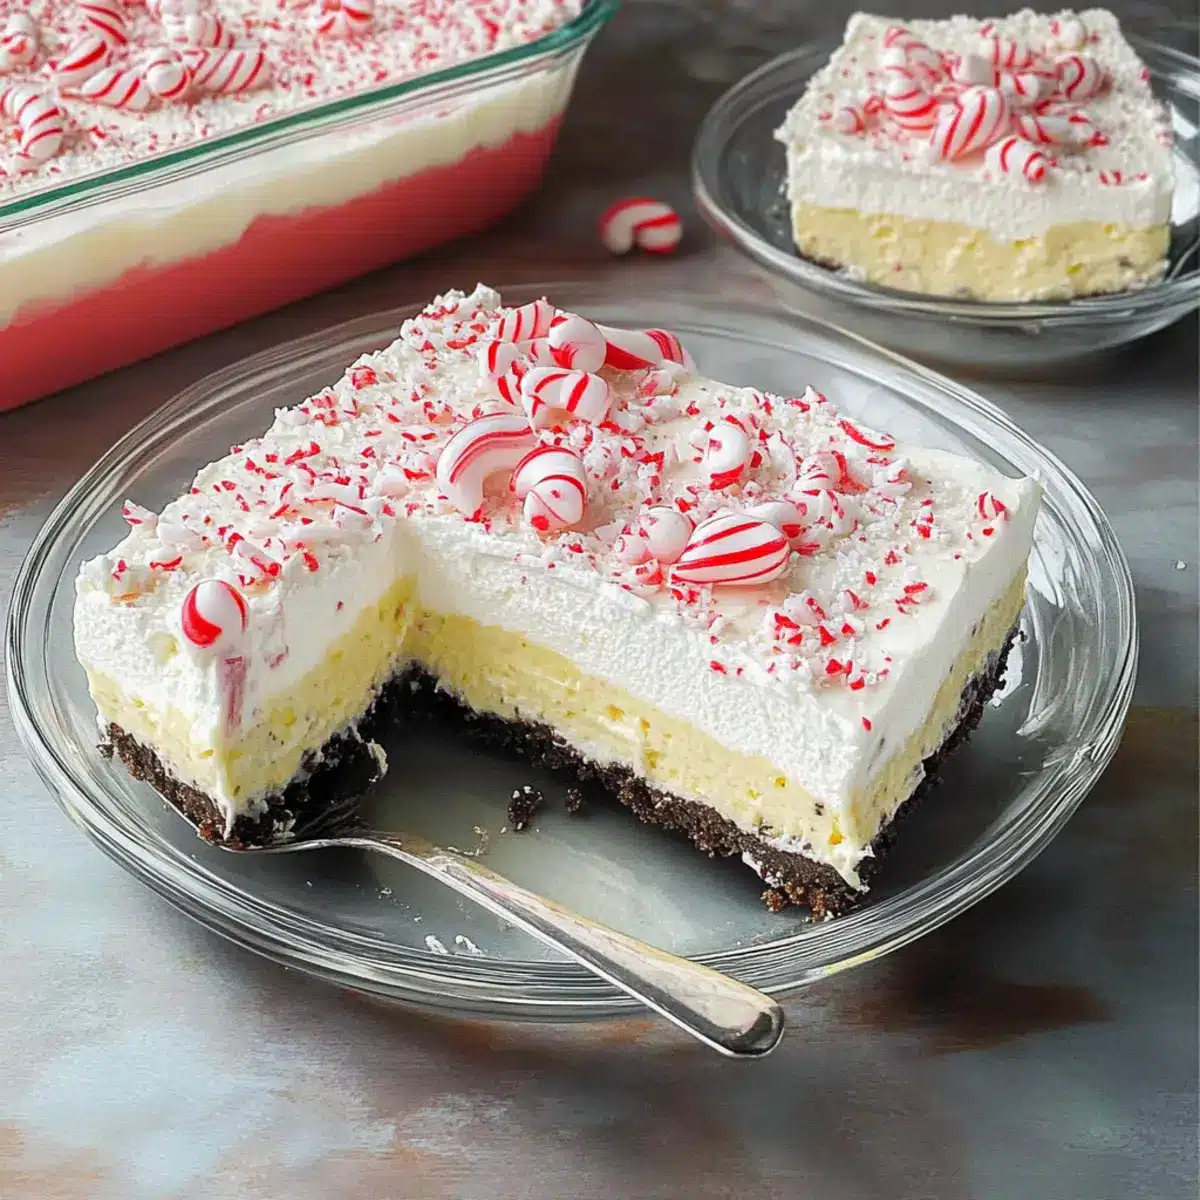
Once the No-Bake Layered Candy Cane Dessert is fully chilled and set, carefully cut into squares and lift them out of the dish. For the best crunch, top each piece with a few extra crushed candy canes right before serving. This final touch enhances both the texture and flavor, making your holiday gathering even more memorable.
What to Serve with No-Bake Layered Candy Cane Dessert
Imagine a festive holiday table where every bite feels like a warm hug, creating memories you’ll cherish for years to come.
- Hot Cocoa: The rich, chocolatey warmth perfectly complements the cool, minty flavors in the candy cane dessert, creating a delightful balance.
- Peppermint Tea: Ideal for those who prefer a light, refreshing drink, peppermint tea enhances the dessert’s festive spirit with aromatic notes.
- Gingerbread Cookies: The spiced crunch of gingerbread cookies pairs beautifully with the creamy layers and minty finish, adding a savory twist.
- Fresh Berries: Bright and juicy raspberries or strawberries add a refreshing tartness that contrasts with the sweetness of the dessert, keeping each bite exciting.
- Chocolate Mousse: Rich and velvety, chocolate mousse offers an indulgent contrast that pairs wonderfully with the layers of cheesecake and pudding.
- Holiday Fruit Salad: A colorful mix of crisp apples, juicy oranges, and seasonal fruits adds a refreshing crunch, balancing out the richness of the dessert.
- Vanilla Ice Cream: A scoop of vanilla ice cream melts luxuriously against the cool layers, providing a creamy richness that elevates the experience.
- Sparkling Water with Mint: A light and bubbly drink with a hint of mint refreshes your palate, enhancing the festive flavors of your dessert.
- Coffee: Whether hot or iced, the robust flavor of coffee complements the creamy sweetness, making it a perfect option for a cozy gathering.
Candy Cane Dessert Variations
Customize your layered candy cane dessert with these delightful tweaks that will suit every palate and occasion!
- Graham Cracker Crust: Swap the Oreo cookies for graham crackers for a more classic flavor that pairs beautifully with creamy layers.
- Sugar-Free Option: Use a sugar alternative like stevia or monk fruit, ensuring the sweet balance remains delightful and guilt-free.
- Non-Dairy Delight: Substitute regular cream cheese and whipped topping with dairy-free versions for a vegan-friendly treat that everyone can enjoy.
- Chocolate Mint Twist: Try chocolate pudding mix instead of white chocolate for a rich, indulgent flavor that adds a new level of comfort.
- Seasonal Spice: Add a pinch of cinnamon or nutmeg to the cream cheese layer for a warming spiced twist—perfect for holiday gatherings!
- Chocolate Love: Drizzle melted chocolate over the top layer before adding crushed candy canes for an extra layer of sweetness—similar to how I love to add chocolate to my festive Monster Bark Candy!
- Layered Fruit: Incorporate a layer of crushed berries like strawberries or raspberries between the cream cheese and pudding layers for a pop of color and freshness.
- Heated Up: For a bit of heat, add a sprinkle of crushed red pepper flakes to the cream cheese mixture—an unexpected but enjoyable surprise!
Feel free to mix and match these variations to create a candy cane dessert that’s entirely your own!
Storage Tips for Candy Cane Dessert
Fridge: Store the layered candy cane dessert tightly covered in the refrigerator for up to 3 days. The flavors meld beautifully, enhancing the taste as it sits.
Freezer: If you wish to freeze this dessert, wrap it tightly in plastic wrap and then aluminum foil to prevent freezer burn. It can last up to 1 month.
Thawing: When ready to enjoy, transfer from the freezer to the fridge and let it thaw overnight for the best texture.
Reheating: This dessert is best served chilled, so no reheating is necessary. Garnish with crushed candy canes just before serving to keep them crisp.
Expert Tips for Candy Cane Dessert
-
Chill Time Matters: Allow the dessert to chill for at least 4 hours. Overnight chilling intensifies flavors and improves texture.
-
Candy Cane Crispness: Add crushed candy canes just before serving to maintain their crunch. This prevents sogginess in your lovely layers.
-
Room Temperature Cream Cheese: Make sure to bring cream cheese to room temperature for a smooth, lump-free filling. Beat thoroughly until fully creamy.
-
Layering Technique: Spread layers gently but evenly to avoid mixing. A spatula helps create beautiful, distinct layers in your candy cane dessert.
-
Customization Options: Feel free to play with different pudding flavors or cookie bases to make the candy cane dessert uniquely yours!
Make Ahead Options
These No-Bake Layered Candy Cane Desserts are a fantastic choice for meal prep, taking the stress out of holiday entertaining! You can prepare the crust and cream cheese layer up to 24 hours in advance, ensuring the dessert is ready to go when your guests arrive. Simply make the crust and cream cheese layer as instructed, cover tightly, and refrigerate. When you’re ready to serve, complete the dessert by whipping up the pudding layer, spreading it over the cream cheese, and adding the whipped topping and crushed candy canes just before the party. This way, you’ll keep the toppings crisp and fresh while ensuring the candy cane dessert tastes just as delightful as if you made it that day!
Candy Cane Dessert Recipe FAQs
What kind of Oreos should I use for the crust?
You can use classic Oreo cookies for a traditional flavor, but feel free to experiment! Substituting with graham crackers or gingerbread cookies gives a unique twist. Just ensure any cookies you choose are finely crushed to form a sturdy base for your layered candy cane dessert.
How should I store the leftovers?
Store your layered candy cane dessert tightly covered in the refrigerator for up to 3 days. The flavors actually improve as it sits! If needed, you can also freeze it—wrap the dessert tightly in plastic wrap followed by aluminum foil to prevent freezer burn; it lasts up to 1 month.
Can I use non-dairy ingredients in this recipe?
Absolutely! You can substitute the regular cream cheese and whipped topping with their non-dairy counterparts without sacrificing the dessert’s creamy texture. Similarly, any non-dairy milk can work in the cream cheese layer for those who are lactose intolerant or prefer plant-based options.
What should I do if my cream cheese layer is lumpy?
Don’t worry! If your cream cheese layer ends up lumpy, it’s often because the cream cheese was cold. To fix this, make sure to let your cream cheese sit at room temperature for about 30 minutes before mixing. If lumps remain, simply beat the mixture longer until smooth. You can also use a hand mixer to combine more effectively.
How long does it take for the dessert to set?
For optimal results, refrigerate the layered candy cane dessert for at least 4 hours before serving. However, for a richer flavor and creamier texture, I highly recommend letting it chill overnight. This way, the layers set well, and they meld together beautifully!
Can I adjust the sweetness of the dessert?
Yes! If you want to adjust the sweetness, consider substituting regular sugar in the cream cheese layer with a sugar alternative that suits your preference. Just keep in mind that different alternatives may affect the texture slightly, so adjust based on the instructions on the package for best results.
Delicious Candy Cane Dessert: A Festive No-Bake Delight
Ingredients
Equipment
Method
- Pulse Oreo cookies in a food processor until fine crumbs form, about 30 seconds. Combine crumbs with melted unsalted butter and press into the bottom of a 13x9-inch dish. Chill for 15 minutes.
- In a large bowl, beat softened cream cheese and sugar until smooth, about 2-3 minutes. Gradually add in 2% milk and fold in half of the whipped topping and crushed candy canes. Spread over the crust.
- In a separate bowl, whisk together pudding mix and cold milk until thickened, approximately 2 minutes. Spread pudding over the cream cheese layer.
- Top with remaining whipped topping and sprinkle with crushed candy canes. Cover with plastic wrap and refrigerate for at least 4 hours.
- Cut into squares and serve chilled, topping each piece with extra crushed candy canes just before serving.
Leave a Reply