
As the crisp autumn air settles in, Halloween’s delightful spookiness draws near, and I can’t help but envision a cozy dinner that captures both the spirit of the season and the comfort of home-cooked meals. Enter Mummy Chicken Pot Pies—these individual delights are not just visually captivating with their fun, mummy-like appearance; they also deliver a hearty, satisfying meal that’s perfect for both kids and adults. With effortless prep and a reassuring warmth that chases away the chill, these pot pies are sure to become a family favorite. Ready to whip up some Halloween magic in your kitchen? Let’s dive into this deliciously comforting recipe!
Why Are Mummy Chicken Pot Pies Unique?
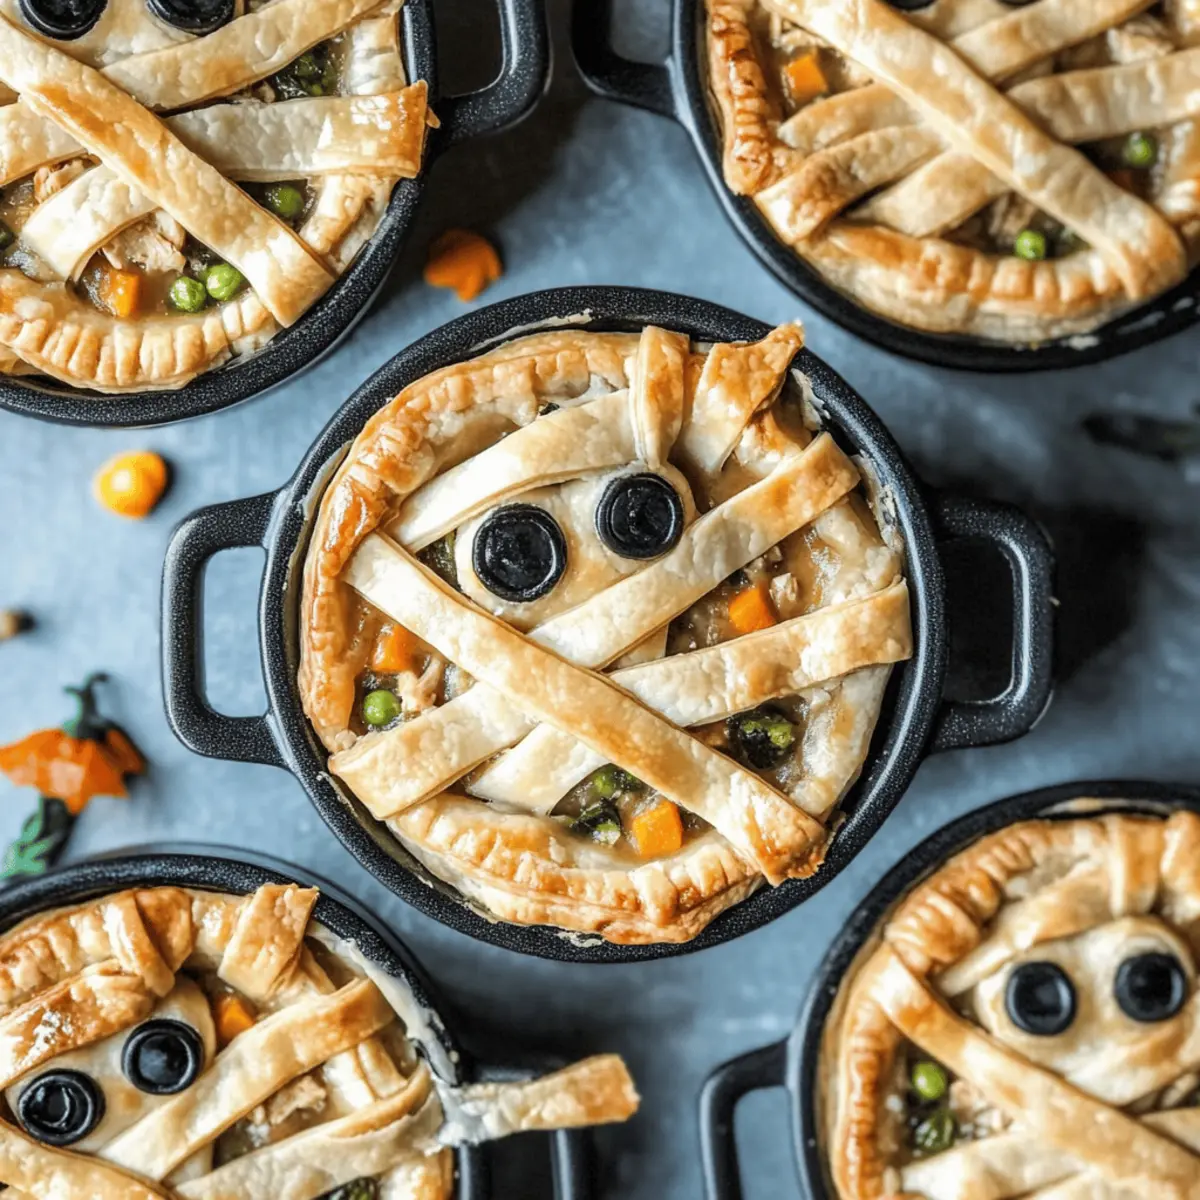
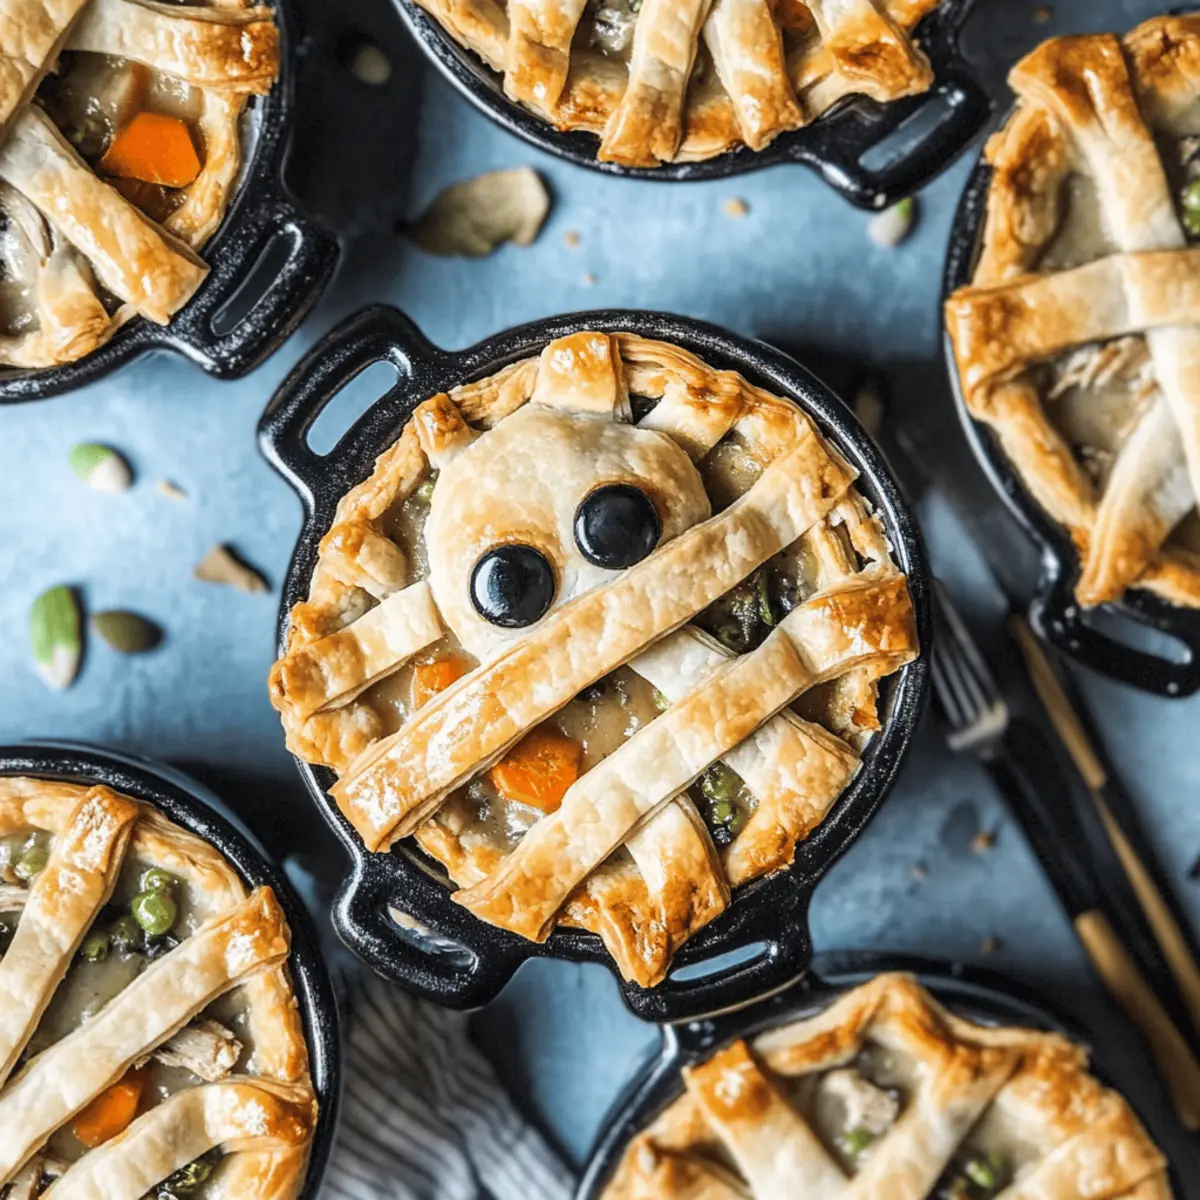
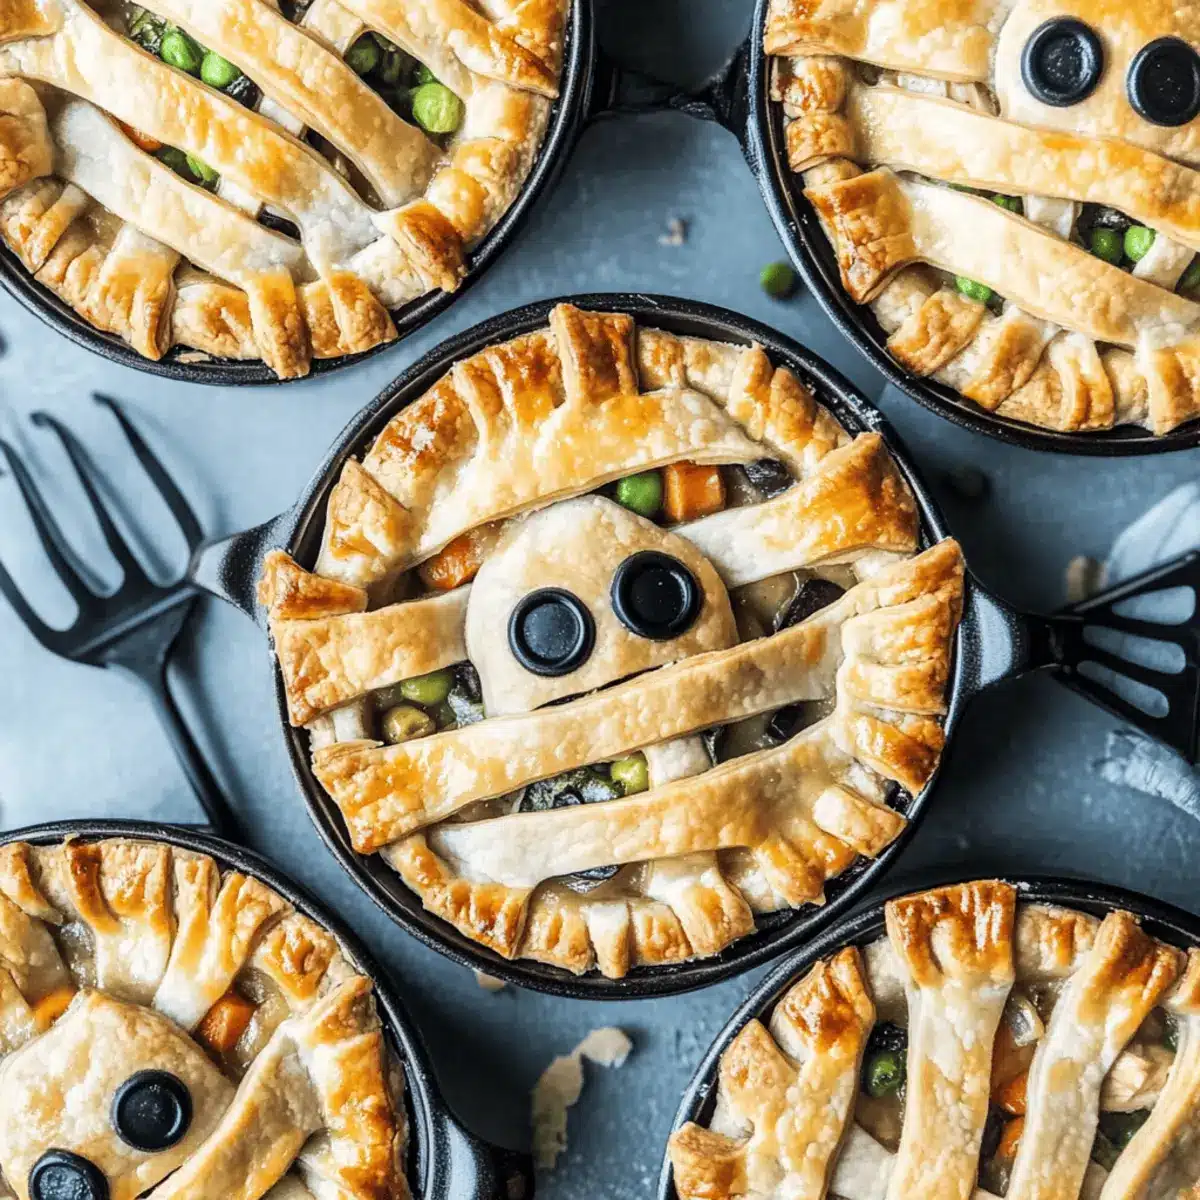
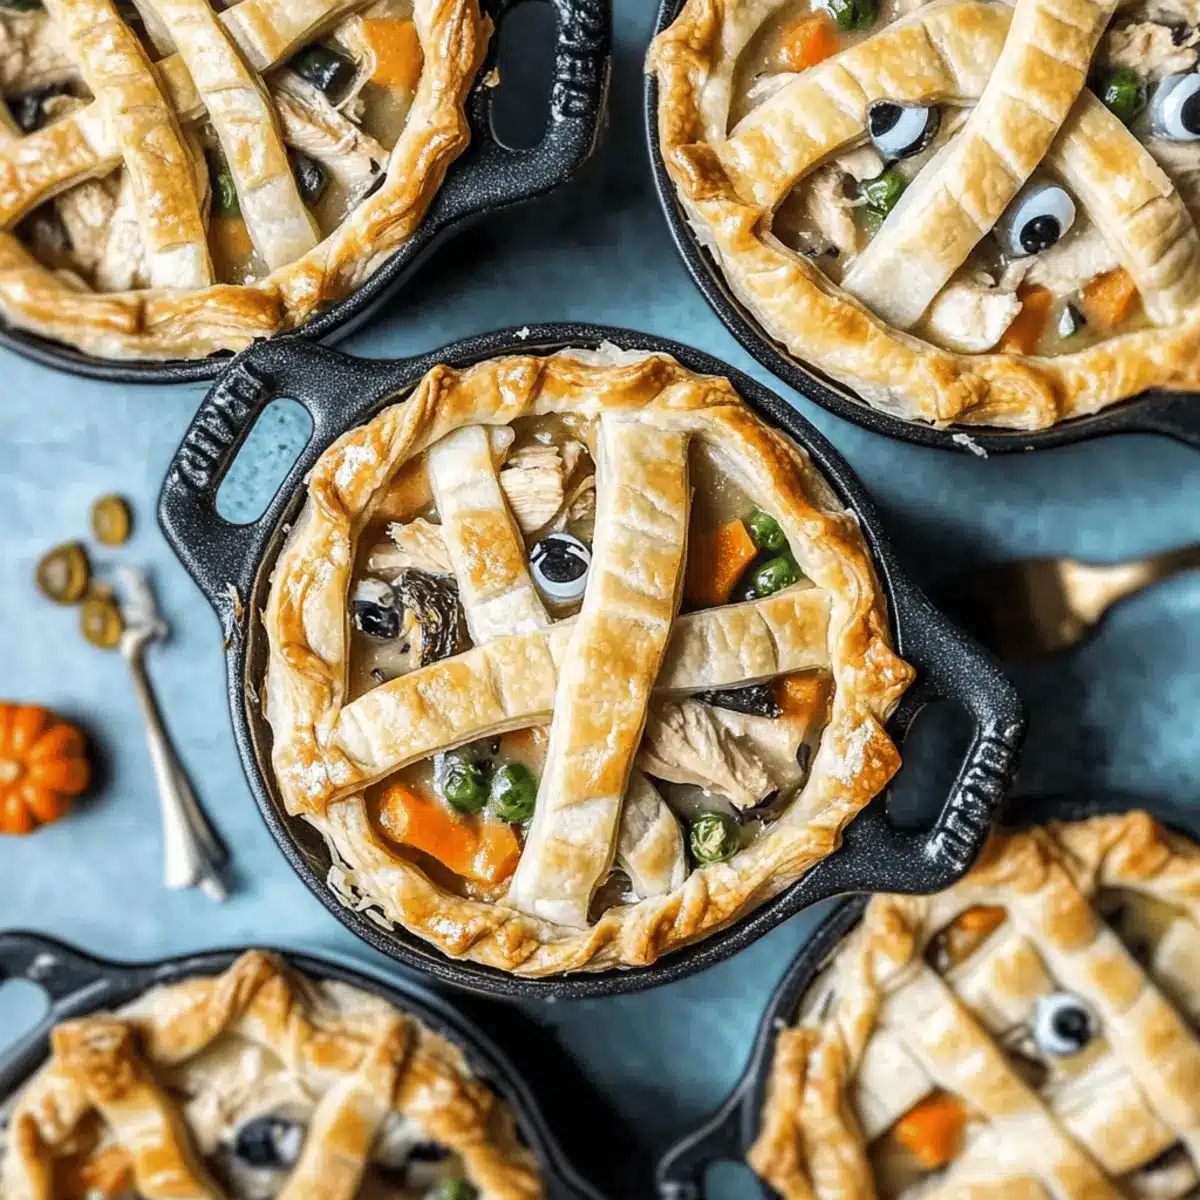
Spook-tacular Presentation: These pot pies boast a playful mummy design, making dinnertime fun and festive for Halloween.
Comforting Flavor: With a creamy filling featuring tender chicken and veggies, every bite is a warm hug on a chilly night.
Kid-Friendly Appeal: Kids will love the candy eyes, while adults appreciate the savory goodness hidden beneath the playful crust.
Quick Prep Time: Store-bought pie crust saves you time, letting you focus on the fun part—creating that spooky look!
Versatile Options: Feel free to swap in your favorite vegetables or make a large pie for sharing, perfect alongside paired dishes like Layered Halloween Jello to celebrate the season.
These Mummy Chicken Pot Pies are the ultimate cozy meal that combines fun with flavor—what’s not to love?
Mummy Chicken Pot Pies Ingredients
For the Crust
• Double Pie Crust – Provides a flaky exterior; opt for 15-ounce refrigerated pie crusts for quicker prep.
For the Filling
• Cubed Cooked Chicken – Adds protein and heartiness; rotisserie chicken is a fantastic shortcut.
• Salted Butter – Used for sautéing vegetables; it enhances the overall flavor.
• Yellow Onion – About 1 cup chopped; brings sweetness and aroma to your filling.
• Carrots – About ¾ cup diced; contributes natural sweetness and vibrant color.
• Celery – About ¾ cup chopped; adds necessary crunch and depth.
• Cremini Mushrooms – Approximately 2 cups sliced; boosts umami flavor and texture.
• Garlic – About 1 tablespoon minced; elevates the flavor profile significantly.
• All-Purpose Flour – Helps thicken the filling; prevents unsightly lumps when mixed with liquid.
• Chicken Broth – Provides moisture and flavor; about 2 cups for a rich base.
• Heavy Cream – About ½ cup; adds a velvety richness to the filling.
• Dried Thyme – About 1 teaspoon; serves as a seasoning for depth of flavor.
• Kosher Salt – About ½ teaspoon; used for proper seasoning.
• Black Pepper – About ¼ teaspoon; adds a subtle hint of spice.
• Frozen Peas – About ½ cup; brings sweetness and color to the filling.
• Fresh Parsley – About ¼ cup chopped; adds a fresh touch for finishing.
• Large Egg – 1 beaten egg for the egg wash, which gives the crust its golden hue.
• Candy Eyes – About 12 large candy eyes; a fun touch that enhances the Halloween theme.
Transforming these ingredients into Mummy Chicken Pot Pies will fill your kitchen with warmth and excitement, creating a meal everyone will remember!
Step‑by‑Step Instructions for Mummy Chicken Pot Pies
Step 1: Prepare the Oven and Ramekins
Preheat your oven to 425°F (220°C), allowing it to reach the ideal baking temperature. While the oven warms, lightly spray six individual ramekins with nonstick cooking spray to ensure easy removal of the Mummy Chicken Pot Pies after baking. Set them aside, ready for the delicious filling to come.
Step 2: Sauté Vegetables
In a large skillet, melt 2 tablespoons of salted butter over medium heat. Add 1 cup chopped yellow onion, ¾ cup diced carrots, and ¾ cup chopped celery, cooking until softened, about 5 minutes. Stir in 2 cups sliced cremini mushrooms and 1 tablespoon minced garlic, cooking for an additional 3 minutes until the mushrooms are tender and fragrant, then remove from heat.
Step 3: Make the Filling
Sprinkle ¼ cup of all-purpose flour over the sautéed vegetables in the skillet, stirring to coat generously. Gradually pour in 2 cups of chicken broth and ½ cup of heavy cream, mixing well. Allow the mixture to simmer for 3-4 minutes, or until it thickens to a creamy consistency. Season with 1 teaspoon of dried thyme, ½ teaspoon kosher salt, ¼ teaspoon black pepper, and fold in 2 cups of cubed cooked chicken, ½ cup of frozen peas, and ¼ cup of fresh parsley, then remove from heat to cool slightly.
Step 4: Prepare Crusts
While the filling cools, roll out your double pie crusts on a lightly floured surface. Cut out circles for the bottom of each ramekin, ensuring they fit snugly, and then slice strips from the remaining dough for the mummy’s bandages. Aim for approximately ½ inch in width for the strips to achieve the best look.
Step 5: Assemble Pot Pies
Spoon the slightly cooled filling evenly into each ramekin, filling them to the brim. Arrange the dough strips in a crisscross pattern across the top to create the spooky mummy appearance. Press the edges to seal and brush with a beaten egg for a golden finish. For an extra touch, sprinkle a pinch of coarse salt over the crust if desired.
Step 6: Bake
Carefully place the assembled Mummy Chicken Pot Pies in the preheated oven and bake for 20-25 minutes, or until the crust is golden brown and flaky. Keep an eye on them towards the end to ensure they don’t over-brown. Once done, remove from the oven and let them cool slightly before decorating with candy eyes for a festive Halloween touch.
Expert Tips for Mummy Chicken Pot Pies
Cooling Filling: Allow the filling to cool slightly before adding it to the crusts. This prevents a soggy bottom, ensuring your Mummy Chicken Pot Pies maintain their flaky texture.
Choose Chicken Wisely: Opt for rotisserie chicken to save time and add great flavor. Avoid using overly dry chicken, which can lead to a less enjoyable pot pie.
Perfect Baking: Always ensure your oven is fully preheated to 425°F for the best result. A hot oven promotes a perfect puffed crust for your pot pies.
Egg Wash Magic: Don’t skip the egg wash! Brushing a beaten egg over the crust creates a stunning golden hue, leading to a visually appealing finish that enhances the holiday theme.
Customize Vegetables: Feel free to swap out veggies based on what you have on hand. Bell peppers, corn, or even green beans can add a colorful twist to your Mummy Chicken Pot Pies.
Serving Size Modification: If using a large pie plate instead of individual ramekins, increase the baking time to 30-35 minutes to ensure the filling is fully heated through and the crust is golden brown.
What to Serve with Mummy Chicken Pot Pies?
A cozy dinner deserves equally delightful sides to complete the meal and embrace the Halloween spirit.
-
Layered Halloween Jello: This colorful, spooky dessert adds a festive touch and provides a refreshing contrast to the savory pot pies. Kids will love the vibrant layers just as much as the candy eyes on their meals!
-
Mixed Green Salad: A fresh salad brightens the plate with crisp greens and tangy vinaigrette, balancing the rich flavors of the pot pies. Toss in some crunchy nuts or seasonal fruits for added texture and sweetness.
-
Garlic Breadsticks: Soft and buttery garlic breadsticks are perfect for dipping into the creamy filling of the Mummy Chicken Pot Pies. This classic pairing invites everyone to savor every last bite.
-
Homemade Butterbeer: Enhance your Halloween dinner with this creamy, fizzy drink inspired by magical realms. Its sweetness pairs wonderfully with the savory notes of the pot pies, offering a whimsical beverage for all ages.
-
Roasted Vegetables: Warm, seasoned roasted veggies like carrots and Brussels sprouts will complement the creamy filling. Their slight caramelization enhances the natural sweetness and provides a hearty texture alongside the pot pies.
-
Pumpkin Spice Muffins: For those sweet-tooth moments, pop a pumpkin spice muffin on the table—perfect for dessert or as a snack while assembling the Mummy Chicken Pot Pies earlier in the day!
These accompaniments will create a well-rounded, festive Halloween feast that everyone will enjoy!
How to Store and Freeze Mummy Chicken Pot Pies
Fridge: Store leftover Mummy Chicken Pot Pies in an airtight container for up to 3-4 days. Reheat in the oven or microwave until warmed through to enjoy them again!
Freezer: Assemble pot pies without baking, cover tightly with plastic wrap, and freeze for up to 1 month. When ready to bake, remove from the freezer and cook from frozen, adjusting the baking time to ensure they’re fully heated.
Room Temperature: If serving at a gathering, limit time at room temperature to 2 hours to ensure food safety and quality.
Reheating: To maintain their flaky texture, reheat baked pot pies in the oven at 350°F for about 15-20 minutes. Enjoy them as a cozy meal any time!
Mummy Chicken Pot Pies Variations & Substitutions
Customizing your Mummy Chicken Pot Pies is a delightful way to make them your own!
-
Larger Pie: Use a 9-inch pie plate for a shareable version. Just adjust baking time to 30-35 minutes.
Imagine gathering everyone around a single pie, digging in for some hearty fun! -
Vegetarian Option: Swap chicken for 2 cups of your favorite vegetables, like bell peppers or zucchini.
This twist makes for an equally comforting dish, without losing the familiar warmth of pot pie. -
Dairy-Free: Use coconut milk or almond milk in place of heavy cream for a lactose-free alternative.
The subtle sweetness balances well with the savory filling, creating a unique flavor profile. -
Gluten-Free: Substitute all-purpose flour with a gluten-free blend or cornstarch for thickening.
You’ll still achieve that luscious filling without the gluten, making it friendly for a broader audience. -
Seasoned Twist: Add 1 teaspoon of smoked paprika or a dash of cayenne for heat and extra depth.
Just think of those warming spices blending beautifully in your creamy filling! -
Alternative Protein: Try shredded turkey or cooked lentils instead of chicken for variety.
This option is perfect after a holiday feast, using leftovers in a new way. -
Savory Eyes: Replace candy eyes with mozzarella cheese and olives for a savory twist.
It still captures the fun spirit of Halloween while adding cheesy goodness! -
Crispy Topping: Top with crushed crackers or fried onions before baking for added texture.
A little crunch elevates the whole experience, making each bite extra special.
These delightful variations help you create an entirely new experience with each batch, ensuring that your Mummy Chicken Pot Pies never grow old. For more inspiration, you might love pairing them with Layered Halloween Jello or diving into some hearty Five Spice Chicken for a cozy meal!
Make Ahead Options
These Mummy Chicken Pot Pies are perfect for meal prep, allowing you to fully enjoy Halloween festivities without the last-minute rush! You can prepare the filling up to 3 days in advance; simply cool it thoroughly, then store it in an airtight container in the refrigerator to maintain that creamy goodness. The pie crusts can also be prepped up to 24 hours before—roll them out and keep them wrapped in plastic wrap to prevent drying out. When you’re ready to bake, fill the crust with the chilled filling, assemble the pot pies, brush with egg wash, and bake at 425°F for 20-25 minutes. They’ll be just as delicious and provide a cozy, stress-free dinner option for busy weeknights!
Mummy Chicken Pot Pies Recipe FAQs
What kind of chicken should I use for the filling?
Absolutely! I recommend using rotisserie chicken for its convenience and flavor. You can also use leftover cooked chicken, just ensure it’s moist and cut into bite-sized cubes for the best texture in your pot pies.
How long can I store leftover Mummy Chicken Pot Pies in the fridge?
You can store leftover Mummy Chicken Pot Pies in an airtight container for up to 3-4 days. Just reheat them in the oven or microwave until hot. They make for a quick and comforting meal later in the week!
Can I freeze Mummy Chicken Pot Pies?
Yes, you can! To freeze, assemble the pot pies without baking them. Wrap them tightly in plastic wrap or foil and store them in the freezer for up to 1 month. When you’re ready to eat, bake from frozen, extending the cooking time to ensure they’re fully heated through.
What should I do if my filling is too thick or too runny?
If your filling is too thick, add a little more chicken broth or cream gradually until you reach your desired consistency. On the other hand, if it’s too runny, return it to the heat and simmer for a few extra minutes until it thickens up, stirring cautiously to avoid lumps!
Can I use different vegetables in my Mummy Chicken Pot Pies?
Very much so! Feel free to mix in your favorite vegetables. Bell peppers, corn, and potatoes are great options. Just remember to adjust the sauté time based on how long these veggies need to soften through.
Are Mummy Chicken Pot Pies suitable for kids with allergies?
While the recipe is kid-friendly, it’s essential to consider allergies. If your child has food sensitivities, you can swap out ingredients as necessary—such as using gluten-free flour for thickening or omitting the cream and substituting it with a dairy-free alternative. Always check labels for any offending ingredients!
Mummy Chicken Pot Pies: Cozy Halloween Treats Everyone Loves
Ingredients
Equipment
Method
- Preheat your oven to 425°F (220°C) and lightly spray ramekins with nonstick cooking spray.
- Melt 2 tablespoons of salted butter in a skillet over medium heat. Add 1 cup chopped yellow onion, ¾ cup diced carrots, and ¾ cup chopped celery; cook for 5 minutes.
- Stir in 2 cups sliced cremini mushrooms and 1 tablespoon minced garlic; cook for an additional 3 minutes.
- Sprinkle ¼ cup of all-purpose flour over vegetables, stirring to coat. Gradually pour in 2 cups of chicken broth and ½ cup heavy cream, mixing well. Simmer for 3-4 minutes until thickened.
- Season with 1 teaspoon dried thyme, ½ teaspoon kosher salt and ¼ teaspoon black pepper. Fold in 2 cups cubed cooked chicken, ½ cup frozen peas, and ¼ cup fresh parsley.
- Roll out the pie crusts on a floured surface. Cut circles for the ramekins and strips for the mummy's bandages.
- Spoon the filling into ramekins, top with dough strips in a crisscross pattern, seal edges and brush with beaten egg.
- Bake for 20-25 minutes until crust is golden brown. Cool slightly and decorate with candy eyes.
Leave a Reply