
As I stood in my kitchen, the aroma of sautéing onions and garlic wafted in the air—ah, the comforting and mouthwatering scent that instantly warms the heart! I was on a mission to create the ultimate stuffed peppers, a dish that not only delights the palate but also embodies healthy eating. Packed with seasoned ground beef, fluffy rice, and topped with bubbling cheese, these Stuffed Peppers promise to be a crowd-pleaser at your dinner table. Plus, they’re freezer-friendly, making meal prep a breeze for those busy weeknights. Whether you’re cooking for the family or a cozy gathering with friends, these colorful peppers are sure to impress! Are you ready to whip up a batch that will have everyone asking for seconds?
Why Are Stuffed Peppers So Irresistible?
Colorful, Savory Presentation: Stuffed Peppers bring vibrant colors to your table, making any meal visually appealing.
Freezer-Friendly Delight: Prepare a large batch and freeze them for quick dinners that taste homemade, just like your favorite Ricotta Stuffed Peppers!
Customizable Filling: Feel free to swap ingredients for personal preference—try quinoa for a healthy twist or add your choice of protein like turkey or plant-based meat!
A Family Favorite: Everyone from kids to adults loves these flavorful bites; it’s a fun way to enjoy nutritious veggies without the fuss!
Satisfying and Nutritious: Packed with hearty ingredients, these peppers not only fill you up but also provide essential nutrients, perfect for anyone looking for a healthy dinner option!
Stuffed Peppers Ingredients
For the Filling
• Uncooked brown or white rice – Acts as the base for the filling; quinoa is a great gluten-free substitute!
• Ground beef (1 pound) or ground turkey – Provides a hearty protein base; feel free to swap in ground chicken or plant-based meat for a lighter option.
• Canned diced tomatoes (15 ounces) – Adds moisture and sweetness; ensure you don’t drain them for the best consistency.
• Tomato sauce (8 ounces) – Binds the filling together, keeping it juicy and flavorful.
• Finely chopped yellow onion (¾ cup) – Contributes sweetness and depth; substitute with shallots for a milder flavor.
• Minced garlic (3 cloves) – Enhances the dish’s flavor; garlic powder can work in a pinch!
• Italian seasoning (2 teaspoons) – Infuses the filling with a blend of savory herbs; swap for taco seasoning for a fun twist!
For the Peppers
• Bell peppers (6 pieces, any color) – Serve as delightful edible vessels; choose firm peppers that stand tall!
For the Topping
• Shredded mozzarella cheese (1 cup, divided) – Creates a creamy, melty topping; cheddar makes a tasty alternative!
• Olive oil (2 teaspoons) – Ideal for sautéing onions and beef to build flavor; a splash of frying oil works as well!
Seasonings
• Garlic powder (½ teaspoon), salt (½ teaspoon), pepper (¼ teaspoon) – Balance the flavors; adjust amounts to suit your taste preferences.
These Stuffed Peppers ingredients will set you on the path to creating an unforgettable dish that brings comfort and nutrition to your dinner table!
Step‑by‑Step Instructions for Stuffed Peppers
Step 1: Cook the Rice
Begin by cooking the uncooked brown or white rice according to the package instructions, usually around 15–20 minutes. Once tender, remove it from the heat and let it cool slightly in a bowl. This fluffy rice will serve as a hearty base for your Stuffed Peppers and help absorb all the delicious flavors of your filling.
Step 2: Preheat the Oven
While the rice cools, preheat your oven to 400°F (200°C). This temperature is perfect for baking the stuffed peppers, allowing the cheese to melt beautifully and the peppers to become tender. Make sure to give your oven enough time to reach this temperature, ensuring even cooking for a delightful end result.
Step 3: Prepare the Bell Peppers
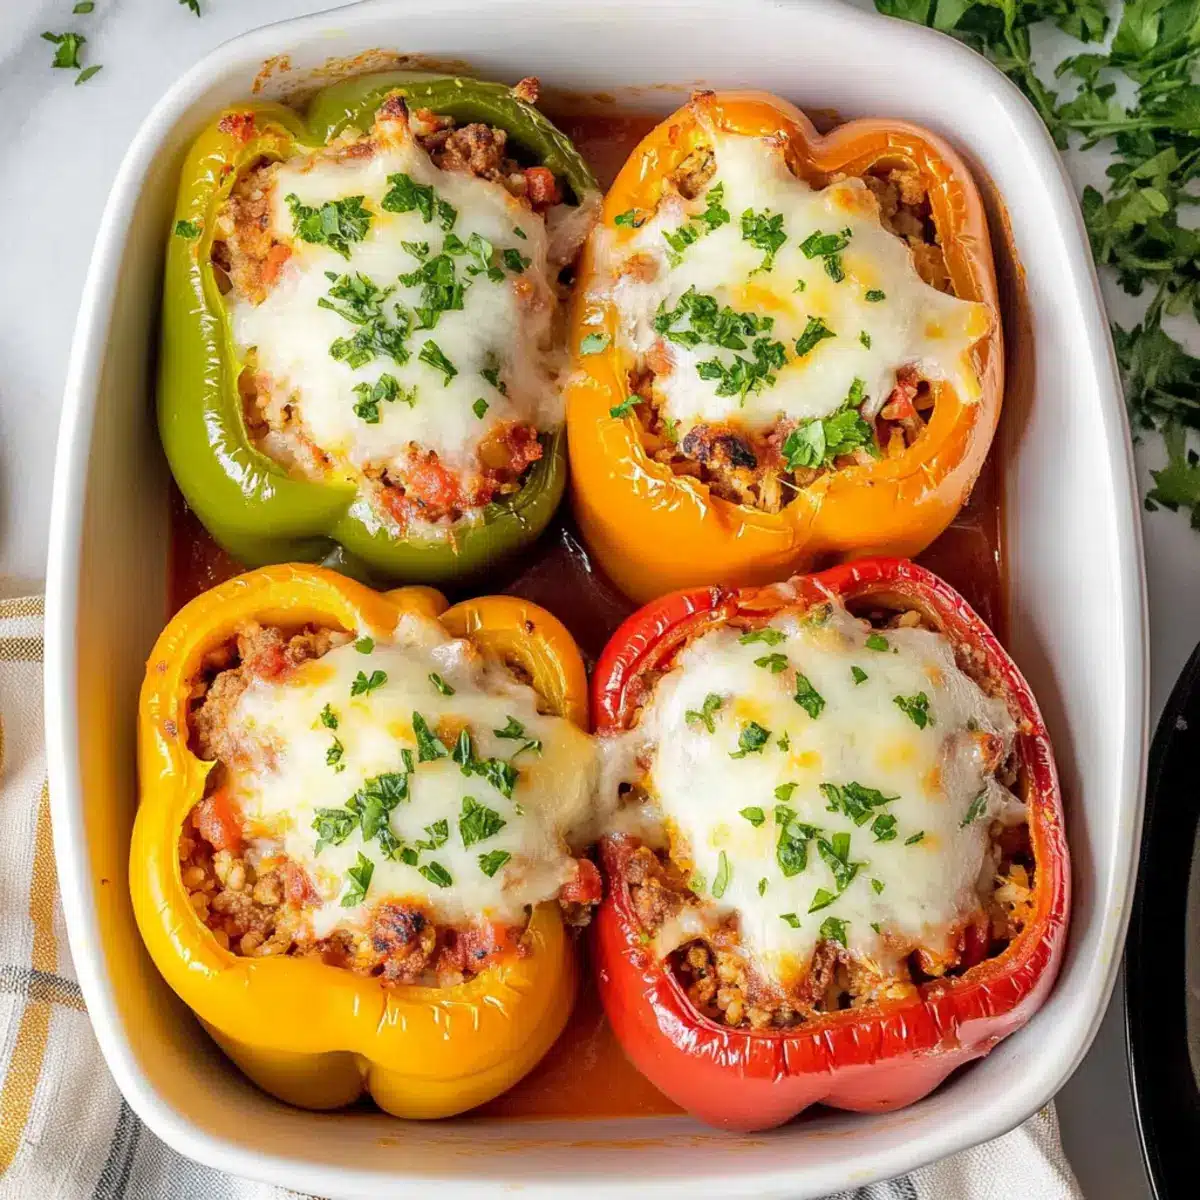
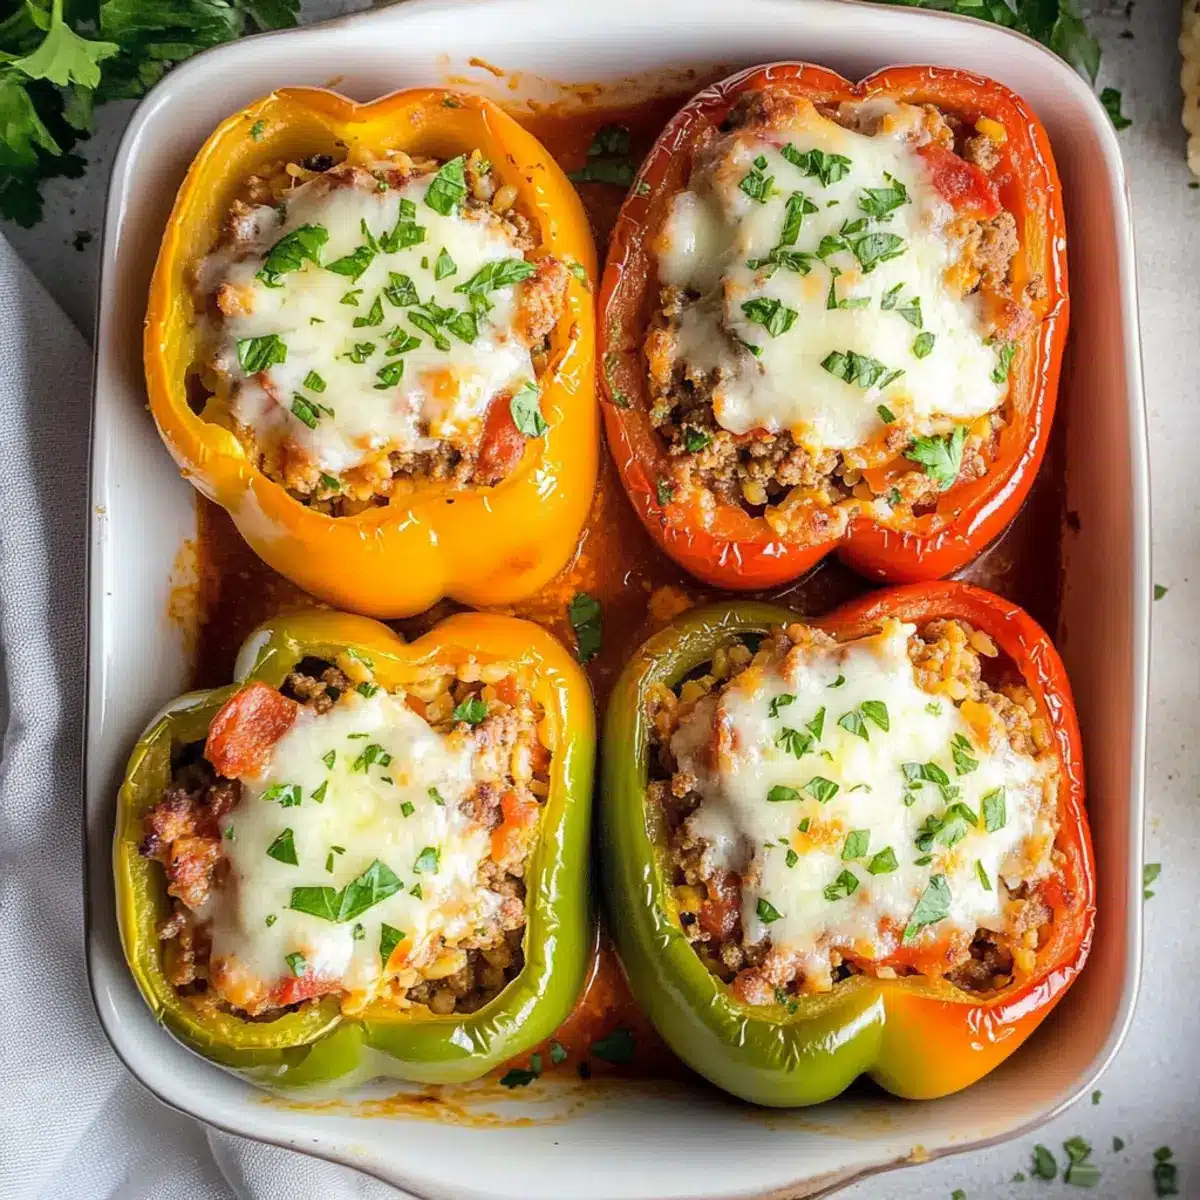
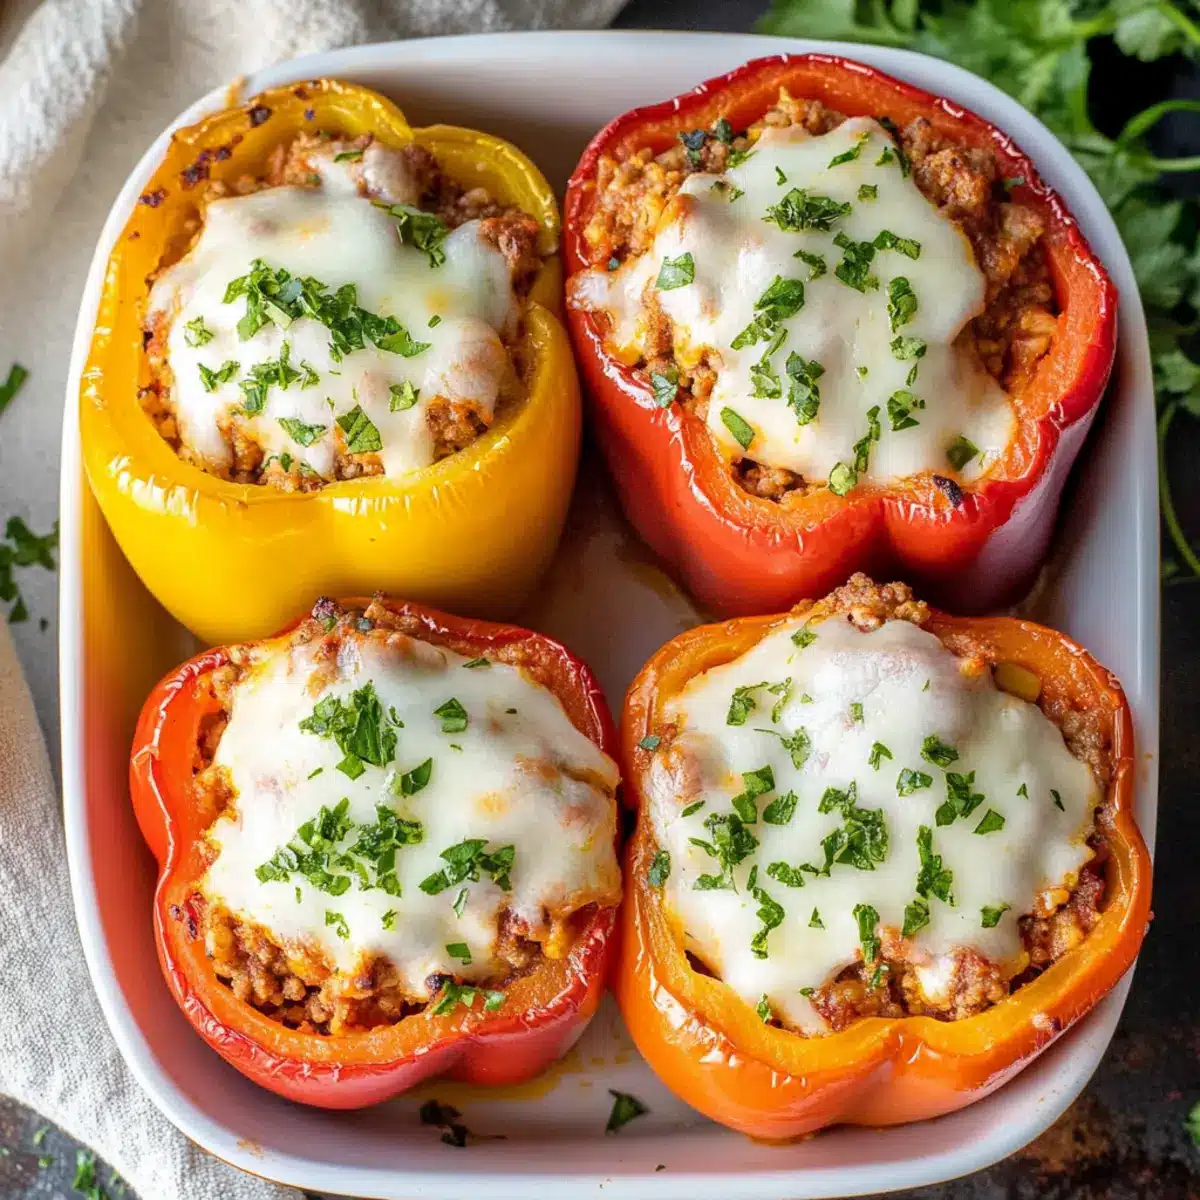
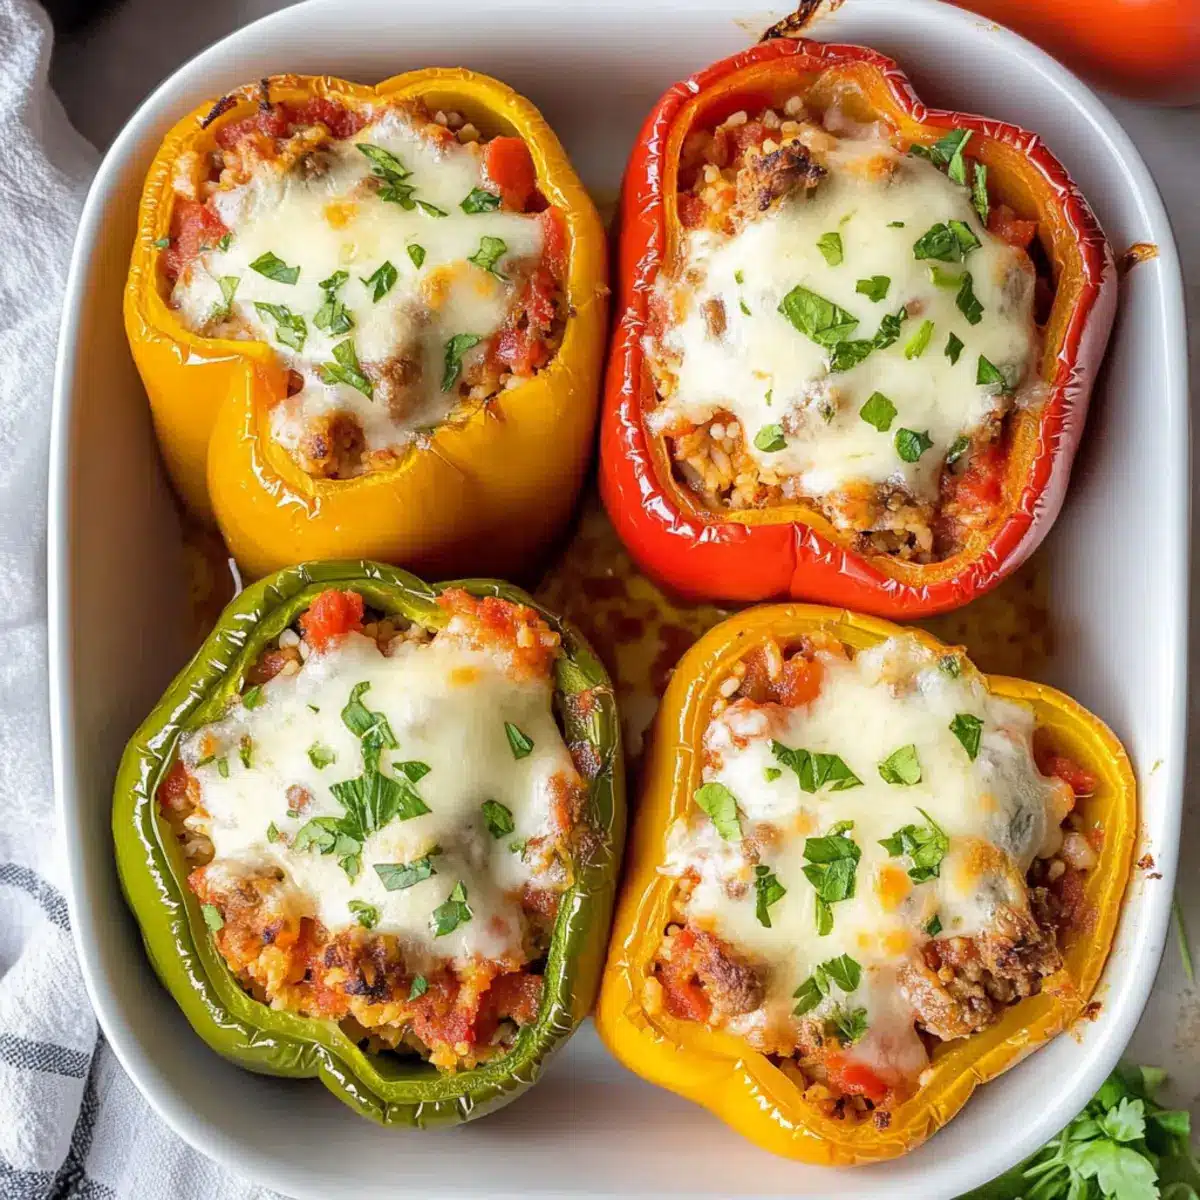
Once the oven is preheated, prepare the bell peppers by cutting the tops off and carefully removing the seeds and membranes inside. Choose firm and colorful peppers that stand upright, as they will be the star vessels of your Stuffed Peppers. Place them upright in a baking dish, ready to be filled.
Step 4: Sauté the Aromatics
In a large skillet, heat 2 teaspoons of olive oil over medium heat. Once the oil shimmers, add ¾ cup of finely chopped yellow onion and sauté until softened, about 2-3 minutes. The onions will become translucent and fragrant, forming a savory base for your filling, complemented by the next ingredients to come.
Step 5: Cook the Ground Meat
Add 1 pound of ground beef or turkey to the skillet with the onions, breaking it apart with a wooden spoon. Cook until browned, which typically takes about 5-7 minutes. Once fully cooked, drain any excess grease, ensuring your filling stays flavorful without being greasy for those delicious Stuffed Peppers.
Step 6: Mix in the Flavorful Filling
Stir in 3 cloves of minced garlic, 15 ounces of canned diced tomatoes (don’t drain), 8 ounces of tomato sauce, and 2 teaspoons of Italian seasoning into the skillet. Let this mixture simmer on low heat for about 5 minutes to meld the flavors, forming a rich, savory filling that will beautifully stuff your peppers.
Step 7: Combine with Rice and Cheese
Once the filling has simmered, remove it from the heat and fold in the cooked rice and half of the 1 cup of shredded mozzarella cheese. This step not only adds texture but also ensures a creamy richness in your Stuffed Peppers, as the cheese melts into the warm filling and brings it all together.
Step 8: Assemble the Stuffed Peppers
Pour ½ cup of water into the bottom of the prepared baking dish to help steam the peppers while baking. Carefully stuff each bell pepper with the filling, pressing it down gently to pack it in. Top each pepper with the remaining mozzarella cheese, creating that irresistible cheesy layer we all love.
Step 9: Bake to Perfection
Cover the baking dish tightly with foil and place it in the preheated oven. Bake for 30 minutes, allowing the peppers to soften while trapping moisture inside. After 30 minutes, carefully uncover the dish and bake for an additional 5 minutes until the cheese is bubbly and lightly browned, creating a beautiful golden crust on your Stuffed Peppers.
Stuffed Peppers Variations & Substitutions
Feel free to get creative and personalize your stuffed peppers with these delightful variations. Cooking should be a fun exploration of flavors!
-
Vegetarian Version: Replace ground beef with a mix of black beans and corn for a hearty, plant-based filling.
-
Quinoa Twist: Swap rice for quinoa as a protein-packed, gluten-free alternative, adding a nutty flavor to your dish.
-
Spicy Kick: Mix in diced jalapeños or use spicy diced tomatoes to bring a vibrant heat to your filling—perfect for spice lovers!
-
Creamy Addition: Stir in a dollop of cream cheese into the filling for an extra layer of creaminess that melts beautifully.
-
Herb Infusion: Add fresh herbs like basil or parsley to your filling for a burst of freshness that elevates the taste profile.
-
Mexican Flavor: Use taco seasoning instead of Italian herbs for a zesty twist. Serve with avocado and salsa for a complete meal experience.
-
Stuffed Pepper Soup: Transform leftovers into a comforting soup by adding broth and extra veggies—just simmer together for a warm bowl of goodness!
Preparing stuffed peppers can be as diverse as your craving! Want something a bit different? Check out these delicious Baked Crab Stuffed options when you’re ready to explore seafood flavors, or try the irresistible Stuffed Portobello Mushrooms for a fun twist!
Expert Tips for Stuffed Peppers
Flavor Boost: Use fresh herbs: Fresh basil or parsley can enhance the flavor of your stuffed peppers, adding a burst of freshness.
Cheese Variations: Experiment with cheese: Try using a blend of cheeses—like provolone and parmesan—for a richer taste in your Stuffed Peppers.
Prevent Soggy Peppers: Drain tomatoes properly: Keep the filling moist but not watery by using a can of diced tomatoes without draining the excess liquid carefully.
Freezer Made Easy: Freeze unbaked: Assemble your stuffed peppers without baking and store them in freezer-safe containers for up to 3 months; they’ll be ready for easy meals later!
Check Peppers’ Doneness: Cook until tender: Ensure your peppers are cooked through, being firm yet soft; a fork should easily pierce them without falling apart.
How to Store and Freeze Stuffed Peppers
Fridge: Keep baked Stuffed Peppers in an airtight container for up to 3 days. Reheat in the microwave or oven until heated through for a quick and satisfying meal.
Freezer: Assemble unbaked Stuffed Peppers and store them in freezer-safe containers for up to 3 months. Thaw in the refrigerator before baking for a fresh, wholesome dinner.
Reheating: To reheat, place the stuffed peppers in a baking dish with a splash of water, cover with foil, and warm in the oven at 350°F (175°C) until heated throughout for optimal results.
Wrap it Right: Ensure stuffed peppers are tightly wrapped if freezing, to prevent freezer burn and maintain flavor integrity when you’re ready to indulge.
Make Ahead Options
These Stuffed Peppers are perfect for meal prep enthusiasts looking to save time on busy weeknights! You can easily prepare the filling (ground beef, rice, and seasonings) and stuff the peppers up to 24 hours in advance—simply assemble them in a baking dish, cover tightly, and refrigerate. To maintain quality, avoid adding the cheese until just before baking; this keeps it fresh and melty. Once you’re ready to serve, simply preheat your oven and bake the stuffed peppers for 30 minutes covered with foil, followed by an additional 5 minutes uncovered for that beautiful bubbly cheese on top! With these make-ahead tips, you’ll enjoy delicious, homemade meals without the last-minute rush.
What to Serve with Classic Italian Stuffed Peppers?
These vibrant stuffed peppers create an eye-catching centerpiece for your dinner table, perfect for elevating any meal.
-
Garlic Bread: The warm, buttery aroma of garlic bread complements the savory filling beautifully and adds a indulgent touch. It’s perfect for soaking up extra sauce from the peppers!
-
Simple Green Salad: Crisp greens tossed with a light vinaigrette provide a refreshing contrast to the rich flavors of the stuffed peppers. Top it with cherry tomatoes and avocado for extra texture.
-
Roasted Vegetables: The caramelization from roasting brings out the natural sweetness of seasonal veggies, which balances the savory stuffing and makes your plate even more satisfying.
-
Quinoa Pilaf: A fluffy quinoa dish infused with herbs can add a nutritious, grainy side that mirrors the textures in the peppers. It’s a delightful way to keep things light yet filling.
-
Steamed Broccoli: Bright green, lightly steamed broccoli offers fantastic color and nutrition, making for a side that pairs wonderfully with the peppers without overpowering their flavors.
-
Red Wine: A glass of smooth red wine, such as Chianti or Merlot, enhances the deep flavors while adding a touch of sophistication to your meal. It’s a classic pairing that many will appreciate!
-
Chocolate Cake: For dessert, serve a rich chocolate cake that offers a sweet conclusion to the savory meal. Its moist texture and decadent chocolate flavor contrast delightfully with the peppers’ hearty filling.
-
Herbal Iced Tea: A cool, refreshing herbal iced tea can cleanse the palate between bites, providing a perfect contrast to the warm, hearty dish. Try mint or chamomile for a soothing finish.
Stuffed Peppers Recipe FAQs
What type of bell peppers should I choose for stuffing?
I recommend selecting firm bell peppers that stand upright. Vibrant colors not only enhance the visual appeal but also vary in flavor—red peppers are sweeter, while green ones offer a more savory taste!
How long can I store baked Stuffed Peppers in the fridge?
You can keep baked Stuffed Peppers in an airtight container for up to 3 days. To reheat, simply microwave or warm them in the oven until heated throughout, ensuring they’re still soft and delicious.
Can I freeze Stuffed Peppers, and how do I do it correctly?
Absolutely! Assemble the stuffed peppers without baking them and store them in freezer-safe containers for up to 3 months. Ensure they are well-wrapped to prevent freezer burn. When you’re ready to enjoy, thaw them in the refrigerator overnight before baking.
What should I do if the filling is too watery?
If your filling is too watery, make sure you didn’t drain the canned tomatoes before adding them. You can also try adding more rice or bread crumbs to absorb excess moisture. Simmer the mixture a little longer on the stove to reduce liquid before stuffing the peppers.
Can my dog eat Stuffed Peppers?
While peppers themselves are safe for dogs, avoid giving them stuffed peppers with ingredients like garlic, onions, or seasoned meat, as these can be harmful to pets. Always check ingredients for any potential allergens or toxic items before sharing!
How can I spice up my Stuffed Peppers?
For a kick, consider mixing in diced jalapeños or using spicy diced tomatoes in your filling. You can also sprinkle red pepper flakes over the top before baking for an extra layer of heat!
Delicious Stuffed Peppers - Healthy Comfort for Any Night
Ingredients
Equipment
Method
- Cook the uncooked brown or white rice according to the package instructions, usually around 15–20 minutes. Once tender, remove it from the heat and let it cool slightly.
- Preheat your oven to 400°F (200°C).
- Prepare the bell peppers by cutting the tops off and carefully removing the seeds and membranes. Place them upright in a baking dish.
- Heat 2 teaspoons of olive oil over medium heat. Add ¾ cup of finely chopped yellow onion and sauté until softened, about 2-3 minutes.
- Add 1 pound of ground beef or turkey to the skillet and cook until browned, about 5-7 minutes. Drain any excess grease.
- Stir in 3 cloves of minced garlic, 15 ounces of canned diced tomatoes, 8 ounces of tomato sauce, and 2 teaspoons of Italian seasoning. Let simmer on low heat for 5 minutes.
- Remove the filling from heat and fold in the cooked rice and half of the 1 cup of shredded mozzarella cheese.
- Pour ½ cup of water into the bottom of the prepared baking dish and carefully stuff each bell pepper with the filling. Top with the remaining mozzarella cheese.
- Cover the baking dish tightly with foil and bake for 30 minutes. Uncover and bake for an additional 5 minutes until the cheese is bubbly and lightly browned.
Leave a Reply