
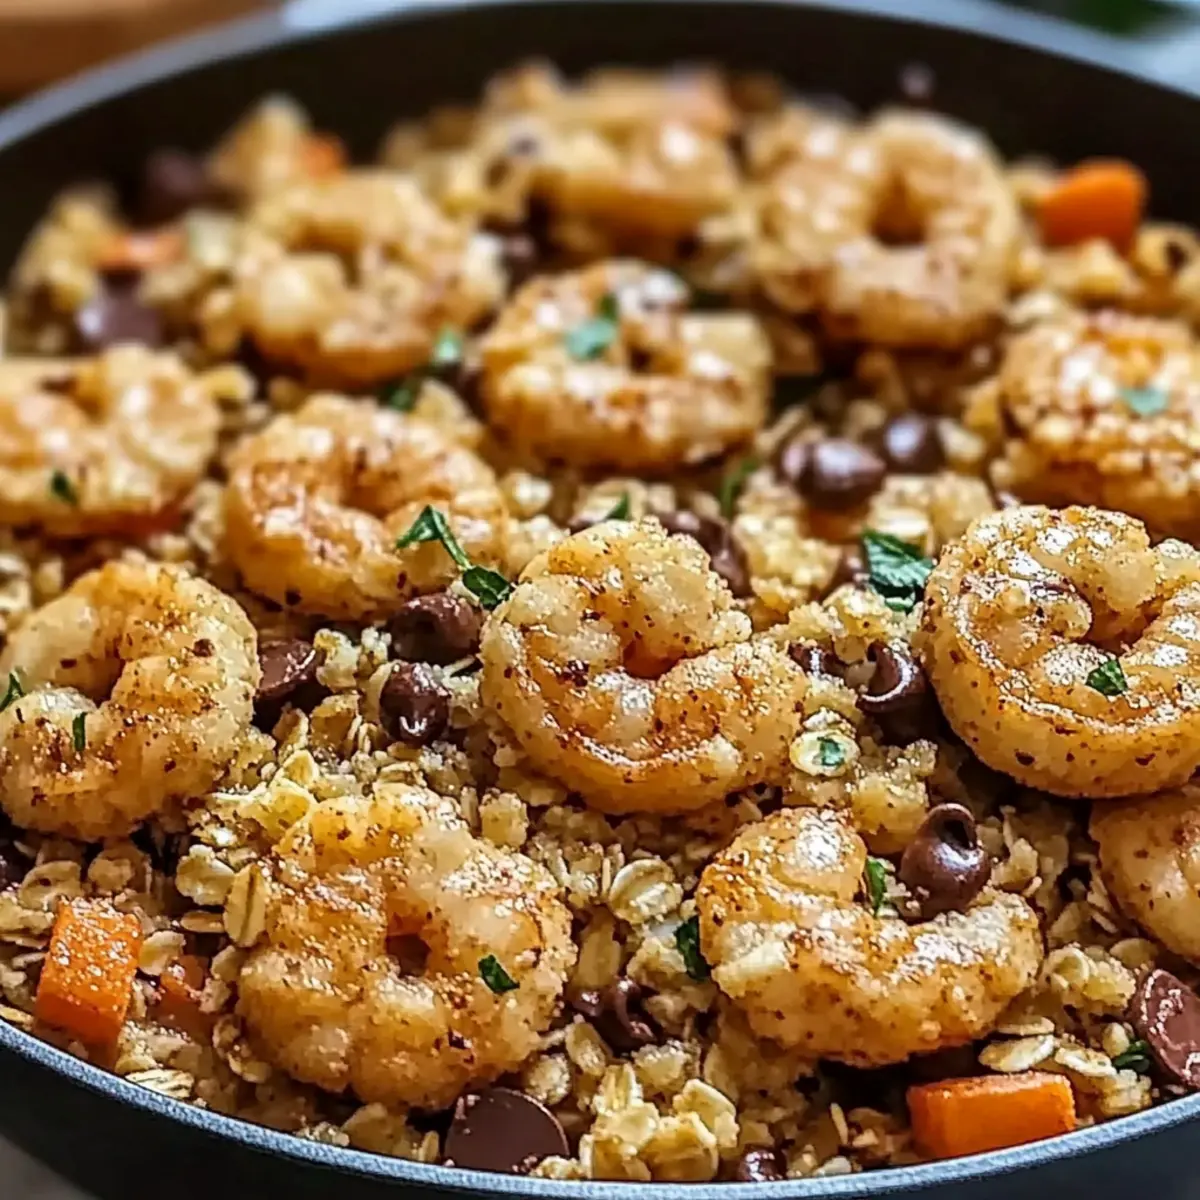
You wouldn’t believe how quickly a comforting dish like Cauliflower Fried Rice with Shrimp can become a weeknight staple in your kitchen! This simple yet satisfying recipe offers a delightful twist on traditional fried rice, swapping out grains for vibrant, nutrient-packed cauliflower. The beauty of this dish lies not just in its 15-minute prep time, but also in its health-boosting benefits—it’s low-carb, gluten-free, and incredibly fulfilling. Perfect for those of us looking to ditch the takeout habit without sacrificing flavor, this recipe invites endless customizations based on what’s in your fridge. Are you ready to bring a taste of gourmet dining home without the fuss? Let’s dive into the kitchen and create something memorable together!

Why Choose Cauliflower Fried Rice?
Quick and Easy: In just 15 minutes, you’ll have a satisfying dinner that feels gourmet! Healthy Swap: This recipe replaces traditional rice with nutrient-dense cauliflower, making it low-carb and gluten-free. Flavorful Base: The mix of garlic, ginger, and shrimp creates a savory delight that’s anything but boring. Customizable: Add any leftover veggies or proteins for a personalized touch that fits your taste. Whether craving something light or looking to impress, this dish delivers without the hassle—perfect for busy weeknights!
Cauliflower Fried Rice with Shrimp Ingredients
For the Vegetable Base
• Cauliflower – finely chopped or riced, this replaces traditional rice, providing a low-carb and gluten-free option.
• Bell Peppers – diced, they add sweetness and vibrant color to the dish.
• Carrots – grated or diced, these lend a natural sweetness and a lovely crunch.
• Green Onions – sliced thinly, they enhance flavor and add a fresh pop of color.
For the Flavoring
• Garlic – minced, it offers robust flavor and makes the dish aromatic.
• Ginger – freshly grated, it brings warmth and a zing to balance the other flavors.
• Soy Sauce – provides umami; choose a gluten-free version if needed.
For the Protein
• Shrimp – peeled and deveined, they cook quickly, adding a delightful seafood element to the meal.
Optional Toppings
• Sesame Seeds – sprinkle on top before serving for added texture and a nutty flavor.
• Cilantro – fresh leaves can be chopped and added for a burst of freshness.
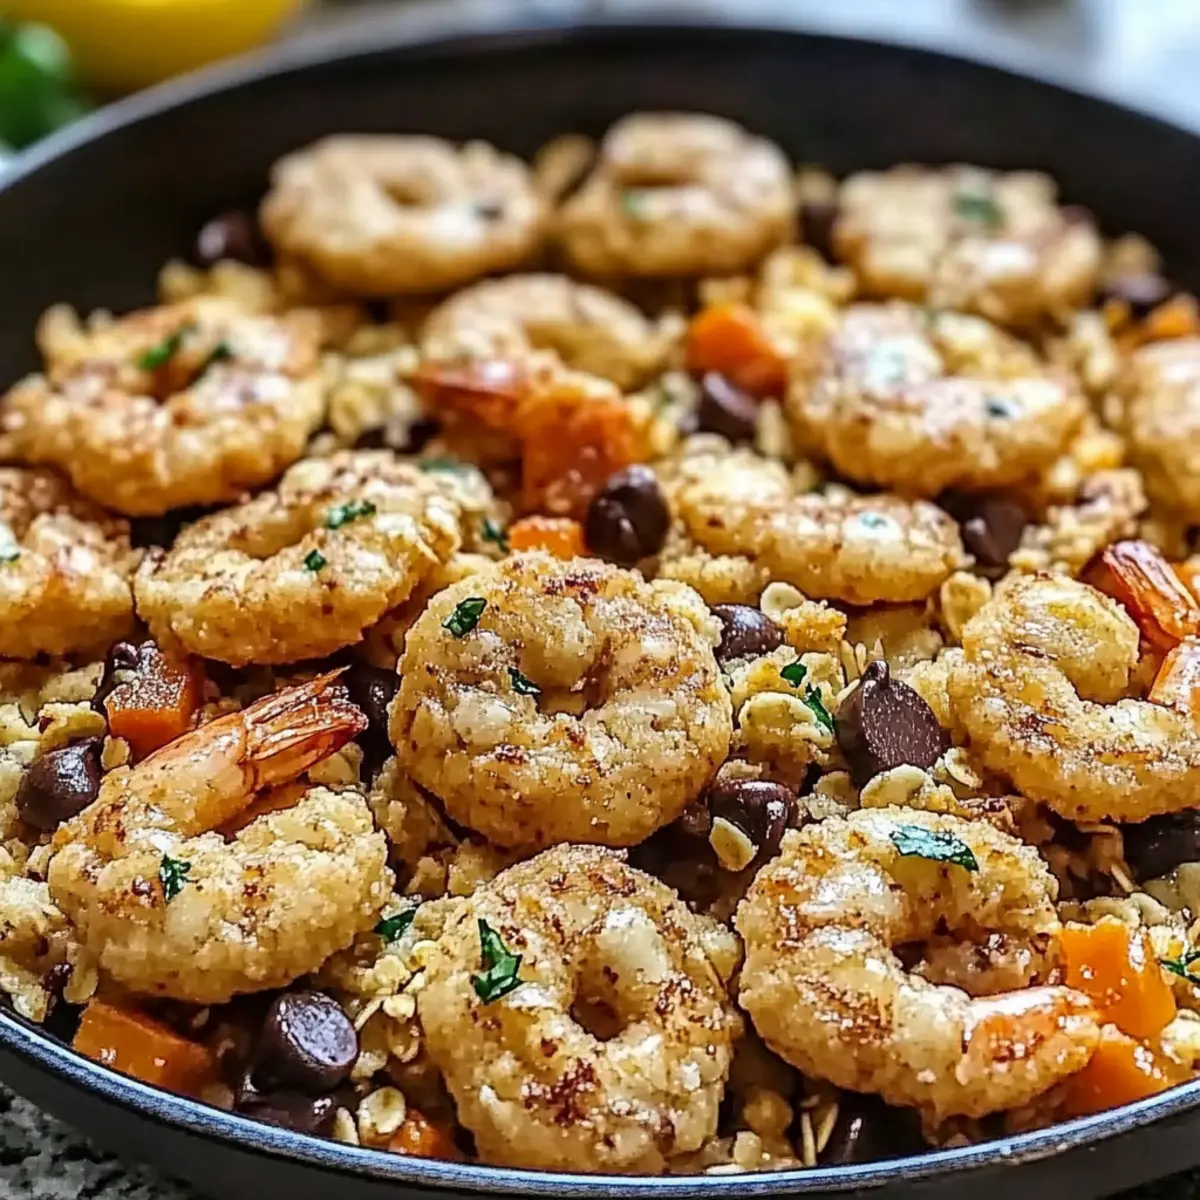
Bringing the joyous flavors of Cauliflower Fried Rice with Shrimp to your dinner table is just a few simple steps away!
Step‑by‑Step Instructions for Cauliflower Fried Rice with Shrimp
Step 1: Preheat and Prepare
Begin by preheating your oven to 350°F (175°C) if you’re planning to roast any veggies. While the oven heats, gather your ingredients: finely chopped cauliflower, diced bell peppers, grated carrots, and sliced green onions. This will ensure your Cauliflower Fried Rice with Shrimp remains a quick and enjoyable process.
Step 2: Sauté the Aromatics
In a large non-stick skillet or wok, heat a drizzle of oil over medium heat. Add the minced garlic and freshly grated ginger, stirring them for about 1 minute until fragrant—this step builds a wonderful aroma that enhances the flavor of your dish. Make sure they don’t burn; you want them just golden and toasty.
Step 3: Add Vegetables
Next, introduce your diced bell peppers and grated carrots to the skillet, sautéing them for about 3–4 minutes. Stir frequently until the vegetables soften and their colors brighten, showcasing a lovely crunch. This forms the flavorful base of your Cauliflower Fried Rice with Shrimp, adding both texture and delightful sweetness.
Step 4: Incorporate Cauliflower
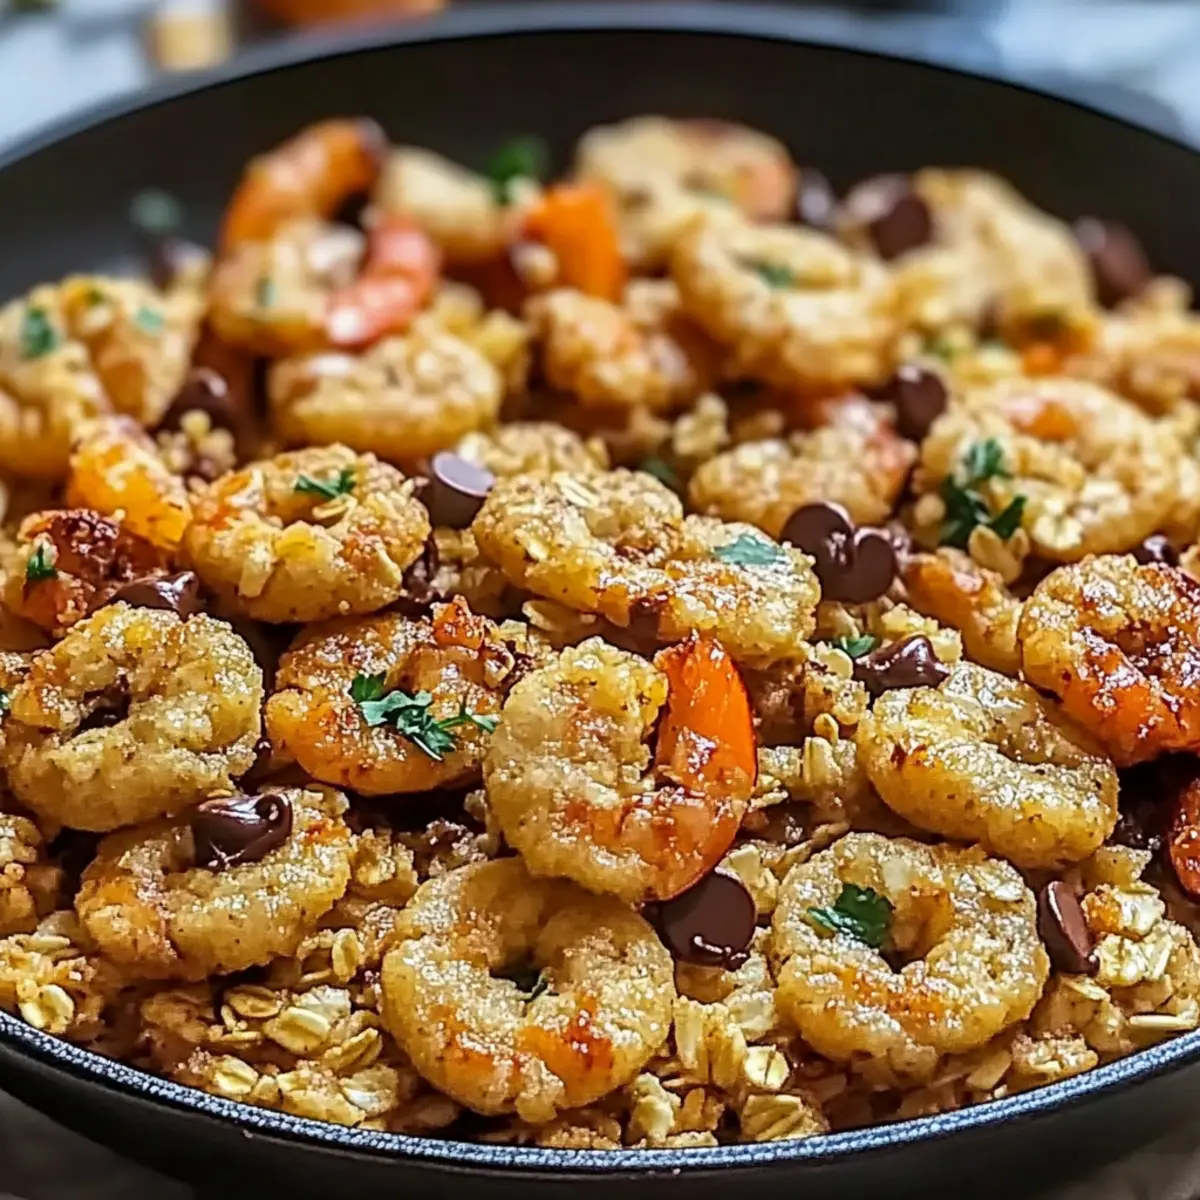
Now, add the finely chopped cauliflower—giving it a good stir to combine with the sautéed vegetables. Cook for another 4–5 minutes, stirring occasionally until the cauliflower becomes tender yet retains a slight crispness. The vibrant colors of the mixed veggies will make your dish visually exciting while providing essential nutrients.
Step 5: Cook the Shrimp
Push the vegetable mixture to one side of the skillet, creating space for the shrimp. Add the peeled and deveined shrimp to the cleared area, cooking them for about 2–3 minutes on each side until they turn pink and opaque. This quick cooking time allows them to stay juicy, enhancing your Cauliflower Fried Rice with Shrimp’s renowned taste.
Step 6: Flavor with Soy Sauce
Drizzle soy sauce over the shrimp and veggie mixture, stirring well to evenly coat everything in this savory goodness. Let the dish cook for an additional minute so the flavors meld beautifully. If you’re using gluten-free soy sauce, this step still delivers that authentic flavor without compromising dietary needs.
Step 7: Garnish and Serve
Finally, remove the pan from heat and sprinkle with sliced green onions and optional toppings like sesame seeds or cilantro. This adds a fresh pop of color and flavor to your Cauliflower Fried Rice with Shrimp. Serve hot, letting the enticing aromas fill your kitchen—your delicious weeknight meal is ready to be enjoyed!
Expert Tips for Cauliflower Fried Rice with Shrimp
-
Use Fresh Ingredients: Fresh veggies and shrimp enhance flavor and texture in this dish. Avoid overcooked or wilted vegetables to keep your Cauliflower Fried Rice vibrant.
-
Right Cauliflower Size: Ensure your cauliflower is riced or finely chopped evenly for uniform cooking. Large pieces can remain crunchy while the rest get soft.
-
High Heat Cooking: Sauté on medium-high heat to achieve that perfect stir-fried flavor. Lower temperatures can lead to stewing rather than frying.
-
Quick Cooking: Shrimp cooks rapidly; don’t crowd the pan. Ensure shrimp are in one layer for even cooking—this maximizes their juiciness in your Cauliflower Fried Rice.
-
Experiment with Add-ins: Feel free to toss in any leftover proteins or seasonal veggies you have on hand. This makes your Cauliflower Fried Rice truly customizable to your taste.
How to Store and Freeze Cauliflower Fried Rice with Shrimp
Room Temperature: Let leftovers cool completely before storing; consume within 2 hours. Cauliflower fried rice is best enjoyed fresh.
Fridge: Store in an airtight container in the refrigerator for up to 3 days. Reheat in a skillet over medium heat or microwave until warmed through.
Freezer: Freeze in a heavy-duty freezer bag or airtight container for up to 2 months. To reheat, thaw in the fridge overnight and then heat in a skillet, stirring occasionally for even warming.
Reheating: Ensure even reheating by adding a splash of water during the process to restore moisture. Enjoy the flavors of your Cauliflower Fried Rice with Shrimp as if it were freshly made!
What to Serve with 4-Ingredient Crispy Chocolate Oat Cookies
Indulge in a delightful spread that elevates your cookie experience, perfect for sharing or enjoying solo!
- Creamy Milk: A classic pairing, the rich creaminess complements the chocolatey flavors of the cookies perfectly, creating a nostalgic treat.
- Fresh Berries: Juicy strawberries or raspberries add a bright, tart flavor that balances the sweetness of the cookies, enhancing every bite.
- Vanilla Ice Cream: Scooped on top or on the side, ice cream offers a delightful contrast in temperature and texture, making dessert feel extra indulgent.
- Nut Butter Spread: A dollop of almond or peanut butter adds an extra layer of rich flavor, transforming each cookie into an even more satisfying snack.
- Chia Seed Pudding: This creamy pudding is a healthful counterpart, with its light texture and subtle sweetness providing a refreshing contrast to the cookies.
- Decaf Coffee or Tea: A warm beverage brings comfort, while the roasty flavors draw out the cookies’ chocolate notes, making for a cozy afternoon treat.
- Dark Chocolate Dipping Sauce: For the ultimate chocolate lover, a warm, melted chocolate dip makes for a fun, interactive dessert experience!
- Coconut Yogurt: Tangy and creamy, this adds a refreshing twist to the sweetness, perfect for those looking for a lighter complement to the cookies.
Make Ahead Options
These Chocolate Oat Cookies are ideal for meal prep, saving you time during busy days! You can combine the oats, nut butter, and sweetener up to 24 hours in advance; just store the mixture in an airtight container in the refrigerator. Additionally, the cookie dough can be portioned into balls and frozen for up to 3 months; this allows you to bake fresh cookies whenever a craving strikes. When you’re ready to enjoy your cookies, simply bake from frozen, adding an extra minute or two to the bake time. This way, you’ll always have delicious, homemade treats on hand without the hassle!
Variations & Substitutions for Cauliflower Fried Rice with Shrimp
Feel free to get creative with this delicious dish and adapt it to your taste preferences or dietary needs!
-
Protein Swap: Substitute shrimp for diced chicken, tofu, or even cooked pork for a different flavor profile. Each option brings its unique texture and taste, allowing you to tailor the dish just how you like it.
-
Veggie Boost: Add a cup of peas, corn, or snap peas for extra color and sweetness. These vibrant additions not only enhance the visual appeal but also offer different nutrients and crunch.
-
User-Friendly: Want a bit more spice? Consider adding sliced jalapeños or red pepper flakes to kick the heat up a notch. This fiery twist can awaken the flavors and elevate your dining experience.
-
Herb Enhancement: Fresh herbs like basil or mint can add a fresh and aromatic touch. Fold them in at the end for a burst of flavor that complements the savory profile beautifully.
-
Low-Carb Twist: For a different take, swap cauliflower with spiralized zucchini. It gives a lighter, refreshing finish, perfect for summertime meals or anyone wanting to reduce their carb intake.
-
Soy Sauce Alternative: For a gluten-free version, use coconut aminos instead of soy sauce. This substitute still maintains that umami flavor while being friendly to those with dietary restrictions.
-
Nutty Flavor: Incorporate a drizzle of sesame oil before serving for a warming, nutty aroma. This small addition can transform the overall flavor, making your dish reminiscent of traditional Asian cuisine.
Exploring these variations will surely enhance your culinary adventure, making your Cauliflower Fried Rice with Shrimp even more enjoyable. If you’re on a seafood kick, you might also want to try our New Orleans Shrimp and Corn Bisque for another delightful seafood experience!
Cauliflower Fried Rice with Shrimp Recipe FAQs
How do I choose the right cauliflower for this recipe?
Absolutely! When selecting cauliflower, look for heads that are firm, compact, and have creamy white florets. Avoid any with dark spots or signs of wilting. Fresh, crisp cauliflower ensures your dish maintains its delightful texture, making for a vibrant Cauliflower Fried Rice with Shrimp.
What is the best way to store leftovers?
For sure! Allow any leftovers to cool completely before transferring them into an airtight container. You can store your Cauliflower Fried Rice with Shrimp in the fridge for up to 3 days. For optimal flavor and texture, reheat in a skillet over medium heat, adding a splash of water to help restore moisture.
Can I freeze Cauliflower Fried Rice with Shrimp?
Definitely! To freeze, let it cool down, then place the Cauliflower Fried Rice with Shrimp in a heavy-duty freezer bag or an airtight container. It can be frozen for up to 2 months. When you’re ready to enjoy it again, thaw in the refrigerator overnight and reheat on the stovetop, stirring occasionally until warmed through.
What if my shrimp cook too fast and become tough?
Very! To prevent shrimp from turning rubbery, make sure not to crowd them in the pan. Cook them in a single layer, and keep an eye on them—they only need about 2–3 minutes on each side until they’re pink and opaque. If they start to curl tightly, it’s a sign they’re overcooked.
Are there any dietary considerations for this dish?
Absolutely! This recipe is gluten-free if you use gluten-free soy sauce, making it suitable for those with gluten sensitivities. Additionally, if you have shellfish allergies, you can easily substitute shrimp with chicken or tofu for a different, yet equally delicious, protein option.
How can I customize my Cauliflower Fried Rice with Shrimp?
Very easily! Feel free to add any leftover vegetables or proteins you have on hand. You can mix in peas, corn, or even diced chicken for extra heartiness. If you love a bit of heat, a dash of red pepper flakes can provide that spicy kick, making this dish truly your own!
Cauliflower Fried Rice with Shrimp: A Light, Flavorful Twist
Ingredients
Equipment
Method
- Preheat your oven to 350°F (175°C) if roasting veggies. Gather all ingredients to ensure a quick cooking process.
- In a large non-stick skillet or wok, heat oil over medium heat. Add minced garlic and grated ginger, stirring for 1 minute until fragrant.
- Add diced bell peppers and grated carrots to the skillet, sautéing for about 3–4 minutes until softened.
- Add finely chopped cauliflower, stirring to combine. Cook for 4–5 minutes until tender but slightly crisp.
- Push the vegetable mixture to one side. Add the shrimp to the cleared area, cooking for 2–3 minutes on each side until pink and opaque.
- Drizzle soy sauce over the mixture, stirring well to coat everything. Cook for an additional minute.
- Remove from heat and sprinkle with green onions and optional toppings. Serve hot.
Leave a Reply