
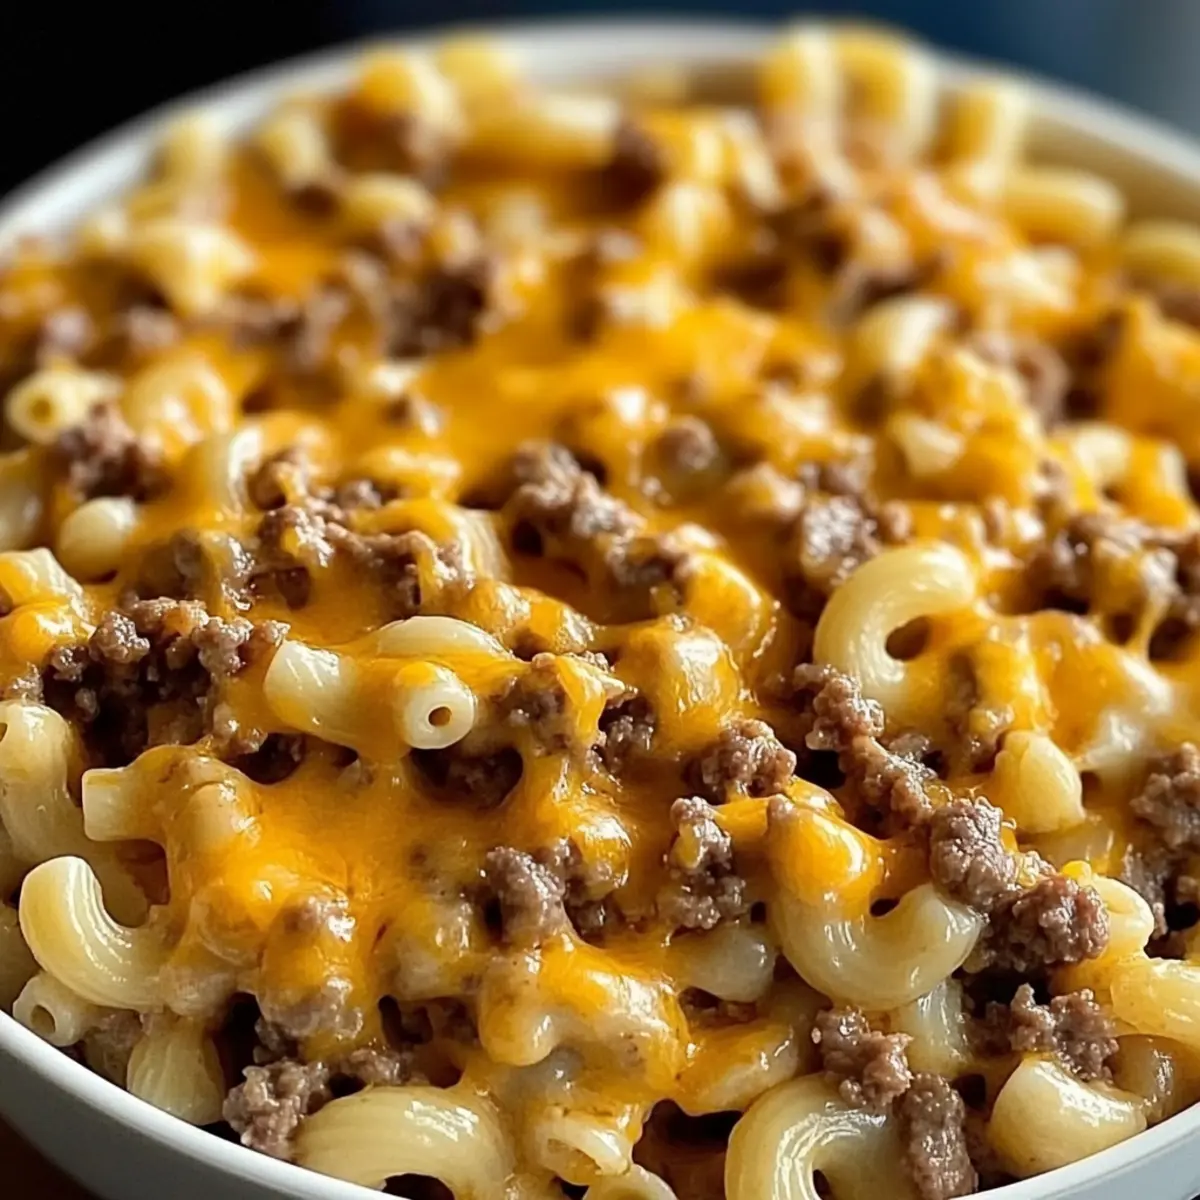
As I stood in my kitchen, the comforting aroma of melted cheese and savory beef enveloped me like a warm hug, stirring memories of family dinners layered with laughter and love. My Homemade Cheesy Hamburger Helper is the perfect solution for a busy weeknight—this dish combines tender elbow macaroni with ground beef, all bathed in a creamy cheddar sauce that wraps around each bite. It’s a one-pot wonder that not only saves you time but also delivers all the comfort food feels you crave. With its satisfying flavors and simple prep, this meal quickly becomes a household favorite. So, are you ready to whip up a delicious dinner that will leave everyone asking for seconds?
Why is this Cheesy Hamburger Helper special?
Quick and Easy: This recipe comes together in just 30 minutes, making it perfect for those busy weeknights when time is of the essence.
Comfort at Its Best: Each bite provides a creamy, cheesy embrace that takes you back to comforting family meals, sure to satisfy even the pickiest eaters.
Versatile Ingredients: You can easily switch up the protein or the pasta type, tailoring it to your family’s preferences—try using chicken or gluten-free pasta for a twist!
One-Pot Wonder: Say goodbye to a mountain of dishes; everything cooks together in one pot, simplifying your cleanup process. If you’re looking for more one-pot meals, check out my delicious Baked Ravioli Casserole.
Crowd-Pleaser: This dish is sure to be a hit at dinner gatherings, ensuring that everyone leaves the table satisfied and happy.
Substitution-Friendly: With plenty of options for substitutions such as using vegetable broth or adding mixed veggies, you can easily create a meal that suits any dietary needs.
Cheesy Hamburger Helper Ingredients
For the Sauce
- Ground Beef – Use lean ground beef for a healthier, less greasy option.
- Milk – Adds creaminess and helps create the velvety sauce; substitute with non-dairy milk for a lactose-free version.
- Shredded Cheddar Cheese – Provides that signature creamy, cheesy flavor; a blend of cheddar and mozzarella enhances stretchiness.
For the Pasta
- Elbow Macaroni – The main carbohydrate that brings structure; feel free to substitute shell or penne pasta for variety.
- Beef Broth – Essential for depth of flavor; you can use chicken or vegetable broth for a lighter taste.
For Seasoning
- Garlic Powder – Enhances the flavor profile with a garlicky aroma; fresh minced garlic can be swapped for a more robust taste.
- Onion Powder – Adds a touch of sweetness and depth; fresh onions sautéed with beef can be a tasty alternative.
- Paprika – Offers warmth and vibrant color; smoked paprika can provide a unique twist.
- Black Pepper & Salt – Essential for seasoning; adjust to your personal taste preference.
For Cooking
- Olive Oil – Used for cooking the beef, adding heart-healthy fats; feel free to substitute with vegetable or canola oil.
- Optional Mixed Vegetables – Add nutrition and color to the dish; consider peas, carrots, or corn for a pop of color and flavor.
Now that you’ve gathered these delightful ingredients, get ready to create some comfort food magic with this Homemade Cheesy Hamburger Helper that will leave your family asking for more!
Step‑by‑Step Instructions for Homemade Cheesy Hamburger Helper
Step 1: Cook the Beef
In a large skillet, heat 1 tablespoon of olive oil over medium heat. Once the oil shimmers, add 1 pound of lean ground beef, breaking it apart with a spatula as it cooks. Sauté for about 5-7 minutes until the beef is browned and no longer pink, making sure to stir occasionally for even cooking.
Step 2: Add Spices
After browning the beef, drain any excess fat from the skillet. Stir in 1 teaspoon of garlic powder, 1 teaspoon of onion powder, 1 teaspoon of paprika, and a pinch of salt and black pepper. Cook for an additional minute, allowing the spices to bloom and coat the beef, creating a fragrant base for your Homemade Cheesy Hamburger Helper.
Step 3: Incorporate Pasta
Now it’s time to bring this comfort dish together! Add 2 cups of elbow macaroni directly to the skillet with the beef. Stir the pasta in well, ensuring it gets coated with the seasoned beef mixture, which will enhance its flavor as it cooks.
Step 4: Pour in Broth
Next, add 4 cups of beef broth to the skillet, ensuring that the pasta is completely submerged. Increase the heat to high and bring the mixture to a rolling boil. This will cook the pasta and infuse it with savory goodness, so keep an eye on it to avoid overflow.
Step 5: Simmer
Once boiling, reduce the heat to low and cover the skillet with a lid. Simmer for 10-12 minutes, or until the elbow macaroni is tender and has absorbed most of the liquid. Stir occasionally to prevent sticking, while enjoying the mouthwatering aroma filling your kitchen.
Step 6: Add Milk
After the pasta is tender, remove the lid and stir in 1 cup of milk. Cook for an additional 2-3 minutes, allowing the sauce to thicken slightly. You’ll know it’s ready when it coats the pasta nicely, transforming your Homemade Cheesy Hamburger Helper into a creamy delight.
Step 7: Melt the Cheese
Remove the skillet from heat and stir in 2 cups of shredded cheddar cheese until it’s completely melted and creamy. This step will give your dish that luscious, cheesy texture. The more cheese you add, the more comforting and gooey your Hamburger Helper will become!
Step 8: Optional Vegetables
If desired, add 1 cup of optional mixed vegetables like peas, carrots, or corn to the skillet. Gently stir them in and let them warm through for about 2 minutes, adding color and nutrition to your comforting meal.
Step 9: Taste and Adjust
Before serving, taste your Homemade Cheesy Hamburger Helper and adjust the seasoning if necessary. A little extra salt or pepper can elevate the flavors. This simple step ensures that everyone will enjoy this comforting dish just the way they like it.
Step 10: Serve
Serve the Homemade Cheesy Hamburger Helper hot, garnished with extra cheese or fresh herbs if desired. Pair it with a side salad or garlic bread, and watch as your family dives into this satisfying meal, bursting with cheesy goodness.
What to Serve with Homemade Cheesy Hamburger Helper
Elevate your dinner experience with delightful sides that bring out the best in this creamy, comforting dish.
-
Garlic Bread: The buttery, crispy texture of garlic bread complements the creamy sauce, making it a perfect vehicle for every last bite of this cheesy goodness.
-
Side Salad: A fresh, crisp salad adds a refreshing crunch that beautifully contrasts the rich cheesiness. Toss in seasonal veggies and a light vinaigrette for an uplifting balance.
-
Steamed Broccoli: Bright green, tender broccoli not only adds color to your plate but its subtle earthiness pairs nicely with the savory flavors of the Hamburger Helper.
-
Roasted Vegetables: Sweet roasted carrots, bell peppers, or zucchini provide a sweet counterbalance to the dish’s saltiness, introducing a delightful medley of flavors and textures.
-
Sweet Corn: Bright, sweet corn brings a pop of flavor to the table, elevating the overall taste experience and adding a touch of sweetness to balance the savory notes.
-
Apple Crisp: For a delightful contrast, finish your meal with a warm apple crisp. The sweet, crumbly top and spiced apples create a comforting farewell to your dinner, leaving everyone satisfied.
Make Ahead Options
These Homemade Cheesy Hamburger Helper are perfect for busy weeknights when you want to save time! You can prep the ground beef mixture (steps 1-2) and store it in an airtight container in the refrigerator for up to 24 hours. Simply reheat it in a skillet, then stir in the pasta, broth, and continue with steps 3-10 when you’re ready to serve. You can also measure out and pre-assemble all the dry ingredients (pasta, seasonings) ahead of time, which can save you precious minutes during meal prep. For the best quality, refrigerate any leftovers in an airtight container for up to 3 days, adding a splash of milk when reheating to restore creaminess!
Expert Tips for Cheesy Hamburger Helper
-
Choose Lean Beef: Select lean ground beef to keep your dish healthier and avoid that greasy texture that can ruin the comfort of your meal.
-
Stir Often: Regularly stirring your pasta while it simmers will prevent it from sticking to the bottom of the pan, ensuring a smooth, creamy Cheesy Hamburger Helper.
-
Liquid Adjustments: Don’t hesitate to adjust the beef broth based on your preferred sauce consistency; adding extra broth will create a soupier dish that’s still indulgent.
-
Cheese Varieties: Experiment with cheese blends; swapping in mozzarella or pepper jack will add unique flavor nuances that keep the dish exciting.
-
Incorporate Veggies: Including mixed vegetables not only enhances nutrition but also adds vibrant colors that make your Hamburger Helper even more appealing to the eye.
Cheesy Hamburger Helper Variations
Feel free to get creative and tailor this recipe to your taste buds with these delightful variations!
-
Gluten-Free Pasta: Swap elbow macaroni for gluten-free pasta, ensuring a delicious dish that everyone can enjoy!
-
Different Protein: Use cooked chicken or turkey instead of beef for a lighter alternative. This twist gives you the power to switch flavors while keeping the meal comforting.
-
Cheese Alternatives: Try using Monterey Jack or pepper jack cheese for a zesty kick. Mixing cheeses can create a rich, multi-layered flavor experience.
-
Add Veggies: Toss in frozen peas, diced carrots, or corn to sneak in more nutrition. The pop of color and texture will elevate your cheesy delight.
-
Vegan Version: Substitute the ground beef with lentils or a plant-based meat alternative, and opt for plant-based milk and cheese. This ensures tasty comfort food that fits a vegan lifestyle.
-
Spicy Kick: For those who enjoy heat, sprinkle in some crushed red pepper flakes during the cooking process. The added spice creates an exciting twist on the classic.
-
Creamy Variation: Replace regular milk with heavy cream for a richer sauce. This indulgent change will take the creamy texture to a whole new level!
-
One-Pot Meal Bonus: Pair your Cheesy Hamburger Helper with a simple side salad or garlic bread. For other delicious one-pot options, explore my mouthwatering Baked Ravioli Casserole.
With these variations, you can enjoy a unique take on Homemade Cheesy Hamburger Helper every time you make it!
How to Store and Freeze Cheesy Hamburger Helper
- Fridge: Store leftovers in an airtight container in the fridge for up to 3 days. Make sure to let it cool completely before sealing to maintain freshness.
- Freezer: For longer storage, freeze in a freezer-safe container for up to 3 months. Thaw in the fridge overnight before reheating.
- Reheating: Reheat gently on the stovetop or in the microwave, adding a splash of milk to restore creaminess and prevent dryness.
- Taste Check: Always taste and adjust seasonings after storing, as flavors may mellow during storage. Enjoy your warm, cheesy Hamburger Helper!
Homemade Cheesy Hamburger Helper Recipe FAQs
What type of ground beef should I use for the best flavor?
Absolutely! For the richest flavor without excess grease, I recommend using lean ground beef (85% lean is ideal). This option keeps your Cheesy Hamburger Helper creamy and satisfying while minimizing any greasiness. If you prefer a lighter dish, you can also use ground turkey or chicken.
How should I store leftovers, and how long will they last?
Leftovers of your delicious Homemade Cheesy Hamburger Helper can be stored in an airtight container in the fridge for up to 3 days. I always let it cool completely before sealing to keep it fresh. Simply reheat on low to enjoy that creamy texture again!
Can I freeze Cheesy Hamburger Helper, and if so, how?
Yes, you can definitely freeze it! To do so, place cooled portions into airtight, freezer-safe containers. Be sure to label them with the date and use within 3 months for best quality. When you’re ready to enjoy it again, thaw it overnight in the fridge, then reheat gently on the stovetop, adding a splash of milk if needed to restore its creaminess.
What can I do if the sauce is too thick or too thin?
No worries! If your sauce turns out too thick, simply stir in a bit more beef broth or milk, heating gently until you reach your desired consistency. Conversely, if it’s too thin, you can let it simmer uncovered on low heat for a few minutes to allow some of the liquid to evaporate and thicken it up.
Are there any dietary substitutions I should consider?
Very! For a gluten-free option, you can swap elbow macaroni for gluten-free pasta. If you have lactose intolerance, using non-dairy milk or lactose-free cheese will keep the cozy flavors intact without any discomfort. Additionally, adding mixed vegetables is a great way to sneak in more nutrients and flavor!
Cheesy Hamburger Helper That’s Quick, Creamy, and Comforting
Ingredients
Equipment
Method
- In a large skillet, heat olive oil over medium heat and add ground beef. Cook for 5-7 minutes until browned.
- Drain excess fat and stir in garlic powder, onion powder, paprika, salt, and black pepper. Cook for an additional minute.
- Add elbow macaroni to the skillet, stir well to coat with seasoning.
- Pour in beef broth, bring to a boil. Cook until pasta is tender, about 10-12 minutes.
- Stir in milk and cook for 2-3 minutes until sauce thickens.
- Remove from heat and add shredded cheddar cheese, stir until melted.
- If desired, stir in optional mixed vegetables and warm for 2 minutes.
- Taste and adjust seasoning if necessary before serving.
- Serve hot, garnished with extra cheese or herbs if desired.
Leave a Reply