
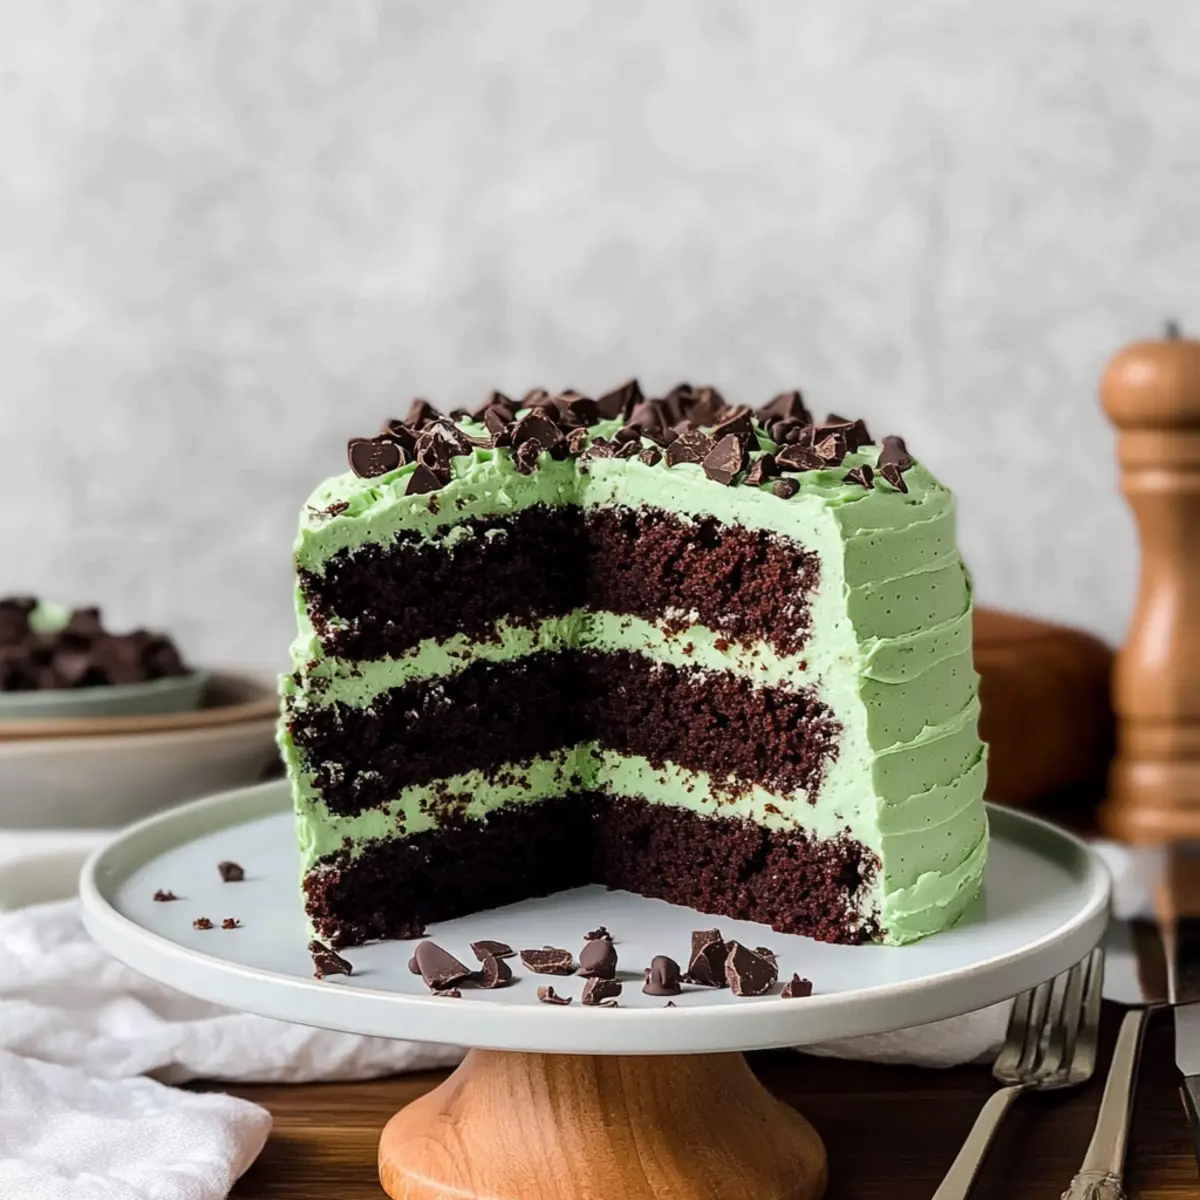
As I stood in my kitchen, the scent of chocolate wafted through the air, instantly transporting me to delightful childhood memories of mint chocolate chip ice cream on summer days. Today, I’m excited to share my beloved Andes Chocolate Mint Cake, a showstopper that combines the luscious layers of chocolate cake with a refreshing mint twist. This cake not only dazzles your senses but also offers a moist, indulgent experience that’s perfect for any celebration or a sweet escape at home. Plus, it’s surprisingly easy to whip up and can be customized just how you like it! Ready to dive into this delicious adventure? Let’s get baking!
Why is this cake a must-try?
Indulgent, Decadent Layers: Each slice of this Andes Chocolate Mint Cake is a decadent layering of rich chocolate cake and creamy mint frosting that will have your taste buds dancing.
Nostalgic Flavor: It’s reminiscent of your favorite mint chocolate chip ice cream, making it a nostalgic treat for many.
Simple Preparation: Don’t worry about intricate techniques; this cake is easy to whip up, making it perfect for both novice and experienced bakers.
Versatile Serving Options: Serve it as a stunning centerpiece for celebrations or a delightful surprise for a family gathering, and it pairs wonderfully with a scoop of vanilla ice cream or Carrot Cream Cake.
Customizable: Add your personal touch with different frosting colors or garnish options like crushed Andes mints or even Chocolate Chip Banana on the side!
Andes Chocolate Mint Cake Ingredients
This luscious cake will capture your heart and taste buds!
For the Cake
- All-purpose flour – Provides structure; measure it accurately to avoid dryness.
- Dutch process cocoa powder – Adds a rich chocolate flavor; regular cocoa can be substituted if needed.
- Granulated sugar – Sweetens the cake and enhances the overall flavor.
- Baking powder – Acts as a leavening agent to help the cake rise.
- Baking soda – Works alongside baking powder to give the cake extra lift.
- Salt – Balances sweetness and enhances all flavors.
- Canola oil (or vegetable) – Helps retain moisture; melted butter can also be used for flavor.
- Vanilla extract – Adds depth and warmth to the cake’s flavor.
- Eggs – Binds the ingredients together and helps with structure.
- Buttermilk – Adds moisture and tenderness; yogurt mixed with water can serve as a substitute.
- Hot water – Intensifies the chocolate flavor and activates the cocoa.
For the Frosting
- Unsalted butter – Gives the frosting a creamy texture and richness.
- Powdered sugar – Sweetens the frosting and contributes to its thick consistency.
- Peppermint extract – Provides the frosting its signature mint flavor—essential for Andes Chocolate Mint Cake!
- Heavy cream – Adds lightness to the frosting, making it fluffy.
- Food dye (blue, green, brown) – Used to achieve the perfect color for your mint frosting.
- Semisweet chocolate – Adds extra texture and chocolate flavor; opt for quality brands like Lindt.
- Andes Mints – These delicious chocolates enhance the mint chocolate experience, used for filling and decoration.
Step‑by‑Step Instructions for Andes Chocolate Mint Cake
Step 1: Preheat the Oven and Prepare Pans
Preheat your oven to 350°F (175°C). While it’s heating, grease and flour three 8-inch round cake pans to ensure the Andes Chocolate Mint Cake comes out smoothly after baking. You can also line the bottoms with parchment paper for easy release; this will make your cake layers beautifully intact.
Step 2: Mix Dry Ingredients
In a large mixing bowl, sift together 2 cups of all-purpose flour, 3/4 cup of Dutch process cocoa powder, 2 cups of granulated sugar, 2 teaspoons of baking powder, 1 teaspoon of baking soda, and 1 teaspoon of salt. Whisk the dry ingredients thoroughly until well combined, ensuring there are no lumps. This foundation will give your cake a rich chocolate flavor and a perfect rise.
Step 3: Combine Wet Ingredients
In a separate bowl, whisk together 1 cup of canola oil, 2 teaspoons of vanilla extract, 1 cup of buttermilk, 2 large eggs, and 1 cup of hot water until fully blended. The hot water will help deepen the chocolate flavor, making your Andes Chocolate Mint Cake irresistibly moist. Ensure all ingredients are at room temperature for the best texture.
Step 4: Mix Wet and Dry Ingredients
Gradually pour the wet mixture into the bowl with the dry ingredients, folding gently to combine them. Mix until just combined—be careful not to overmix, as you want the cake to stay light and fluffy. This step brings together the rich chocolate and mint essence that will define your cake.
Step 5: Pour into Prepared Pans
Once your batter is thoroughly mixed, divide it evenly among the three prepared cake pans. Smooth the tops with a spatula for an even bake. Place them in the preheated oven and bake for 24 to 27 minutes, or until a toothpick inserted in the center comes out clean. The aroma of chocolate will fill your kitchen!
Step 6: Cool the Cakes
After baking, remove the pans from the oven and let them cool in the pans for about 10 minutes. Then, gently turn them out onto cooling racks to cool completely. This step is crucial, as it prevents moisture buildup and ensures that the layers stay fluffy for your Andes Chocolate Mint Cake.
Step 7: Prepare the Frosting
In a large mixing bowl, beat 1 cup of softened unsalted butter until creamy and fluffy using an electric mixer. Gradually add in 4 cups of powdered sugar, mixing on low to start, then increase speed until well combined. The frosting will be thick; ensure a perfect consistency by now incorporating any remaining ingredients.
Step 8: Flavor and Color the Frosting
Add 1 teaspoon of peppermint extract, 1 teaspoon of vanilla extract, a pinch of salt, and 1/4 cup of heavy cream to the frosting. Beat until light and fluffy. To achieve the desired minty color for the frosting, add a few drops of food dye until you reach the perfect shade that matches the essence of your Andes Chocolate Mint Cake.
Step 9: Assemble Your Cake
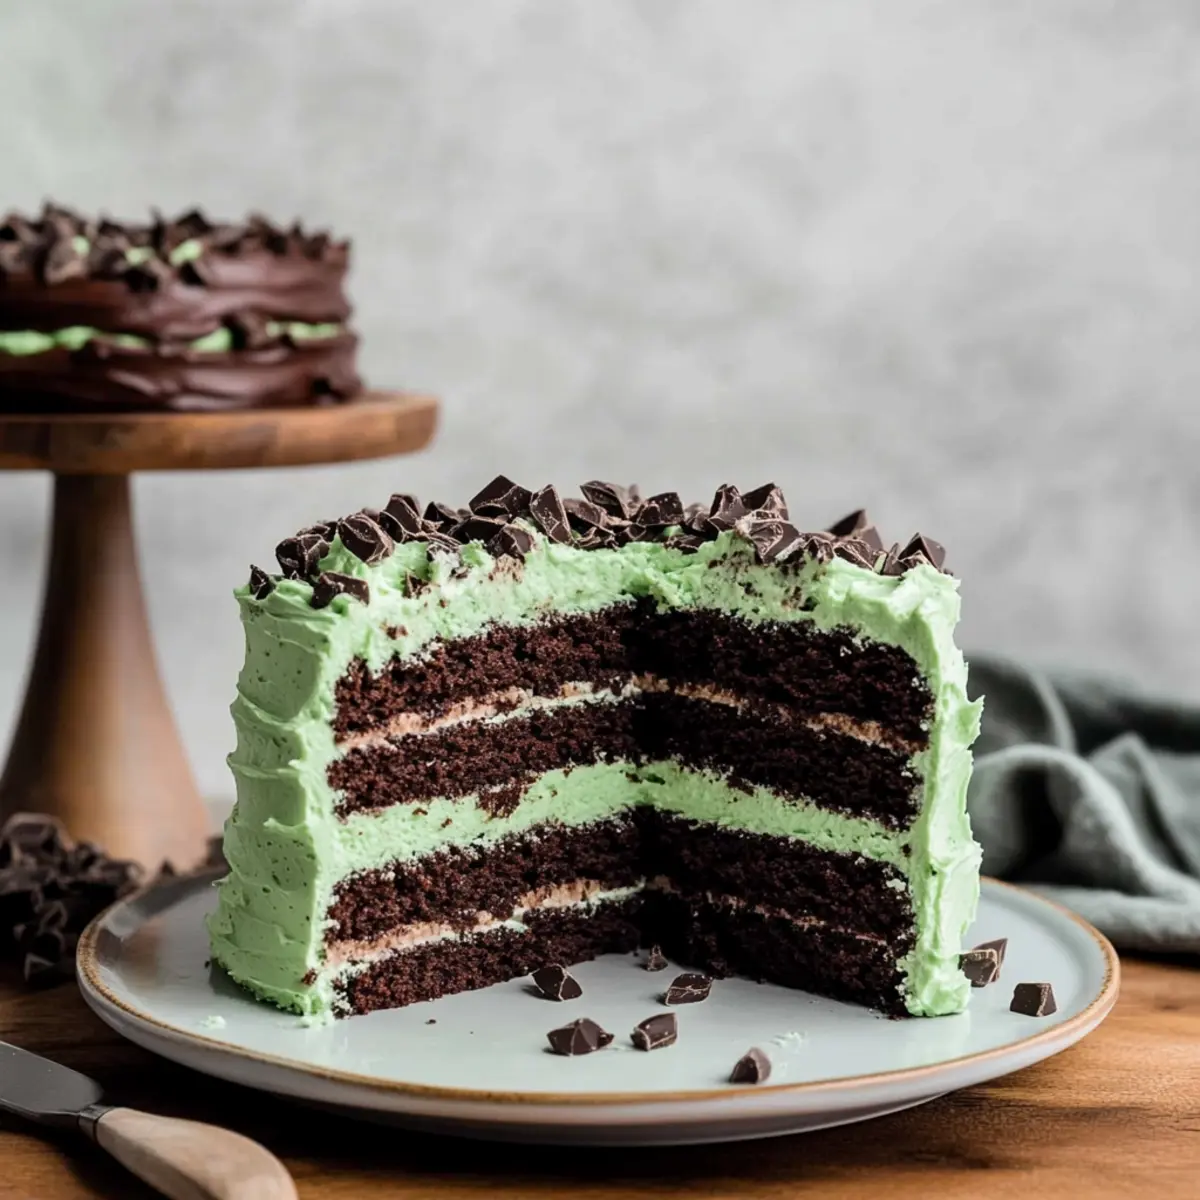
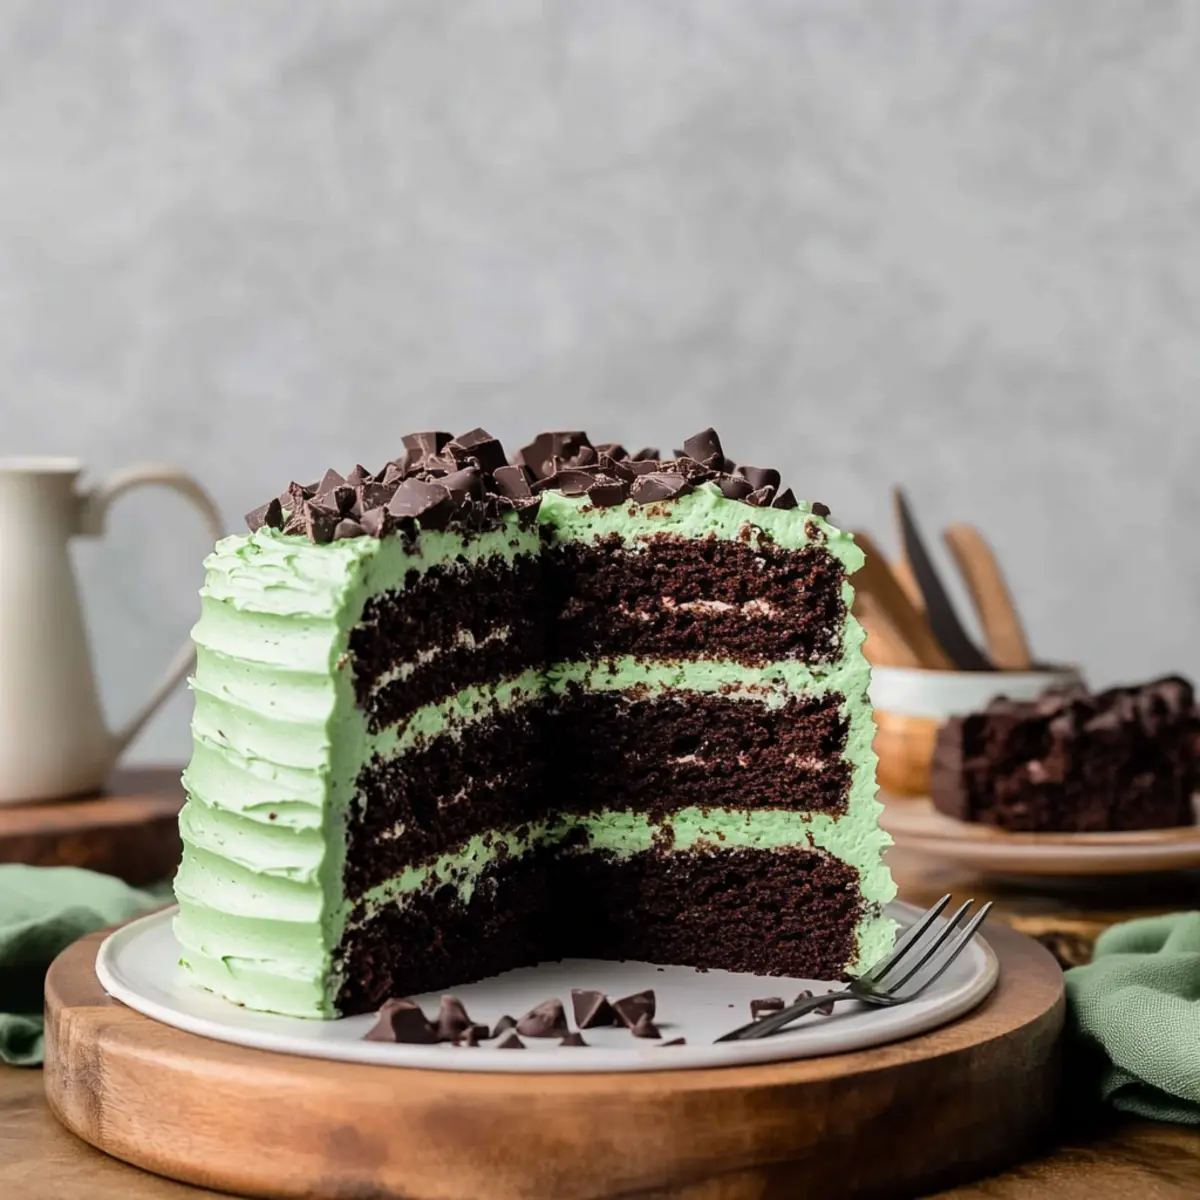
Place one cooled cake layer on a serving plate. Spread a generous amount of the mint frosting on top, followed by a sprinkle of chopped Andes Mints for that delightful mint chocolate crunch. Repeat this process with the second layer, and then add the final layer on top before frosting the entire cake.
Step 10: Final Frosting and Garnish
Using any remaining frosting, cover the outside and top of the Andes Chocolate Mint Cake, smoothing it out for a polished look. To enhance the indulgence, decorate the cake with additional chopped Andes Mints on top. This final touch not only adds flavor but also a beautiful presentation.
Make Ahead Options
These Andes Chocolate Mint Cake layers are a dream for busy home cooks looking to save time! You can bake the cake layers up to 3 days in advance; just wrap them tightly in plastic wrap and refrigerate to maintain their moisture. The frosting can also be prepared ahead and stored in the fridge for up to 24 hours in an airtight container. When you’re ready to assemble, simply allow both the cake and frosting to come to room temperature, then layer the cake with the mint frosting and Andes Mints as directed. This prep will ensure that your cake is just as delicious when served, making it perfect for celebrations without the last-minute rush!
Tips for the Best Andes Chocolate Mint Cake
-
Accurate Measurements: Make sure to measure the flour and cocoa powder correctly. Spoon them into your measuring cup and level it off to avoid a dry cake.
-
Room Temperature Ingredients: Using eggs and buttermilk at room temperature helps create a smoother batter, ensuring a moist Andes Chocolate Mint Cake.
-
Hot Water Magic: Don’t skip the hot water in the wet ingredients. It intensifies the chocolate flavor and keeps the cake deliciously moist.
-
Cooling Time: Allow the cakes to cool completely before frosting. If still warm, the frosting might melt and become too runny, compromising the final look.
-
Frosting Consistency: For a fluffier frosting, beat in heavy cream gradually. It helps achieve that dreamy texture, perfect for layering your cake.
-
Decorating Tips: When garnishing the cake with Andes mints, chop them finely. This prevents clogging in piping tips if you decide to pipe decorations.
What to Serve with Andes Chocolate Mint Cake
Indulging in a luscious slice of Andes Chocolate Mint Cake invites a delightful journey of flavors that can be beautifully enhanced with the right pairings.
-
Vanilla Ice Cream: A scoop of creamy vanilla ice cream perfectly balances the rich chocolate and mint flavors, offering a refreshing contrast.
-
Fresh Berries: Juicy strawberries or raspberries add a burst of tartness, brightening each decadent bite and providing a lovely color contrast.
-
Mint-Infused Tea: A warm cup of mint tea echoes the cake’s minty essence, creating a cozy and refreshing beverage option.
-
Chocolate Ganache: Drizzling chocolate ganache on top elevates the dessert into a truly indulgent experience, enriching the chocolate depth even more.
A mini-paragraph pairing: Pairing this cake with a glass of chilled milk enhances the nostalgic feel of childhood treats. The creamy texture of milk complements the bold chocolate and mint flavors while enhancing the overall indulgence.
-
Espresso or Coffee: An espresso shot or brewed coffee adds a delightful richness, balancing out the sweetness and providing a sophisticated touch.
-
Chocolate Mousse: A side of smooth chocolate mousse provides an additional layer of chocolatey goodness, making every bite sensational.
-
Pistachio Baklava: The nutty richness of pistachio baklava offers an unexpected but delightful contrast, making your dessert experience even more exciting.
-
Lemon Sorbet: For a zesty touch, serve lemon sorbet alongside; its tartness brightens the palette after the rich cake.
Andes Chocolate Mint Cake Customization
Feel free to unleash your creativity and make this Andes Chocolate Mint Cake your own with these delicious twists!
- Cupcakes: Transform this cake into delectable cupcakes! Bake for 18-20 minutes, and watch them disappear at any gathering.
- Dairy-Free: Substitute buttermilk with almond milk mixed with vinegar and use dairy-free butter for the frosting—everyone can enjoy!
- Minty Twist: Incorporate fresh mint leaves into the batter or use mint-flavored baking chips for an extra burst of flavor.
- Nutty Addition: Add chopped walnuts or pecans into the batter for a delightful crunch that contrasts beautifully with the moist cake layers.
- Frosting Variation: Swap peppermint extract for anise or orange extract for a refreshing, unexpected spin on the traditional mint frosting.
- Chocolate Lovers: Layer brioche-style chocolate ganache between each cake layer for an indulgent fusion that elevates the dessert to new heights.
- Garnish Boost: Top with a sprinkle of crushed Thin Mint cookies for an exciting texture and a nod to your favorite cookies.
- Serving Suggestion: Pair with a scoop of creamy vanilla ice cream or alongside a slice of Black Velvet Cupcakes for a stunning dessert table.
Storage Tips for Andes Chocolate Mint Cake
Fridge: Store leftovers in an airtight container in the fridge for up to 5 days to maintain freshness and flavor.
Freezer: For longer storage, wrap individual slices of the Andes Chocolate Mint Cake tightly in plastic wrap and place them in a freezer-safe bag. They can be frozen for up to 30 days.
Reheating: To enjoy a slice, thaw overnight in the fridge and reheat in the microwave for about 10-15 seconds to restore its moistness.
Room Temperature: If serving immediately, the cake can sit at room temperature for up to 2 hours; any longer may affect its texture.

Andes Chocolate Mint Cake Recipe FAQs
What type of cocoa powder should I use for this cake?
Absolutely! For the Andes Chocolate Mint Cake, I recommend using Dutch process cocoa powder for a rich chocolate flavor. However, if you only have regular cocoa powder on hand, it can be substituted without affecting the overall taste significantly.
How should I store leftovers?
Store any leftover Andes Chocolate Mint Cake in an airtight container in the fridge for up to 5 days. If you want to keep it longer, wrap individual slices tightly in plastic wrap, and place them in a freezer-safe bag. In the freezer, they can be kept for up to 30 days. Just remember to thaw them overnight in the fridge before enjoying!
Can I freeze this cake?
Yes, indeed! To freeze your Andes Chocolate Mint Cake, first, cool the cake completely and then wrap each slice firmly in plastic wrap. After wrapping, place the slices in a freezer-safe bag and store them in the freezer for up to 30 days. When ready to enjoy, simply thaw in the fridge overnight and pop it in the microwave for 10-15 seconds to regain its moisture.
What should I do if my cake layers are domed?
No worries! If your Andes Chocolate Mint Cake layers come out domed, you can simply level them with a serrated knife. Place the cake layer on a cutting board and gently slice off the dome to create a flat surface for frosting. This step ensures that your layers sit evenly on top of each other for a beautiful presentation.
Is this cake suitable for people with nut allergies?
Very! The Andes Chocolate Mint Cake recipe does not contain any nut-based ingredients, making it suitable for those with nut allergies. However, I always recommend double-checking the labels on your ingredients to ensure they are processed in nut-free facilities since cross-contamination can occur.
Can I use a different type of chocolate for the frosting?
Of course! While semisweet chocolate pairs beautifully with the mint frosting, you could certainly substitute it with milk chocolate for a sweeter taste or dark chocolate for a richer flavor. Just be sure to adjust the amount if you’re switching to something significantly sweeter or more bitter, so your frosting maintains the right balance!
Andes Chocolate Mint Cake: Indulge in a Minty Delight!
Ingredients
Equipment
Method
- Preheat your oven to 350°F (175°C). Grease and flour three 8-inch round cake pans.
- In a large mixing bowl, sift together the dry ingredients: all-purpose flour, cocoa powder, granulated sugar, baking powder, baking soda, and salt.
- In a separate bowl, whisk together the wet ingredients: canola oil, vanilla extract, buttermilk, eggs, and hot water until fully blended.
- Gradually pour the wet mixture into the dry ingredients, folding gently to combine until just combined.
- Divide the batter evenly among the prepared pans and smooth the tops. Bake for 24 to 27 minutes until a toothpick comes out clean.
- Remove the cakes from the oven and let them cool in the pans for about 10 minutes before turning them out to cool completely.
- In a mixing bowl, beat the softened unsalted butter until creamy, then gradually add powdered sugar until well combined.
- Add peppermint extract, vanilla extract, salt, and heavy cream to the frosting, beating until light and fluffy with desired color.
- Assemble the cake by spreading frosting between the layers and on the top and sides of the cake.
- Decorate with additional chopped Andes Mints on top for flavor and presentation.
Leave a Reply