
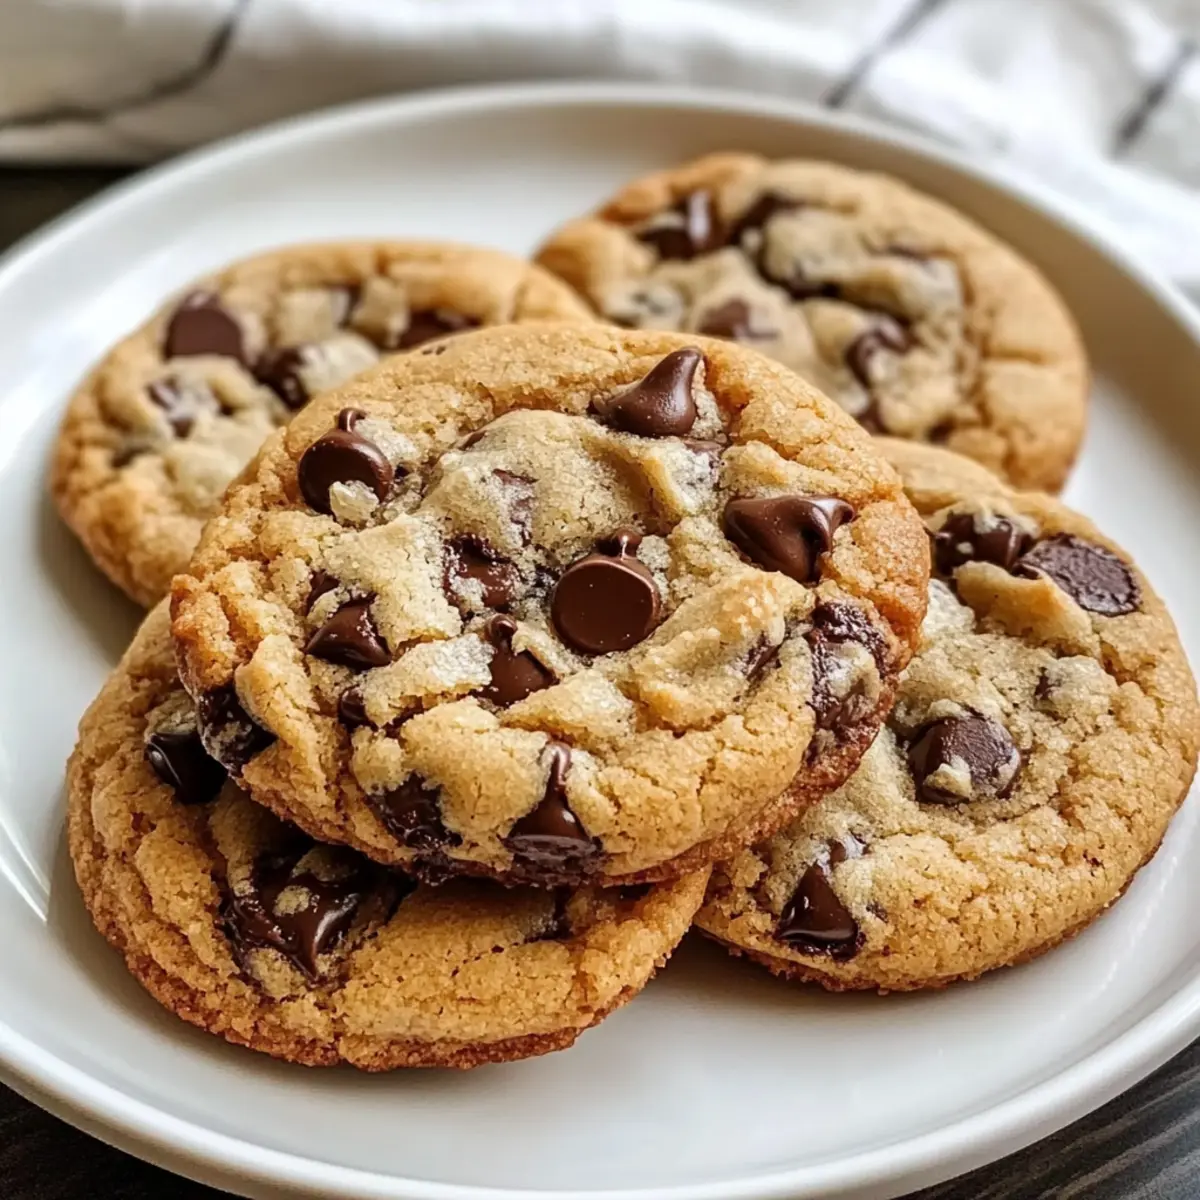
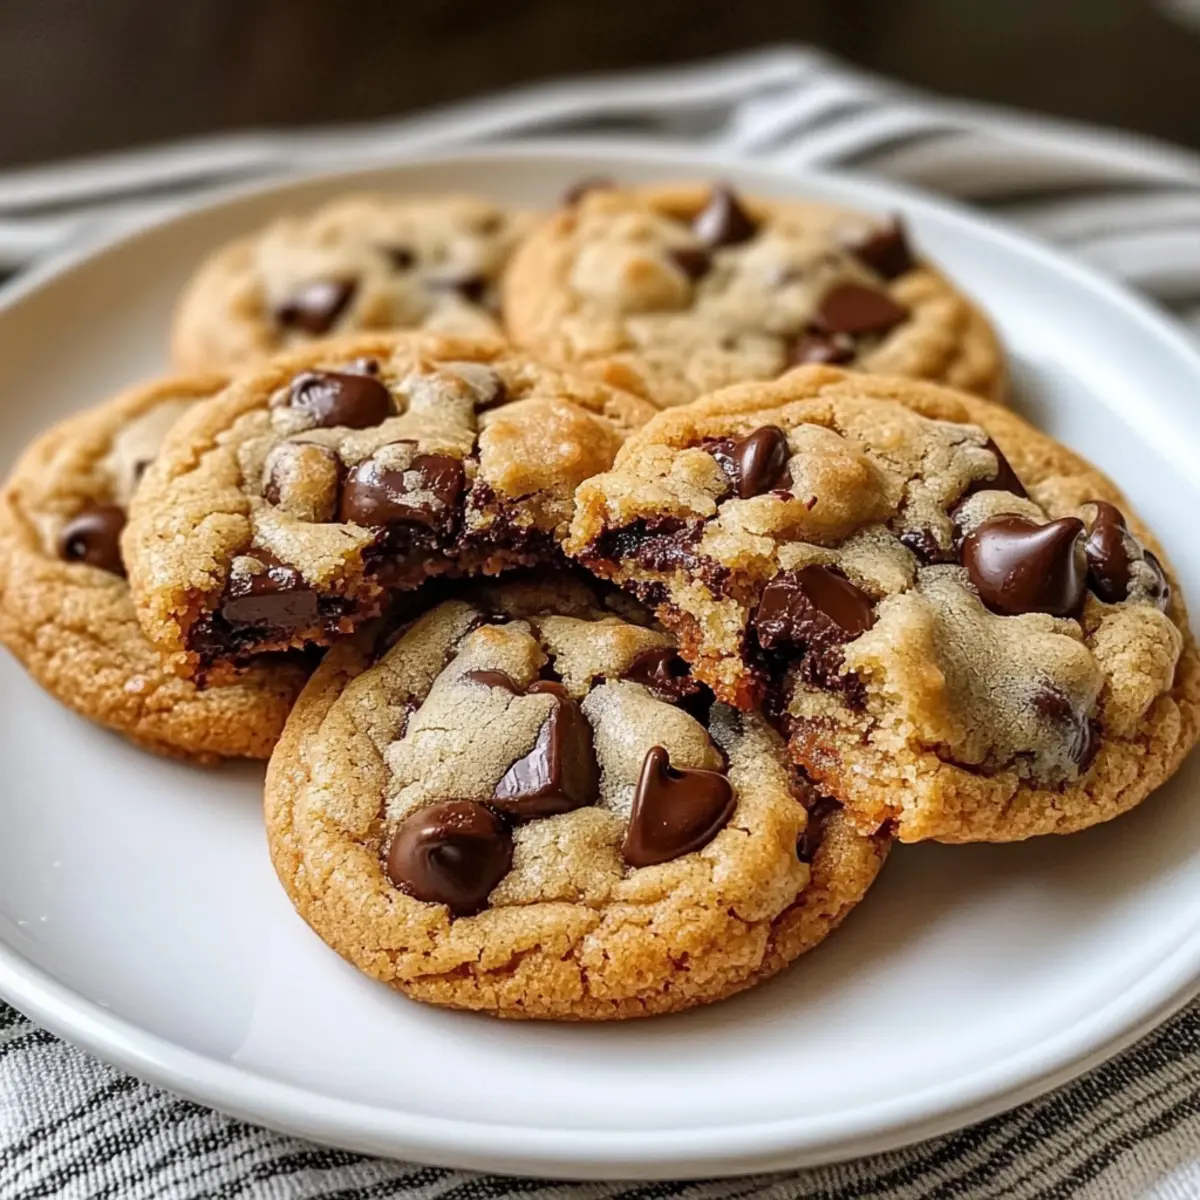
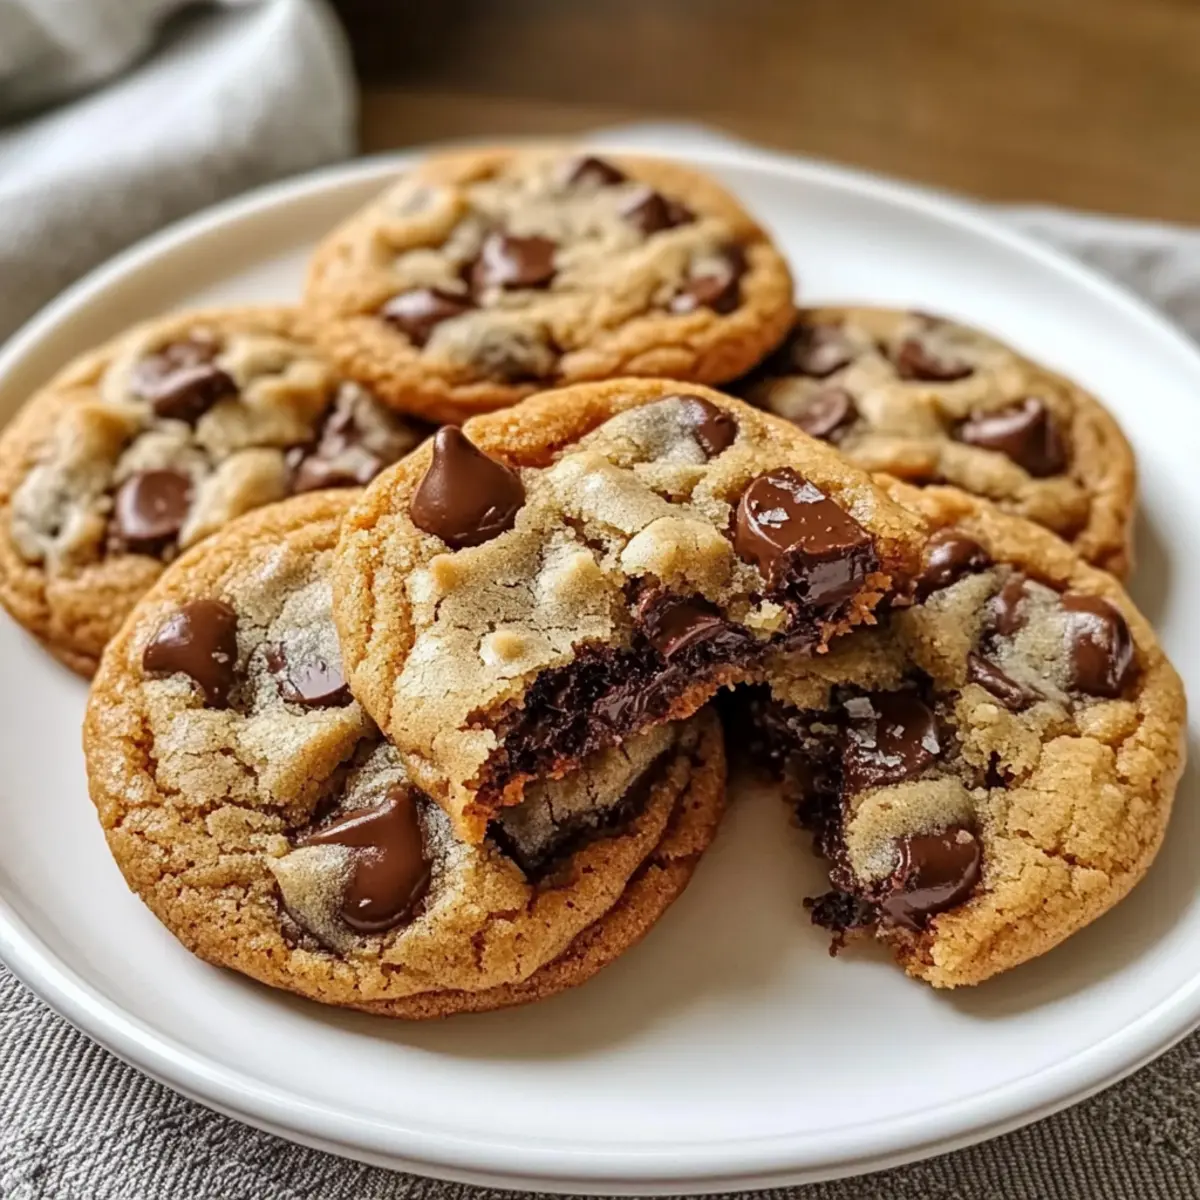
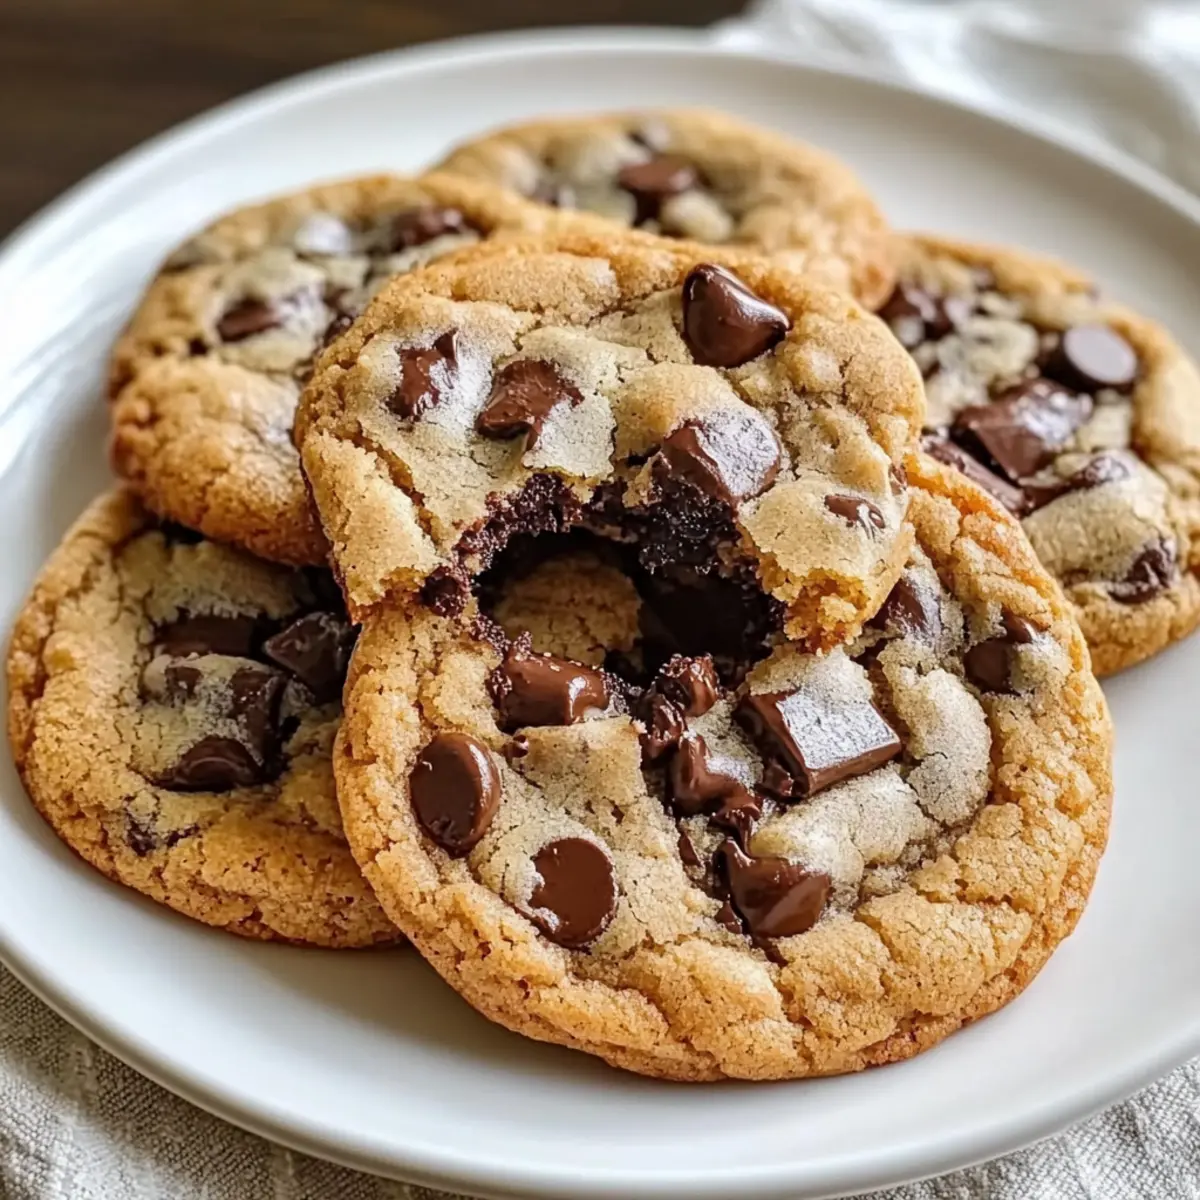
As I stood in my cozy kitchen, the heavenly smell of warm, melting chocolate enveloped me, transporting me back to my favorite bakery moments. There’s something magical about freshly baked Ultra Thick Bakery Style Chocolate Chip Cookies. This beginner-friendly recipe is your golden ticket to creating cookies that boast a crispy edge and a soft, chewy center—perfect for satisfying those sweet cravings without the fuss of complex techniques. With just 20 minutes of prep time, you’ll soon be indulging in these delicious treats that promise to impress family and friends. Plus, they freeze beautifully, making them an ideal dessert to have on hand. Are you ready to dive into making these delightful cookies that bring joy with every bite?
Why are these cookies a must-try?
Indulgent Texture: These cookies are incredibly thick and chewy, with a satisfying crunch on the edges. Gooey Chocolate Bliss: Each bite reveals melted chocolate chips that elevate the cookie experience. Beginner-Friendly: You don’t need to be a baking pro to achieve bakery-quality treats. Quick Preparation: With just 20 minutes of prep, you can treat yourself and your loved ones to fresh cookies in no time. Endless Customization: Feel free to mix in your favorite nuts or even substitute chocolate chips for a twist. If you’re looking for more fun ways to enjoy delicious flavors, check out Dark Chocolate Coffin or Southern Style Honey!
Bakery Style Chocolate Chip Cookie Ingredients
-
For the Cookie Dough
• All-Purpose Flour – Provides structure and balances chewiness with tenderness; substitute with a gluten-free blend if needed.
• Baking Soda – Essential for lift and an airy crumb, helping achieve that perfect cookie texture.
• Salt – Enhances sweetness and balances flavors, ensuring the richness of the chocolate shines through.
• Unsalted Butter – Contributes a light, fluffy texture; remember to use softened butter, not melted, for the best results.
• Granulated Sugar – Adds sweetness and contributes to those delightful crispy edges.
• Brown Sugar – Infuses moisture and chewiness; feel free to choose light or dark based on your preference.
• Vanilla Extract – A splash of high-quality vanilla elevates the flavor to a whole new level.
• Eggs – Essential for moisture and binding; incorporate one at a time for optimal dough consistency.
• Semi-Sweet Chocolate Chips – The star of the show that melts into gooey pockets; dark or milk chocolate works beautifully too.
• Nuts (optional) – Walnuts or pecans add a delightful crunch and nutty flavor if desired. -
For Topping
• Flaked Sea Salt (optional) – A sprinkle on top enhances the chocolate experience, creating a sweet-savory contrast that’s irresistible.
Feel free to dive into the joy of baking these bakery style chocolate chip cookies!
Step‑by‑Step Instructions for Bakery Style Chocolate Chip Cookies
Step 1: Preheat the Oven
Begin by preheating your oven to 350°F (175°C) to ensure it reaches the right temperature for baking. While the oven heats, line a baking sheet with parchment paper, which will prevent the cookies from sticking and make for easy cleanup. This preparation sets the stage for your delicious bakery style chocolate chip cookies.
Step 2: Mix Dry Ingredients
In a medium bowl, whisk together all-purpose flour, baking soda, and salt until well combined. This not only ensures even distribution but also helps to aerate the flour, contributing to the perfect chewy texture of your cookies. Once mixed, set this bowl aside to focus on the wet ingredients.
Step 3: Cream the Sugars and Butter
In a large mixing bowl, add softened unsalted butter, granulated sugar, and brown sugar. Using an electric mixer, cream these ingredients together for about 2-3 minutes until the mixture becomes light and fluffy. The key here is to incorporate enough air for the cookies to rise beautifully, which will enhance their bakery-style texture.
Step 4: Add Vanilla Extract
Next, mix in the vanilla extract into your creamy butter and sugar mixture until fully combined. The rich aroma of vanilla will fill your kitchen, adding a warm and inviting note to your bakery style chocolate chip cookies. This step plays a vital role in elevating the overall flavor of the dough.
Step 5: Incorporate Eggs
Add eggs one at a time to your mixture, ensuring that each egg is fully mixed in before adding the next. This gradual incorporation helps bind the ingredients together and creates a smooth batter. Watch as the mixture transforms into a beautifully silky consistency, ready for the dry ingredients.
Step 6: Combine Dry and Wet Mixtures
Gradually add the reserved dry flour mixture to the wet ingredients while mixing on low speed. Be careful not to overmix; just blend until the flour is just incorporated. This gentle integration maintains the dough’s structure, which is essential for achieving that thick and chewy texture characteristic of bakery style chocolate chip cookies.
Step 7: Fold in Chocolate Chips and Nuts
Using a spatula, gently fold in the semi-sweet chocolate chips and nuts, if desired, until they are evenly distributed throughout the cookie dough. The goal is to ensure each bite is filled with gooey chocolate and a delightful crunch from the nuts. This is the moment you can really customize your cookies!
Step 8: Scoop the Dough
Using a large cookie scoop (about 3 tablespoons), portion out the dough onto your prepared baking sheet, leaving about 2 inches of space between each mound. These generous cookie mounds are what give your bakery style chocolate chip cookies their ultra-thick goodness.
Step 9: Add Extra Toppings
For an extra touch, press a few additional chocolate chips on top of each cookie mound and sprinkle lightly with flaked sea salt. This enhances the visual appeal and adds a delightful salty-sweet contrast to your cookies, elevating the overall experience with each bite.
Step 10: Bake the Cookies
Place the baking sheet in the preheated oven and bake for 10-12 minutes. Keep an eye on them; you’re looking for golden edges and slightly underbaked centers. This perfect baking time ensures your cookies will be thick and chewy, embodying that classic bakery style we all love.
Step 11: Cool Before Serving
Once baked, remove the cookies from the oven and let them cool on the baking sheet for about 5 minutes. This crucial resting time allows them to set, making them easier to transfer without breaking. After that, move them to a wire rack to cool completely, ensuring they remain soft and chewy.
How to Store and Freeze Bakery Style Chocolate Chip Cookies
Room Temperature: Keep cookies in an airtight container at room temperature for up to 1 week to maintain their fresh, chewy texture.
Freezer: For longer storage, arrange cookies in a single layer in freezer-safe bags and freeze for up to 3 months. Ensure to seal tightly to prevent freezer burn.
Reheating: When you’re ready to enjoy, warm the cookies in a preheated oven at 350°F (175°C) for 5-8 minutes. This will refresh them, making them taste like freshly baked bakery style chocolate chip cookies.
Thawing: To thaw frozen cookies, simply leave at room temperature for a few hours or microwave for 10-15 seconds if you need a quick treat!
Expert Tips for Bakery Style Chocolate Chip Cookies
- Butter Temperature: Use softened, not melted, butter for the perfect texture. Melted butter can lead to flatter cookies.
- Chill the Dough: Refrigerate your dough for at least 30 minutes before baking to maintain cookie shape and enhance flavor.
- Measuring Flour: Spoon and level your flour when measuring; too much flour can make cookies dry and crumbly.
- Mixing Technique: Incorporate ingredients gently to avoid overmixing, which can toughen the dough and affect the thickness of your bakery style chocolate chip cookies.
- Baking Time: Keep an eye on the cookies towards the end of baking; slightly underbaked centers will result in chewier cookies.
- Customization: Don’t hesitate to swap chocolate chips with your favorite variety or add nuts to enhance your cookies’ flavor and texture!
What to Serve with Ultra Thick Bakery Style Chocolate Chip Cookies
Indulging in these scrumptious cookies opens the door to wonderful possibilities for a delightful meal.
-
Chilled Milk: A classic pairing that enhances the rich chocolate flavors, creating a comforting experience with every bite.
-
Vanilla Ice Cream: Scoop it alongside your cookies for a decadent dessert; the creamy sweetness complements the warm, chewy cookies perfectly.
-
Fresh Berries: Juicy strawberries or raspberries add a refreshing tartness, balancing the sweetness of the cookies while providing a pop of color on your plate.
-
Whipped Cream: Light and airy, whipped cream makes a lovely topping for a cookie dessert platter, adding creaminess that contrasts beautifully with the chewy texture.
-
Coffee or Espresso: A warm cup of coffee or espresso deepens the chocolate notes, creating a rich and satisfying taste experience that’s perfect for any time of day.
-
Nutty Brownies: Pair these cookies with brownies for a double chocolate delight that chocolate lovers will adore; a combination of textures adds excitement to the dessert table.
-
Milkshakes: Blend vanilla or chocolate ice cream with milk into a creamy milkshake, transforming dessert into a special treat that’s both fun and nostalgic.
-
Fruit Tart: A refreshing fruit tart cuts through the sweetness of the cookies, providing a beautifully balanced array of flavors that delight the palate.
Bakery Style Chocolate Chip Cookies Customization
Feel free to sprinkle in your creativity and personal touch to these cookies for a truly unique treat!
-
Dark Chocolate Delight: Swap out semi-sweet chocolate chips for dark chocolate for a richer, more intense flavor that’s simply divine.
-
White Chocolate Twist: Use white chocolate chips for a sweeter alternative that pairs beautifully with the buttery cookie base. An irresistible mix that brings a touch of elegance!
-
Nutty Crunch: Add chopped walnuts or pecans for a delightful crunch that elevates the texture and flavor profile. The nutty flavors complement the chocolate beautifully.
-
Oatmeal Goodness: Mix in 1 cup of rolled oats for added texture and heartiness. This variation gives you a cookie that’s not only delicious but also feels a bit more wholesome.
-
Fruity Fusion: Toss in some dried cranberries or raisins alongside the chocolate chips for a sweet-tart contrast that brightens each bite. It’s a delightful surprise for the taste buds!
-
Spicy Kick: Incorporate a pinch of cinnamon or a dash of cayenne pepper to elevate the warmth and intrigue of the flavor. It’s a subtle way to give your cookies a unique edge!
-
Gluten-Free Option: Substitute all-purpose flour with a gluten-free flour blend for a delightful treat that everyone can enjoy. Just be aware that textures may vary slightly.
For more exciting dessert ideas, try out these heavenly options: Chocolate Chip Banana or a delicious twist with Korean Style Pot. Happy baking!
Make Ahead Options
These Ultra Thick Bakery Style Chocolate Chip Cookies are perfect for meal prep enthusiasts looking to save time on busy weeknights! You can make the dough up to 3 days in advance; simply prepare it as instructed and refrigerate it in an airtight container. For optimal flavor, let the dough chill overnight. When you’re ready to bake, just scoop the chilled dough onto your baking sheet and bake straight from the fridge, adding an extra minute if necessary. You can also freeze the cookie dough balls for up to 3 months. When ready to enjoy, let them thaw in the fridge overnight before baking, and you’ll have fresh, bakery-quality cookies at your fingertips any day of the week!
Bakery Style Chocolate Chip Cookies Recipe FAQs
What type of flour is best for these cookies?
I recommend using all-purpose flour as it provides the perfect structure, balancing chewiness with tenderness. If you’re looking for a gluten-free alternative, try a gluten-free blend, but be aware that the texture may vary.
How should I store leftover cookies?
Absolutely! Keep your cookies in an airtight container at room temperature for up to 1 week. To maintain freshness and that delightful chewy texture, make sure they are completely cooled before storing.
Can I freeze these cookies?
Yes, you can freeze them! Arrange the cookies in a single layer on a baking sheet and place them in the freezer for about 1-2 hours until firm. Then, transfer them to a freezer-safe bag, sealing tightly. They’ll stay fresh for up to 3 months. When you’re ready to enjoy, just thaw at room temperature!
What should I do if my cookies turn out flat?
If your cookies come out flatter than expected, check a couple of things. First, ensure your butter was softened but not melted. Melted butter can lead to spreading. Secondly, make sure your flour is measured correctly; too little flour can also cause flattening. If needed, chill the dough for 30 minutes before baking to help them hold their shape.
Do these cookies contain common allergens?
Yes, these cookies contain gluten (from the flour) and dairy (from the butter). If you’re concerned about allergies, make sure to use gluten-free flour and dairy-free butter substitutes. Additionally, if you’re including nuts, opt for nut-free alternatives for those with nut allergies.
How do I achieve the perfect chewy texture?
To create that ultra-thick and chewy cookie, ensure your ingredients are at the right temperature. Use softened butter to trap air while creaming, and avoid overmixing the flour mixture—mix just until combined. Chilling the dough for at least 30 minutes before baking can also help maintain their shape and enhance texture. Enjoy your baking!
Bakery Style Chocolate Chip Cookies That Melt in Your Mouth
Ingredients
Equipment
Method
- Preheat your oven to 350°F (175°C) and line a baking sheet with parchment paper.
- In a bowl, whisk together all-purpose flour, baking soda, and salt until combined.
- Cream softened butter, granulated sugar, and brown sugar together for 2-3 minutes until light and fluffy.
- Mix in the vanilla extract into your butter and sugar mixture until fully combined.
- Add eggs one at a time, mixing well after each addition.
- Gradually add the dry mixture to the wet mixture while mixing on low speed until just incorporated.
- Fold in the chocolate chips and nuts until evenly distributed throughout the dough.
- Scoop dough onto prepared baking sheet, leaving about 2 inches of space between each mound.
- Press extra chocolate chips on top and sprinkle lightly with flaked sea salt.
- Bake for 10-12 minutes, until golden edges and slightly underbaked centers appear.
- Cool on the baking sheet for 5 minutes before transferring to a wire rack.
Leave a Reply