
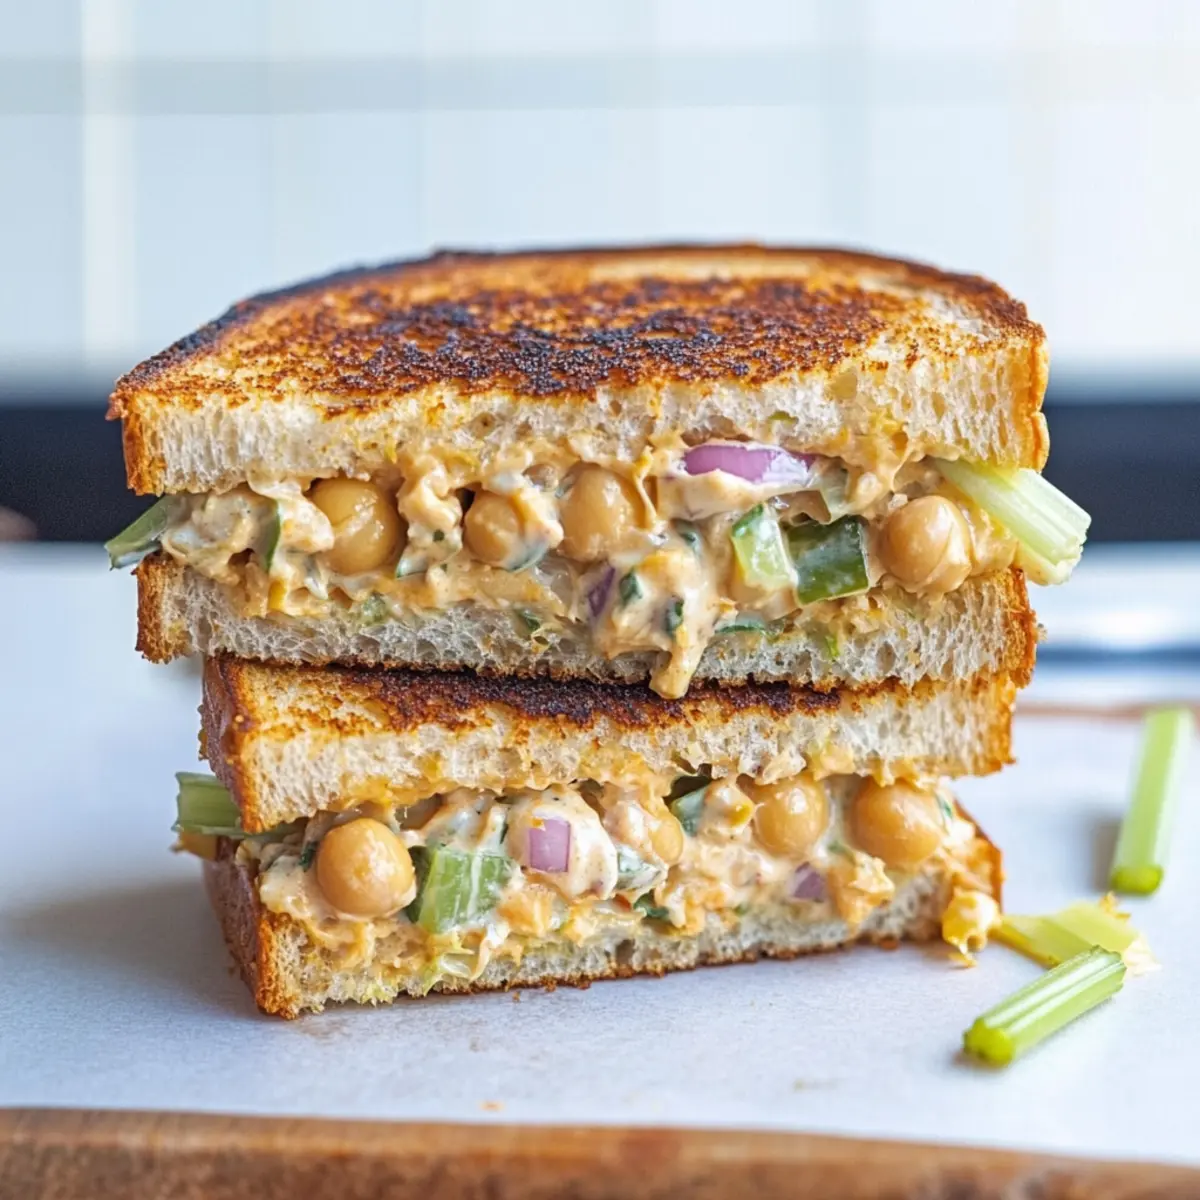
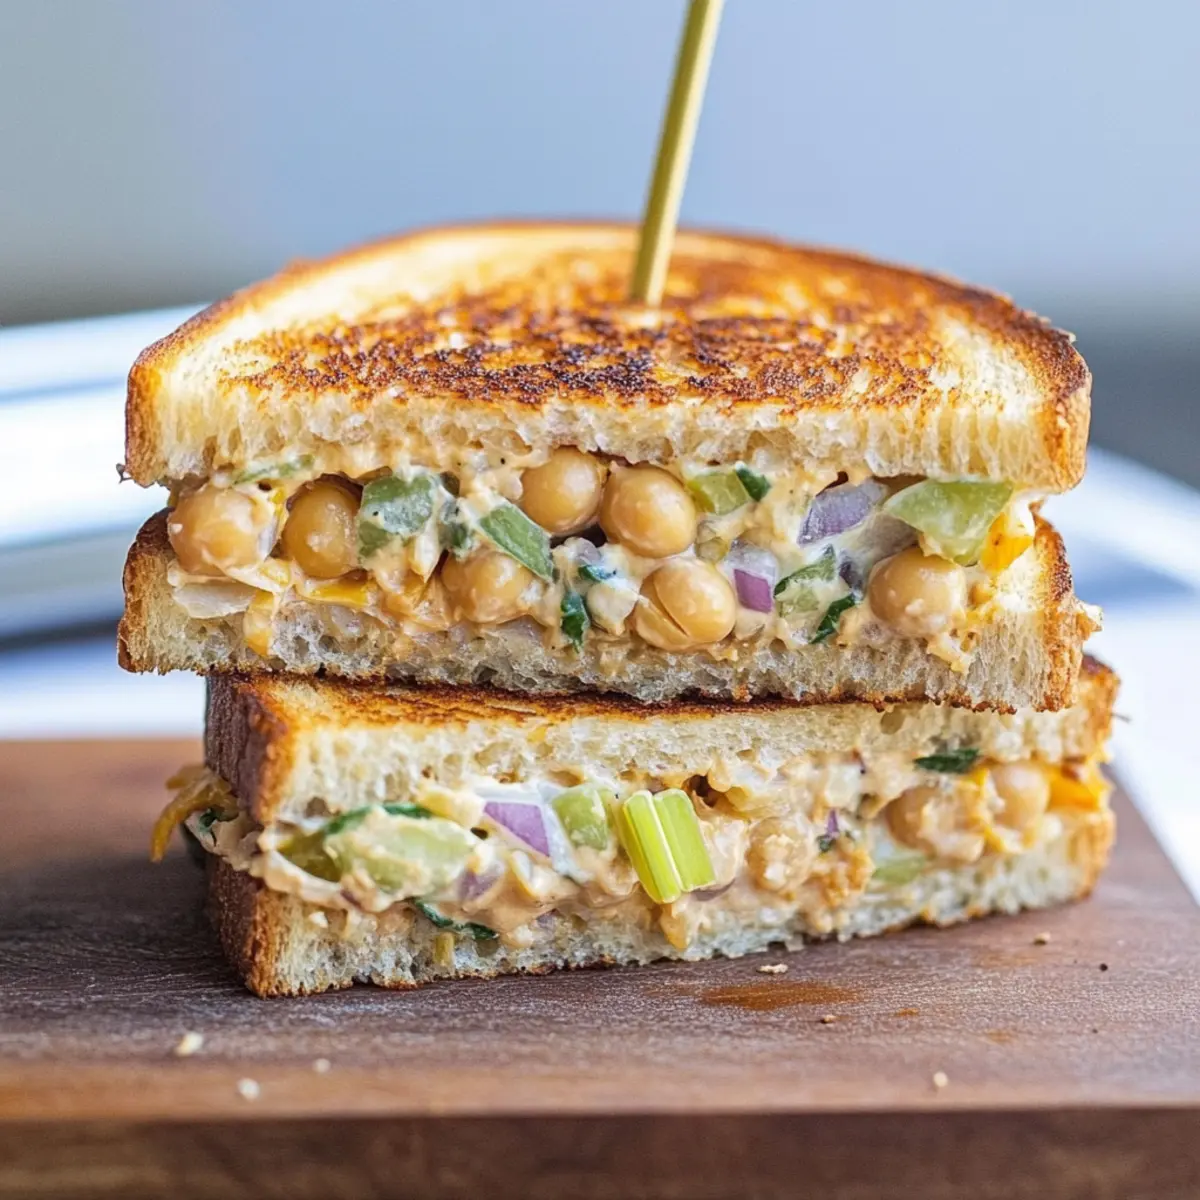
The aroma of a warm, toasty sandwich fills the air as I slice into my Chickpea Salad Melts—a delightful twist on the classic tuna melt that’s completely vegetarian. With hearty chickpeas and fresh ingredients, this recipe combines the nostalgic comfort of a beloved dish with all the vibrancy your tastebuds crave. The best part? These melts are not only quick and easy to make, but they also pack a fulfilling punch that’s perfect for lunch or dinner. Whether you’re trying to please picky eaters or simply want to elevate your weekday meals, these melts are here to satisfy. Curious about how to bring this scrumptious meal to your table? Let’s dive into the details!
Why Choose Chickpea Salad Melts?
Nutritious and Delicious: Packed with protein and fiber from chickpeas, these melts are as wholesome as they are satisfying.
Quick and Easy: With just a few simple ingredients, you can whip up a gourmet meal in under 30 minutes.
Versatile: Feel free to mix it up! Swap out celery for dill pickles or try different breads, even gluten-free options for those with dietary needs.
Kid-Friendly Appeal: The creamy texture and comforting warmth make these sandwiches perfect for kids and adults alike!
Meal Prep Friendly: Make the chickpea salad ahead of time and keep it in the fridge, so you’re ready to assemble whenever cravings strike. Who doesn’t love an easy, delicious meal that’s ready when you are?
Try pairing your melts with a refreshing Roasted Pear Salad for a complete meal that’s both light and satisfying!
Chickpea Salad Melts Ingredients
For the Salad
- Chickpeas – This main protein source provides a creamy texture; substitute with crumbled tofu for a lower-carb option.
- Celery – Adds a refreshing crunch to the salad; feel free to omit for a smoother consistency.
- Mayonnaise – Binds ingredients together to create a cohesive spread; use vegan mayo for a plant-based version.
- Dijon Mustard – Brings a tangy depth of flavor; yellow mustard can be used as a substitute.
- Red Onion – Offers sharpness and bite; adjust the amount to your taste or swap for milder green onions.
- Kelp Flakes (optional) – Imparts a fishy flavor reminiscent of tuna; consider using 1-2 tablespoons if desired.
For the Sandwich
- Bread – Essential for serving; gluten-free varieties or whole grain options can add more fiber.
Curious about these Chickpea Salad Melts? Let’s gather everything you need for this comforting, creamy vegetarian delight!
Step‑by‑Step Instructions for Chickpea Salad Melts
Step 1: Mash the Chickpeas
Begin by opening a can of chickpeas and draining them well. In a large mixing bowl, use a fork to mash the chickpeas until they reach a slightly chunky consistency—this should take about 2-3 minutes. You want some texture to remain, so don’t fully purée them.
Step 2: Combine the Salad Ingredients
Add in freshly chopped celery, diced red onion, creamy mayonnaise, and tangy Dijon mustard to the bowl of mashed chickpeas. Stir all the ingredients together using a spoon until they are well combined, ensuring the mixture is cohesive yet still chunky. This should take about 2 minutes, and it should have a lovely, inviting aroma.
Step 3: Prepare the Bread
While mixing your chickpea salad, heat a skillet over medium heat. Take slices of your preferred bread—gluten-free, whole grain, or classic white—and spread butter generously on one side of each slice. This will create a beautiful, golden crust as you cook the melts, so get ready for that sizzle!
Step 4: Assemble the Sandwiches
Spread a generous portion of the chickpea salad mixture onto the unbuttered side of half the bread slices. Top with another slice of bread, buttered side up. This delicious creation should now form a cohesive sandwich. Repeat for however many melts you want to make, setting them aside on a plate.
Step 5: Cook the Chickpea Salad Melts
Carefully place the sandwiches in the hot skillet, cooking them for about 3-4 minutes until the bottom is golden brown. Be sure to keep an eye on them during cooking to avoid burning. The smell of toasty bread and savory filling will fill the air—absolutely delicious!
Step 6: Flip and Finish Cooking
Using a spatula, gently flip each sandwich to cook the other side, another 3-4 minutes or until it reaches a perfect golden brown. Ensure the filling is heated through and the bread is nicely crisp. You can press down gently with the spatula to help the filling meld into the bread.
Step 7: Serve and Enjoy
Once both sides are golden and crispy, remove the sandwiches from the skillet and let them cool for a minute. Slice them in half for easier eating, and feel free to garnish with extra toppings if desired. These Chickpea Salad Melts are best served warm, so dig in and delight in every comforting bite!
What to Serve with Chickpea Salad Melts
Elevate your meal with delightful sides that complement the comforting, creamy goodness of these veggie-filled melts.
-
Simple Green Salad: Crisp mixed greens tossed in a light vinaigrette adds freshness and balances the richness of the melts.
-
Sweet Potato Fries: The natural sweetness and crispy texture provide a delightful contrast, making for a hearty pairing.
-
Crispy Roasted Vegetables: Seasonal vegetables like zucchini and bell peppers roast to perfection, adding color and nutritious flavor to your plate.
-
Creamy Tomato Soup: A warm bowl of tomato soup offers a classic dipping companion that enhances creamy bites.
-
Avocado and Lime Salsa: The zesty kick from fresh lime and the creamy avocado elevates the chickpeas, providing a refreshing contrast.
-
Herbed Potato Wedges: Roasted potatoes seasoned with fresh herbs create a hearty and satisfying combination with your melts.
For a refreshing drink, serve with a sparkling lemonade; its citrusy fizz will awaken your taste buds and complete a delightful dining experience!
How to Store and Freeze Chickpea Salad Melts
Fridge: Store assembled sandwiches in an airtight container for up to 3 days to maintain freshness. Reheat in a skillet for the best texture.
Make-Ahead Chickpea Salad: Prepare the chickpea salad mix and keep it in the fridge for up to 3 days. Assemble sandwiches just before cooking to keep bread crispy.
Freezer: If you want to freeze assembled melts, wrap them tightly in foil before placing in a freezer-safe bag. They can be frozen for up to 1 month.
Reheating: To reheat frozen melts, thaw in the fridge overnight and cook in a skillet over medium heat until warmed through and golden brown, about 5-7 minutes.
Make Ahead Options
These Chickpea Salad Melts are perfect for busy weeknights and meal prep enthusiasts! You can prepare the chickpea salad up to 3 days in advance and store it in an airtight container in the refrigerator to maintain freshness. Simply mash the chickpeas and mix in the celery, onion, mayonnaise, and mustard as usual. To keep the bread crisp, assemble the sandwiches only when you’re ready to serve. Just before cooking, butter the bread and spread the chickpea mixture on the unbuttered side. Heat them in a skillet for that golden-brown finish, and you’ll enjoy a delightful, comforting meal with minimal effort and just as delicious as if made fresh!
Chickpea Salad Melts Variations
Don’t hesitate to get creative with your Chickpea Salad Melts! Each spin can elevate the flavors and textures in delightful ways.
-
Dairy-Free: Substitute traditional mayonnaise with vegan mayo for a luscious plant-based experience. The creaminess remains, making your melts guilt-free!
-
Spicy Kick: Add a dash of sriracha or your favorite hot sauce to the chickpea mixture for a flavorful heat. This simple addition can transform each bite into a zesty delight.
-
Crunchy Additions: Toss in chopped bell peppers or shredded carrots to the salad for an extra crunch. They not only enhance the texture but also bring vivid colors to your dish.
-
Herbs Galore: Fresh herbs like dill or cilantro can add a burst of freshness. They’re perfect for brightening up the filling, tying together the rich flavors beautifully.
-
Cheese Lovers: Sprinkle some shredded cheddar or feta inside the sandwich for a cheesy twist. Melting cheese adds an indulgent touch that makes these melts even more comforting.
-
Lettuce Wraps: For a low-carb version, wrap the chickpea salad in large leafy greens instead of bread. This delightful twist keeps it fresh and light—perfect for warm days.
-
Nutty Flavor: Stir in some toasted sunflower seeds or walnuts for an added crunch and a nutty flavor. It enhances the heartiness while providing an extra boost of nutrition.
-
Mediterranean Style: Incorporate diced olives and a hint of lemon juice for a Mediterranean flair. This combination brings a bright, tangy twist that pairs beautifully with the creamy filling.
By trying out some of these variations, you can explore and personalize your Chickpea Salad Melts whenever the mood strikes! And remember, if you’re looking to complement your meal, consider pairing these melts with a light Roasted Pear Salad. The flavors will dance harmoniously on your palate!
Expert Tips for Chickpea Salad Melts
• Chunky Consistency: Don’t over-mash the chickpeas; a slightly chunky texture enhances the melts and makes them more satisfying.
• Toasty Perfection: Lightly toast the bread before assembling. This promotes a delightful crunch, elevating the overall texture of your Chickpea Salad Melts.
• Watch the Heat: Keep an eye on your skillet temperature. Too high can burn the bread while leaving the filling cold. Cook low and slow for the best results.
• Personalize Your Fillings: Don’t hesitate to experiment! Swap in different ingredients like avocado or pickles to create your ideal flavor profile.
• Vegan Option: Use vegan mayo and bread to make these Chickpea Salad Melts fully plant-based. They’re incredibly tasty without compromising flavor!
Chickpea Salad Melts Recipe FAQs
What type of chickpeas should I use?
Absolutely! Canned chickpeas are the most convenient option as they are already cooked. Just drain and rinse them before mashing. You can also use dried chickpeas, but make sure to soak and cook them first, which may take a bit more time.
How should I store leftover Chickpea Salad Melts?
For optimal freshness, store assembled sandwiches in an airtight container in the refrigerator for up to 3 days. I recommend reheating in a skillet for about 3-4 minutes on each side to restore that delightful crispy texture.
Can I freeze Chickpea Salad Melts?
Yes, you can! First, assemble your melts, then wrap them tightly in foil and place them into a freezer-safe bag. They’ll last for up to 1 month. When you’re ready to enjoy them, thaw your melts in the refrigerator overnight, then cook them in a skillet for about 5-7 minutes over medium heat until warmed through and golden brown.
What can I do if my chickpea salad is too dry?
If you find your chickpea salad mixture is too dry, simply add a little more mayonnaise or a splash of lemon juice for moisture and flavor. Mix well until the desired consistency is achieved. I often suggest starting with a tablespoon at a time until it’s perfect for your taste!
Is this recipe suitable for those with gluten allergies?
Definitely! Just choose gluten-free bread for your sandwiches. The filling itself is naturally gluten-free, so you can enjoy all the flavors without worry. Many stores offer delicious gluten-free options these days, so you won’t miss out on the taste or texture.
Can I add more vegetables to the Chickpea Salad?
Very! Feel free to fold in additional veggies like diced bell peppers, shredded carrots, or even chopped spinach to enhance the nutrition and add texture. Mixing it up with your favorite veggies makes this recipe even more exciting and nutritious!
Chickpea Salad Melts: Comforting, Creamy Vegetarian Goodness
Ingredients
Equipment
Method
- Begin by opening a can of chickpeas and draining them well. In a large mixing bowl, use a fork to mash the chickpeas until they reach a slightly chunky consistency.
- Add in freshly chopped celery, diced red onion, creamy mayonnaise, and tangy Dijon mustard to the bowl of mashed chickpeas. Stir all the ingredients together using a spoon until they are well combined.
- While mixing your chickpea salad, heat a skillet over medium heat. Take slices of your preferred bread and spread butter generously on one side of each slice.
- Spread a generous portion of the chickpea salad mixture onto the unbuttered side of half the bread slices. Top with another slice of bread, buttered side up.
- Carefully place the sandwiches in the hot skillet, cooking them for about 3-4 minutes until the bottom is golden brown.
- Using a spatula, gently flip each sandwich to cook the other side, another 3-4 minutes or until it reaches a perfect golden brown.
- Once both sides are golden and crispy, remove the sandwiches from the skillet and let them cool for a minute. Slice them in half for easier eating.
Leave a Reply