
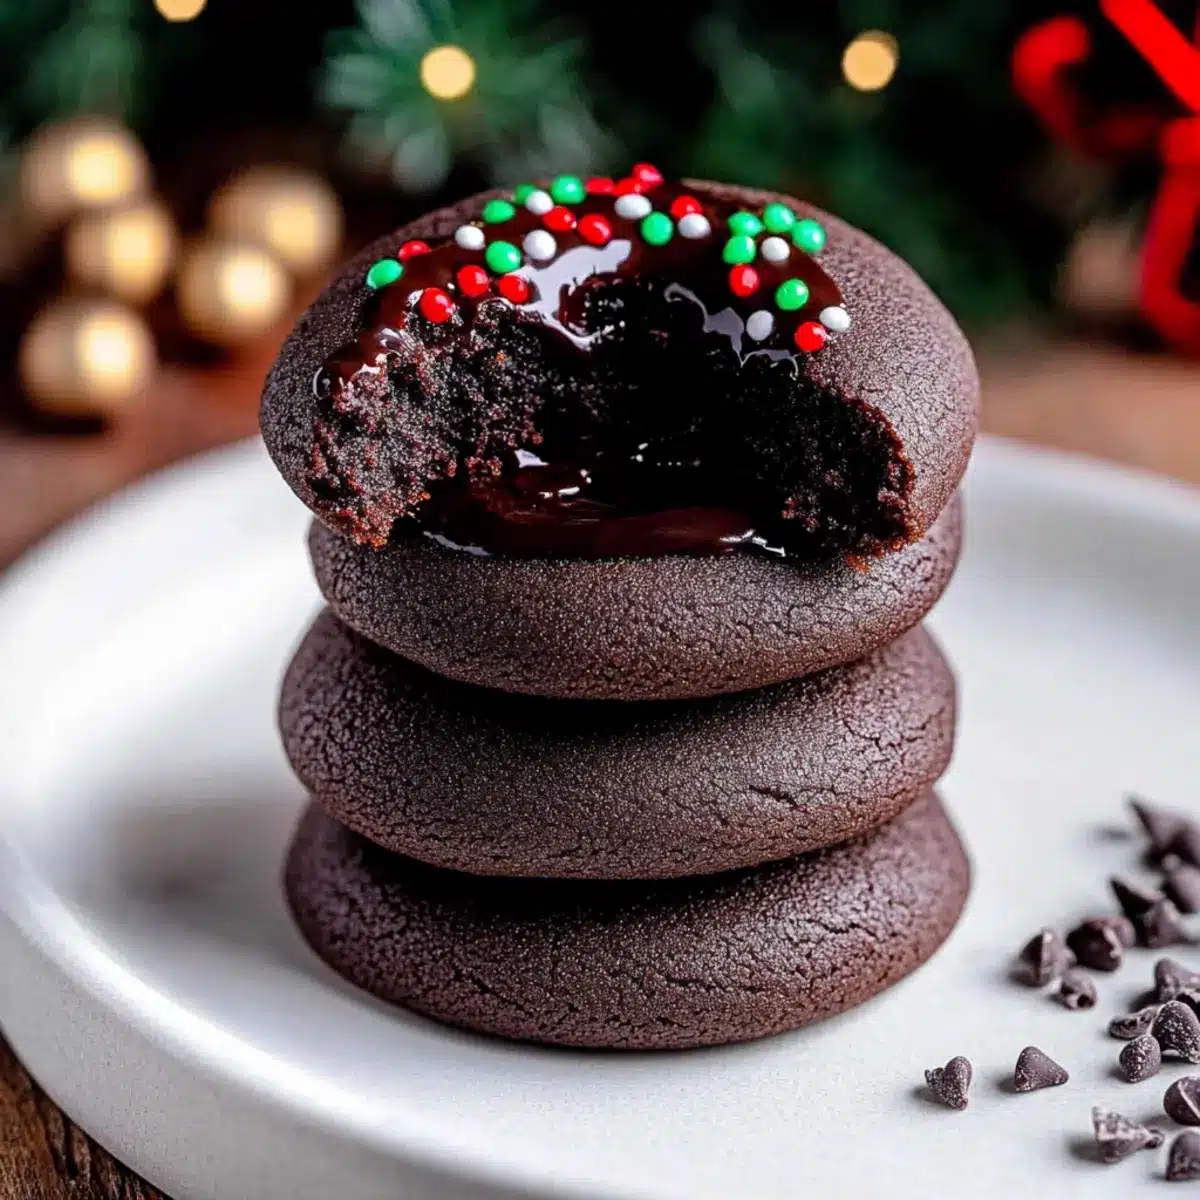
As I stood in my kitchen, the warm scent of melting chocolate enveloped me, transporting me back to childhood holidays filled with laughter and love. Today, I’m excited to share a recipe for Chocolate Thumbprint Cookies that will bring that same joy to your home. These deliciously rich and chewy cookies, with their velvety ganache centers, are not only easy to whip up but also the ultimate crowd-pleaser. Perfect for gatherings or cozy nights in, they make any occasion feel special. With just a handful of simple ingredients, you can create a melt-in-your-mouth experience that’ll impress friends and family alike. So, are you ready to dive into the delightful world of these scrumptious cookies? Let’s get baking!
Why You’ll Love These Cookies
Indulgent Flavor: Each bite of these Chocolate Thumbprint Cookies offers a rich, chewy depth that chocolate lovers will adore.
Easy to Make: With minimal ingredients and straightforward steps, they’re perfect for both novice and seasoned bakers alike.
Perfect for Any Occasion: Whether you’re celebrating the holidays or just craving a sweet treat, these cookies are sure to impress your guests.
Versatile Twist: Feel free to customize the ganache with mint or fruit preserves for a unique twist that fits your taste! Check out our Chocolate Chip Banana Bars for more fun flavor ideas.
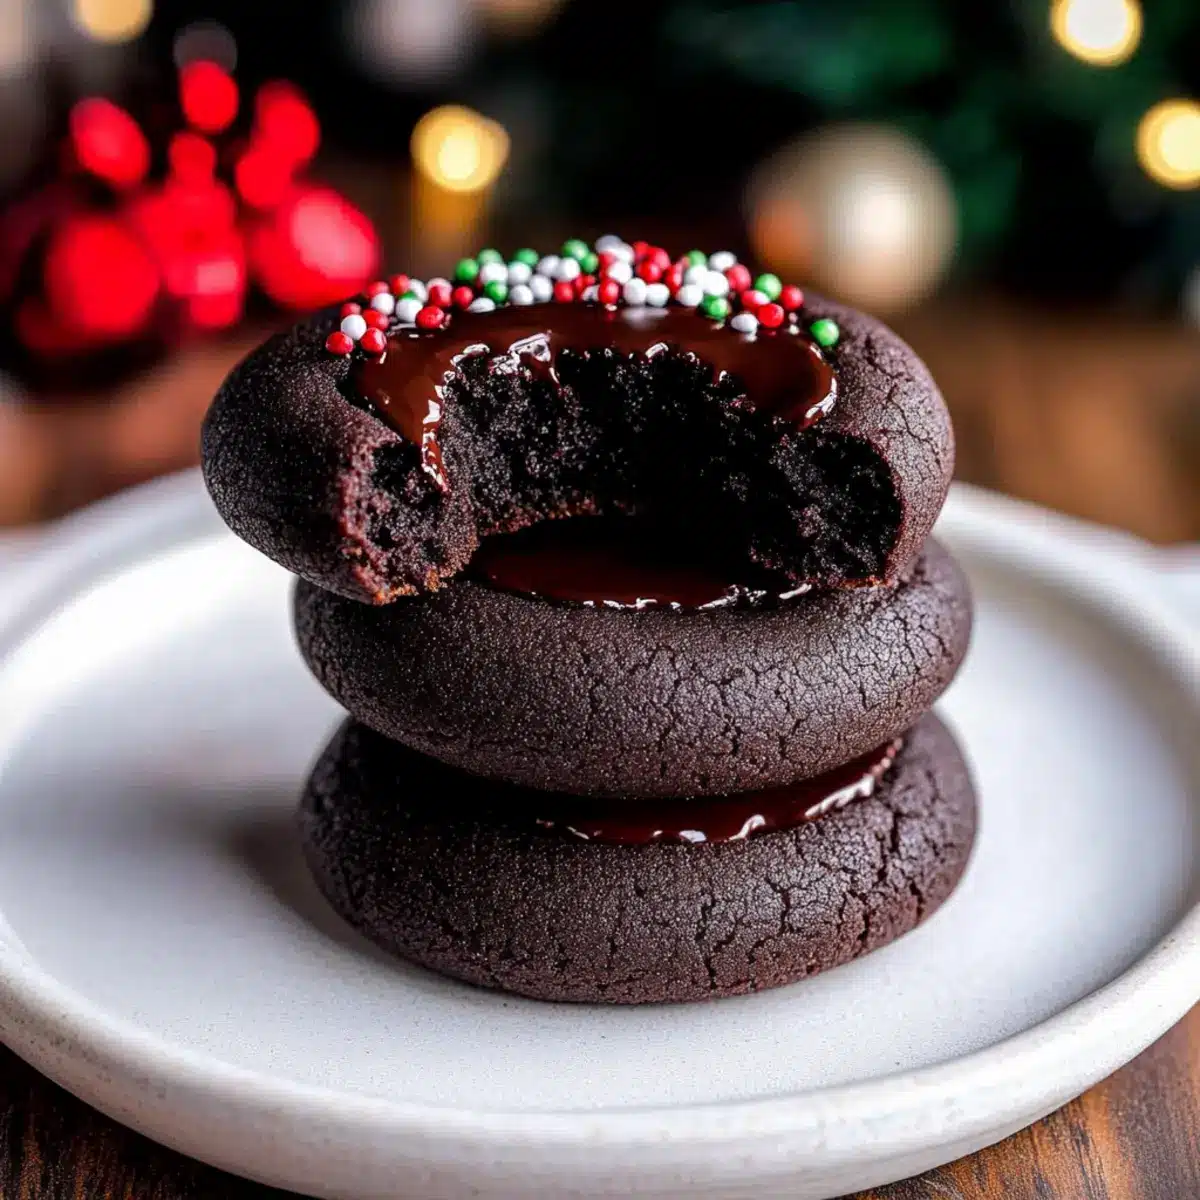
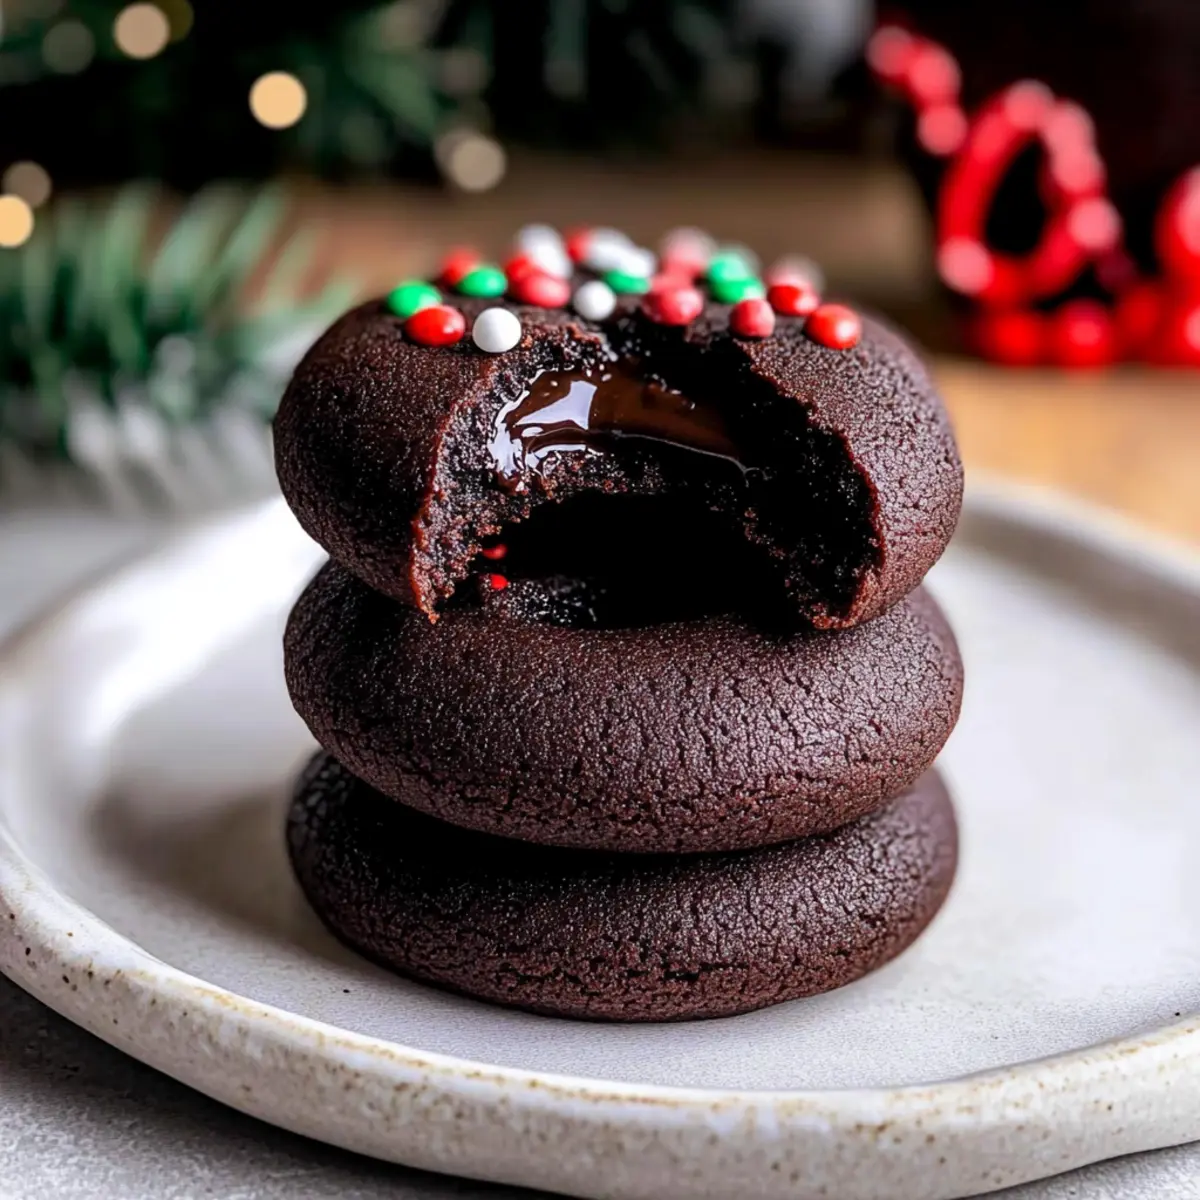
Impressive Presentation: The charming thumbprint feature and silky ganache make these cookies visually stunning, ideal for gifting or serving at parties.
Get ready to make an unforgettable batch of cookies that will have everyone coming back for more!
Chocolate Thumbprint Cookies Ingredients
Get ready to create mouthwatering cookies!
For the Cookie Dough
- All-Purpose Flour – Provides structure; ensure it is spooned and leveled to avoid excess.
- Dutch Process Cocoa Powder – Gives rich chocolate flavor and color; substitute with regular cocoa if needed, but expect a flavor variation.
- Salt – Enhances flavor; do not omit for best results.
- Baking Powder – Creates a light texture; ensure it’s fresh for optimal rise.
- Unsalted Butter – Adds moisture and richness; make sure it’s softened at room temperature.
- Light Brown Sugar – Provides moisture and a hint of caramel flavor; can be swapped with granulated sugar for less complexity.
- Granulated White Sugar – Contributes sweetness and texture; can substitute entirely with white sugar if preferred.
- Egg Yolks – Add richness and moisture; use at room temperature for best incorporation.
- Vanilla Bean Paste or Extract – Adds depth of flavor; substitute with extract, using 1 tsp instead of 1.5 tsp if necessary.
For the Ganache Filling
- Semi-Sweet Chocolate Chips – Used for the ganache filling; opt for high-quality chips for best taste.
- Heavy Whipping Cream – Creates a smooth, rich ganache; use half and half as a thinner substitute if necessary.
For Decoration
- Nonpareils (optional) – For decoration; add for a festive touch if desired.
These Chocolate Thumbprint Cookies will elevate your cookie game and become a beloved recipe in your home!
Step‑by‑Step Instructions for Chocolate Thumbprint Cookies
Step 1: Preheat Oven and Prepare Baking Sheets
Begin by preheating your oven to 350°F (175°C). While the oven warms, line two baking sheets with parchment paper to prevent the cookies from sticking. This will create an easy cleanup experience while ensuring your Chocolate Thumbprint Cookies bake evenly and come off without a hitch.
Step 2: Mix Dry Ingredients
In a medium mixing bowl, whisk together 1 ¼ cups of all-purpose flour, 1/3 cup Dutch process cocoa powder, ¼ teaspoon salt, and ½ teaspoon baking powder. This combination of dry ingredients is essential for structure and flavor, so make sure to blend them well before setting the mixture aside for the next step.
Step 3: Cream Butter and Sugars
In a large mixing bowl, cream together ½ cup softened unsalted butter, ½ cup light brown sugar, and ¼ cup granulated sugar using an electric mixer on medium speed for about 2 minutes. The mixture should become light and fluffy, indicating that the sugars have been well incorporated, paving the way for your rich Chocolate Thumbprint Cookies.
Step 4: Add Eggs and Vanilla
Next, incorporate 2 room temperature egg yolks and 1 ½ teaspoons vanilla bean paste (or extract) into the creamed mixture. Mix on low speed until the ingredients are fully combined and the batter appears light and fluffy. This will enhance the cookies’ richness and add depth of flavor, making your cookies irresistibly tasty.
Step 5: Combine Mixtures
Gradually add the dry ingredient mixture to your butter and sugar combination. Mix gently, just until combined, to avoid overworking the dough. You want the batter to be smooth and cohesive without any visible flour, ensuring a delicious and tender texture for your Chocolate Thumbprint Cookies.
Step 6: Form Cookies
Using a cookie scoop, portion the dough into 34 equal balls (approximately 1 tablespoon each). Roll them between your palms to form smooth balls, then place them on your prepared baking sheets, ensuring they are spaced appropriately to allow for spreading while baking.
Step 7: Create Indentations
Once the dough balls are arranged on the baking sheets, use a 1/4 teaspoon measuring spoon to carefully press into the center of each cookie ball, creating a small well. This indentation will hold the luscious chocolate ganache later, so ensure they are deep enough to contain the filling once baked.
Step 8: Chill Dough
Refrigerate the baking sheets with the formed cookie dough for at least 1 hour. Chilling is crucial for maintaining the cookies’ shape during baking and achieving a beautifully soft and chewy texture that makes these Chocolate Thumbprint Cookies so delightful.
Step 9: Bake Cookies
After chilling, bake the cookie trays in your preheated oven for 9-11 minutes. Watch for the edges to firm up, while the centers remain slightly soft. Once baked, press the indentations once more with the back of your measuring teaspoon if necessary to retain their shape.
Step 10: Prepare Ganache
While the cookies cool, prepare the ganache by heating ½ cup of heavy whipping cream in a small saucepan over medium heat until it just reaches a boil. Pour the hot cream over 1 cup of semi-sweet chocolate chips in a bowl, letting it sit for 1 minute before stirring until the mixture becomes smooth and glossy.
Step 11: Assemble Cookies
Fill each cooled cookie’s indentation with about 1 teaspoon of the smooth ganache you just prepared. Optionally, sprinkle nonpareils over the ganache for a festive touch, adding the perfect finishing detail to your gorgeous Chocolate Thumbprint Cookies.
Step 12: Set Ganache
Finally, place the filled cookies in the refrigerator for 10-15 minutes to allow the ganache to set and firm up. This step allows the rich chocolate ganache to become velvety and stable, ensuring a delightful melt-in-your-mouth experience with every bite of your delicious cookies.
Make Ahead Options
These Chocolate Thumbprint Cookies are perfect for busy home cooks looking to save time! You can prepare the cookie dough up to 24 hours in advance; simply scoop and shape the dough into balls, then place them on a baking sheet and cover tightly with plastic wrap before refrigerating. The ganache can also be made ahead and stored in the refrigerator for up to 3 days. When ready to bake, just chill the dough, bake, and fill with the warmed ganache. By prepping ahead, you’ll have these delectable cookies ready with minimal effort, ensuring every batch is just as delicious as if made fresh.
Expert Tips for Chocolate Thumbprint Cookies
-
Perfect Flour Measurement: Always spoon and level your flour to prevent excess, which can yield dry cookies. Accurate measurements are key to perfect Chocolate Thumbprint Cookies!
-
Chill for Shape: Make sure to chill the dough for at least one hour; this helps maintain the cookie shape while baking, resulting in a beautiful and chewy texture.
-
Gooey Ganache: Use high-quality semi-sweet chocolate chips for the ganache to truly elevate the flavor of your cookies. The better the chocolate, the richer the experience!
-
Indenting Technique: For perfect thumbprints, use a measure spoon to create deep enough wells in the dough balls. If they lose shape while baking, gently re-press them again as soon as they come out of the oven.
-
Storage Tips: Keep your cookies in an airtight container at room temperature for up to three days. For longer storage, freeze them for up to two weeks, ensuring they maintain their delightful texture and flavor!
Chocolate Thumbprint Cookies Variations
Feel free to get creative with these delightful cookies and add your personal touch!
-
Minty Fresh: Add mint extract to the ganache for a refreshing twist that elevates the chocolate flavor. Imagine the blend of chocolate and mint creating a nostalgic taste that can transport you to peppermint-laden holidays.
-
Fruity Delight: Substitute the ganache with your favorite fruit preserves, such as raspberry or apricot, for a burst of fruity flavor in each bite. This unexpected twist can turn your cookies into a delightful surprise for your taste buds!
-
Gluten-Free: Use Bob’s Red Mill 1 to 1 gluten-free baking flour to adapt the recipe for those with gluten sensitivities, ensuring everyone can enjoy these treats without missing out!
-
Nutty Addition: Fold in chopped nuts, like pecans or hazelnuts, into the cookie dough for an extra crunch and a rich flavor that complements the chocolate beautifully. The texture can elevate these cookies to a whole new level of deliciousness!
-
Spice it Up: Add a pinch of cinnamon or espresso powder to the cookie dough for a warming twist that enhances the chocolate flavor. The lovely aromatic spice can create an entirely new treat that’s perfect for cozy evenings.
-
Dairy-Free: For a dairy-free version, swap the butter for coconut oil and use dairy-free chocolate chips for the ganache. This way, you can still indulge without compromising on your dietary preferences!
-
Double Chocolate: For an even richer experience, replace half of the all-purpose flour with additional cocoa powder. The result will be intensely chocolaty cookies that true chocolate lovers will absolutely adore!
-
Decorative Options: Use colorful sprinkles or edible glitter instead of nonpareils for added flair. Make your cookies pop with color, turning them into show-stoppers for any festive occasion!
As you explore these variations, you might also enjoy checking out our silky Dark Chocolate Coffin for more decadent chocolate experiences or the delightful Chocolate Chip Banana Bars for a fun twist on classic flavors! Let your creativity shine!
How to Store and Freeze Chocolate Thumbprint Cookies
Room Temperature: Store cookies in an airtight container at room temperature for up to 3 days to keep them fresh and chewy.
Fridge: If you prefer chilled cookies, you can keep them in the fridge for up to 5 days. Just make sure they are wrapped well to prevent drying out!
Freezer: Freeze Chocolate Thumbprint Cookies in an airtight container or zip-top bag for up to 2 weeks. Layer parchment between cookies to prevent sticking.
Reheating: Thaw frozen cookies in the fridge overnight or at room temperature for a couple of hours before enjoying. You can also warm them for a few seconds in the microwave for that fresh-baked feel!
What to Serve with Rich Chocolate Thumbprint Cookies
Indulging in these delightful cookies is just the beginning; let’s create the perfect spread to elevate your dessert experience.
-
Creamy Vanilla Ice Cream: The cool, creamy texture of vanilla ice cream beautifully contrasts the rich chocolate, while its sweet creaminess helps balance the indulgent flavors.
-
Fresh Berries: A medley of raspberries and strawberries adds a bright, tart element, cutting through the richness of the cookies and inviting freshness to your plate.
-
Rich Hot Chocolate: Embrace the chocolate theme with a warm cup of hot cocoa. The soothing beverage pairs perfectly, creating a cozy atmosphere for any gathering.
-
Chocolate Drizzle: Enhance the chocolate experience by drizzling some melted chocolate over your cookies. This not only amplifies the flavor but makes them look even more tempting.
-
Savory Cheesecake: A slice of plain cheesecake makes a wonderful contrast, offering a creamy and slightly tangy flavor that complements the sweetness of the cookies.
-
Nutty Coffee: Pairing these cookies with a cup of rich espresso or nutty coffee creates a delightful balance, enhancing both the cookie’s flavors and the drink’s aromas.
-
Whipped Cream Topping: Add a dollop of freshly whipped cream atop each cookie for an added touch of elegance and a creamy flavor that perfectly complements the chocolate.
-
Mint Tea: For a refreshing option, serve your cookies with a cup of mint tea. The bright and invigorating taste will cleanse your palate between bites, showcasing the cookies’ rich texture.
These pairings will enhance your dessert experience and create a beautiful presentation that is sure to impress!

Chocolate Thumbprint Cookies Recipe FAQs
How do I choose ripe ingredients for these cookies?
Absolutely! For the best results, ensure your unsalted butter is softened to room temperature, allowing it to cream with sugars smoothly. Egg yolks should also be at room temperature for easy mixing. Opt for high-quality cocoa powder and chocolate chips, as these will significantly enhance the rich flavor of your Chocolate Thumbprint Cookies.
How should I store my cookies?
Very! To keep your cookies fresh and chewy, store them in an airtight container at room temperature for up to 3 days. If you’d like to extend their life, they can be kept in the fridge for up to 5 days. Just be sure to wrap them well to prevent them from drying out.
Can I freeze Chocolate Thumbprint Cookies?
Of course! To freeze, place the cookies in an airtight container or a zip-top bag for up to 2 weeks. It’s a good idea to layer parchment paper between cookies to prevent them from sticking together. When you’re ready to enjoy them, thaw in the fridge overnight or at room temperature for a couple of hours. If you want a warm treat, pop them in the microwave for a few seconds!
What if my cookies spread too much while baking?
No worries! If your cookies spread too much, it might be due to not chilling the dough long enough or using too much butter. Make sure to chill the dough for at least 1 hour before baking. If they lose their shape in the oven, gently press down the centers again to maintain their indents right after taking them out.
Can I make these cookies gluten-free?
Absolutely! For a gluten-free version of these Chocolate Thumbprint Cookies, I recommend using a 1-to-1 baking flour, such as Bob’s Red Mill, which will provide a similar texture and flavor. Just ensure that all other ingredients, like baking powder and chocolate, are gluten-free as well.
Are there any allergy considerations?
Yes! These cookies contain common allergens such as gluten (from all-purpose flour), eggs, and dairy (from butter and cream). If serving to guests, make sure to check for allergies beforehand, and consider substitutions like gluten-free flour or dairy-free chocolate chips to accommodate dietary needs.
Irresistible Chocolate Thumbprint Cookies with Silky Ganache
Ingredients
Equipment
Method
- Preheat your oven to 350°F (175°C) and line two baking sheets with parchment paper.
- Whisk together flour, cocoa powder, salt, and baking powder in a medium bowl.
- Cream together butter, light brown sugar, and granulated sugar until light and fluffy.
- Add egg yolks and vanilla, mixing until combined.
- Gradually add dry ingredient mixture to the creamed mixture, mix gently.
- Using a cookie scoop, portion the dough into 34 equal balls and place on prepared baking sheets.
- Press into the center of each cookie ball to create a small well.
- Chill the formed dough in the refrigerator for at least 1 hour.
- Bake the cookies for 9-11 minutes, then press the wells again if necessary.
- Heat cream in a saucepan, pour over chocolate chips, and stir until smooth.
- Fill the indentations of cooled cookies with ganache, optionally sprinkle nonpareils.
- Refrigerate filled cookies for 10-15 minutes to set ganache.
Leave a Reply