
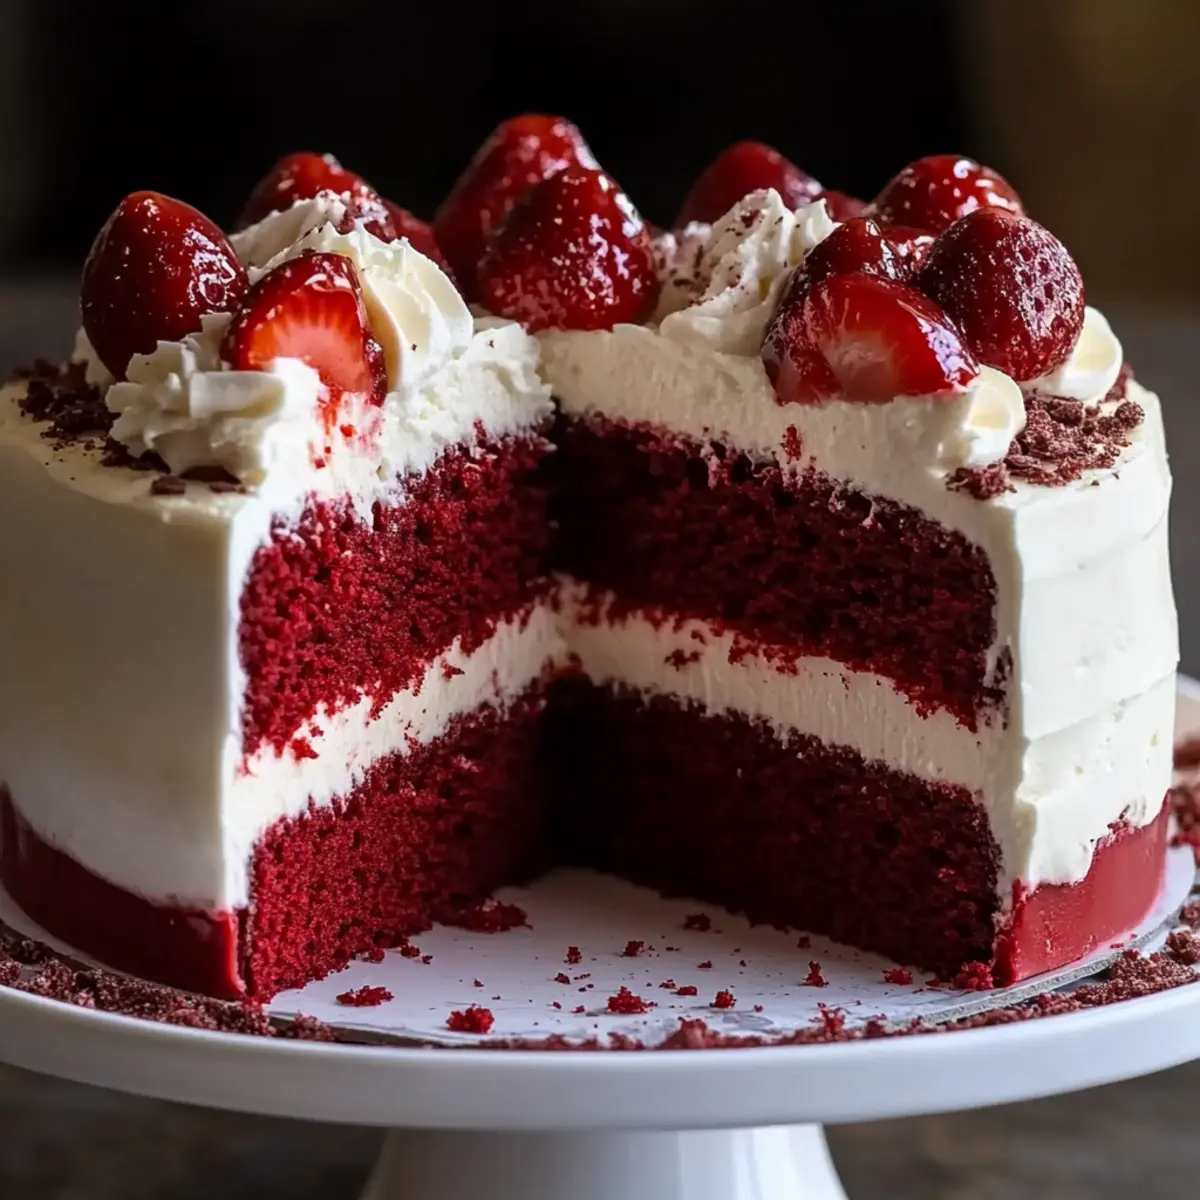
As I sifted through my baking ingredients on a rainy afternoon, a thought struck me: why not create a showstopper that marries two beloved desserts into one gorgeous masterpiece? Enter the Decadent Red Velvet Cheesecake Cake—an indulgent blend that effortlessly combines the velvety richness of red velvet cake with a creamy cheesecake layer at its heart. This stunning dessert isn’t just a feast for the eyes; it boasts the perfect balance of textures and flavors, making it an unforgettable centerpiece for any gathering. Plus, it’s surprisingly approachable for home bakers, with quick prep time, and easy-to-follow steps. Whether you’re celebrating a special occasion or simply treating yourself, this cake is sure to brighten your day. Curious about how to whip up this delicious masterpiece? Let’s dive in!
Why is this cake a must-try?
Irresistible combination of flavors: The creamy cheesecake layer perfectly complements the moist, rich red velvet, offering a delectable fusion that will satisfy any dessert lover.
Stunning presentation: Its vibrant color and layered design make it a showstopper, ideal for celebrations or gatherings.
Versatile for any occasion: Whether served at a birthday or a casual weeknight dinner, it’s sure to impress.
Easy variations: Feeling adventurous? Transform it into red velvet cheesecake cupcakes or add a luscious chocolate ganache drizzle for extra flair.
Time-saving option: Despite its impressive appearance, this recipe is straightforward, giving you more time to enjoy with loved ones while indulging in a delicious piece of cake. If you love creative desserts, check out our Berry Peach Cheesecake for another stunning option!
Red Velvet Cheesecake Cake Ingredients
For the Red Velvet Cake
- All-purpose flour – Structure and stability; substitute with gluten-free flour for a gluten-free version.
- Granulated sugar – Sweetness and moisture; can be replaced with brown sugar for a slightly different taste.
- Cocoa powder – Provides chocolate flavor and color; use natural cocoa instead of Dutch-processed for proper reaction.
- Baking soda – Leavening agent; do not substitute with baking powder.
- Buttermilk – Adds moisture and tanginess; substitute with milk and vinegar (1 cup milk + 1 tbsp vinegar).
- Vegetable oil – Moisture and richness; can be substituted with melted butter.
- Eggs – Binding and moisture; can use flax eggs for a vegan option.
- Red food coloring – Enhances appearance; omit for a natural look or use beet juice for color.
- Vanilla extract – Flavor enhancer; no substitutes necessary.
For the Cheesecake Layer
- Cream cheese – Creamy texture and flavor base; use a vegan cream cheese for a dairy-free option.
- Granulated sugar – Sweetness; can substitute with powdered sugar for a smoother texture.
- Sour cream – Adds tanginess; substitute with Greek yogurt for similar flavor.
- Vanilla extract – Flavor enhancer; optional.
- Eggs – Setting agent; replace with a chia seed mixture for vegan adaptations.
For the Cream Cheese Frosting
- Cream cheese – Base for frosting; must be full-fat for best results.
- Butter – Adds creaminess and stability; use plant-based butter for dairy-free option.
- Powdered sugar – Sweetness and structure; adjust based on desired sweetness.
- Vanilla extract – Flavor enhancer; optional.
Step‑by‑Step Instructions for Red Velvet Cheesecake Cake
Step 1: Preheat and Prepare Pans
Begin by preheating your oven to 350°F (175°C) and greasing three 9-inch round cake pans. Ensure the pans are well-coated to prevent sticking. This initial preparation is essential for achieving beautifully baked red velvet cake layers. Set your pans aside while you gather the ingredients, readying yourself for the delightful journey ahead.
Step 2: Make the Red Velvet Cake Batter
In a large mixing bowl, whisk together the all-purpose flour, granulated sugar, cocoa powder, baking soda, and a pinch of salt until well combined. In another bowl, mix the buttermilk, vegetable oil, eggs, red food coloring, and vanilla extract until smooth. Carefully combine the wet and dry ingredients, stirring gently to avoid overmixing, resulting in a vibrant red batter full of flavor.
Step 3: Bake the Red Velvet Layers
Evenly distribute the red velvet cake batter into the prepared pans, filling each about two-thirds full. Place the pans in the preheated oven and bake for 40-50 minutes. Keep an eye out for a springy top and a toothpick inserted into the center emerging clean. Once done, remove them from the oven and allow them to cool in the pans for 10 minutes.
Step 4: Prepare the Cheesecake Layer
While the cakes cool, get started on the cheesecake layer. In a mixing bowl, beat the cream cheese and granulated sugar until creamy and smooth. Add in the sour cream, vanilla extract, and eggs, mixing gently just until blended. This velvety cheesecake filling is essential for the rich contrast in your Red Velvet Cheesecake Cake.
Step 5: Bake the Cheesecake
Pour the cheesecake mixture into a greased 9-inch round pan, smoothing the top with a spatula. To prevent cracking, place this pan in a larger baking dish filled with hot water, creating a water bath. Bake at 325°F (160°C) for 50-60 minutes, or until the edges are set but the center stays slightly jiggly. Allow it to cool completely afterwards.
Step 6: Cool the Cakes
After the cakes have cooled for 10 minutes, gently remove them from the pans and transfer them to wire racks. Ensure they cool completely, as cooling is vital to prevent melting or ruining your frosting. The cheesecake also needs a cooling period; refrigerate it for at least 4 hours or overnight to achieve the perfect texture.
Step 7: Assemble Your Cake
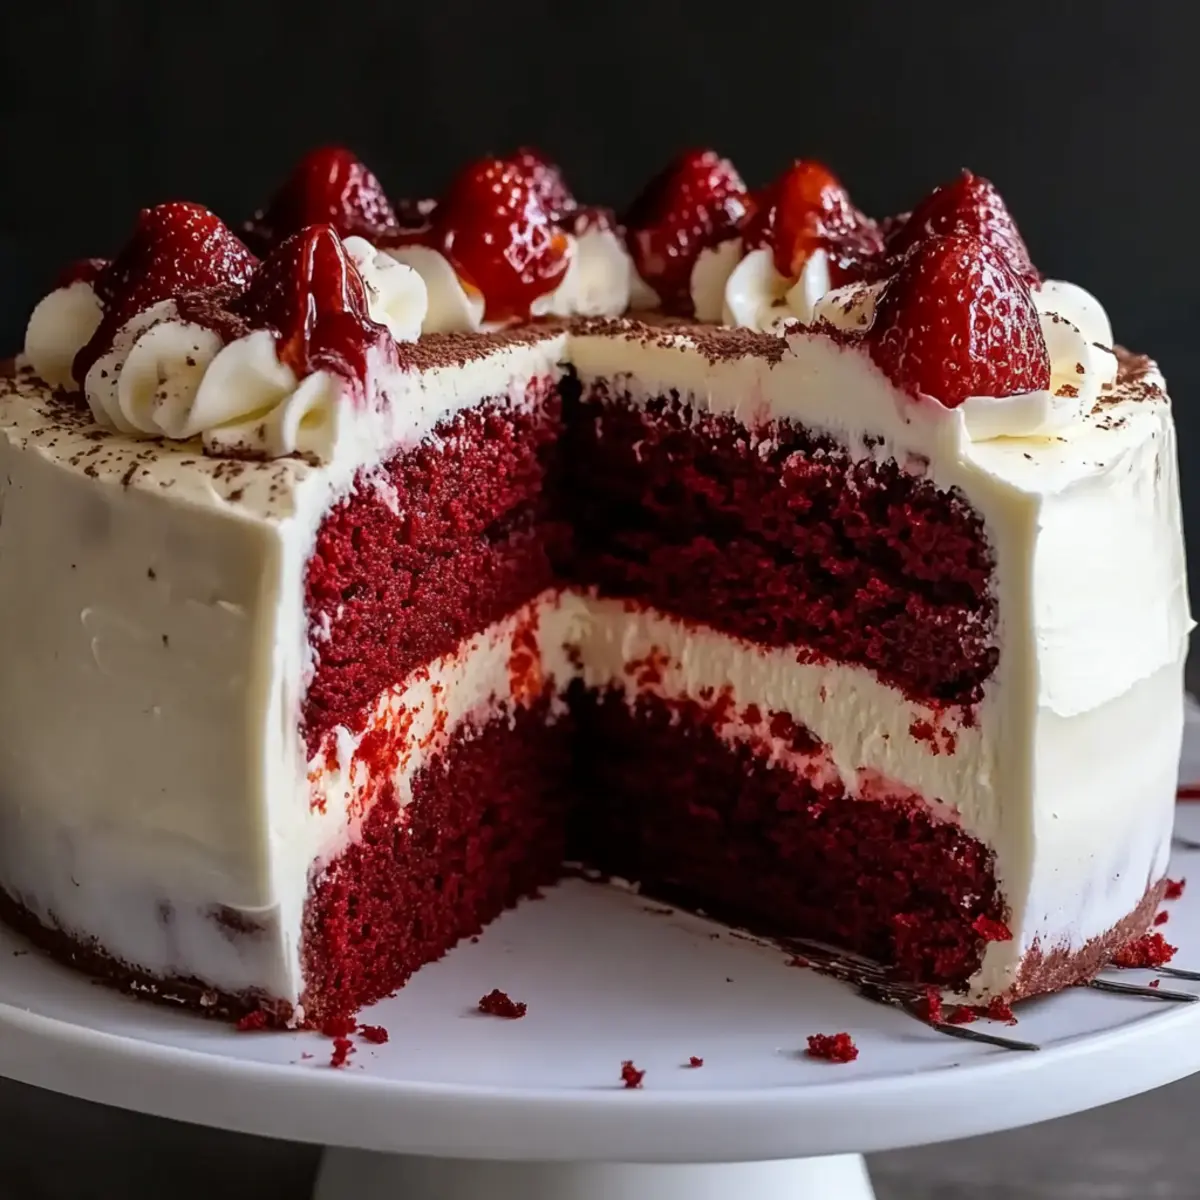
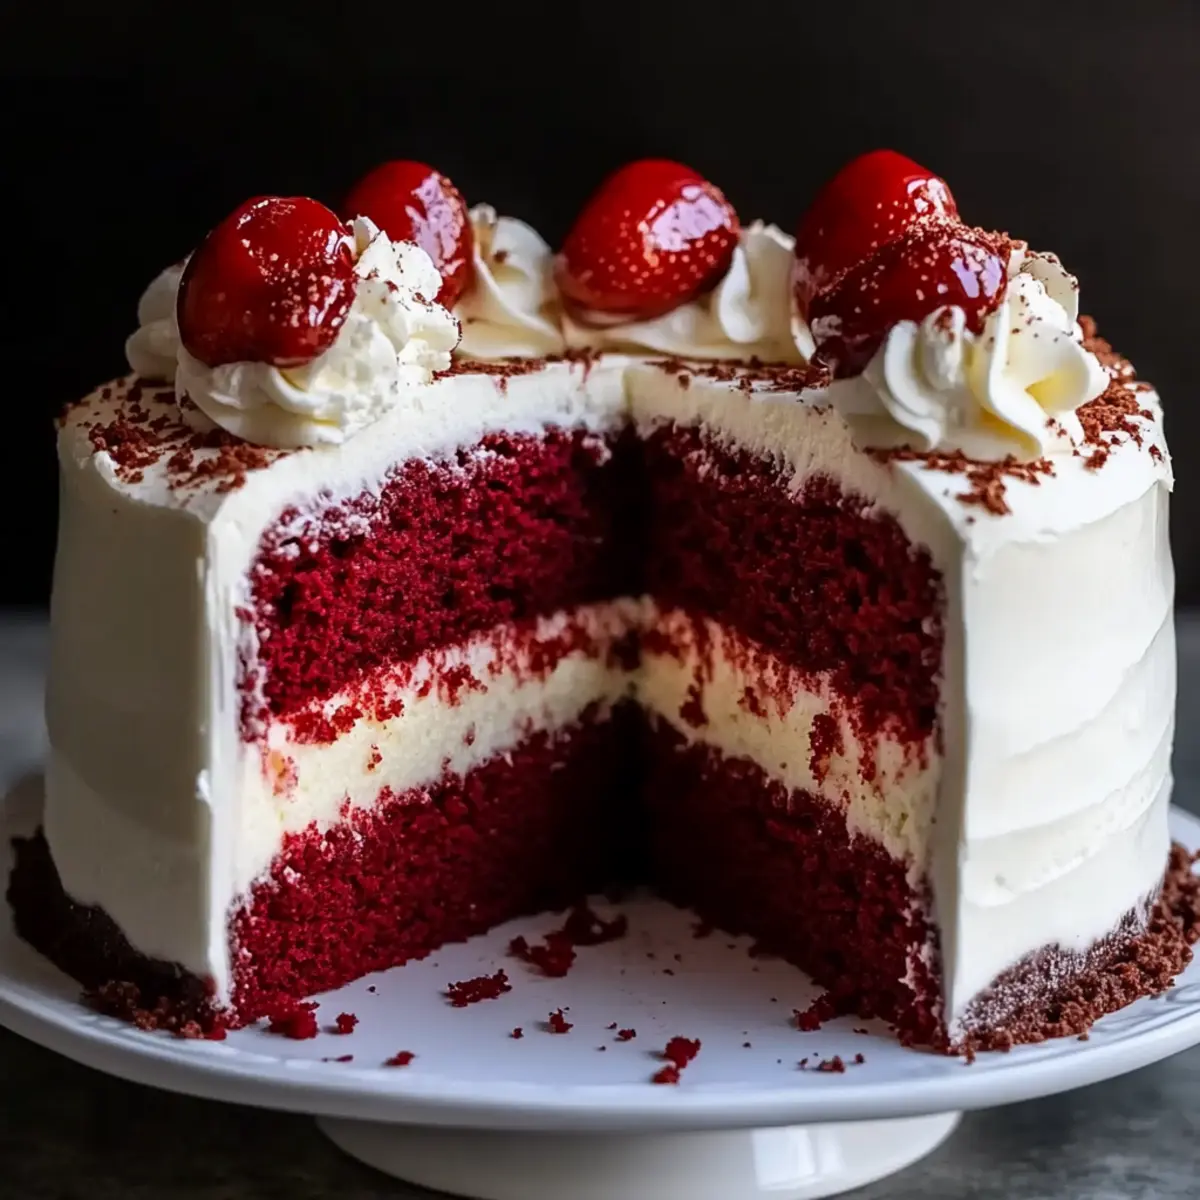
Once everything is completely cooled, begin to assemble your Red Velvet Cheesecake Cake. Place one layer of red velvet cake on a serving plate, then carefully add the chilled cheesecake layer on top. Follow with a second red velvet layer, ensuring they align perfectly for a stunning presentation.
Step 8: Frost the Cake
For the final touch, prepare your cream cheese frosting by beating together cream cheese, butter, powdered sugar, and vanilla until creamy and smooth. Generously frost the top and sides of the assembled cake, creating a delightful visual that invites everyone to indulge. Your beautifully layered creation is now ready to shine at your next celebration!
Expert Tips for Red Velvet Cheesecake Cake
- Water Bath Magic: Always use a water bath when baking the cheesecake layer to prevent unsightly cracks and to ensure a smooth, creamy texture.
- Cool Completely: Allow both the cake layers and cheesecake layer to cool completely before assembly. This prevents melting of the frosting and maintains the structure of your Red Velvet Cheesecake Cake.
- Avoid Overmixing: When combining ingredients for both the cake and cheesecake layers, mix just until combined. Overmixing can lead to dense textures.
- Chill Before Serving: For the best flavor and texture, refrigerate the assembled cake for a few hours before serving. It allows the flavors to meld beautifully.
- Store Properly: If you have leftovers, wrap tightly in plastic wrap or store in an airtight container. This Red Velvet Cheesecake Cake can last up to 5 days in the fridge!
Red Velvet Cheesecake Cake Variations
Feel free to get creative and tailor this delicious cake to your preferences—the possibilities are as rich as the cake itself!
- Cupcake Transformation: Turn this cake into red velvet cheesecake cupcakes by filling cupcake liners with batter and a dollop of cheesecake before baking.
- Flavor Twists: Experiment with almond or lemon extract instead of vanilla for a zesty variation that brightens each bite.
- Chocolate Decadence: Top with a gooey chocolate ganache instead of frosting for an even richer taste that chocolate lovers will adore.
- Layered Delight: For an indulgent treat, sandwich whipped cream between layers of cake and cheesecake for a delightful surprise.
- Dairy-Free Option: Use vegan cream cheese and plant-based butter in the frosting to create a lactose-free version without sacrificing taste.
- Color Change: For a different look, skip the food coloring and use beet juice for natural coloring, giving it a fun and earthy feel.
- Reduced Sugar: Substitute sweetener or adjust the sugar levels in the cake and frosting without compromising flavor for a lighter version.
- Add Some Heat: Sprinkle a bit of cinnamon or cayenne in the cake batter for a surprising warm kick that pairs well with the creamy frosting.
Looking for more dessert ideas? Test out our delightful Black Velvet Cupcakes or try an Iced Blueberry Cheesecake Latte for a refreshing treat!
Make Ahead Options
These Decadent Red Velvet Cheesecake Cake layers are perfect for busy home cooks looking to save time! You can prepare both the red velvet cake and cheesecake layers up to 24 hours in advance, allowing the flavors to meld beautifully. Simply bake, cool, and wrap each layer tightly in plastic wrap before refrigerating to maintain their moistness. If you prefer, the assembled cake can be refrigerated for up to 2 days. Just remember to frost it on the day you plan to serve it for the best texture and taste. This make-ahead strategy not only simplifies your baking process but also ensures that your cake remains just as delightful and impressive as if made fresh!
What to Serve with Decadent Red Velvet Cheesecake Cake
As you prepare to indulge in this rich and luxurious treat, consider some delightful pairings that will elevate your dessert experience.
-
Vanilla Ice Cream: A classic accompaniment that adds a creamy, cool element to your cake, balancing its richness perfectly.
-
Fresh Berries: A burst of juicy berries like strawberries or raspberries adds a refreshing zest that contrasts the cake’s sweetness.
-
Chocolate Ganache: Drizzle warm chocolate ganache over each slice for an extra layer of decadence that chocolate lovers will adore.
-
Espresso or Coffee: The earthy flavors of espresso pair wonderfully, enhancing the cake’s cocoa notes and providing a delightful finish.
-
Whipped Cream: Light and airy whipped cream on the side offers a fluffy counterpoint to the dense cake, making each bite more satisfying.
-
Lemon Zest: A sprinkle of lemon zest over the top brings a bright, citrus note that cuts through the richness, refreshing the palate.
-
Caramel Sauce: Sweet and buttery caramel sauce poured gently over the cake adds a luxurious touch that enhances the indulgence.
-
Sparkling Water: For a refreshing drink option, serve sparkling water with a lemon wedge to cleanse the palette between bites.
-
Tea: A warm cup of chamomile or chai balanced with spices can provide a soothing contrast, making dessert feel like a comforting experience.
-
Chocolate-Covered Strawberries: These decadent treats not only complement the cake with their chocolatey richness but also add a beautiful touch to your dessert table.
How to Store and Freeze Red Velvet Cheesecake Cake
Fridge: Store your assembled Red Velvet Cheesecake Cake in the fridge, tightly wrapped or in an airtight container, for up to 5 days to maintain freshness.
Freezer: If you need to freeze leftovers, wrap each layer individually in plastic wrap and then aluminum foil. The cake can last in the freezer for up to 3 months.
Thawing: To enjoy your frozen cake, transfer it to the fridge the night before serving, allowing it to thaw slowly and retain its texture.
Reheating: If you prefer it warm, place individual slices in the microwave for about 15-20 seconds. Enjoy the delightful flavors without losing the cake’s creamy texture!

Red Velvet Cheesecake Cake Recipe FAQs
How do I choose ripe ingredients for the cake?
Absolutely! For a perfect texture, use fresh ingredients. Ensure your eggs are at room temperature for better mixing, and check that your cream cheese is soft to create a smooth frosting. Avoid using any ingredients that show signs of spoilage, like dark spots on eggs or an off smell from the cream cheese.
What’s the best way to store leftover Red Velvet Cheesecake Cake?
Very good question! Store leftover cake in the fridge, tightly wrapped or in an airtight container, for up to 5 days. This keeps it fresh and delicious! If you’re planning to enjoy it later, consider freezing it instead. Just remember to wrap each layer individually in plastic wrap and then aluminum foil to prevent freezer burn.
Can I freeze the Red Velvet Cheesecake Cake?
Absolutely! If you want to freeze your cake, I recommend wrapping each layer separately in plastic wrap before placing them in a freezer-safe bag. This prevents them from getting freezer burn. The cake can be stored in the freezer for up to 3 months. When you’re ready to enjoy it, simply transfer it to the refrigerator the night before serving to thaw gently.
What if my cheesecake cracks while baking?
It happens! If your cheesecake cracks, don’t worry—you can easily cover it with frosting when assembling your cake. To prevent cracking, use a water bath during baking, which keeps the baking environment moist. If you see cracks forming, reduce the oven temperature slightly to help it bake more evenly.
Are there any dietary considerations I should be aware of?
Indeed, if you or your guests have dietary restrictions, consider using vegan cream cheese and flax eggs for a dairy-free and egg-free version of the cake. Also, for gluten-free options, swap the all-purpose flour for a gluten-free blend. Always check ingredient labels to avoid hidden allergens.
How long should I let the cheesecake cool before assembling the cake?
Great question! Allow the cheesecake to cool in the pan for at least 1 hour at room temperature, then refrigerate it for a minimum of 4 hours or overnight for best texture. It’s crucial that both the cheesecake and cake layers are completely cool before assembly to prevent the frosting from melting.
Irresistible Red Velvet Cheesecake Cake for Your Next Celebration
Ingredients
Equipment
Method
- Preheat your oven to 350°F (175°C) and grease three 9-inch round cake pans.
- In a large mixing bowl, whisk together flour, sugar, cocoa powder, baking soda, and a pinch of salt.
- In another bowl, mix buttermilk, vegetable oil, eggs, food coloring, and vanilla until smooth. Combine with dry ingredients.
- Distribute batter into pans, filling about two-thirds full. Bake for 40-50 minutes.
- Cool cakes in pans for 10 minutes, then transfer to wire racks.
- Beat cream cheese and sugar until smooth. Add sour cream, vanilla, and eggs, mix until blended.
- Pour cheesecake mixture into a greased 9-inch round pan, place in a water bath, and bake at 325°F (160°C) for 50-60 minutes.
- Cool cheesecake in the fridge for at least 4 hours or overnight.
- Assembly: Place one red velvet layer on a plate, add cheesecake layer, then another red velvet layer on top.
- Frost the top and sides with cream cheese frosting, and serve.
Leave a Reply