
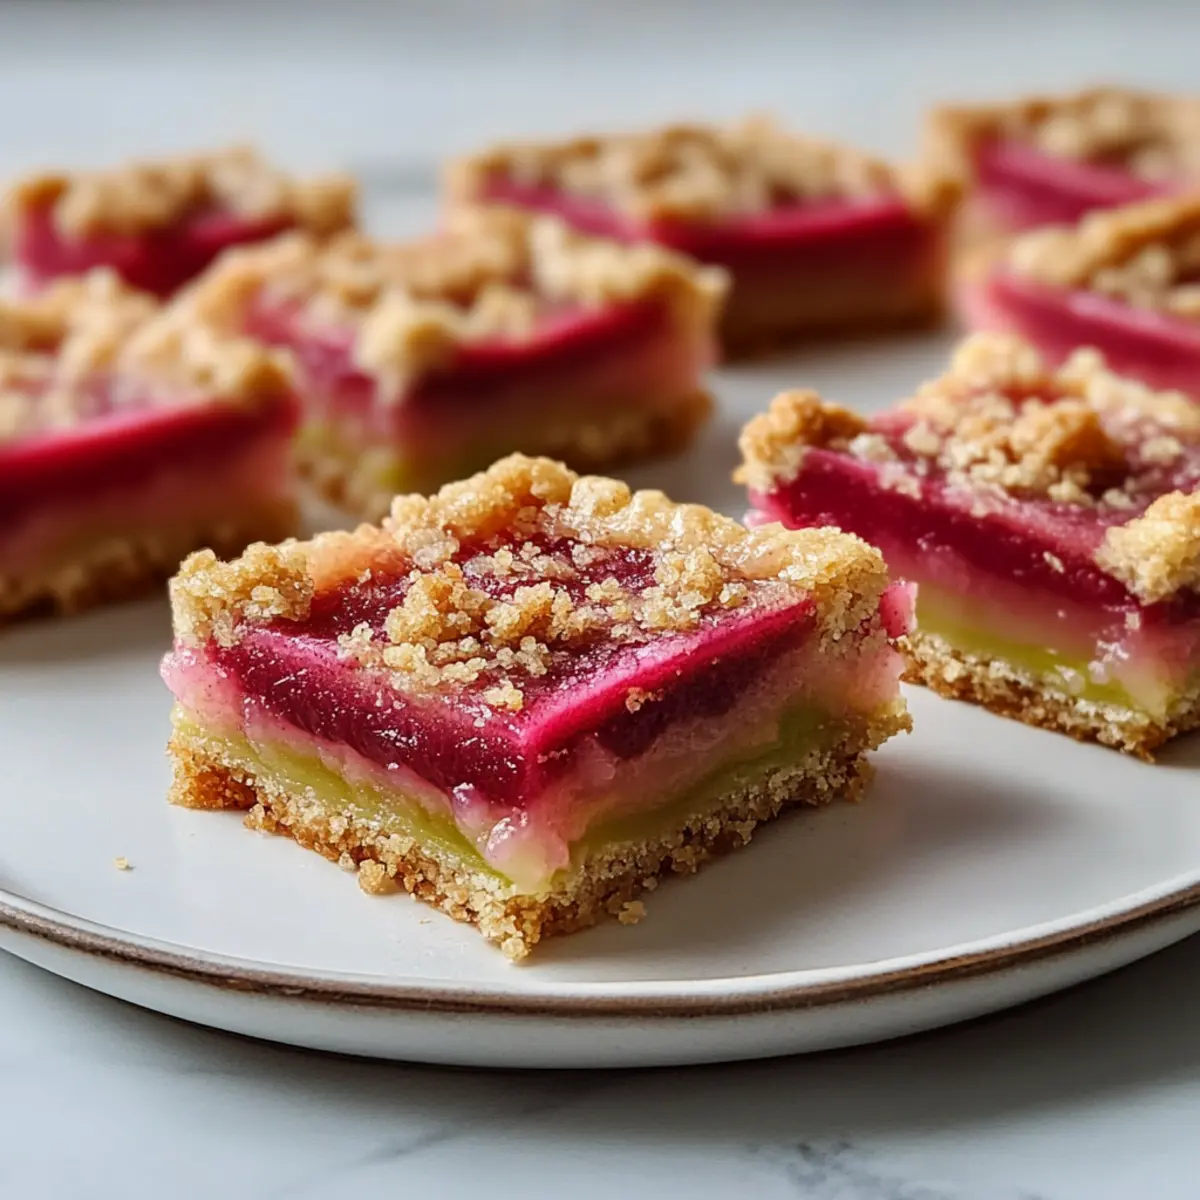
As I strolled through the local farmer’s market, the vibrant green stalks of rhubarb caught my eye, instantly transporting me to sunny spring afternoons spent in my grandmother’s kitchen. This inspired me to whip up a batch of Rhubarb Dream Bars, a delightful blend of a buttery crust and a tangy rhubarb filling that is refreshingly light. This recipe is not just quick to prepare; it’s also gluten-free-friendly, making it a perfect crowd-pleaser for your next gathering. With minimal fuss and common pantry ingredients, you’ll be boasting about these bars to friends and family in no time. Ready to impress your taste buds and bring spring to your table? Let’s dive into this scrumptious recipe!
Why Are Rhubarb Dream Bars So Irresistible?
Bright Flavors: The tartness of fresh rhubarb combined with a buttery crust creates a delightful balance that tantalizes your taste buds and screams springtime.
Quick and Easy: With minimal preparation time, these bars are perfect for busy bakers looking for a delicious dessert without spending hours in the kitchen.
Versatile Treat: Whether served chilled at a picnic or as a sweet ending to dinner, these bars adapt beautifully to any occasion, just like my favorite Summer Berry Peach dessert.
Crowd-Pleasing Goodness: With their light texture and bold flavors, these bars are bound to be a hit, making them the ideal choice for your next gathering.
Healthier Option: Made with simple, whole ingredients and a gluten-free substitute available, you can indulge without the guilt!
Rhubarb Dream Bars Ingredients
• Get ready to create a delightful treat!
For the Crust
- All-purpose flour – Provides structure for the crust and filling; substitute with a 1:1 gluten-free mix for a gluten-free version.
- Confectioners’ sugar – Adds sweetness and tender texture to the crust; no substitutions recommended unless adjusting sweetness.
- Butter (softened) – Contributes to the buttery flavor and flaky texture; ensure it’s at room temperature for easy mixing.
For the Filling
- White sugar – Sweetens the rhubarb filling; possible to reduce by ½ cup without significantly affecting texture.
- Salt – Enhances flavors; don’t omit as it balances the sweetness.
- Eggs (large, beaten) – Provides structure and moisture; ensure they are fully beaten for best results.
- Chopped fresh rhubarb – The star ingredient with a tart and fruity flavor; you can use frozen rhubarb if thawed and drained well.
Enjoy crafting these Rhubarb Dream Bars and delight in their light and tasty spring essence!
Step‑by‑Step Instructions for Rhubarb Dream Bars
Step 1: Preheat the Oven
Begin by preheating your oven to 350°F (175°C). This step is crucial for achieving that perfect, golden finish on your Rhubarb Dream Bars. Make sure your oven is fully heated before moving on to the next steps to ensure even baking.
Step 2: Prepare the Crust Mixture
In a large mixing bowl, combine 2 cups of all-purpose flour, 1 cup of confectioners’ sugar, and 1 cup of softened butter. Mix until the mixture resembles coarse crumbs. The softness of the butter should help create a uniform texture. This crumbly combination will form the base of your bars, so ensure it is well mixed.
Step 3: Press the Crust into the Pan
Grease a 9×13 inch baking dish, then evenly press the crumbly crust mixture into the bottom. Aim for a smooth, compact layer that covers the base. Once pressed, place the baking dish in the preheated oven and bake for 15 minutes, or until lightly golden around the edges.
Step 4: Mix the Filling Ingredients
While the crust is baking, prepare your filling. In a separate bowl, beat together 3 large eggs, 1 cup of white sugar, 1 teaspoon of salt, and ½ cup of all-purpose flour until smooth and well incorporated. This custard mixture will serve as the perfect backdrop for the tangy rhubarb.
Step 5: Fold in the Rhubarb
Carefully fold 2 cups of chopped fresh rhubarb into the egg mixture until evenly distributed. Take care not to overmix, as you want the rhubarb pieces to remain intact for bursts of flavor throughout your Rhubarb Dream Bars. Ensure the filling is ready to pour when the crust finishes baking.
Step 6: Combine Filling and Crust
Once the crust has baked for 15 minutes, pull it out of the oven and immediately pour the rhubarb filling over the hot crust. Spread it evenly using a spatula for consistent baking. The heat from the crust will help set the filling perfectly as it bakes.
Step 7: Bake the Bars
Return the baking dish to the oven and bake for 40-45 minutes. Keep an eye on the top; it should turn lightly golden and the center should no longer jiggle. This visual cue is essential for ensuring your Rhubarb Dream Bars are set properly.
Step 8: Cool and Slice
Once baked, remove the dish from the oven and allow it to cool completely on a wire rack. This cooling step helps the bars firm up for easy slicing. Once cool, cut into squares or rectangles and serve. Enjoy your delightful Rhubarb Dream Bars cold or at room temperature!
Make Ahead Options
These Rhubarb Dream Bars are perfect for meal prep enthusiasts looking to save time on busy days! You can prepare the crust and filling up to 24 hours in advance. For best results, complete Steps 1-5 of the recipe, then cover the crust and filling separately and refrigerate. This step prevents the crust from becoming soggy and ensures the filling maintains its fresh flavor. When you’re ready to enjoy, simply pour the filling over the freshly baked crust and bake as directed. With these make-ahead options, you’ll have delicious Rhubarb Dream Bars ready to impress with minimal last-minute effort!
Expert Tips for Rhubarb Dream Bars
-
Use Fresh Rhubarb: Ensure you select fresh rhubarb for the best flavor. If using frozen, remember to thoroughly thaw and drain it to avoid excess moisture.
-
Egg Mixing Matters: Be sure to fully beat the eggs before adding them to the filling mixture. This helps achieve a smooth, custard-like texture that binds deliciously with the rhubarb.
-
Proper Cooling Time: Allow the bars to cool completely before slicing. This step is critical for the custard filling to set properly and for clean cuts.
-
Check for Doneness: Look for a golden top and ensure the center is no longer jiggly. This ensures that your Rhubarb Dream Bars are perfectly baked and ready to enjoy.
-
Customize Flavors: Experiment by adding a touch of vanilla extract or orange zest to the filling mixture for a delightful twist that complements the rhubarb beautifully.
How to Store and Freeze Rhubarb Dream Bars
Fridge: Keep your rhubarb dream bars in an airtight container in the refrigerator for up to 4-5 days. They taste wonderful chilled and may even develop more flavor after resting a day.
Freezer: For longer storage, freeze the bars by wrapping them tightly in plastic wrap, then place them in a freezer-safe container. They can be stored for up to 3 months.
Thawing: To enjoy frozen rhubarb dream bars, thaw them overnight in the fridge. They can be served chilled or at room temperature for the best experience.
Reheating: If you prefer them warm, gently reheat the bars in the oven at 300°F (150°C) for about 10 minutes until warmed through, but avoid overheating to keep the texture enjoyable.
What to Serve with Rhubarb Dream Bars
Bring a delightful harmony to your meal by pairing these sweet, tangy bars with complementary sides and drinks.
-
Whipped Cream:
A dollop of freshly whipped cream adds a luxurious, creamy touch that perfectly balances the tangy rhubarb. -
Fresh Berries:
Juicy strawberries or blueberries enhance the freshness while providing a sweet contrast to the tartness of the bars. A berry medley is a vibrant, colorful addition. -
Iced Tea:
A refreshing glass of iced tea, garnished with mint, makes for a delightful drink pairing that cools the palate and adds complexity. -
Vanilla Ice Cream:
Creamy vanilla ice cream melts gently over the warm bars, creating a delectable contrast that transforms every bite into a dreamy experience. -
Lemonade:
A glass of tangy lemonade brightens the table, complementing the tartness of the rhubarb while quenching your thirst. -
Scones:
For a sumptuous breakfast or tea-time treat, serve these bars alongside buttery scones, enhancing the theme of light, spring-inspired delights. -
Fried Chicken Tenders:
Make a charming picnic by pairing the bars with crispy chicken tenders for a balance of sweet and savory tastes, invoking warm memories of outdoor gatherings.
Rhubarb Dream Bars Variations
Feel free to explore exciting twists and swaps for your Rhubarb Dream Bars to make them uniquely yours!
-
Gluten-Free: Use a 1:1 gluten-free flour blend in place of all-purpose flour to keep everyone happy at the table.
-
Flavor Boost: Add vanilla extract or orange zest to the filling for a delightful burst of flavor. This simple addition elevates the tangy rhubarb beautifully!
-
Mixed Fruit: Combine rhubarb with fresh strawberries or raspberries for a juicy fruit medley that brings extra sweetness and color to your bars.
-
Nutty Crunch: Sprinkle chopped nuts on top of the filling before baking for a crunchy texture that contrasts wonderfully with the soft custard.
-
Eating Healthier: Reduce the sugar in the filling by ½ cup without compromising the flavor, making these treats a bit lighter while still scrumptious.
-
Layered Delight: Turn your bars into a delightful trifle by layering pieces with whipped cream and extra rhubarb compote. Perfect for special gatherings!
-
Spicy Kick: For those who enjoy a bit of heat, try adding a pinch of cinnamon or ginger to the filling for an unexpected twist that warms the palate.
-
Serving Suggestion: Pair these delicious Rhubarb Dream Bars with a perfect dollop of whipped cream or consider serving them alongside your favorite summer berry desserts like my easy Summer Berry Peach recipe for a delightful treat.
Rhubarb Dream Bars Recipe FAQs
What type of rhubarb should I use for the best flavor?
Absolutely! Fresh rhubarb is your best option for these bars. When selecting, look for firm stalks with a bright color and no dark spots. If using frozen rhubarb, thaw it completely and drain well to prevent excess moisture in the filling.
How should I store leftover Rhubarb Dream Bars?
Store your delicious rhubarb dream bars in an airtight container in the refrigerator for up to 4-5 days. Chilling them not only keeps them fresh but allows the flavors to meld beautifully. Enjoy them cold straight from the fridge for a refreshing treat!
Can I freeze Rhubarb Dream Bars for later enjoyment?
Yes, you can freeze them! Wrap the completely cooled bars tightly in plastic wrap and then place them into a freezer-safe container. They’ll stay fresh in the freezer for up to 3 months. When you’re ready to indulge, simply thaw them overnight in the fridge.
What should I do if my Rhubarb Dream Bars are too runny?
If you find your bars are too runny, it may be due to excess moisture from the rhubarb or not baking long enough. Ensure that you’re using completely thawed rhubarb. Extend the baking time slightly (check every 5 minutes) until the filling is set and no longer jiggles in the center.
Are these Rhubarb Dream Bars gluten-free?
Yes, they can be made gluten-free! Substitute the all-purpose flour with a 1:1 gluten-free flour blend. This allows those avoiding gluten to enjoy a slice of spring in every bite without compromising texture or flavor.
Can I use other fruits instead of rhubarb?
The more the merrier! While rhubarb is the star of this recipe, you can experiment by incorporating other fruits like strawberries or blueberries for a unique twist. Just be mindful of the fruit’s moisture content to ensure a well-set filling.
Delicious Rhubarb Dream Bars: Light, Tangy Spring Treats
Ingredients
Equipment
Method
- Preheat your oven to 350°F (175°C).
- In a large mixing bowl, combine 2 cups of all-purpose flour, 1 cup of confectioners’ sugar, and 1 cup of softened butter. Mix until the mixture resembles coarse crumbs.
- Grease a 9x13 inch baking dish, then evenly press the crumbly crust mixture into the bottom. Bake for 15 minutes or until lightly golden around the edges.
- In a separate bowl, beat together 3 large eggs, 1 cup of white sugar, 1 teaspoon of salt, and ½ cup of all-purpose flour until smooth.
- Fold in 2 cups of chopped fresh rhubarb into the egg mixture until evenly distributed.
- Once the crust has baked for 15 minutes, pour the rhubarb filling over the hot crust and spread it evenly.
- Return the baking dish to the oven and bake for 40-45 minutes until the top is lightly golden and the center is firm.
- Remove from the oven and allow it to cool completely on a wire rack before slicing.
Leave a Reply