
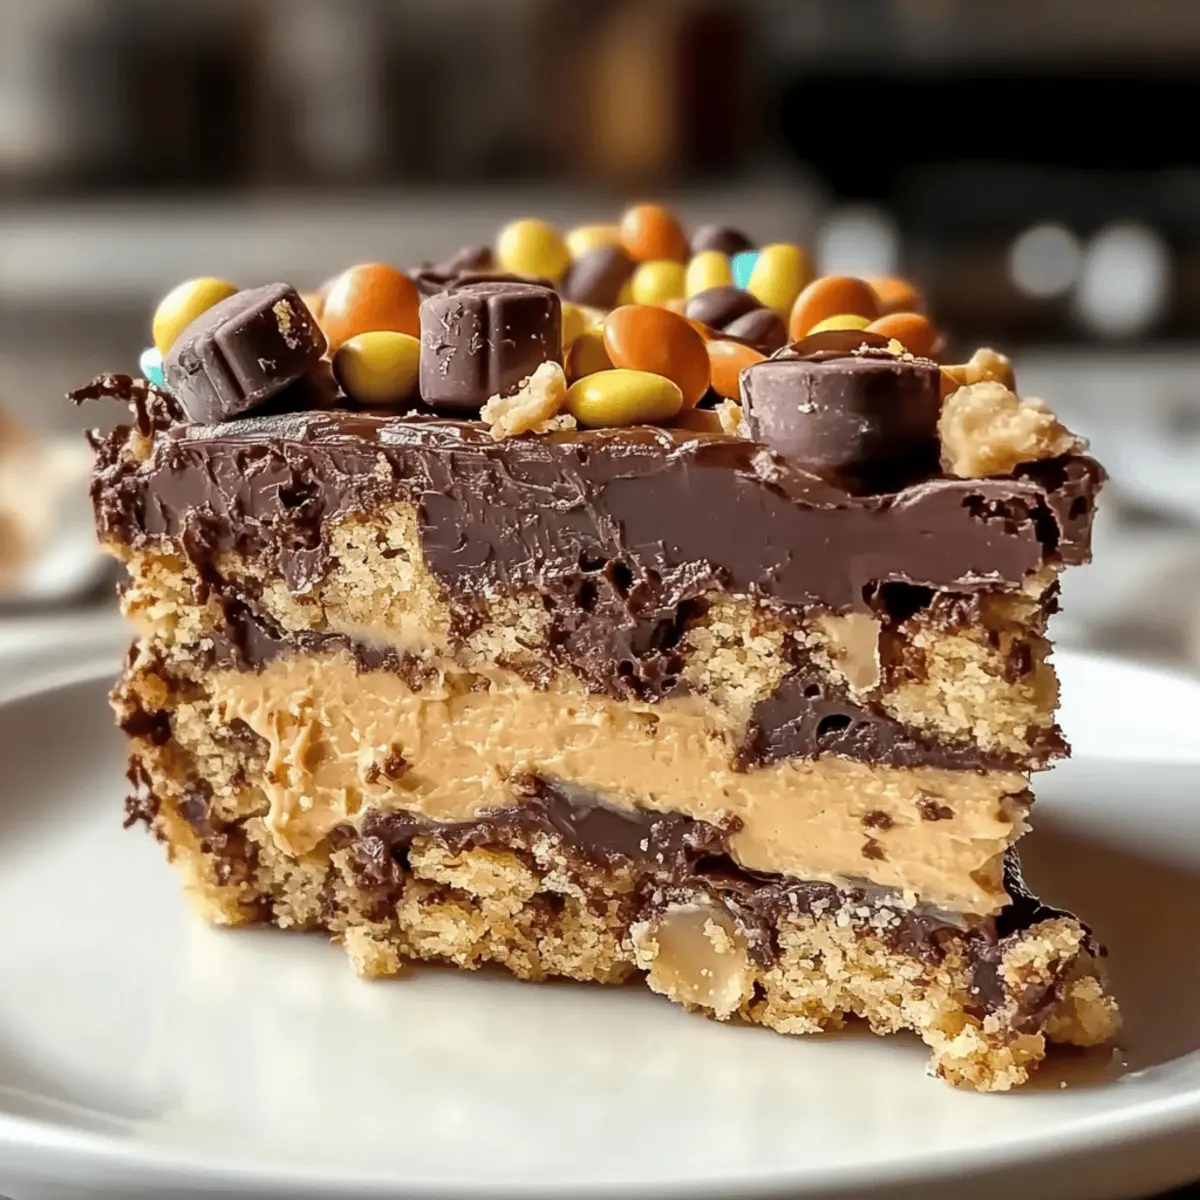
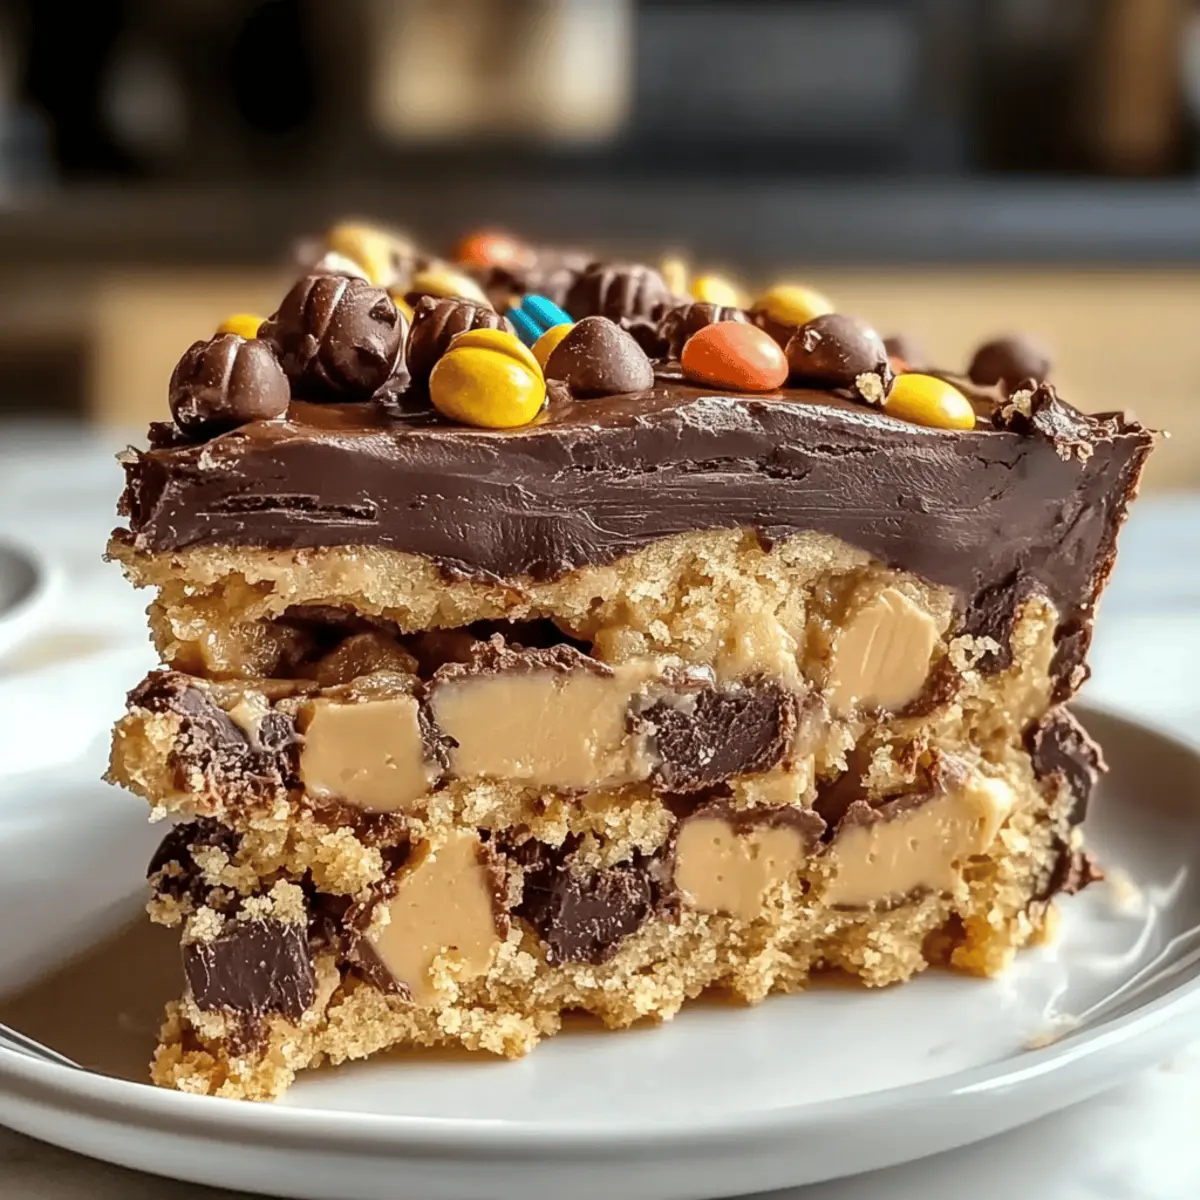
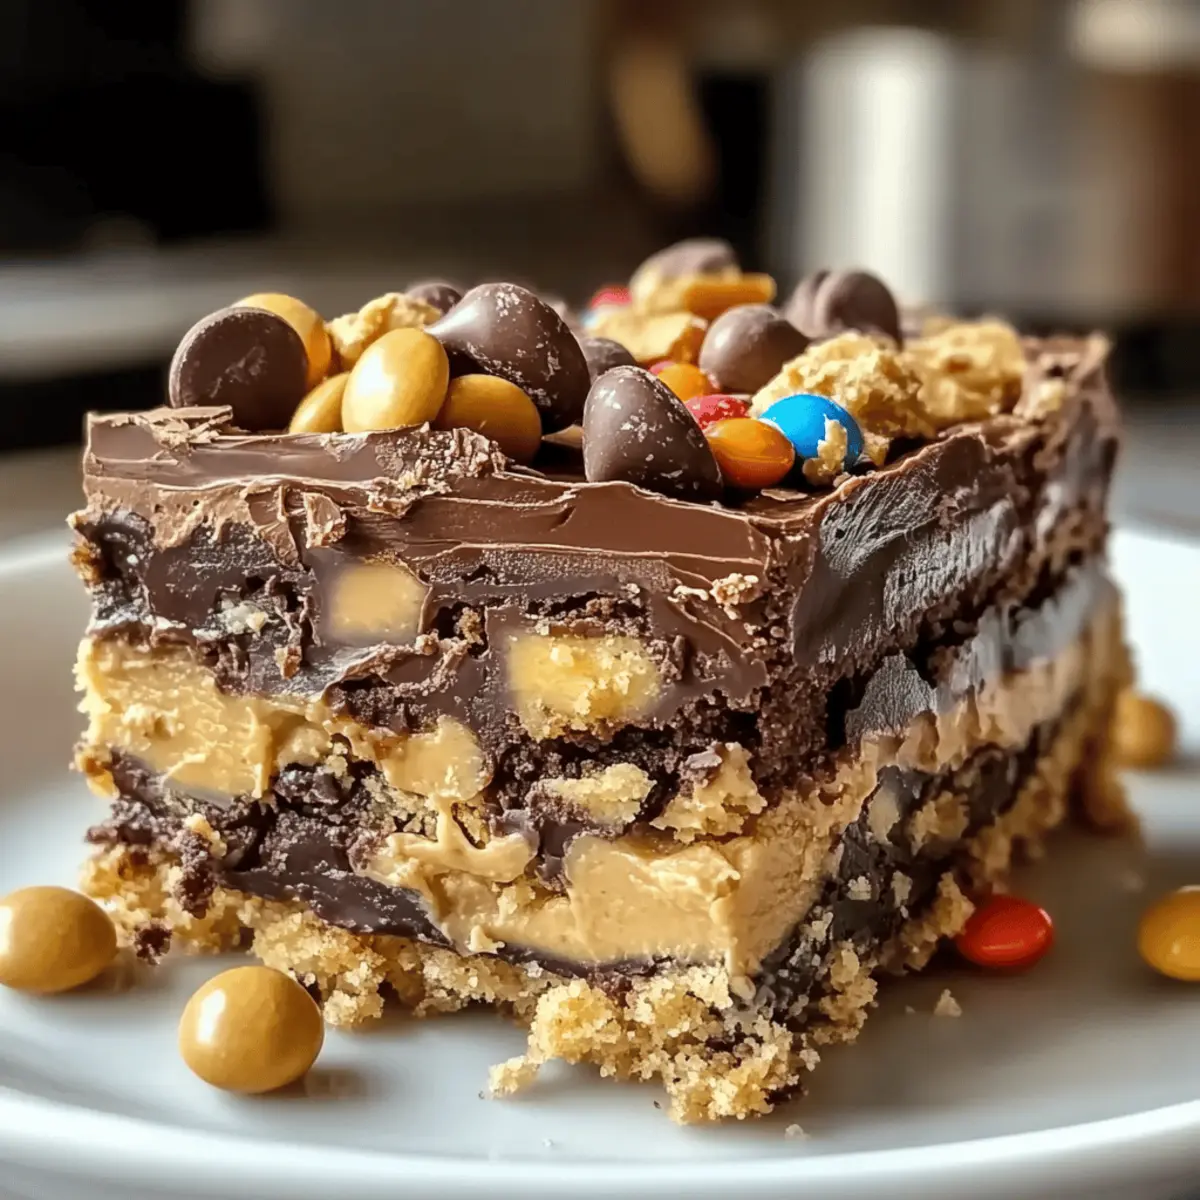
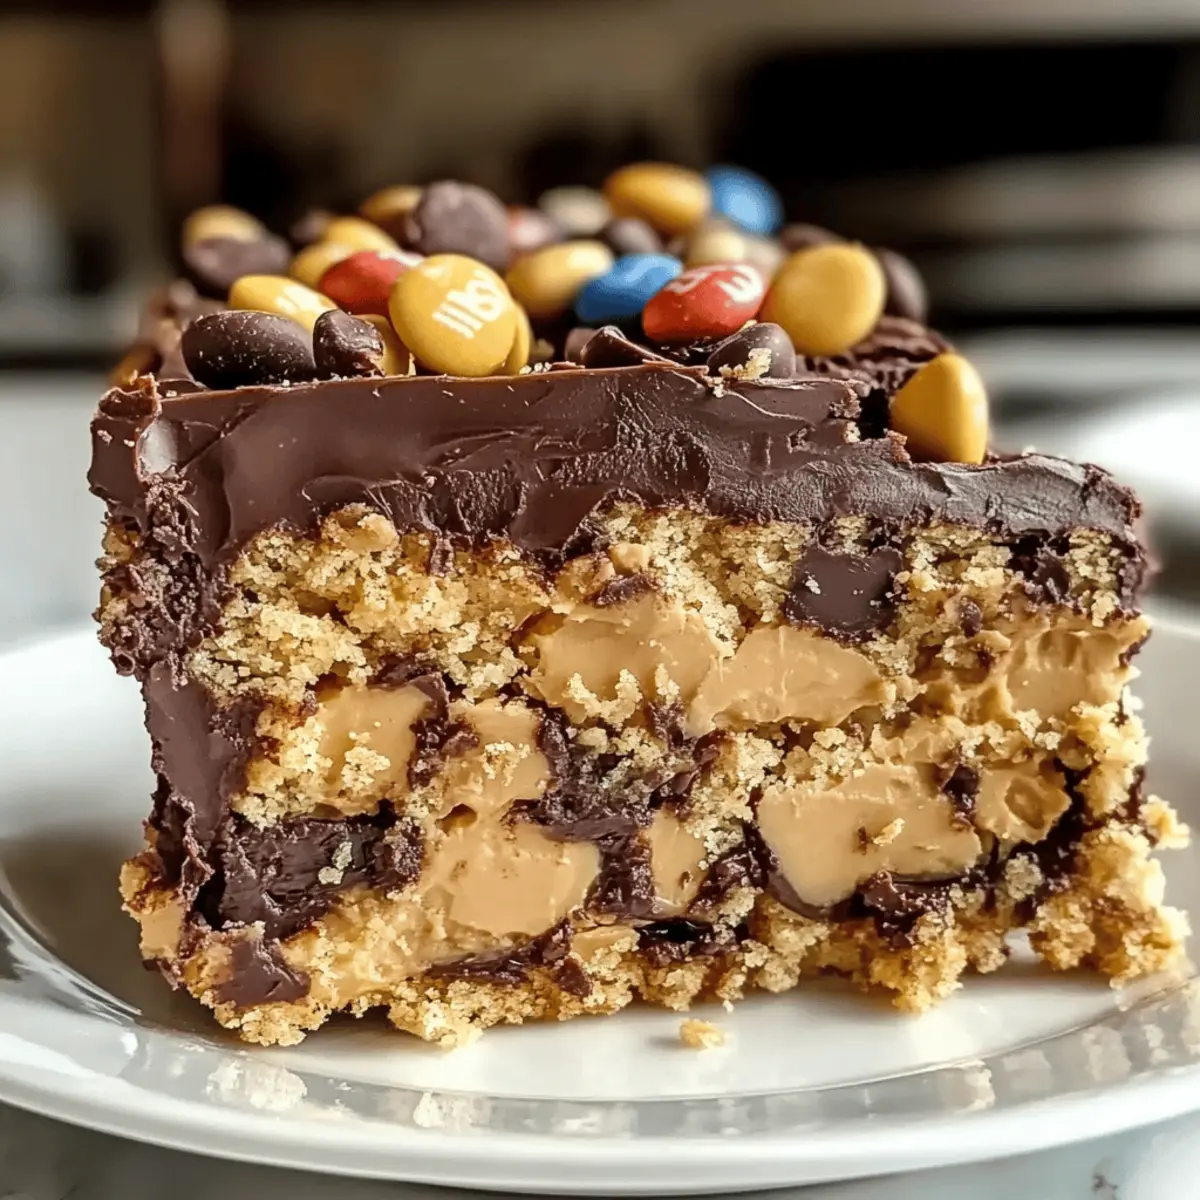
The moment that warm, chocolatey aroma wafts through your kitchen, you know something delicious is happening. Enter the Peanut Butter Cup Dump Cake, your new go-to dessert that requires minimal fuss and maximum satisfaction. This easy dessert is not only a crowd-pleaser, but it also allows for countless ingredient substitutions, making it a versatile choice for any occasion. Whether you’re preparing for a last-minute gathering or simply want to indulge in something sweet without the hassle, this dump cake has you covered. With its rich layers of creamy peanut butter, gooey chocolate, and delightful candy crunch, it’s a cozy pick-me-up that’s sure to brighten your day. Ready to dive into a sweet experience that will leave you wanting more? Let’s get baking!
Why is this dump cake a must-try?
Simplicity at its finest: This Peanut Butter Cup Dump Cake requires just a few simple ingredients and minimal prep work, making it the ideal dessert for both novice and experienced bakers. Irresistible flavors combine creamy peanut butter, rich chocolate, and delightful candy pieces that are sure to please any crowd. Versatile options allow you to customize it according to your preferences—swap in chocolate cake mix or mix in pretzels for a fun twist! Time-saving and fuss-free, you can whip it up quickly or even make it ahead of time for parties, just like our popular Chicken Satay with Peanut Sauce recipe. Lastly, the delightful, gooey texture of this cake will have everyone coming back for seconds!
Peanut Butter Cup Dump Cake Ingredients
• Here’s what you’ll need for this delightful treat!
For the Cake Base
- Yellow Cake Mix – Acts as the foundation for the cake; a chocolate or Devil’s food cake mix can provide a richer flavor twist.
- Eggs – These bind the ingredients together while adding essential moisture.
- Milk – Enhances the cake’s texture; feel free to use any milk type you have on hand.
- Oil – Keeps the cake wonderfully moist and tender.
For the Peanut Butter Layer
- Peanut Butter – Delivers a creamy richness; there’s no need to pre-melt it, just dollop straight from the jar.
For the Chocolate Goodness
- Chocolate Chips – Infuse the cake with a rich chocolate flavor; you can substitute with chopped chocolate bars or candy-coated chocolates like peanut butter M&Ms.
For the Crunchy Topping
- Candy Pieces – Add a fun crunch and a pop of sweetness; feel free to mix and match different types based on your favorite treats!
By combining these ingredients, you’re not just making a dessert; you’re creating an experience with the Peanut Butter Cup Dump Cake! Enjoy every bite!
Step‑by‑Step Instructions for Peanut Butter Cup Dump Cake
Step 1: Preheat the Oven
Begin by preheating your oven to 350°F (175°C). This will ensure it reaches the perfect temperature for baking the Peanut Butter Cup Dump Cake. While the oven heats, gather your ingredients and prepare your baking dish by greasing it to prevent sticking. A 9×13-inch dish works wonderfully for this delightful dessert.
Step 2: Layer the Cake Mix
Once the oven is ready, evenly sprinkle the dry yellow cake mix as the base layer in your greased baking dish. Ensure a smooth, even layer that serves as the foundation for your Peanut Butter Cup Dump Cake. This step only takes a minute, but it sets the stage for the delightful layers to come.
Step 3: Add Peanut Butter and Chocolate Chips
Dollop creamy peanut butter generously over the cake mix, spreading it for a lovely swirled effect. Next, sprinkle chocolate chips evenly across the top. Their melting goodness will sink into the layers while baking, enriching the flavors. This visual layering creates the irresistible texture we adore in this cake.
Step 4: Pour Milk and Oil
Gently pour milk and oil over the layered ingredients, allowing them to seep through carefully. This step is crucial as it helps bind and moisten the cake mix for that perfect texture. The mixture will look somewhat dry at this point, but don’t worry—the magic happens in the oven!
Step 5: Sprinkle Candy Pieces
Top the whole creation with your chosen candy pieces for an added crunch and sweetness. Spread them evenly across the surface so that every bite of your Peanut Butter Cup Dump Cake can deliver a delightful surprise. This also adds a pop of color, making it visually appealing.
Step 6: Bake the Cake
Place your assembled cake in the preheated oven and bake for 40-45 minutes. Keep an eye on it; the top should become golden and puffy, with edges pulling away slightly from the dish. You’ll know it’s ready when a toothpick inserted in the center comes out with moist crumbs attached.
Step 7: Let It Cool
After baking, remove the Peanut Butter Cup Dump Cake from the oven and let it cool for about 10-15 minutes before serving. This cooling period allows the layers to settle without losing their delightful moisture. Slice into squares while warm, and watch everyone dive into this gooey treat!
Expert Tips for the Best Peanut Butter Cup Dump Cake
- Ingredient Substitutions: Feel free to experiment with different cake mixes like chocolate or spice for exciting variations, keeping the base rich and flavorful.
- Layering Evenly: Distributing the dry cake mix and peanut butter evenly ensures that all layers bake uniformly, resulting in a consistent texture throughout the Peanut Butter Cup Dump Cake.
- Optimal Baking Time: Keep an eye on the cake during the last few minutes of baking; every oven behaves differently, and you don’t want it to overbake.
- Cooling Essential: Allow the cake to cool for at least 10-15 minutes before serving; this helps it set and enhances the gooey texture everyone loves.
- Serving Suggestion: Top with a scoop of vanilla ice cream or a drizzle of chocolate sauce for an extra indulgent treat that complements the dump cake perfectly!
Storage Tips for Peanut Butter Cup Dump Cake
- Room Temperature: Allow the Peanut Butter Cup Dump Cake to cool completely before storing; it can be kept at room temperature for up to 2 days, covered with foil or plastic wrap to maintain moisture.
- Fridge: Store leftovers in an airtight container in the refrigerator for up to 4 days to keep the cake fresh and delicious; reheat individual servings in the microwave for a cozy treat.
- Freezer: For longer storage, freeze slices wrapped tightly in plastic wrap and then aluminum foil; they can be stored in the freezer for up to 3 months. Thaw the cake in the refrigerator overnight before enjoying.
- Reheating: Warm up individual slices in the microwave for 15–20 seconds, or reheat larger portions at 300°F (150°C) for 10–15 minutes for delightful gooeyness!
What to Serve with Peanut Butter Cup Dump Cake
Indulging in this decadent dessert creates a symphony of flavors; let’s enhance your gathering with perfect pairings!
- Vanilla Ice Cream: A scoop of creamy vanilla ice cream complements the rich chocolate and peanut butter, creating a delightful contrast.
- Fresh Berries: Juicy strawberries or tart raspberries balance the sweetness, bringing freshness and a burst of color to your dessert table.
- Whipped Cream: Top your slice with fluffy homemade whipped cream for an airy texture that elevates each bite of cake.
- Coffee or Espresso: A cup of strong coffee amplifies the chocolate notes in the cake, making each mouthful feel even more luxurious.
- Chocolate Drizzle: Drizzling warm chocolate sauce over the top adds extra richness, making it an indulgent treat for chocolate lovers.
- Nutty Granola: Sprinkling a handful of crunchy granola provides a delightful texture contrast while echoing the nutty flavor of peanut butter.
- Caramel Sauce: A drizzle of warm caramel sauce adds a sweet richness that complements the cake’s gooey layers beautifully.
- Milkshake: Blend up a chocolate or peanut butter milkshake for a fun pairing that takes the dessert experience to a whole new level!
Make Ahead Options
Busy home cooks will love how easy it is to prepare the Peanut Butter Cup Dump Cake in advance! You can layer the cake mix, peanut butter, and chocolate chips in your baking dish up to 24 hours ahead of time, simply cover with plastic wrap and refrigerate to keep everything fresh. When you’re ready to bake, pour the milk and oil over the layered ingredients, sprinkle with candy pieces, and pop it into the oven. This approach not only saves precious time during meal prep but also ensures the cake is just as delicious when baked. Embrace this make-ahead option, and enjoy a delightful dessert with minimal last-minute fuss!
Peanut Butter Cup Dump Cake Variations
Feel free to get creative with this dump cake and make it your own delightful creation!
-
Chocolate Cake Mix: Swap out yellow cake mix for chocolate or devil’s food for a deeper flavor.
-
Nut-Free Option: Use sunflower seed butter instead of peanut butter for those with nut allergies. This version will still be delicious and rich!
-
Crunchy Twist: Mix in crushed pretzels or peanuts for a delightful crunch that complements the creamy layers. It adds an exciting salty contrast!
-
White Chocolate: Incorporate white chocolate chips alongside or instead of regular chocolate chips for a sweeter treat. It’s a dreamy variation for white chocolate lovers.
-
Fruit Additions: Toss in some chopped bananas or strawberries for a fruity burst of flavor. This will brighten up the cake and add a fresh twist to the richness!
-
Extra Layering: Add a layer of marshmallows before baking for a s’mores-inspired twist. The gooeyness will take the cake to another level.
-
Spicy Kick: Sprinkle in some cayenne pepper or cinnamon for a warm, spicy lift that plays beautifully with the sweetness. It’s a delightful surprise!
-
Candy Rainbow: Mix in your favorite candy bits—think M&M’s or Reese’s Pieces—on top for an eye-catching cake that kids will adore. Each slice becomes a colorful treat!
With these variations, the Peanut Butter Cup Dump Cake transforms into countless delicious delights. It’s all about your cravings and creativity! Enjoy this dessert with friends and family just like our treasured Black Velvet Cupcakes with Raspberry Filling.
Peanut Butter Cup Dump Cake Recipe FAQs
What is the best way to select ripe ingredients for this dump cake?
Absolutely! When choosing your peanut butter, go for a high-quality natural option if you can, as it’ll yield a creamier texture in the cake. For chocolate chips, opt for semi-sweet for a balanced taste, or dark chocolate for rich depth. All fresh ingredients, such as eggs and milk, should be used close to their expiration dates for the best flavor.
How should I store leftovers from the Peanut Butter Cup Dump Cake?
To keep your Peanut Butter Cup Dump Cake fresh, allow it to cool completely, and then store leftovers in an airtight container in the refrigerator for up to 4 days. If you want to keep it at room temperature, you can cover it with foil or plastic wrap for up to 2 days. This will help maintain its moist texture.
Can I freeze this Peanut Butter Cup Dump Cake?
Yes, you can! For longer storage, wrap individual slices tightly in plastic wrap, then in aluminum foil to prevent freezer burn. It can be stored in the freezer for up to 3 months. When you’re ready to enjoy, simply thaw it in the refrigerator overnight. For a quick treat, let it sit at room temperature for about 30 minutes before serving.
What if my dump cake doesn’t bake correctly?
If your Peanut Butter Cup Dump Cake doesn’t set or has a wet batter after the recommended baking time, it might need a bit more time in the oven—sometimes another 5-10 minutes can make all the difference! Make sure your oven is properly preheated. If you find it overbaked and dry, serve it warm with a scoop of vanilla ice cream or a drizzle of chocolate sauce to enhance the moisture and flavor.
Is this recipe safe for people with dietary restrictions?
While this dump cake is a vegetarian-friendly dessert, if you’re cooking for someone with allergies, swap regular milk for a dairy-free alternative like almond or oat milk and select a peanut butter that’s free from added sugars and oils. Always check the labels of your ingredients to ensure they meet the specific dietary needs of your guests.
Peanut Butter Cup Dump Cake - Irresistibly Gooey Delight
Ingredients
Equipment
Method
- Preheat your oven to 350°F (175°C). Grease a 9x13-inch dish.
- Evenly sprinkle the dry yellow cake mix as the base layer in your greased baking dish.
- Dollop creamy peanut butter over the cake mix and sprinkle chocolate chips on top.
- Gently pour milk and oil over the layered ingredients.
- Top with your chosen candy pieces.
- Bake for 40-45 minutes until the top is golden and a toothpick comes out with moist crumbs.
- Let it cool for about 10-15 minutes before serving.
Leave a Reply