
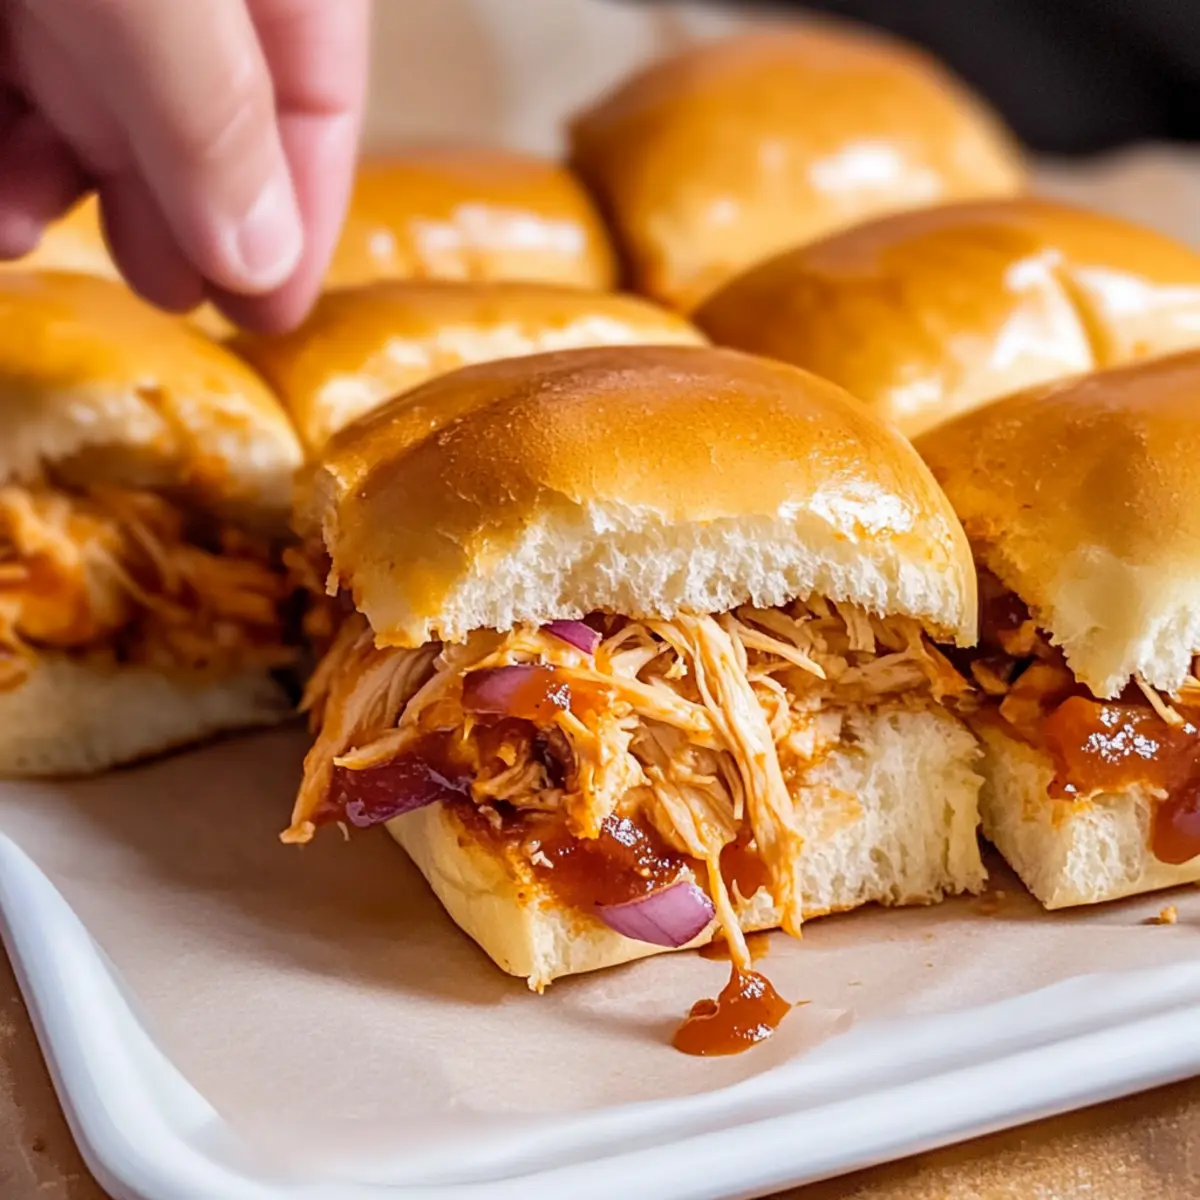
As I stood in my kitchen, the sweet aroma of BBQ began to fill the air, transporting me straight to summertime backyard gatherings. These Easy BBQ Chicken Sliders are the ultimate picnic idea—simple, delicious, and guaranteed to please a crowd. With tender, shredded chicken enveloped in tangy BBQ sauce and nestled between soft Hawaiian rolls, they make for a quick dinner or a fun appetizer that requires minimal prep time. In just 30 minutes, you can indulge in a delightful combination of sweetness and savory goodness that will have everyone reaching for seconds! Perfect for busy weeknights or casual get-togethers, these sliders are not just easy to make; they’re also an excellent way to enjoy homemade flavors without the fuss. Ready to uncover the secrets to these mouthwatering sliders? Let’s dive in!
Why are BBQ Chicken Sliders so special?
Simplicity makes them a breeze to prepare—perfect for busy weeknights or picnics! Irresistible flavors come together with the sweetness of Hawaiian rolls and tangy BBQ sauce, ensuring every bite is delicious. Family-friendly and crowd-pleasing, they’re sure to be a hit at gatherings. If you’re looking to switch things up, why not try these alongside some Strawberry Pecan Chicken for a refreshing contrast? Plus, they’re versatile enough for any occasion, whether as a quick snack or a fun appetizer. Enjoy the ease of making this comfort food classic that everyone will love!
Picnic Idea BBQ Chicken Sliders Ingredients
For the Sliders
• Slider Rolls – Soft Hawaiian sweet rolls that bring sweetness and hold ingredients well.
• Shredded Cooked Chicken – Adds protein and richness; rotisserie chicken is perfect for fast prep.
• BBQ Sauce – Forms the flavor profile; select your favorite brand or use homemade for a personal touch.
• Red Onion – Offers a sharp bite; feel free to replace it with green onions for a milder taste.
• Shredded Cheese – Sharp cheddar or pepper jack provides melty goodness; swap for Monterey jack if preferred.
• Butter – Brushed on top for a golden finish; olive oil works as a tasty, dairy-free alternative.
For Serving
• Coleslaw – A refreshing side that pairs perfectly with the sliders’ savory flavors.
• Potato Salad – Offers a creamy accompaniment; make it your own with herbs and spices.
• Chips – A crunchy addition to complete your picnic spread.
These picnic idea BBQ Chicken Sliders are not just a meal; they are a delightful experience waiting to unfold!
Step‑by‑Step Instructions for Picnic Idea BBQ Chicken Sliders
Step 1: Preheat and Prepare
Begin by preheating your oven to 350°F (175°C) and lining a baking sheet with parchment paper. This will ensure that your picnic idea BBQ Chicken Sliders bake evenly and don’t stick. While your oven heats, gather all your ingredients and ensure your shredded cooked chicken is ready for mixing.
Step 2: Slice the Rolls
Keep the slider rolls attached and carefully slice them in half horizontally. Place the bottom halves onto your prepared baking sheet, ensuring they are evenly spaced. This creates a sturdy base for your flavorful BBQ chicken mixture. Visualize a delightful little platform that is set to hold all the deliciousness to come!
Step 3: Mix the Chicken and Sauce
In a mixing bowl, combine the shredded cooked chicken with your choice of BBQ sauce. Toss until the chicken is coated thoroughly, ensuring every piece is glistening with flavor. This mixture will serve as the heart of your picnic idea BBQ Chicken Sliders, adding moisture and tang to each bite.
Step 4: Assemble the Sliders
Spread the BBQ chicken mixture evenly over the bottom halves of the rolls. Make sure the chicken is layered generously, creating a hearty filling that everyone will love. If desired, drizzle extra BBQ sauce over the chicken for added richness and flavor. The sweet and tangy aroma will be enticing!
Step 5: Add Onions and Cheese
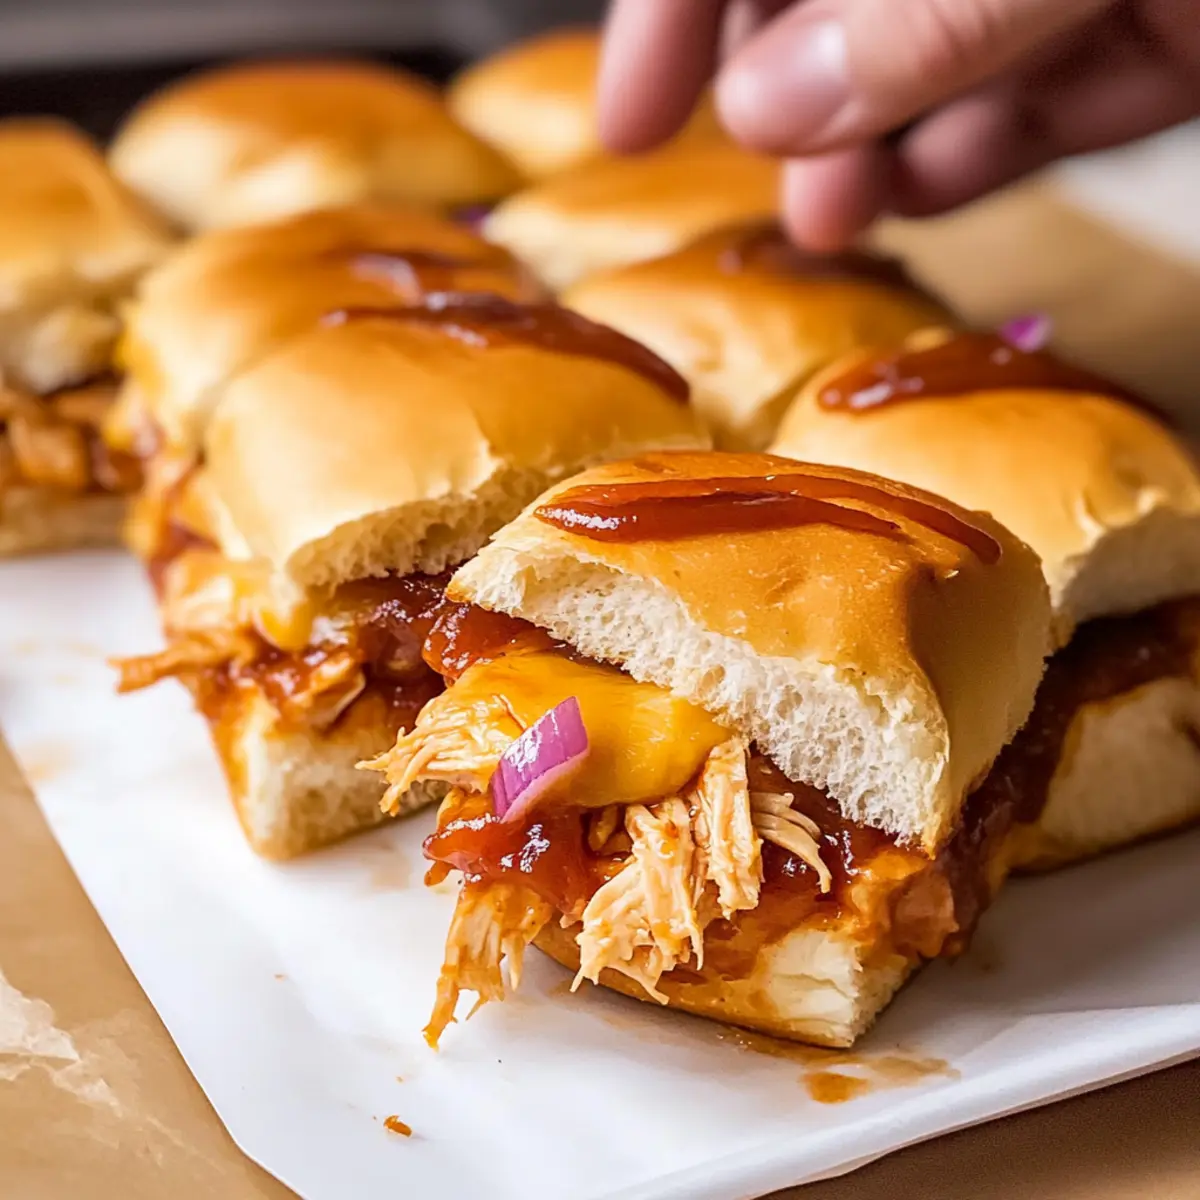
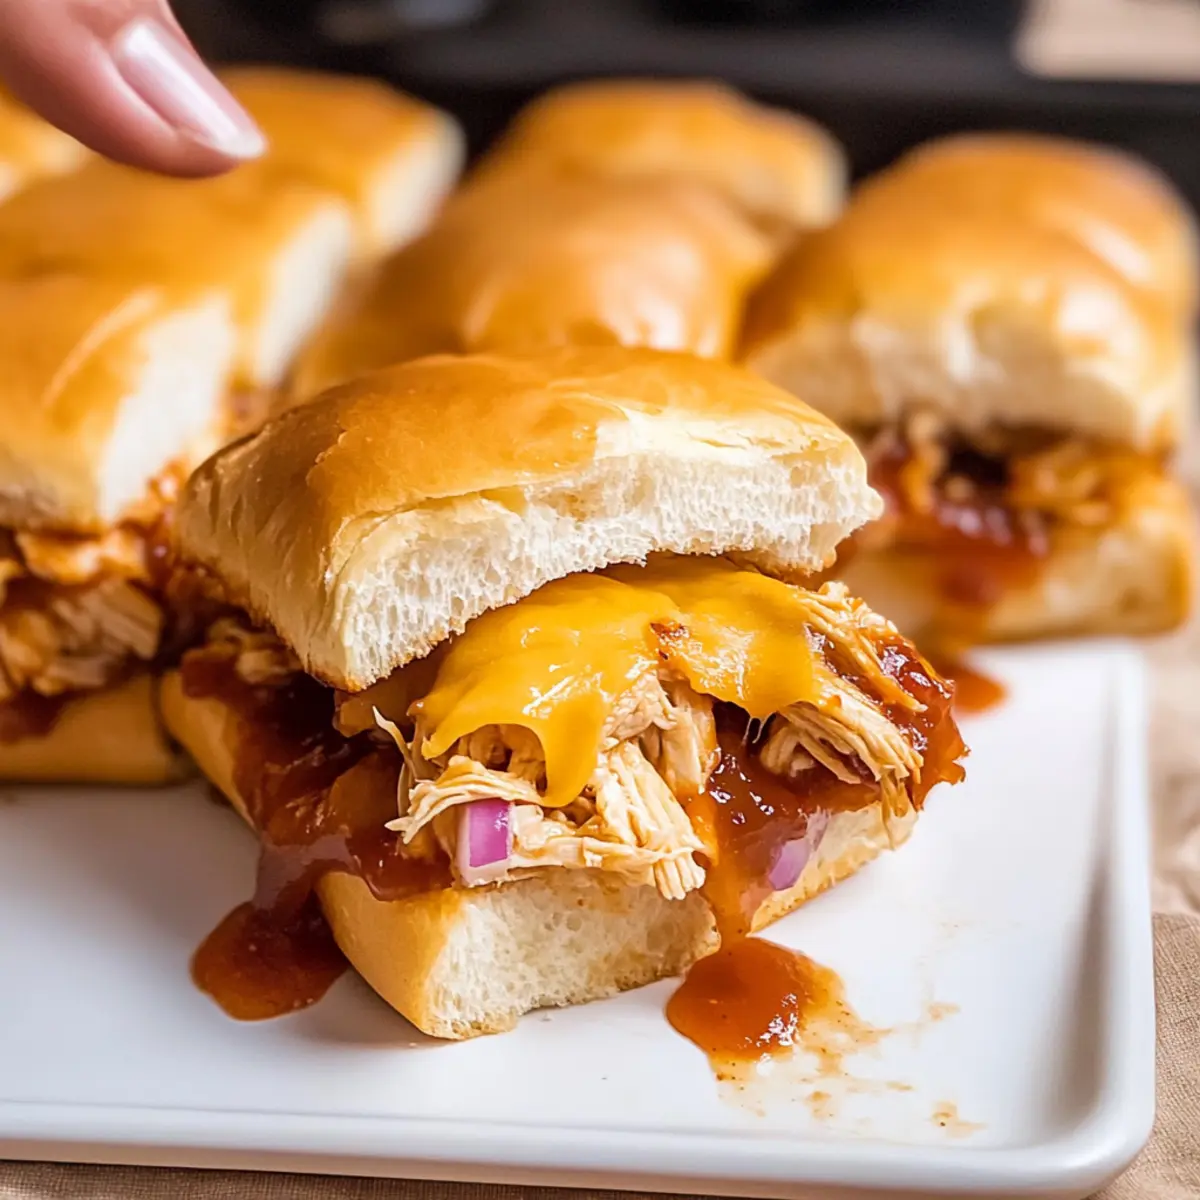
Next, sprinkle sliced red onion over the BBQ chicken layer for a crunchy texture and sharp flavor. Follow this with a generous layer of shredded cheese, allowing it to melt beautifully during baking. This combination enhances the sliders, adding a delicious contrast of flavors that is simply irresistible.
Step 6: Close the Sliders
Carefully place the top halves of the slider rolls onto the assembled sliders, gently pressing down to secure the ingredients. This step completes the beautiful formation of your picnic idea BBQ Chicken Sliders, ready for a golden finish. Ensure everything is stacked neatly for perfect bites!
Step 7: Brush with Butter
Melt some butter and use a pastry brush to lightly coat the tops of the rolls. This will create a golden, crispy exterior that locks in moisture. You can also use olive oil for a delightful dairy-free option, enhancing the overall appeal of these picnic sliders!
Step 8: Bake to Perfection
Loosely cover the assembled sliders with foil to retain moisture and place them in the preheated oven. Bake for about 12 minutes, then carefully remove the foil and continue baking for an additional 5 minutes. This step allows the cheese to melt beautifully and the tops to turn a lovely golden brown.
Step 9: Cut and Serve
Once baked, remove the sliders from the oven and let them cool for a minute. Cut the sliders apart to serve easily, revealing the delicious layers within. These warm and melty picnic idea BBQ Chicken Sliders are perfect for gatherings, family dinners, or casual picnics—ready to wow every crowd!

Make Ahead Options
These BBQ Chicken Sliders are perfect for meal prep enthusiasts! You can assemble the sliders up to 24 hours in advance, which allows the flavors of the BBQ chicken to meld beautifully as they chill in the refrigerator. Simply prepare the sliders according to the instructions, tightly cover them, and refrigerate until you’re ready to bake. For the best results, avoid brushing the tops with butter until just before baking, to ensure they maintain their golden finish. When it’s time to serve, simply bake the assembled sliders at 350°F (175°C) for about 15-20 minutes, until everything is warm and melty. You’ll have homemade BBQ Chicken Sliders that are just as delicious—and ready with minimal last-minute effort!
Expert Tips for BBQ Chicken Sliders
- Perfectly Mixed: Ensure the chicken is well mixed with BBQ sauce to avoid dry spots in your sliders, leading to a more delicious bite.
- Flavor Options: Experiment with different BBQ sauces or add spices to the chicken mix for an extra layer of flavor in your picnic idea BBQ Chicken Sliders.
- Make Ahead: Assemble the sliders ahead of time and refrigerate them until ready to bake; this enhances flavor as the rolls soak up BBQ sauce.
- Watch the Baking: Keep an eye on the sliders while they bake; every oven is different, and you want the cheese melted and the tops golden, but not overcooked.
- Fresh Touch: Adding sliced avocado or jalapeños on top before baking brings freshness and an exciting twist to your classic sliders.
How to Store and Freeze BBQ Chicken Sliders
Refrigerator: Store leftover sliders in an airtight container for up to 2 days. This helps retain their taste while keeping them fresh for snacking.
Freezer: If you want to save sliders for later, wrap them tightly in plastic wrap and place in a freezer-safe bag. They can be frozen for up to 3 months.
Reheating: To reheat, thaw sliders overnight in the fridge, then bake covered at 350°F for 15-20 minutes. This ensures they’re warm and gooey, perfect for enjoying your picnic idea BBQ Chicken Sliders!
Assembly Tip: Consider assembling the sliders without baking and freeze them unbaked. When you’re ready, simply bake from frozen, adding a few extra minutes to the cooking time.
Variations & Substitutions for Picnic Idea BBQ Chicken Sliders
Feel free to add your personal touch to these sliders, transforming them into your unique creation bursting with flavor!
- Pulled Pork: Swap the chicken for tender pulled pork to change up the meat and embrace a different BBQ profile. This heartier option drapes lushly in sweet sauce.
- Shredded Beef: For a richer taste, use shredded beef instead; it pairs beautifully with the same BBQ sauce, giving a beefier twist that’s equally delightful.
- Gluten-Free Rolls: If you have dietary restrictions, simply choose gluten-free rolls to make these sliders accessible to everyone. They are just as delicious without compromising on flavor.
- Spicy Kick: Add jalapeños or hot sauce to your BBQ chicken for a zesty heat that takes these sliders over the top. The added spice will excite those who crave a little fire!
- Cheese Variation: Switch out the cheese for Swiss or Gouda for a different flavor experience. Each cheese brings a unique creaminess that complements the BBQ perfectly.
- Vegetarian Option: Use jackfruit instead of chicken, cooking it down with BBQ sauce for a meat-free alternative that’s still filled with robust flavors. It’s a great way to enjoy sliders without the meat!
- Creamy Coleslaw: Top your sliders with a layer of creamy coleslaw for an added crunch and refreshing contrast. This twist not only enhances texture but also adds a delightful creamy element.
- Sautéed Vegetables: Include sautéed bell peppers or mushrooms in the mix for an added veggie boost. The earthy flavors complement the sweetness of the rolls and BBQ sauce beautifully.
These BBQ Chicken Sliders are versatile and perfect for customization, just like they pair perfectly with a side of Strawberry Pecan Chicken or a delicious Mummy Chicken Pot for your next family gathering!
What to Serve with Easy BBQ Chicken Sliders
There’s nothing quite like the mouthwatering combination of flavors and textures that elevate your picnic experience beyond the ordinary.
-
Coleslaw: This crunchy, tangy side offers a refreshing contrast to the sliders’ savory richness, making each bite feel balanced and bright. Garnish with a sprinkle of fresh herbs for an extra kick.
-
Potato Salad: Creamy and satisfying, a classic potato salad pairs perfectly with the BBQ chicken, providing a hearty side that complements the sliders’ flavors. You can customize it with herbs, mustard, or even a hint of spices for a fun twist!
-
Chips: Crunchy chips add the perfect texture contrast, making for a delightful snack alongside your sliders. Consider flavored options like barbecue or sour cream and onion for a tasty surprise!
-
Pickles: A tangy, briny pickle makes a fantastic compliment to the sliders—its acidity cuts through the richness, and the crunch adds a satisfying bite. Serve whole or sliced for guests to enjoy with each slider!
-
Fruit Salad: Refreshing and colorful, a fruit salad is a sweet, juicy addition to your picnic spread. Combine seasonal fruits for a burst of natural sweetness that will lighten up the meal!
-
Sweet Tea or Lemonade: No picnic is complete without a drink! Sweet tea and lemonade provide thirst-quenching options that enhance the comfort of barbecue flavors while perfectly cooling down warm summer days.
Picnic Idea BBQ Chicken Sliders Recipe FAQs
How do I choose the right BBQ sauce for the sliders?
Absolutely! When selecting BBQ sauce, consider your taste preferences—whether you enjoy a sweet, tangy, or spicy flavor. I often recommend trying a few different brands to find your favorite. A classic smoky BBQ sauce pairs beautifully with the sweetness of the Hawaiian rolls, while a spicy variety can add a kick that complements the rich chicken. Whichever sauce you choose, make sure it’s one you love!
What’s the best way to store leftover BBQ Chicken Sliders?
Leftover sliders can be stored in an airtight container in the refrigerator for up to 2 days. This helps keep them fresh and flavorful for your next snacking session. If you’d like to keep them longer, wrap them tightly with plastic wrap and place them in a freezer-safe bag for up to 3 months. Just make sure to let them cool completely before storing to avoid excess moisture!
Can I freeze the BBQ Chicken Sliders before baking?
Yes, you can! To freeze them, assemble the sliders without baking and wrap them tightly in plastic wrap, then place them in a freezer-safe bag. When you’re ready to enjoy, simply preheat your oven to 350°F, remove them from the freezer, and bake them right from frozen. Just add an extra 5-10 minutes to the cooking time until they are heated through and the tops are golden.
What should I do if my sliders come out dry?
Very common! If you find that your sliders are dry, make sure to mix the shredded chicken thoroughly with enough BBQ sauce to ensure it’s evenly coated. For additional moisture, you can include a bit of the reserved BBQ sauce on top before baking. Also, ensure that they are not overcooked in the oven, as this can dry them out—keep an eye on the timer for perfectly melty sliders.
Are BBQ Chicken Sliders pet-friendly?
I wouldn’t recommend BBQ Chicken Sliders for pets due to possible ingredients that can be harmful, such as onions and certain spices. If you’re looking to share something tasty with your furry friend, consider boiled shredded chicken without any seasoning as a simple treat instead. Always check with your vet if you’re unsure about what’s safe for your pets!
What if I have a family member with cheese allergies?
The more the merrier! If someone has a cheese allergy, you can simply omit the cheese from the sliders or replace it with a dairy-free cheese alternative that melts well. There are many great dairy-free cheeses on the market today that can substitute perfectly, allowing everyone at your table to enjoy the sliders without worry.
Picnic Idea BBQ Chicken Sliders That Wow Every Crowd
Ingredients
Equipment
Method
- Preheat your oven to 350°F (175°C) and line a baking sheet with parchment paper.
- Slice the slider rolls in half horizontally and place the bottom halves on the baking sheet.
- Mix the shredded chicken with BBQ sauce until coated thoroughly.
- Spread the BBQ chicken mixture over the bottom halves of the rolls.
- Sprinkle sliced red onion over the chicken, followed by shredded cheese.
- Place the top halves of the rolls on and gently press down.
- Brush melted butter on the tops of the rolls.
- Cover with foil and bake for about 12 minutes, then uncover to bake for an additional 5 minutes.
- Let cool slightly before cutting apart to serve.
Leave a Reply