
As I leaned over my kitchen counter, the sweet aroma of ripe bananas filled the air, bringing back memories of carefree afternoons and simple joys. That’s when I decided to whip up my favorite go-to treat: Chocolate Banana Peanut Butter Bites. This healthy snack not only offers a perfect blend of creamy peanut butter and luscious chocolate but also requires no baking! It’s quick to prepare, making it ideal for busy families or anyone seeking a nutritious alternative to sugar-laden candies. Plus, these bites are kid-friendly, ensuring even the pickiest eaters will get an energy boost without the guilt. Ready to indulge your taste buds and create some delightful memories in your kitchen? Let’s dive into the recipe!
Why Make Chocolate Banana Peanut Butter Bites?
Simplicity at Its Best: With just a few ingredients and no baking required, these bites can be made in a flash!
Healthy Indulgence: Enjoy the creamy goodness of peanut butter paired with sweet bananas, wrapped in rich chocolate—satisfying your cravings without the guilt.
Kid-Friendly Fun: Little hands love helping out in the kitchen, making these bites a great way to get the whole family involved, just like when we make Garlic Butter Lobster or Chicken Satay Peanut.
Freeze ‘n Go: Prep ahead and keep these bites on hand for quick snacks or after-school treats that stay deliciously frozen and ready to eat!
Versatile Snacking: Feel free to mix it up with different nut butters or chocolate types. Your creativity knows no bounds!
Experience the joy of making these delectable Chocolate Banana Peanut Butter Bites, perfect for everyone looking to escape the fast food routine.
Chocolate Banana Peanut Butter Bites Ingredients
• Here’s what you’ll need for your flavorful no-bake treat:
For the Bites
- Bananas – Use ripe bananas for the sweetest flavor and a creamy texture.
- Peanut Butter – Opt for creamy or crunchy varieties, and try no-sugar-added for a healthier choice.
For the Coating
- Melted Chocolate – Choose milk, dark chocolate chips, or almond bark; feel free to substitute with dairy-free chocolate for a vegan option.
These ingredients combine beautifully to create Chocolate Banana Peanut Butter Bites, a healthful and delicious snack that your family will love!
Step‑by‑Step Instructions for Chocolate Banana Peanut Butter Bites
Step 1: Slice Bananas
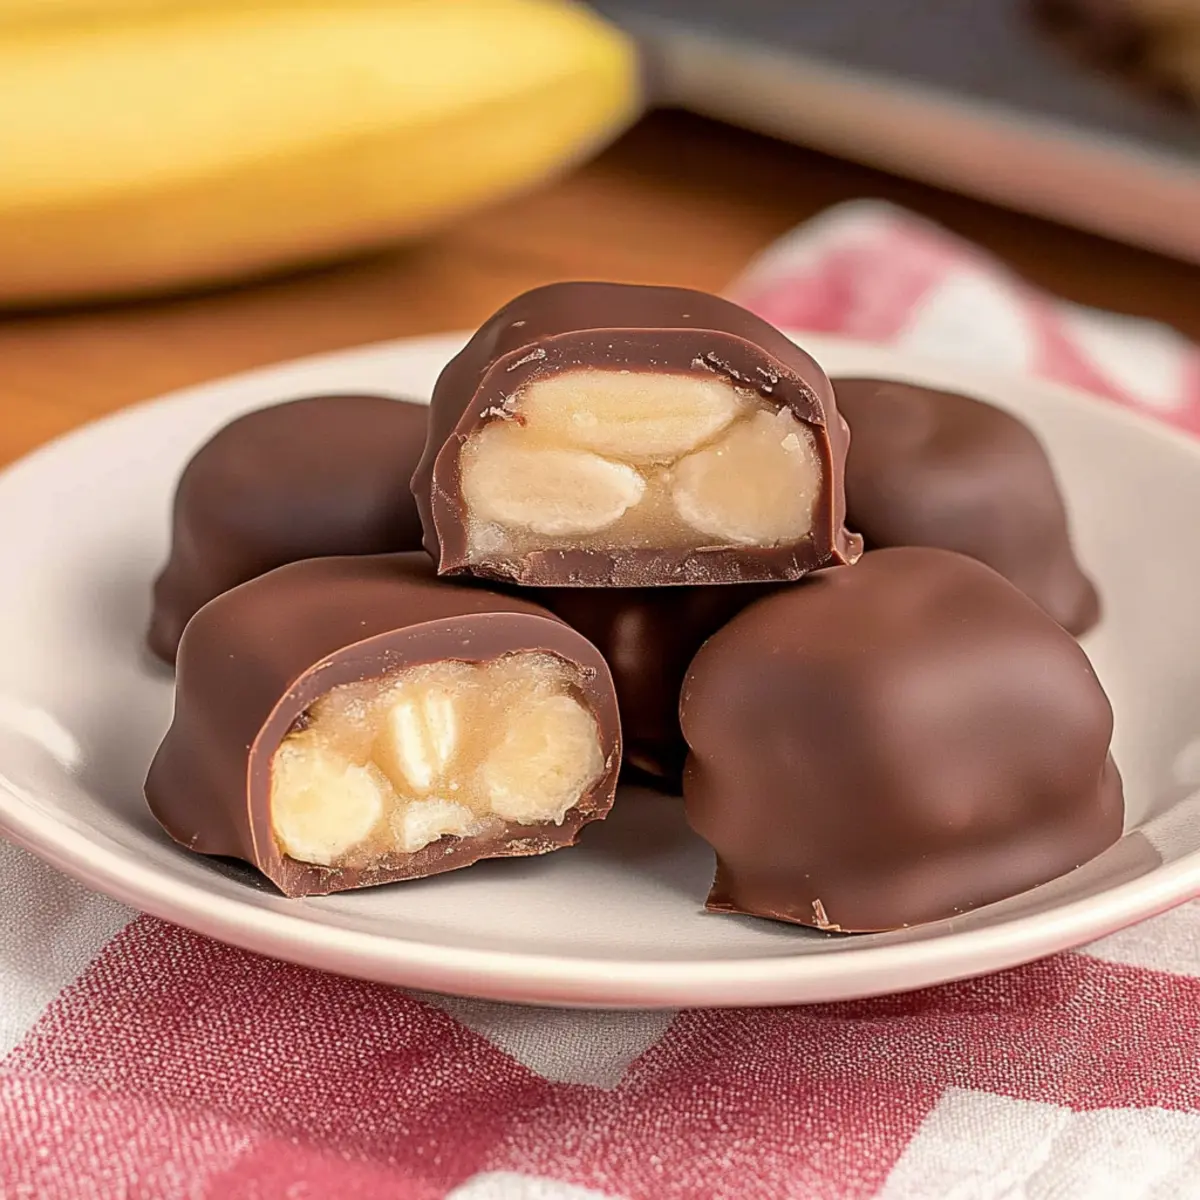
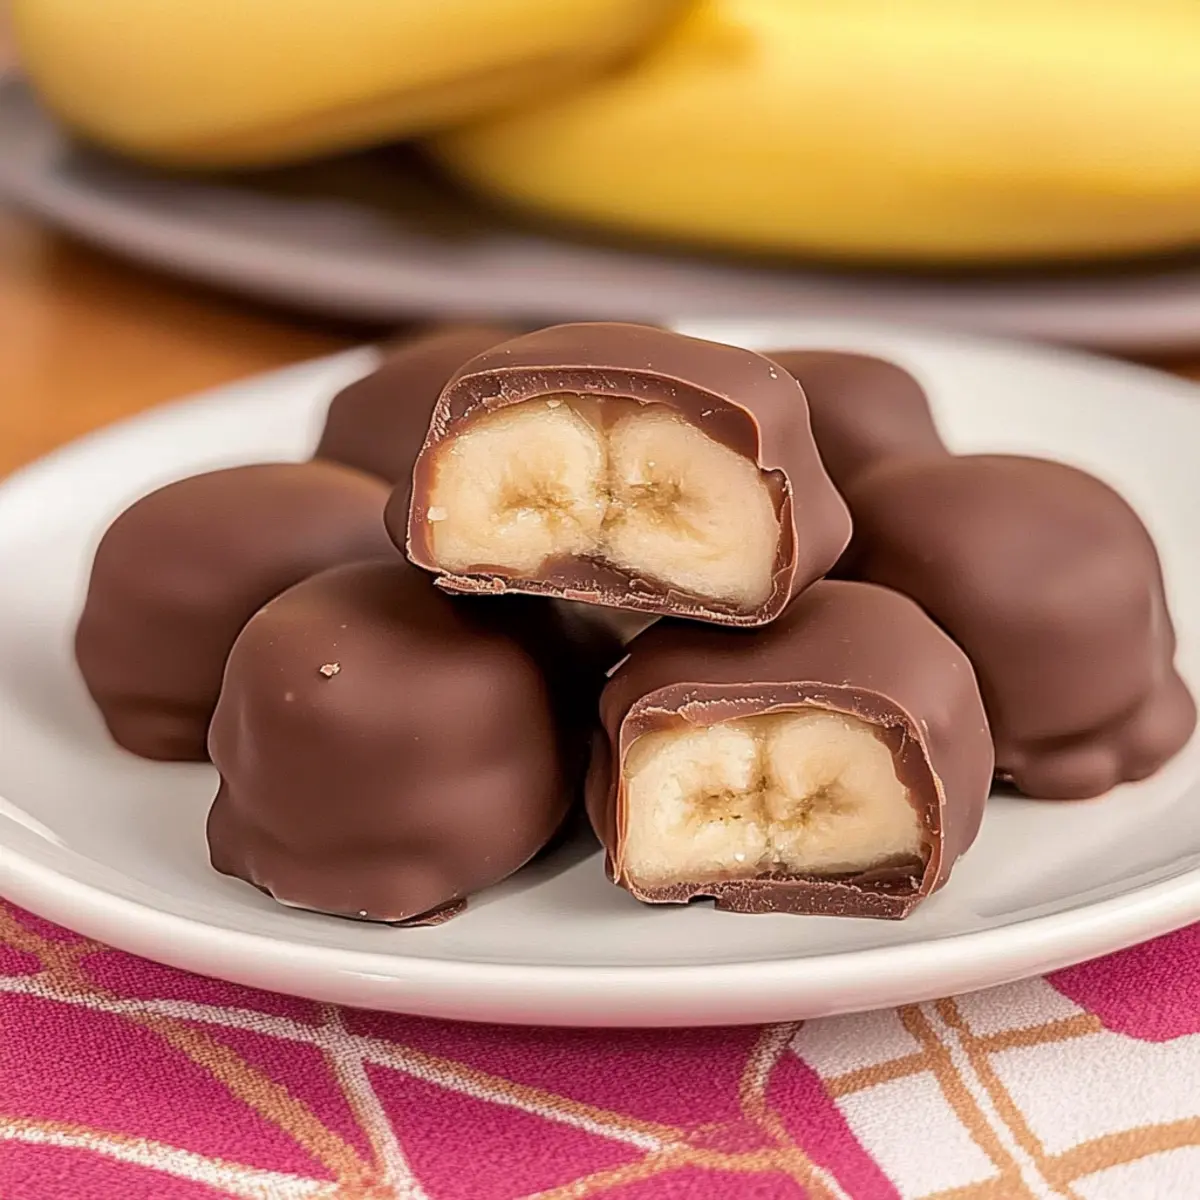
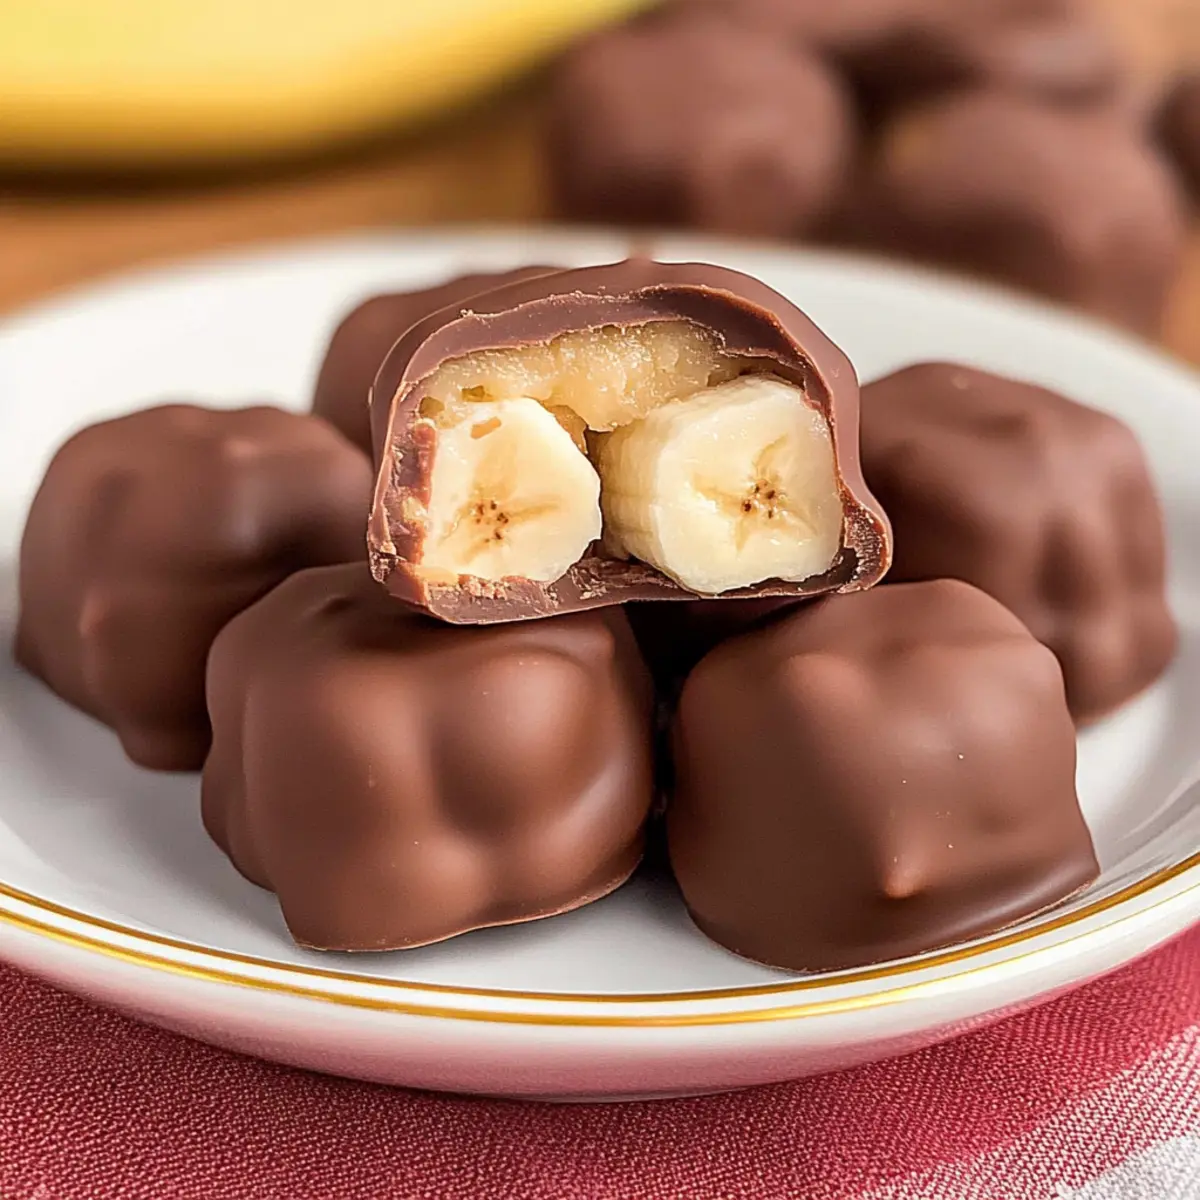
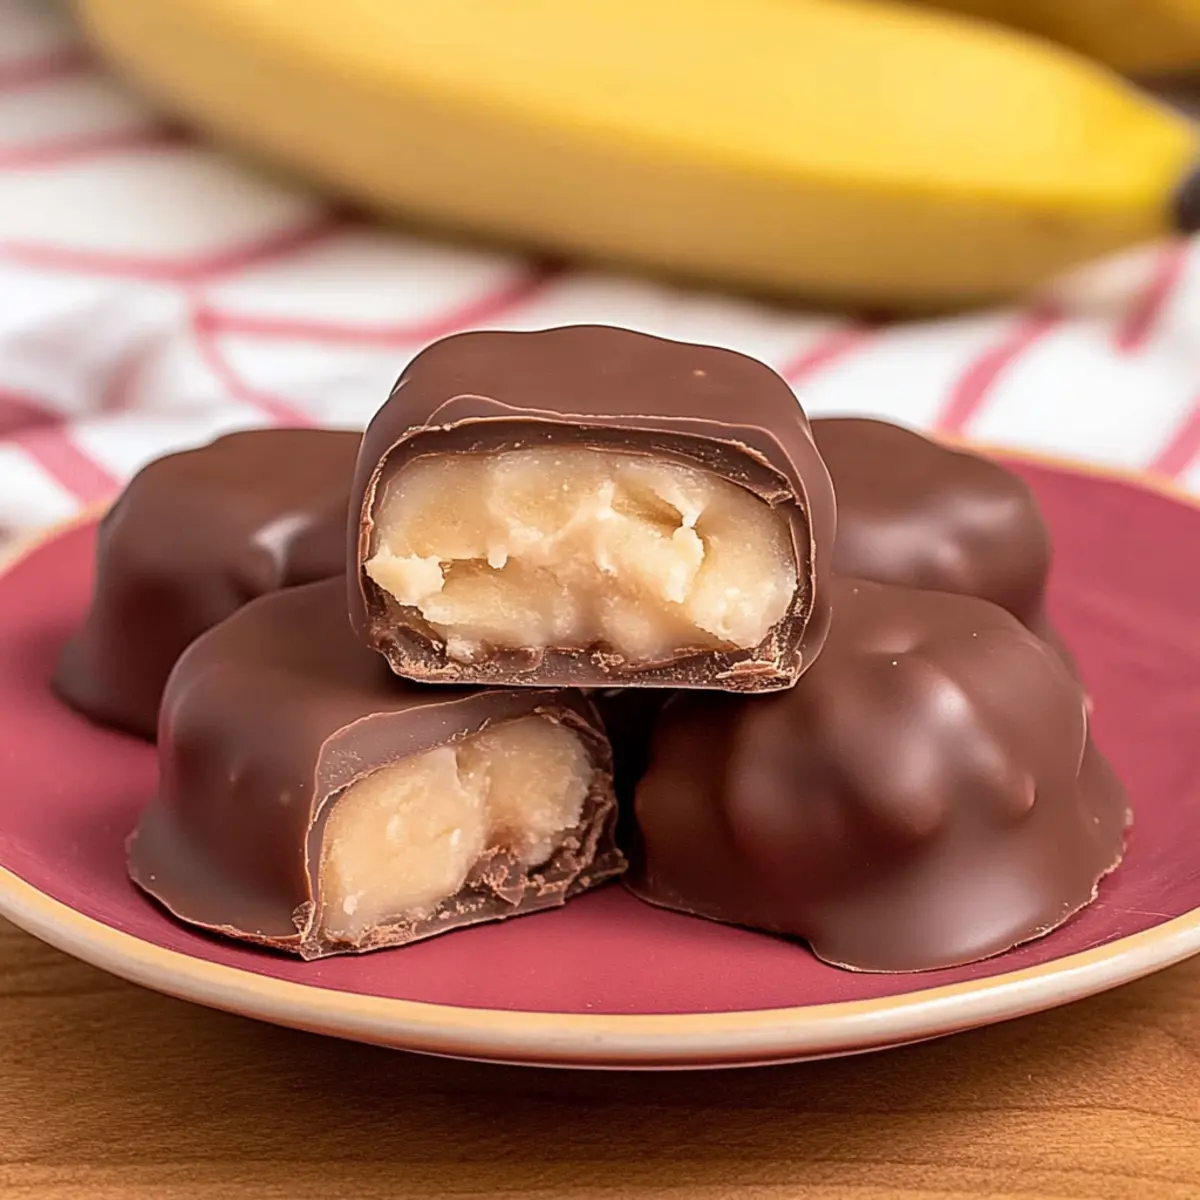
Begin by peeling your ripe bananas and cutting them into bite-sized slices, approximately ⅜” to ½” thick. Aim for uniform slices to ensure even filling. Arrange them neatly on a clean cutting board, as this will make it easier to sandwich the peanut butter filling when you’re ready to assemble your Chocolate Banana Peanut Butter Bites.
Step 2: Fill with Peanut Butter
Take one banana slice and spread a generous layer of peanut butter on one side. Top it with another banana slice to create a satisfying sandwich. Press them gently together, ensuring the peanut butter adheres well. Repeat this process until all banana slices are used; your sandwiches should be creamy and inviting, ready to be chilled.
Step 3: Freeze
Line a baking sheet with parchment paper and carefully place your banana sandwiches on top. Ensure they aren’t touching to prevent sticking. Place the tray in the freezer for about 1 hour, or until the banana sandwiches are solid. This step is crucial for making the coating process easier and will enhance the overall enjoyment of your Chocolate Banana Peanut Butter Bites.
Step 4: Melt Chocolate
While the banana bites freeze, prepare your chocolate coating. In a microwave-safe bowl, melt your chosen chocolate in 30-second intervals, stirring in between until smooth. Alternatively, use a double boiler on low heat for a more controlled melting process. Aim for a glossy consistency to ensure a deliciously smooth finish on your Chocolate Banana Peanut Butter Bites.
Step 5: Coat with Chocolate
Once your banana sandwiches are fully frozen, it’s time for coating! Using a toothpick, dip each frozen banana sandwich into the melted chocolate, ensuring it’s entirely covered. Lift it out and let any excess chocolate drip off before placing it back onto the parchment-lined tray. This will create a beautiful, shiny layer around each bite.
Step 6: Final Freeze
After all the bites are coated, return the tray to the freezer. Allow the Chocolate Banana Peanut Butter Bites to freeze for at least 30 minutes or until the chocolate coating is solid. This final freezing step will give your treats a satisfying crunch and ensure they hold together perfectly when enjoyed.
What to Serve with Chocolate Banana Peanut Butter Bites?
Looking to elevate your sweet snack experience? Pair these delightful bites with a few complementary treats and drinks for a full culinary adventure.
- Creamy Greek Yogurt: A dollop on the side offers tanginess that pairs beautifully with the sweetness of the bites.
- Fresh Berries: Vibrant strawberries or raspberries add a refreshing burst, balancing flavors and textures on your plate. Consider a medley to surprise your taste buds!
- Nutty Granola: Serve a sprinkle of crunchy granola as a topping for added texture, creating a fun, munchy experience alongside the chilled bites.
- Smoothie Delight: Blend up a creamy banana peanut butter smoothie to mirror the snacks’ flavors—perfect for energizing afternoons.
- Homemade Trail Mix: Combine nuts, seeds, and dried fruit for a simple, nutritious option that complements the chocolate’s richness well.
- Minty Iced Tea: A refreshing drink like mint iced tea cleanses the palate while adding a calming note—ideal for warmer days.
- Chocolate Dipped Pretzels: For a salty-sweet twist, pair with chocolate-covered pretzels; the crunch and saltiness contrast perfectly with the smooth bites!
- Frozen Grapes: Light and refreshing, these make for a great palate cleanser while keeping your dessert theme alive.
- Almond Milk: A glass of chilled almond milk brings nutty notes that echo the flavors of your bites—both tasty and soothing!
Make Ahead Options
These Chocolate Banana Peanut Butter Bites are a lifesaver for busy home cooks looking to simplify meal prep! You can assemble the banana sandwiches and freeze them for up to 24 hours ahead of time. Slice your ripe bananas and fill them with peanut butter, then place them on a baking sheet and pop them in the freezer until solid. For optimal texture, make sure they are completely frozen before dipping in chocolate. When you’re ready to enjoy, simply melt the chocolate, coat the frozen sandwiches, and return them to the freezer for another 30 minutes to achieve that delightful crunch. With this preparation, you’ll have kid-friendly snacks at your fingertips, saving you precious time during the week!
Chocolate Banana Peanut Butter Bites Variations
Explore the endless possibilities for these delightful bites and let your creativity shine!
-
Nut Butter Swap: Substitute almond or cashew butter for a unique taste twist. Each nut brings its distinct flavor, enhancing the overall experience.
-
Textured Twist: Mix in mini chocolate chips or crushed nuts within the peanut butter layer. This adds a satisfying crunch that makes every bite a little surprise.
-
Chocolate Variations: Experiment with different chocolate types! Opt for white chocolate or yogurt-based varieties to contrast beautifully with the banana’s natural sweetness.
-
Fruit Fusion: Add other fruits, like strawberries or raspberries, in place of some banana slices for a fruity explosion. The tangy notes can elevate the flavor profile even further.
-
Heat Things Up: If you love a little spice, consider adding a dash of cayenne pepper to the chocolate coating. It creates a beautiful balance of sweet and spicy that will tantalize your taste buds.
-
Dairy-Free Delight: Use dairy-free chocolate for a vegan-friendly option. It’s a simple swap that maintains the deliciousness of these bites while catering to dietary preferences.
-
Mix It Up: Introduce flavors like cinnamon or vanilla extract into the peanut butter mixture. This delightful addition can elevate the depth of flavor in your bites.
Embrace the journey of creating custom Chocolate Banana Peanut Butter Bites that fit your family’s tastes. They are perfect for those days when you crave something special but still healthy, much like our Dark Chocolate Coffin Mousse or Garlic Butter Brazilian Steak. Let the kitchen magic begin!
How to Store and Freeze Chocolate Banana Peanut Butter Bites
Fridge: Store any leftovers in an airtight container in the fridge for up to 3 days to keep them fresh and delicious.
Freezer: For longer storage, place the Chocolate Banana Peanut Butter Bites in a freezer-safe container. They can last up to 7 days while maintaining their delightful texture.
Reheating: There’s no need to reheat these bites; simply enjoy them directly from the freezer for a refreshing, chilled treat.
Layering: When freezing, separate layers with wax paper to prevent sticking, ensuring each bite remains intact and easy to enjoy later.
Expert Tips for Chocolate Banana Peanut Butter Bites
-
Choose Ripe Bananas: Select ripe bananas for the best flavor and texture, ensuring your Chocolate Banana Peanut Butter Bites are sweet and creamy.
-
Proper Peanut Butter Application: Spread an ample layer of peanut butter between banana slices, allowing for maximum flavor and a satisfying bite.
-
Chill Before Coating: Make sure to freeze the banana sandwiches until solid before coating; this prevents the chocolate from melting during the process.
-
Melting Chocolate Wisely: Use a double boiler or microwave at low intervals to melt chocolate slowly. This avoids burning and ensures a smooth coating for your bites.
-
Storage Solutions: Keep your bites in a single layer within a freezer-safe container and use wax paper between layers to prevent sticking.
These tips will help you create delightful Chocolate Banana Peanut Butter Bites that the whole family will love!
Chocolate Banana Peanut Butter Bites Recipe FAQs
How do I choose the right bananas for this recipe?
Absolutely! Opt for ripe bananas that are lightly speckled with brown spots for the sweetest flavor and a creamy texture. Avoid bananas with dark spots all over as they can become overly mushy and won’t hold their shape well in the bites.
How should I store my Chocolate Banana Peanut Butter Bites?
Keep any leftover bites in an airtight container in the fridge for up to 3 days. If you want to store them longer, pop them in a freezer-safe container, where they can last for up to 7 days while maintaining their delightful texture. Always separate layers with wax paper to prevent them from sticking together!
Can I freeze these Chocolate Banana Peanut Butter Bites?
Yes! To freeze, place the bites in a single layer on a baking sheet and freeze until solid, then transfer them to a freezer-safe container. They will keep well in the freezer for up to 3 months. Enjoy them straight from the freezer for a chilled treat!
What if the chocolate coating isn’t smooth?
If your chocolate appears thick or lumpy, it might have been overheated. Place the chocolate in a heat-safe bowl over a pot of simmering water (double boiler method) on low heat and stir until it becomes smooth. Alternatively, you can use fresh chocolate and melt it in short intervals in the microwave to ensure a glossy consistency for the coating.
Are there any dietary considerations for these bites?
Certainly! If you have a nut allergy, you can replace peanut butter with sun butter or any seed-based spread. For those who are lactose intolerant or prefer vegan options, choose dairy-free chocolate for coating. Always check labels to ensure they meet your dietary needs.
Chocolate Banana Peanut Butter Bites
Ingredients
Equipment
Method
- Begin by peeling your ripe bananas and cutting them into bite-sized slices, approximately ⅜" to ½" thick.
- Take one banana slice and spread a generous layer of peanut butter on one side. Top it with another banana slice.
- Line a baking sheet with parchment paper and arrange your banana sandwiches on it. Freeze for about 1 hour.
- Melt your chosen chocolate in a microwave-safe bowl in 30-second intervals until smooth.
- Dip each frozen banana sandwich into the melted chocolate, ensuring it's entirely covered.
- Return the tray to the freezer for at least 30 minutes or until the chocolate coating is solid.
Leave a Reply