
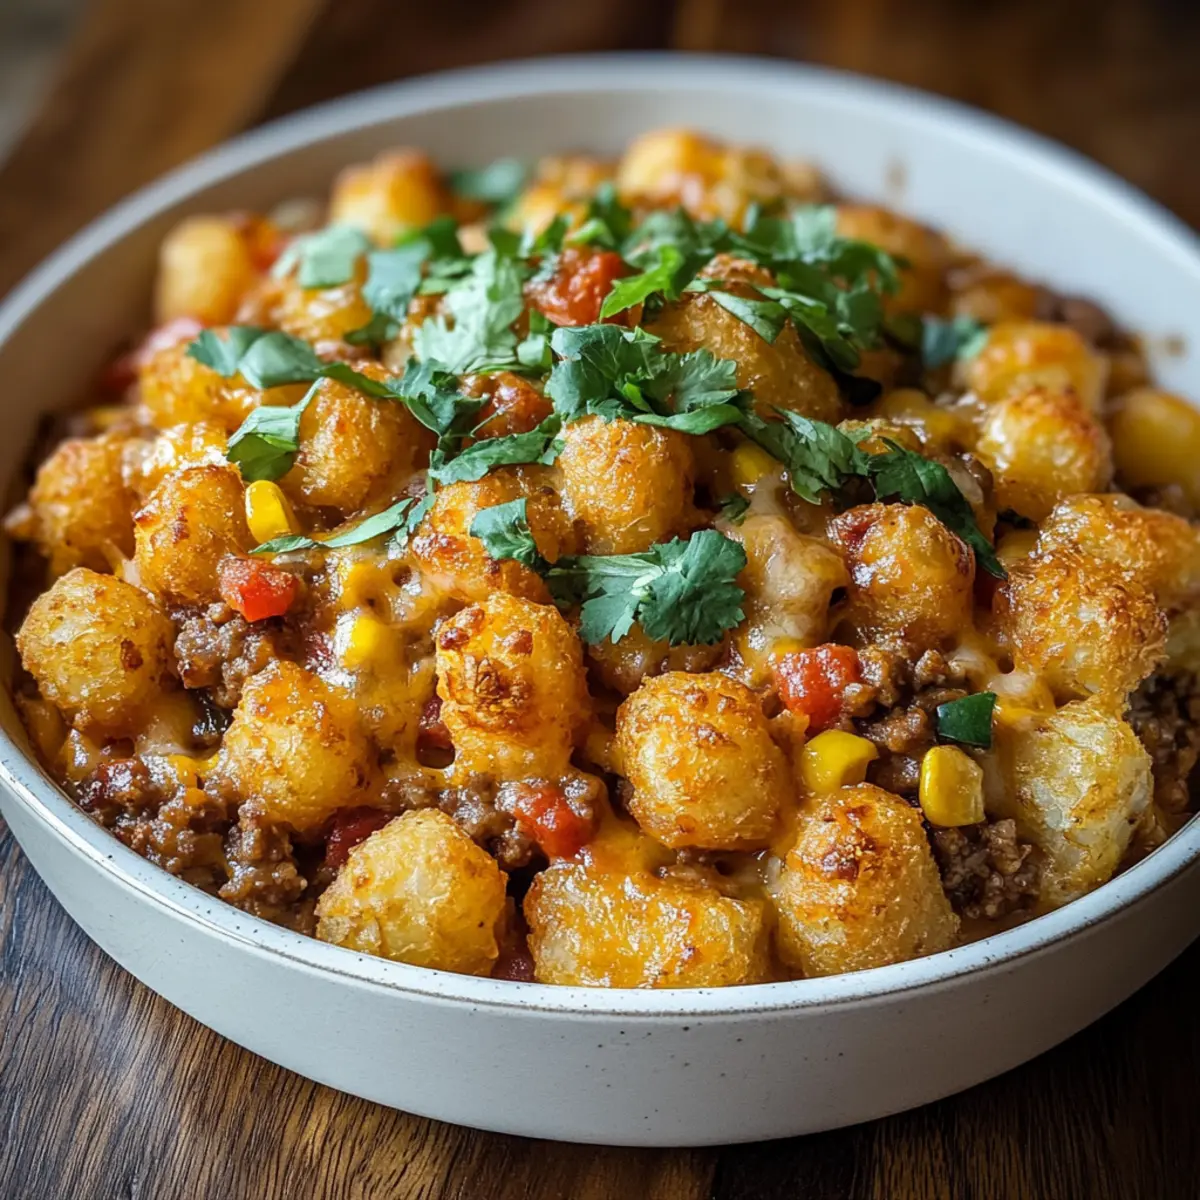
As I pulled the bubbling dish from the oven, the aroma of crispy tater tots drifting through my kitchen felt like a warm hug. This Dairy-Free Tater Tot Casserole has become a favorite in our home, combining heartiness with a healthy twist. With tender ground turkey (or your preferred plant-based protein) and an array of colorful vegetables enveloped in a creamy coconut sauce, it’s comfort food reimagined for those avoiding dairy and gluten. Not only is it a quick recipe, ideal for busy weeknights, but it also transforms classic flavors into a wholesome delight that even the pickiest eaters will adore. Who wouldn’t want to dive into this cozy dish, perfect for gatherings or an effortless family dinner? Ready to uncover the magic behind this casserole? Let’s get cooking!

Why is this Casserole a Game Changer?
Comforting and hearty, this Dairy-Free Tater Tot Casserole brings the nostalgia of traditional dishes right to your table, but without the dairy. Quick to prepare, you can whip this up in under an hour, making it perfect for busy nights. Versatile and customizable, feel free to swap in your favorite vegetables or proteins, like those found in my Baked Crab Casserole. Crowd-pleasing flavors mean even the pickiest eaters won’t be able to resist diving in. And don’t worry, it retains that crispy topping we all love, giving you the perfect balance of texture and taste!
Dairy-Free Tater Tot Casserole Ingredients
• Discover the tasty components that make this dish shine!
For the Casserole Filling
- Ground Turkey or Beef – Adds heartiness to the casserole; substitution: Use Beyond Meat or another plant-based alternative for a vegan option.
- Onion – Provides aromatic flavor and sweetness; substitution: Shallots can be used for a milder taste.
- Garlic – Enhances overall flavor depth; substitution: Garlic powder can work, but fresh is preferred for better taste.
- Red Bell Pepper – Brings sweetness and vibrant color; substitution: Any bell pepper or zucchini can be used.
- Frozen Corn – Adds a touch of sweetness and texture; substitution: Fresh corn can be utilized—cook until tender first.
- Frozen Mixed Vegetables – Offers a nutritious medley; substitution: Fresh vegetables like spinach or kale can enhance the health factor.
- Coconut Milk – Acts as a creamy base without dairy; substitution: Almond milk or cashew cream can lighten it up.
- Dried Thyme – Infuses an earthy flavor; substitution: Fresh thyme can be used—just adjust the quantity.
- Paprika – Adds warm color and flavor; substitution: Smoked paprika can intensify the flavor profile.
- Salt & Pepper – Essential for seasoning; note: Adjust according to your personal spice preference.
For the Topping
- Frozen Tater Tots (Gluten-Free) – Provides the signature crispy topping; note: Check packaging for gluten-free certification, making it a classic Dairy-Free Tater Tot Casserole.
Step‑by‑Step Instructions for Dairy-Free Tater Tot Casserole
Step 1: Preheat the Oven
Start by preheating your oven to 425°F (220°C). This is crucial to achieve the perfect crispiness for your tater tots. While the oven warms up, gather all your ingredients and equipment, including a large skillet and a 9×13 inch baking dish, to get ready for assembling your delicious Dairy-Free Tater Tot Casserole.
Step 2: Brown the Meat
In a large skillet set over medium heat, add your ground turkey or beef. Use a wooden spoon to break it apart as it cooks, turning occasionally until it’s beautifully browned, about 5-7 minutes. Ensure there are no pink spots remaining, as this will provide a solid and hearty base for your casserole.
Step 3: Sauté the Aromatics
Next, add the chopped onion and minced garlic to the skillet. Sauté for approximately 3-4 minutes, stirring frequently, until the onion becomes translucent and fragrant. The aroma will start filling your kitchen, setting the stage for the comforting flavors of the Dairy-Free Tater Tot Casserole you’re about to create.
Step 4: Incorporate the Vegetables
Stir in the red bell pepper, frozen corn, and mixed vegetables, infusing your filling with color and nutrition. Pour in the creamy coconut milk along with the dried thyme, paprika, salt, and pepper. Cook this mixture for another 5-7 minutes, stirring occasionally, until it’s heated through and well combined, ready to bring a flavorful depth to the casserole.
Step 5: Assemble the Casserole
Transfer your savory filling into a greased 9×13 inch baking dish, spreading it out into an even layer. This step is essential for ensuring every bite of your Dairy-Free Tater Tot Casserole is packed with flavor. Make sure the filling covers the bottom of the dish completely to create a nice base for the crispy topping.
Step 6: Add Tater Tots
Now it’s time to add the star of the show! Arrange a single layer of frozen tater tots evenly across the top of your casserole filling. Make sure they are not overlapping for maximum crispiness. This layer will crisp up beautifully in the oven, providing the delightful texture that makes this dish feel like the ultimate comfort food.
Step 7: Bake to Perfection
Place the casserole in your preheated oven and bake for 25-30 minutes. Keep an eye out for the tater tots turning golden brown and crispy, which signals that your Dairy-Free Tater Tot Casserole is ready to come out. The bubbling filling underneath adds to the tantalizing effect!
Step 8: Cool and Serve
Once baked, carefully remove the casserole from the oven and allow it to cool for a few minutes. This short wait will help the filling settle and make serving easier. Slice into portions and enjoy the warm, hearty flavors of this delightful Dairy-Free Tater Tot Casserole with family or friends!

What to Serve with Dairy-Free Tater Tot Casserole
Pair your comforting Dairy-Free Tater Tot Casserole with sides that enhance its heartiness and flavors. Here are some delightful options to create a well-rounded meal.
-
Crispy Side Salad: A fresh mix of greens, cucumbers, and tomatoes tossed in a light vinaigrette adds a refreshing contrast to the dish’s warmth. The crunch will make every bite of the casserole feel even more satisfying.
-
Garlic Bread Sticks: Soft, doughy bread with a hint of garlic butter serves as a perfect companion, ideal for dipping into the casserole’s savory filling. This classic pairing adds an extra layer of comfort to your meal.
-
Roasted Vegetables: Seasoned carrots, bell peppers, and broccoli roasted until caramelized provide a flavorful and nutritious side that complements the rich tastes in the casserole. The added texture brings bursts of flavor with each bite.
-
Avocado Slices: Creamy avocado on the side enhances the dish’s richness while adding healthy fats. Its smoothness balances the casserole’s crunch, creating a delightful mix of textures that elevate your dining experience.
-
Sparkling Water with Lemon: A light, refreshing drink with a citrus twist cleanses the palate between bites, making your meal feel lively and rejuvenating. It pairs perfectly with the robust flavors of the casserole.
-
Chocolate Avocado Mousse: For dessert, this creamy, dairy-free treat is a delightful end to your meal. It’s indulgent yet light, echoing the comforting elements of the casserole without being too heavy.
-
Fruit Salad: A vibrant mix of seasonal fruits introduces a sweet, refreshing note that balances the heartiness of the casserole, making for a colorful and nutritious addition to your meal.
Expert Tips for Dairy-Free Tater Tot Casserole
-
Crispier Tater Tots: Ensure the tater tots are laid out in a single layer without overlapping for maximum crispiness.
-
Customize Veggies: Feel free to mix in seasonal vegetables like zucchini or spinach to enhance both flavor and nutrition.
-
Protein Flexibility: If you prefer a vegetarian option, substitute the ground turkey or beef with plant-based proteins like Beyond Meat for a deliciously hearty twist.
-
Creamy Consistency: For a richer sauce, use coconut cream instead of coconut milk; it’ll elevate the creaminess of your Dairy-Free Tater Tot Casserole.
-
Storage Smarts: Store any leftovers in an airtight container in the refrigerator for up to three days, or freeze for up to a month—just reheat in the oven for the best texture!
-
Flavor Boost: Experiment with adding a sprinkle of nutritional yeast on top before baking for an extra hint of cheesy flavor without dairy.
Make Ahead Options
These Dairy-Free Tater Tot Casserole preparations are perfect for busy weeknights! You can assemble the filling—browned meat, sautéed vegetables, and coconut milk—up to 24 hours in advance. Simply refrigerate the prepared mixture in an airtight container. When you’re ready to enjoy this comforting dish, transfer the filling to your greased baking dish, pile on the tater tots, and bake as directed. To ensure optimal flavor and crispy texture, avoid pre-baking the tater tots beforehand. With these make-ahead instructions, you can savor delicious home-cooked comfort food with minimal evening stress—making dinner a delightful experience instead of a rush!
Storage Tips for Dairy-Free Tater Tot Casserole
-
Room Temperature: Allow the casserole to cool completely before storing; it can sit out for up to 2 hours before refrigeration to prevent bacterial growth.
-
Fridge: Store leftovers in an airtight container in the refrigerator for up to 3 days. Make sure to cover it well to keep the flavors locked in.
-
Freezer: For longer storage, freeze the casserole in a freezer-safe container for up to 1 month. To maintain texture, wrap it tightly with plastic wrap and foil.
-
Reheating: When ready to enjoy, reheat your Dairy-Free Tater Tot Casserole in the oven at 350°F (175°C) for about 25-30 minutes until heated through and crispy on top.
Dairy-Free Tater Tot Casserole Variations
Feel free to unleash your creativity and personalize this dish to suit your taste buds!
- Vegetable Boost: Mix in fresh spinach or kale for added nutrition and a pop of color. Each leaf wilts down beautifully, enhancing both taste and health.
- Vegan Twist: Substitute ground turkey or beef with Beyond Meat or lentils for a completely plant-based meal. It’s just as hearty and delicious!
- Cheesy Flavor: Top the casserole with your favorite dairy-free cheese before adding the tater tots for an extra creamy, cheesy burst. It’s like bringing layers of indulgence to each bite!
- Heat it Up: Sprinkle some red pepper flakes or add diced jalapeños to the filling for a spicy kick. This simple addition can transform comfort into excitement.
- Herb Infusion: Swap out dried thyme for fresh herbs like rosemary or basil to elevate the aromatic profile. Fresh herbs infuse a delightful flavor twist that compliments the dish beautifully.
- Different Topping: Instead of tater tots, try using sweet potato fries for a unique flavor profile that adds natural sweetness and a lovely color contrast. They crisp up just as well!
- Mushroom Medley: Incorporate sautéed mushrooms for a rich, earthy flavor. They add a savory depth that balances perfectly with the creamy sauce.
- Savory Surprise: Mix in a dash of soy sauce or tamari for umami richness. This small twist can really enhance the overall flavor and depth of the casserole.
For more scrumptious ideas, check out my Baked Ravioli Casserole for a different take, or dive into a delightful Baked Crab Casserole for an ocean-inspired dish! Enjoy experimenting!
Dairy-Free Tater Tot Casserole Recipe FAQs
What type of ground meat is best for this casserole?
For this Dairy-Free Tater Tot Casserole, I recommend using ground turkey or beef for their hearty texture and flavor. If you’re looking for a plant-based option, Beyond Meat or other plant-based alternatives work wonderfully too, ensuring everyone can enjoy a comforting meal!
How should I store leftovers?
Once the casserole has completely cooled, store leftovers in an airtight container in the refrigerator for up to 3 days. Ensure it’s well covered to maintain its delicious flavors. If you want to keep it longer, you can freeze it for up to 1 month, just remember to wrap it tightly in plastic wrap followed by foil to prevent freezer burn.
Can I freeze the Dairy-Free Tater Tot Casserole?
Absolutely! To freeze, allow the casserole to cool entirely, then transfer it to a freezer-safe container. Ensure to wrap it tightly using plastic wrap and foil. When you’re ready to eat, thaw it in the refrigerator overnight before reheating in the oven at 350°F (175°C) for about 25-30 minutes until thoroughly heated and crispy on top.
What if my tater tots don’t crisp up?
For perfect crispy tater tots, it’s essential to arrange them in a single layer without any overlapping on top of your casserole. If they’re overcrowded, they’ll steam instead of crisping. Also, ensure you bake them in a preheated oven to achieve that beautiful golden-brown texture!
Can I substitute any ingredients for dietary restrictions?
Yes! This recipe is versatile. If you’re looking for a dairy-free replacement for the coconut milk, almond milk or cashew cream works well. For gluten-free needs, ensure the tater tots are labeled gluten-free—some brands contain gluten. If you have other dietary concerns, you can also mix and match the vegetables to suit your preferences.
How do I know if my vegetables are fresh enough?
When selecting your vegetables, look for vibrant colors and firmness. For example, bell peppers should be bright with no dark spots, and frozen corn should be free of ice crystals. If using fresh veggies, ensure they are tender and not too wilted—this will give your Dairy-Free Tater Tot Casserole the best flavor and texture.
Dairy Free Tater Tot Casserole for Comfort Food Lovers
Ingredients
Equipment
Method
- Preheat your oven to 425°F (220°C).
- In a large skillet set over medium heat, brown the ground turkey or beef for about 5-7 minutes.
- Add chopped onion and minced garlic, sauté for 3-4 minutes.
- Stir in red bell pepper, frozen corn, mixed vegetables, coconut milk, thyme, paprika, salt, and pepper.
- Transfer the filling into a greased 9x13 inch baking dish.
- Arrange a single layer of frozen tater tots evenly across the top.
- Bake for 25-30 minutes or until tater tots are golden brown.
- Allow to cool for a few minutes before slicing and serving.
Leave a Reply