
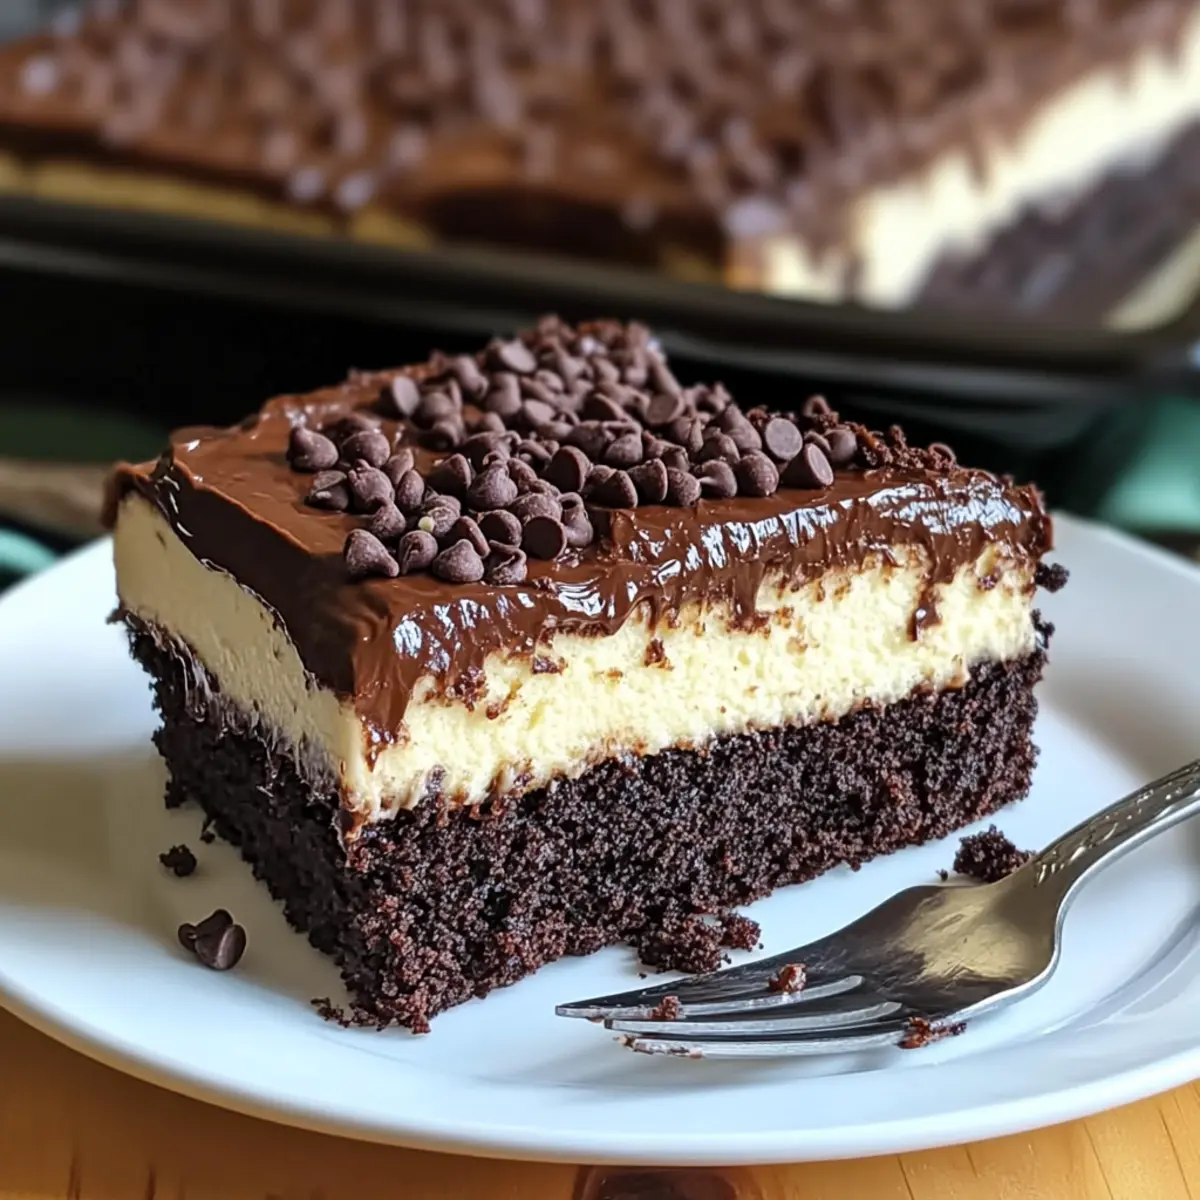
As I stirred the batter, a rich chocolate aroma filled my kitchen, instantly lifting my spirits. This is the moment I knew I was about to indulge in something truly special: Chocolate Ooey Gooey Cake. With a simple approach that uses cake mix, this dessert quickly becomes a cherished favorite, perfect for any gathering or just a cozy night in. Not only is it incredibly easy to prepare, but its creamy, gooey filling makes every bite an indulgent delight that no one can resist. Imagine serving this cake warm, with chocolate pockets oozing from the center, paired with a scoop of ice cream. What’s your go-to accompaniment for a chocolate dessert like this?
Why is this cake a must-try?
Ease of Preparation: With just a few simple ingredients, this recipe allows you to whip up a dessert that tastes like it came from a gourmet bakery.
Indulgent Flavor: The rich chocolate and creamy filling provide an unforgettable treat that satisfies even the strongest sweet cravings.
Versatility: Whether you’re hosting a gathering or treating yourself on a quiet evening, this cake fits every occasion perfectly. Consider serving it warm alongside a scoop of vanilla ice cream for that extra touch, reminiscent of the delightful combinations found in my Chocolate Chip Banana Bars.
Crowd Pleaser: Friends and family will be begging for seconds, and they’ll never guess how easy it was to make!
Unique Texture: With its gooey center and soft cake, each slice is a heavenly experience that elevates any dessert table. You might also want to check out my recipe for Black Velvet Cupcakes for another chocolatey delight.
Chocolate Ooey Gooey Cake Ingredients
For the Cake Base
• Chocolate Cake Mix – The foundation of this delightful dessert provides a quick and easy way to achieve a rich chocolate flavor.
• Eggs – Essential for binding the ingredients and adding moisture; opt for large eggs for the best results.
• Water – Helps hydrate the cake mix, ensuring a perfectly baked cake; consider substituting it with milk for added creaminess.
For the Creamy Filling
• Cream Cheese – Provides a dense and gooey texture that accentuates the chocolate flavor; mascarpone cheese can be a delicious alternative.
• Powdered Sugar – Adds sweetness and a smooth consistency to the filling; adjust the amount depending on your taste preference.
• Chocolate Chips – Infuse bursts of rich chocolate throughout; you can swap them for white chocolate or butterscotch chips for a twist.
This Chocolate Ooey Gooey Cake is sure to impress with its indulgent flavors and easy preparation!
Step‑by‑Step Instructions for Chocolate Ooey Gooey Cake
Step 1: Prepare the Batter
In a large mixing bowl, combine the chocolate cake mix, large eggs, and water. Use a hand mixer or whisk to blend until the mixture is smooth and well combined, about 2-3 minutes. Look for a glossy batter with no lumps; this will form the indulgent base for your Chocolate Ooey Gooey Cake.
Step 2: Bake the Base
Preheat your oven to 350°F (175°C) and grease a 9×13 inch baking pan. Pour the prepared batter into the pan and spread it evenly. Bake in the preheated oven for 25-30 minutes, or until the edges are set and the center is slightly gooey. The cake should spring back when lightly pressed, indicating it’s ready for the next step.
Step 3: Make the Filling
While the cake is baking, prepare the creamy filling. In a separate bowl, beat the cream cheese with powdered sugar until it’s light and creamy, approximately 3-4 minutes. Stir in chocolate chips for those irresistible pockets of chocolate that will elevate the flavor of your Chocolate Ooey Gooey Cake.
Step 4: Add the Filling
Once the base is out of the oven and has slightly cooled for about 5 minutes, dollop the cream cheese filling gently on top of the cake. Using a spatula or knife, swirl the filling into the cake. Aim for a marbled effect, ensuring some gooey filling remains visible to enhance the rich chocolate experience.
Step 5: Final Bake
Return the cake to the oven and bake for an additional 15-20 minutes. You’ll want the filling to be just set, with a slight jiggle, so check for doneness with a toothpick; it should come out with moist crumbs, but not wet batter. This will create that ooey gooey center that makes this cake so special.
Step 6: Cool and Serve
Allow your Chocolate Ooey Gooey Cake to cool in the pan for about 10-15 minutes after removing it from the oven. This will help the filling set slightly for easier slicing. Serve warm for the ultimate gooey texture, and consider pairing with vanilla ice cream for a truly decadent treat.
Expert Tips for Chocolate Ooey Gooey Cake
-
Perfect Baking Time: Ensure you keep a close eye on your cake while it bakes. Underbaking slightly is key to achieving that ooey gooey center, but don’t let it get too jiggly!
-
Mixing Well: Avoid overmixing your batter. Just blend until smooth to keep the cake light and fluffy instead of dense.
-
Cooling Crucial: Allow the cake to cool for about 10-15 minutes once out of the oven. This helps the filling settle, making it easier to slice while still maintaining that gooey texture.
-
Serving Warm: For the best experience, serve your Chocolate Ooey Gooey Cake warm. The filling will be at its most decadent and delightful when enjoyed right after cooling!
-
Creative Twists: Don’t be afraid to experiment! Add nuts in the filling or drizzle with melted chocolate or caramel on top for an indulgent twist that will wow your guests.
Make Ahead Options
These Chocolate Ooey Gooey Cake preparations are perfect for busy home cooks! You can mix the cake batter and store it in the refrigerator for up to 24 hours; this not only saves time but also enhances the flavor as it melds overnight. Additionally, you can prepare the cream cheese filling and refrigerate it in an airtight container for up to 3 days. When you’re ready to bake, pour the chilled batter into your greased pan, top with the filling, and bake as directed. Just be sure to bring the filling to room temperature before swirling it into the cake for optimal texture. This way, you can serve a warm, gooey delight without the last-minute rush!
What to Serve with Decadent Chocolate Ooey Gooey Cake?
Imagine the delightful symphony of flavors and textures that accompany a rich chocolate dessert masterpiece.
-
Vanilla Ice Cream: The creamy coldness adds a delightful contrast to the warm, gooey cake, creating a dreamy dessert experience.
-
Fresh Berries: Ripe strawberries or raspberries offer a refreshing tartness that perfectly balances the sweetness of the cake, elevating each bite.
-
Whipped Cream: Light and fluffy, a dollop of whipped cream introduces an airy texture that complements the cake’s rich filling beautifully. It’s a classic pairing for a reason!
-
Chocolate Sauce Drizzle: Elevate your dessert by drizzling warm chocolate sauce over the cake for an extra layer of decadence.
-
Hazelnut Coffee: Enjoy with a steaming mug of hazelnut coffee to enhance the chocolate notes while bringing a nutty warmth to the experience.
-
Espresso Martini: An indulgent cocktail pairing that boasts rich flavors and a hint of coffee, making your dessert feel like a gourmet experience.
-
Chocolate Chip Cookies: Serve alongside warm chocolate chip cookies for a fun twist—a chocolate lover’s paradise in every bite!
Mix and match these delightful pairings to enrich your dessert experience and create unforgettable moments around the table.
Storage Tips for Chocolate Ooey Gooey Cake
Fridge: Store any leftovers in an airtight container in the refrigerator for up to 3-4 days. This helps keep the Chocolate Ooey Gooey Cake fresh and moist.
Freezer: You can freeze the cake for up to 2 months. Wrap it tightly in plastic wrap and then in aluminum foil to prevent freezer burn. Thaw before serving for best taste.
Reheating: To enjoy the gooey filling, reheat in the oven at 350°F (175°C) for about 10 minutes, or microwave for 20-30 seconds until warm.
Room Temperature: If consumed within the day, it can sit at room temperature for up to 2 hours. Just cover to keep it from drying out.
Chocolate Ooey Gooey Cake Variations
Feel free to get creative and make this delicious cake your own, elevating flavors and textures as you please!
-
Nutty Twist: Add chopped walnuts or pecans to the filling for a delightful crunch alongside the creamy goodness.
-
Flavored Cake Mix: Experiment with vanilla or red velvet cake mixes to create a unique base that adds a fun twist to the ooey gooey experience.
-
Dulce De Leche Drizzle: For an extravagant touch, drizzle the cooled cake with dulce de leche or caramel sauce, enhancing each slice with a sweet, gooey richness.
-
Mini Cheesecake Swirl: Mix in a dollop of your favorite cheesecake filling along with the cream cheese for a rich, creamy layer that sings with flavor.
-
Spicy Kick: For those who like a little heat, add a pinch of cayenne pepper or chili powder to the batter to create complexity and surprise in each bite.
-
Berry Infusion: Fold in fresh raspberries or cherries into the creamy filling for a fruity burst of flavor that beautifully contrasts the rich chocolate.
-
Full-on Chocolate: Swap regular chocolate chips for white chocolate or butterscotch chips; they’ll offer delightful surprise bites that complement the dark chocolate beautifully.
When you’re ready for another indulgent dessert, consider trying my Dark Chocolate Coffin Mousse for an even richer chocolate experience!
Chocolate Ooey Gooey Cake Recipe FAQs
What type of chocolate cake mix should I use?
Absolutely, you can use any brand of chocolate cake mix you love! I often recommend a classic devil’s food cake mix for an extra rich flavor, but feel free to experiment with other varieties like fudge or even low-fat options if you’re watching your intake.
How should I store leftovers of the cake?
To maintain the deliciousness, store any leftovers in an airtight container in the refrigerator for up to 3-4 days. This ensures the Chocolate Ooey Gooey Cake stays moist and irresistible. If you plan on keeping it longer, freezing is a great option!
Can I freeze the Chocolate Ooey Gooey Cake?
Yes, you can absolutely freeze it! Wrap the cake tightly in plastic wrap, then in aluminum foil to prevent freezer burn. It can be frozen for up to 2 months. When you’re ready to enjoy, simply thaw it in the fridge overnight and reheat it slightly before serving for that gooey goodness!
What should I do if my cake is too gooey when baking?
If your cake comes out too gooey, it’s likely due to underbaking. Keep a close eye during the final bake; it should be set around the edges but still have a slight jiggle in the center. Use a toothpick to test; it should come out with moist crumbs, not wet batter. If it’s consistently underbaked, consider adjusting your oven temperature slightly or using an oven thermometer to verify accuracy.
Can I make this recipe gluten-free?
Very much so! You can substitute the chocolate cake mix with a gluten-free alternative; just ensure to check that all other ingredients, like the cream cheese and chocolate chips, are gluten-free as well. This way, you can still enjoy the deliciousness of Chocolate Ooey Gooey Cake without gluten!
Is this cake safe for pets or those with allergies?
While it’s a delightful treat for humans, it’s important to remember that chocolate is toxic to dogs and cats. If you’re sharing with friends who have allergies, be mindful of substituting ingredients accordingly, like using dairy-free cream cheese or ensuring the cake mix doesn’t contain any allergens like nuts or soy for safety!
Irresistible Chocolate Ooey Gooey Cake to Satisfy Cravings
Ingredients
Equipment
Method
- In a large mixing bowl, combine the chocolate cake mix, large eggs, and water. Blend until smooth, about 2-3 minutes.
- Preheat your oven to 350°F (175°C) and grease a 9x13 inch baking pan. Pour the batter into the pan and bake for 25-30 minutes.
- While the cake is baking, beat the cream cheese with powdered sugar until light and creamy, about 3-4 minutes. Stir in chocolate chips.
- Once the base is out of the oven and slightly cooled, dollop the cream cheese filling on top of the cake and swirl it in.
- Return the cake to the oven and bake for an additional 15-20 minutes until the filling is just set.
- Allow the cake to cool in the pan for 10-15 minutes before serving warm.
Leave a Reply