
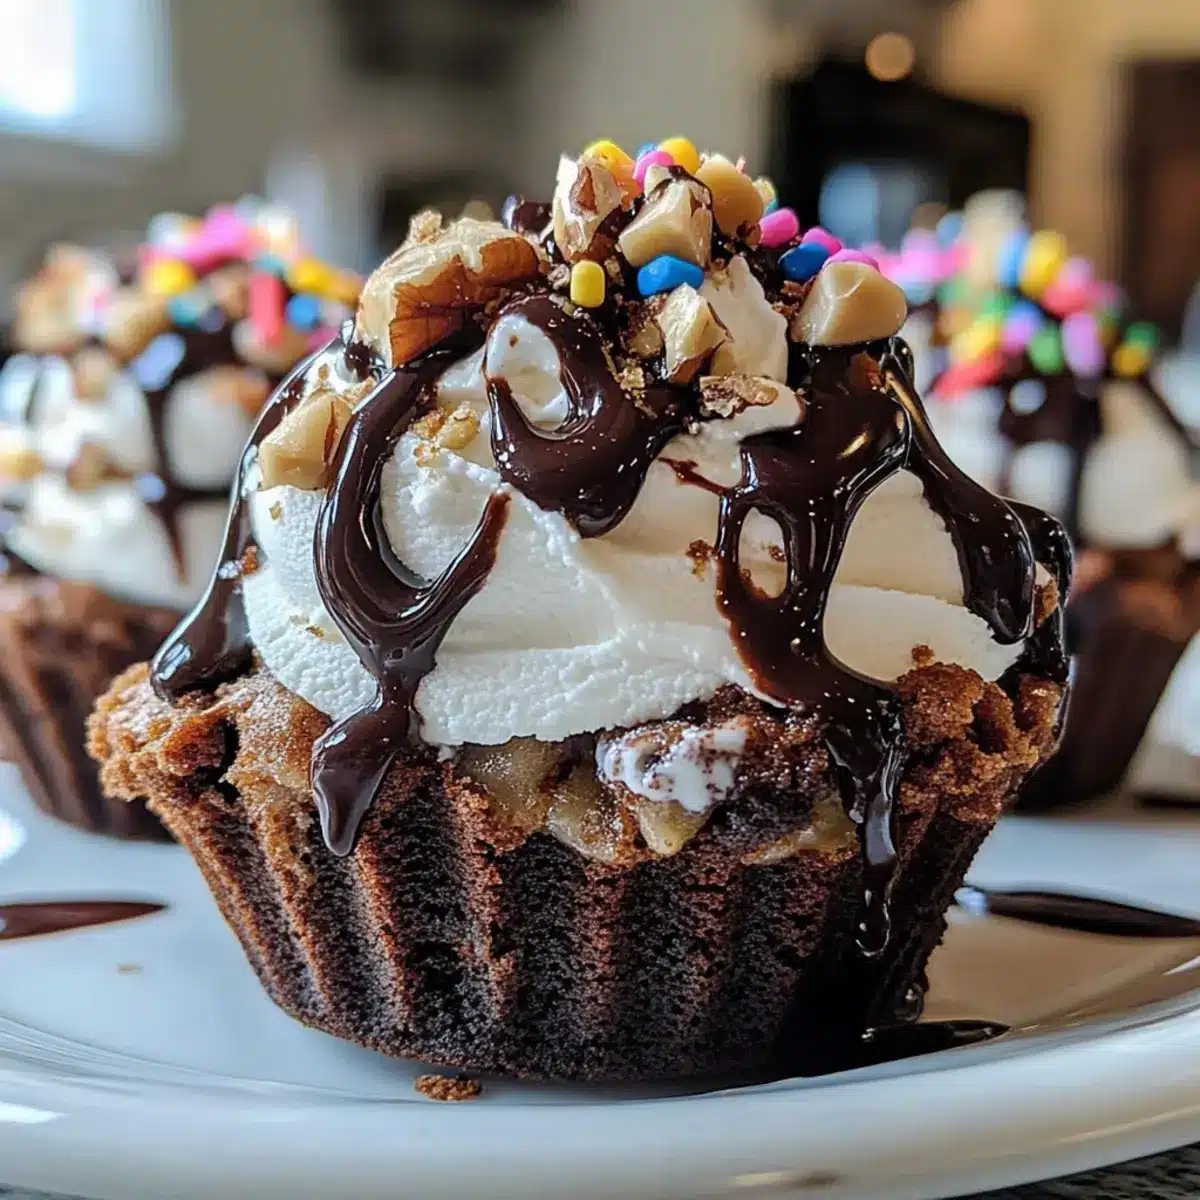
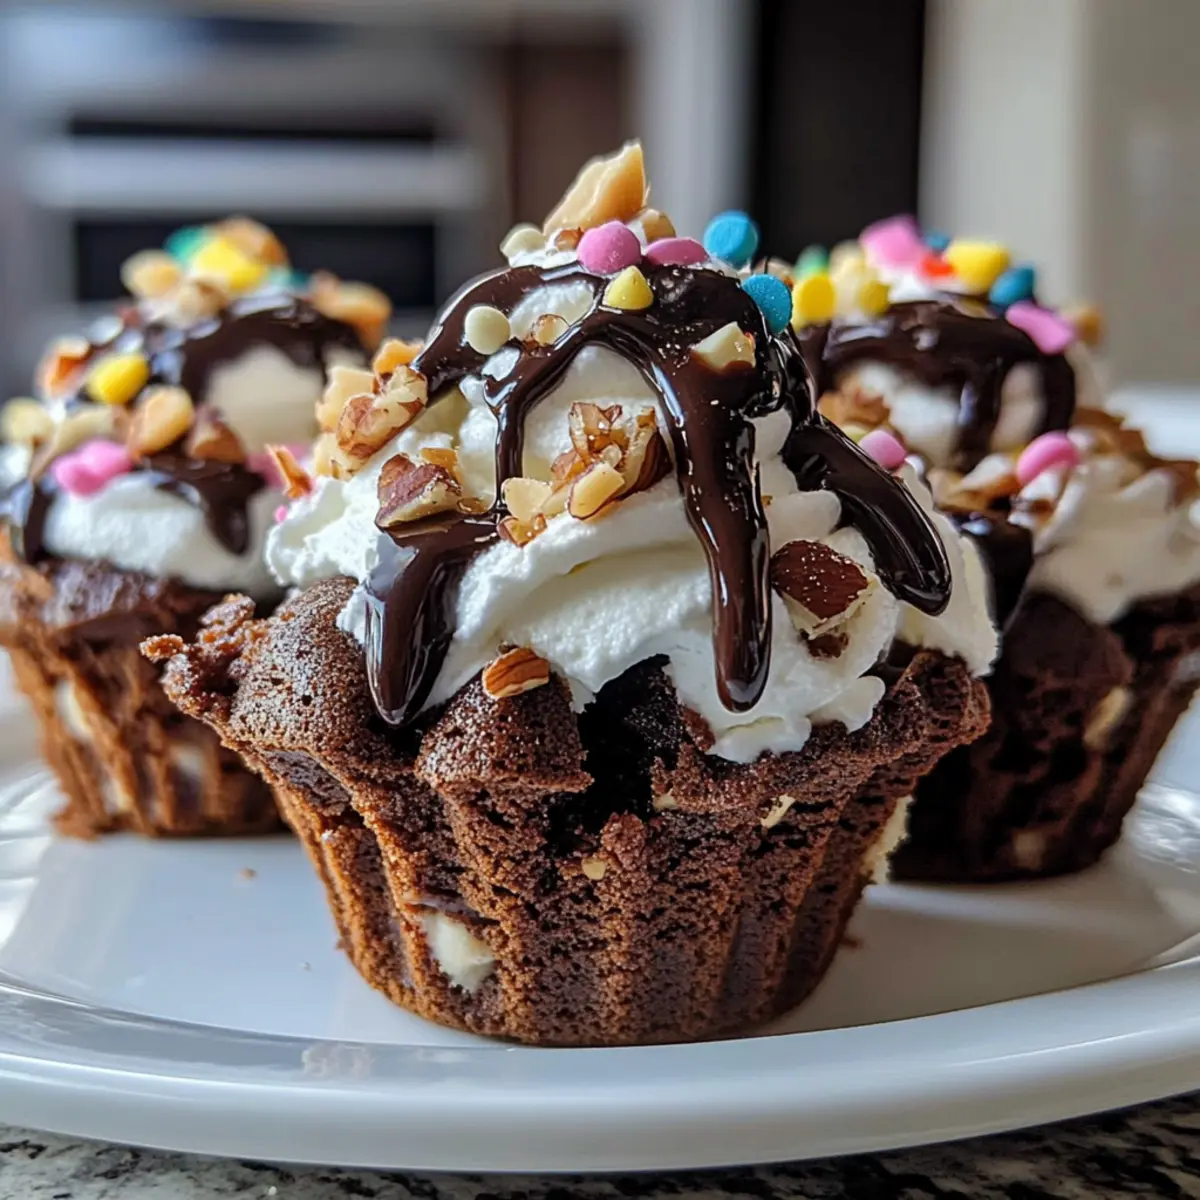
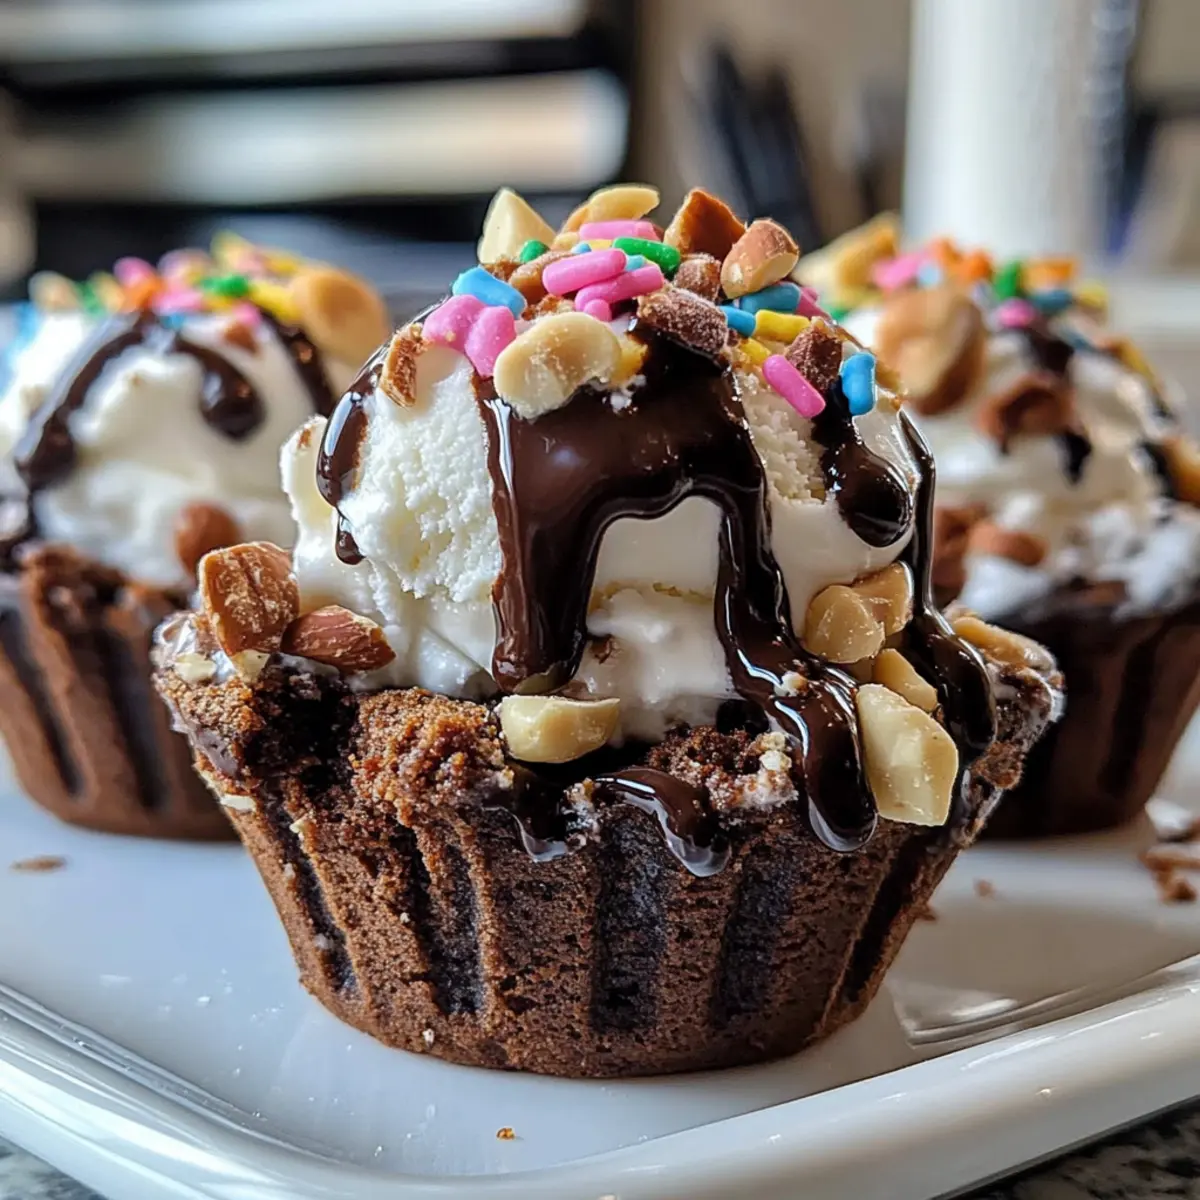
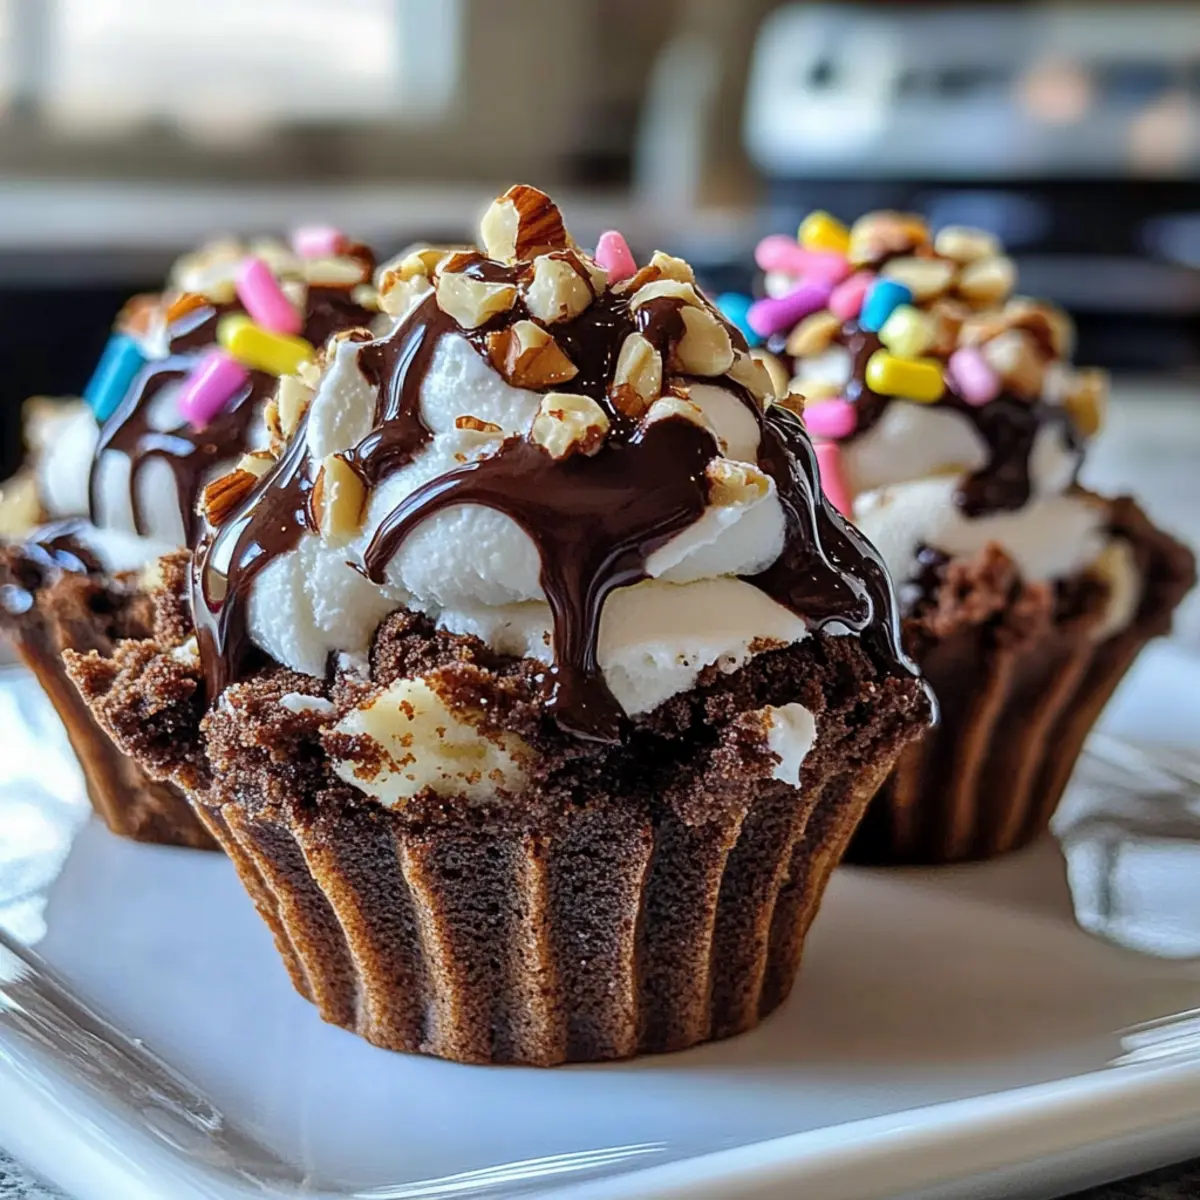
When I first created these 5-Ingredient Brownie Sundae Cups, I was taken aback by how quickly they vanished at the dinner table. Imagine fudgy brownie cups cradling creamy ice cream, just waiting for a shower of delightful toppings! Not only are these brownies easy to whip up, but they’re also a charming showstopper for any occasion—perfect for cozy nights spent indulging or impressing guests at your next gathering. With just five ingredients, you’ll be able to customize them to fit every sweet tooth. Ready to elevate your dessert game and surprise your family with this simple yet satisfying treat? Let’s dive in!
Why Are These Brownie Sundae Cups Irresistible?
Decadence in Every Bite: These 5-Ingredient Brownie Sundae Cups come together effortlessly, yet deliver maximum satisfaction.
Easily Customizable: Tailor your sundae with your favorite ice cream and toppings—think crushed Oreos or caramel drizzle!
Fun for All: They’re perfect for parties, providing a delightful and interactive dessert experience.
Time-Saving Treat: Whip them up in no time, freeing you to enjoy the fun!
Crowd-Pleasing Flavor: Rich, fudgy brownies combined with creamy ice cream are a guaranteed hit, reminiscent of the wonderful Halloween Taco Cups that everyone loves.
Brownie Sundae Cups Ingredients
• For those irresistible Brownie Sundae Cups, here’s what you’ll need:
For the Brownie Cups
- Brownie Mix – A standard 18-ounce box will create the perfect fudgy base for your sundae.
- Water – Helps to mix the batter smoothly, ensuring that everything comes together beautifully.
- Oil – Adds moisture and keeps the brownies rich and delicious.
- Egg – Provides the perfect structure, binding the brownies for that classic texture.
For the Sundae Filling
- Ice Cream – The star of the show! Choose any flavor you love, but vanilla bean pairs wonderfully with these brownies.
For the Toppings
- Chocolate Syrup – Drizzle this over your sundae for an extra touch of sweetness.
- Whipped Cream – Adds a light, fluffy contrast that elevates the entire dessert experience.
- Nuts – Sprinkle your favorite nuts for a crunchy texture that complements the softness of the brownies.
- Sprinkles – These colorful delights make your sundae a feast for the eyes and a fun treat for kids and adults alike!
Get ready to impress everyone with your delicious Brownie Sundae Cups that are easy to customize and unforgettable!
Step‑by‑Step Instructions for Brownie Sundae Cups
Step 1: Preheat the Oven
Begin by preheating your oven to 350°F (175°C). This ensures that when we bake our Brownie Sundae Cups, they cook evenly and beautifully. While the oven warms up, prepare your muffin tin by either greasing it with cooking spray or lining it with paper liners to prevent sticking.
Step 2: Mix the Brownie Batter
In a large mixing bowl, combine the brownie mix, water, oil, and egg. Stir these ingredients together until just combined; be careful not to overmix, as this can affect the texture of your brownies. You want a smooth mixture with a few small lumps still visible to achieve that fudgy consistency.
Step 3: Fill the Muffin Tin
Spoon the brownie batter into each muffin cup, filling them about two-thirds full. This allows space for the brownies to rise while baking. As you fill each cup, watch as the glossy batter settles into the tin, giving you a sneak peek of the delicious treats to come.
Step 4: Bake the Brownie Cups
Place the muffin tin in the preheated oven and bake for 15 minutes. You’ll know they’re ready when a toothpick inserted in the center comes out with a few moist crumbs—this indicates a perfectly fudgy texture. Enjoy the delightful aroma filling your kitchen as they bake!
Step 5: Cool the Brownie Cups
Once baked, remove the muffin tin from the oven and let it cool on a wire rack for about 10 minutes. Then gently remove the brownie cups from the tin, allowing them to cool completely on the rack. This step is essential to prevent a melty mess when you add the ice cream.
Step 6: Scoop in the Ice Cream
After the brownie cups have fully cooled, scoop your favorite ice cream into each one. Feel free to use a generous amount for a truly indulgent experience! Watching the creamy ice cream sit atop the fudgy warm brownie is part of the excitement of assembling your Brownie Sundae Cups.
Step 7: Add the Toppings
Now comes the fun part—dress your Brownie Sundae Cups with chocolate syrup, whipped cream, and any other toppings you love, like nuts or sprinkles. Use your creativity to make each cup visually charming and irresistible. This is your chance to make it uniquely yours!
Step 8: Serve Immediately
Serve the Brownie Sundae Cups right away for the best texture. The contrast of the warm brownie with the cold ice cream and toppings makes for a delightful dessert experience. Gather your loved ones around and savor every decadent bite of this easy and satisfying treat!
Make Ahead Options
These 5-Ingredient Brownie Sundae Cups are a fantastic option for busy home cooks looking to streamline their dessert prep! You can prepare the brownie cups up to 24 hours in advance—just bake and cool them completely before storing in an airtight container at room temperature to maintain their fudgy texture. For the best results, wait to scoop the ice cream and add toppings until just before serving to prevent sogginess. If you want even more convenience, you can freeze the brownie cups for up to 3 months; simply thaw them overnight in the fridge before adding your ice cream. With these make-ahead tips, you’ll have a delightful dessert ready at a moment’s notice!
What to Serve with 5-Ingredient Brownie Sundae Cups
Indulging in these luscious brownie cups is just the beginning—let’s discover the perfect accompaniments to create a delightful dessert experience.
-
Classic Vanilla Ice Cream: The creamy texture of vanilla ice cream enhances the rich chocolate flavor, creating a perfect flavor balance.
-
Fresh Berries: Juicy strawberries, raspberries, or blueberries add a refreshing burst of flavor and a touch of natural sweetness that contrasts beautifully with the brownies.
-
Chocolate Sauce: Drizzling extra chocolate sauce creates an even more decadent experience, making each bite more indulgent than the last.
-
Caramel Sauce: The sweet and buttery notes of caramel perfectly complement the fudgy brownie, adding a delightful contrast of flavors.
-
Whipped Cream: Light and airy, whipped cream adds a fluffy texture that beautifully balances the density of the brownies.
-
Chopped Nuts: Almonds or pecans provide a satisfying crunch, enhancing both the texture and flavor profiles of your sundae cups.
-
Mint Leaves: For a fresh pop, mint leaves lend a herbaceous aroma and bright flavor, making your dessert feel truly vibrant and uplifting.
-
Coffee or Espresso: Pairing this dessert with a rich cup of coffee balances the sweetness and elevates the experience—perfect for a cozy evening.
-
Fudge Brownie Milkshake: For a fun twist, blend leftover brownie bits with vanilla ice cream and milk to create a creamy milkshake that echoes the dessert’s flavors while delighting your taste buds.
Expert Tips for Brownie Sundae Cups
-
Cooling Is Key: Allow the brownie cups to cool completely before adding ice cream to avoid a melty disaster that might ruin your treat’s presentation.
-
Mix Just Right: Overmixing the brownie batter leads to tougher brownies. Stir until combined, ensuring a fudgy and luscious texture for your Brownie Sundae Cups.
-
Toppings Variety: Create a toppings bar with various options like crushed cookies or fresh fruits, allowing guests to personalize their sundaes, making it interactive and fun!
-
Storage Secrets: If you have leftovers, store brownie cups and toppings separately in airtight containers. This will help maintain their delightful textures for your next indulgence.
-
Dairy-Free Option: For a dairy-free version, substitute regular ice cream with coconut milk ice cream, ensuring everyone can enjoy your Brownie Sundae Cups!
Storage Tips for Brownie Sundae Cups
Room Temperature: Store leftover brownie cups in an airtight container for up to 2 days to maintain their fudgy texture.
Fridge: If you prefer, you can refrigerate the brownie cups, but consume them within 3 days for the best taste and quality.
Freezer: Freeze brownie cups for up to 1 month. Wrap each cup in plastic wrap and place in an airtight container to prevent freezer burn.
Reheating: When you’re ready to enjoy, thaw in the fridge overnight and reheat briefly in the microwave for a warm treat before adding ice cream. Always add the ice cream right before serving to keep your Brownie Sundae Cups delightful!
Brownie Sundae Cups Variations
Feel free to get creative with your Brownie Sundae Cups and make them uniquely yours!
- Gluten-Free: Use a gluten-free brownie mix to cater to those with dietary restrictions, ensuring everyone can enjoy this delightful dessert.
- Dairy-Free: Opt for coconut milk ice cream instead of dairy-based options. A rich coconut flavor pairs beautifully with brownies!
- Fruit Twist: Add fresh berries, like strawberries or raspberries, for a refreshing burst of flavor and a pop of color atop the warm brownies.
- Nutty Cravings: Mix in chopped nuts directly into the brownie batter for added crunch and flavor. Walnuts or pecans work wonderfully!
- Flavor Infusion: Enhance the brownie batter with a teaspoon of vanilla extract or espresso powder for deeper, complex flavors.
- Sauce Swap: Instead of chocolate syrup, try caramel or peanut butter sauce for a different indulgent twist that will please any palate.
- Decadent Layers: For an elevated dessert, layer brownie cubes and ice cream in jars, similar to your favorite Fluff Trifle Cups. It’s a feast for the eyes as well as the taste buds!
- Spicy Kick: Add a sprinkle of cinnamon or cayenne pepper to the brownie mix for a surprising little heat that contrasts beautifully with the sweetness of the ice cream.
No matter which variation you choose, your Brownie Sundae Cups are sure to be a hit at any gathering or cozy night in!
5-Ingredient Brownie Sundae Cups Recipe FAQs
What type of brownie mix should I use?
I recommend a standard 18-ounce box of fudge brownie mix for the perfect fudgy base. You can also explore gluten-free options if needed!
How do I store leftover brownie cups?
To preserve their texture, store leftover brownie cups in an airtight container at room temperature for up to 2 days. If you want to keep them longer, refrigerate for up to 3 days or freeze for up to 1 month.
Can I freeze the brownie cups?
Absolutely! If you plan to freeze them, wrap each brownie cup in plastic wrap and place them in an airtight container to prevent freezer burn. When you’re craving one, thaw in the fridge overnight and briefly reheat before adding ice cream.
What should I do if my brownie cups stick to the muffin tin?
Ensure to grease the muffin tin well or use paper liners to prevent sticking. If they do stick, gently run a knife around the edges to loosen them before removing.
Can I make these brownie sundae cups allergen-friendly?
Yes! You can customize your ingredients to accommodate dietary needs. Use a gluten-free brownie mix and substitute regular ice cream with coconut milk ice cream for a dairy-free option.
How can I avoid a melty mess when adding ice cream?
Let the brownie cups cool completely after baking—about 10 minutes in the muffin tin, then more on a wire rack. This prevents the ice cream from melting all over the place!
Decadent Brownie Sundae Cups for Your Sweetest Indulgence
Ingredients
Equipment
Method
- Preheat the oven to 350°F (175°C) and prepare the muffin tin with cooking spray or liners.
- Combine the brownie mix, water, oil, and egg in a mixing bowl and stir until just combined.
- Fill muffin cups with brownie batter about two-thirds full.
- Bake for 15 minutes or until a toothpick inserted comes out with a few moist crumbs.
- Cool for 10 minutes on a wire rack, then remove from the tin to cool completely.
- Scoop ice cream into each brownie cup.
- Top with chocolate syrup, whipped cream, nuts, and sprinkles.
- Serve immediately for the best texture.
Leave a Reply