
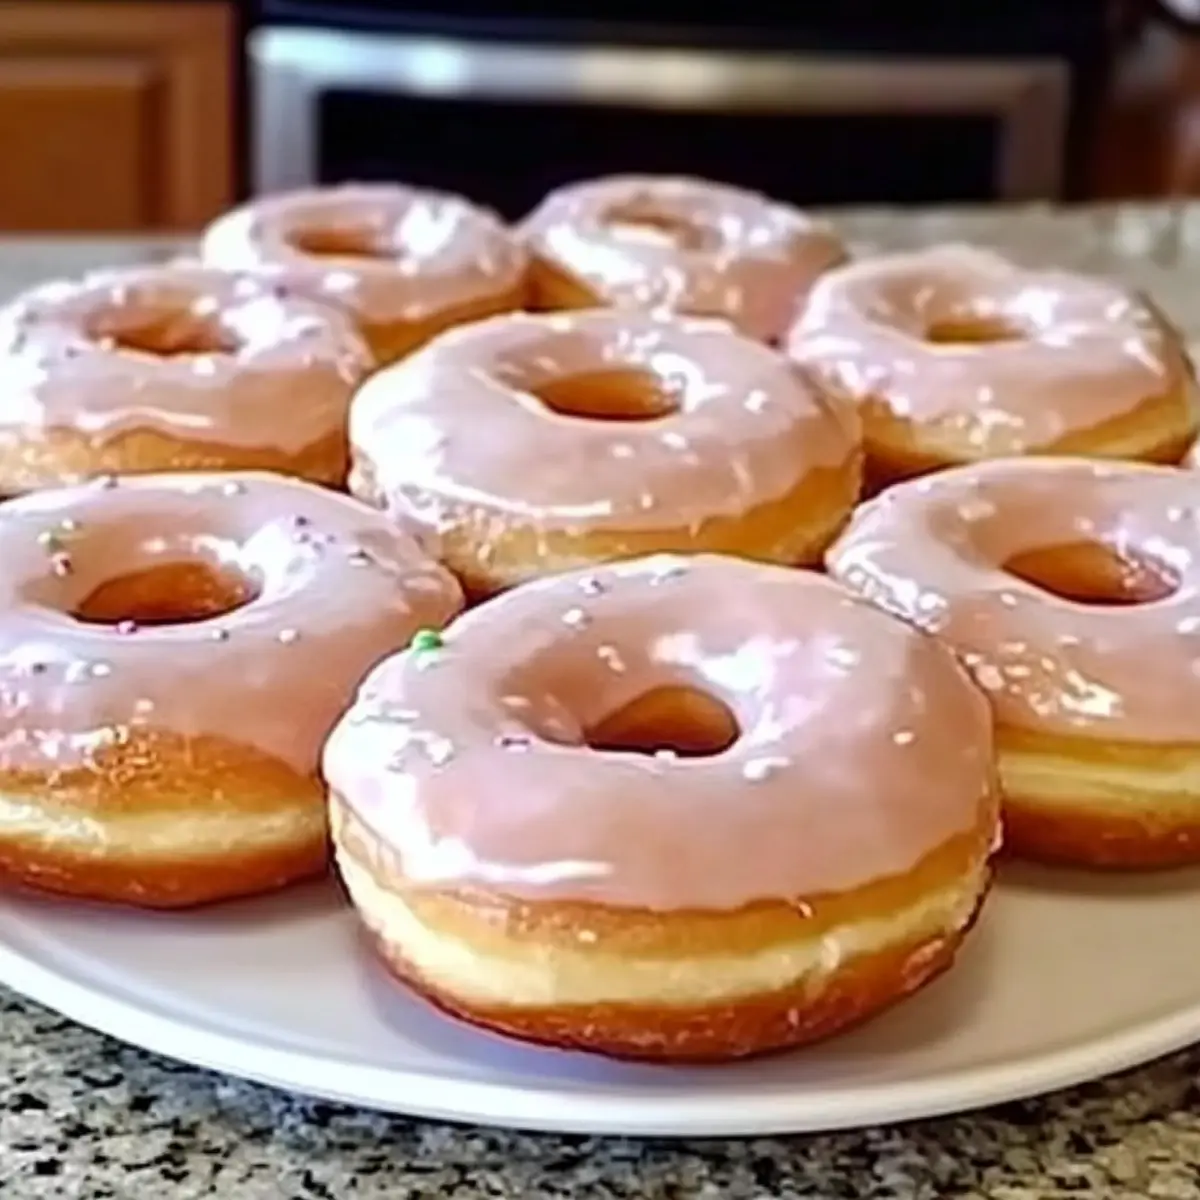
The aroma of sweet, rising dough fills the air as I roll out the softest dough I’ve ever made. There’s something incredibly satisfying about crafting Homemade Glazed Doughnuts, a project that turns everyday ingredients into something wondrous. This easy recipe is not just about indulgence; it’s about creating a delightful experience you can share with loved ones. The customization options are endless, whether you prefer a classic glaze or want to experiment with fun toppings and flavors. These doughnuts are perfect for any occasion, be it a family breakfast spread or a cozy afternoon treat. Plus, they’re freezer-friendly, making them a fantastic treat to have on hand whenever the craving strikes! Ready to sprinkle some joy into your kitchen? Let’s dive into this delicious adventure!
Why Make Homemade Glazed Doughnuts?
Irresistible freshness: There’s nothing quite like warm, homemade doughnuts to brighten your day and bring a smile to your face.
Endless customization: From classic vanilla to exotic flavors, tailor these doughnuts to your unique tastes with various toppings and glazes!
Simple and approachable: This easy recipe is perfect for bakers of all skill levels, making it a fun activity for friends and family.
Ideal for sharing: Whether at gatherings or cozy brunches, these doughnuts are sure to impress and delight your guests.
Freezer-friendly: Make a big batch to enjoy later, just reheat for a warm treat whenever you need a little sweetness!
If you enjoy making delicious homemade meals, why not explore more options like Chicken Shawarma Garlic or try your hand at a savory dish like Steak Bell Peppers?
Homemade Glazed Doughnuts Ingredients
• Get ready for a sweet adventure with these Homemade Glazed Doughnuts!
For the Dough
- Active Dry Yeast – Essential for fluffy dough; substitution: instant yeast can be used without proofing.
- Warm Milk – Activates the yeast; heat to about 110°F for best results.
- Granulated Sugar – Adds sweetness and aids in browning; can substitute with brown sugar for a deeper flavor.
- Unsalted Butter – Provides richness; margarine can serve as a dairy-free option.
- Large Egg – Binds the ingredients together; replace with ¼ cup unsweetened applesauce for a vegan version.
- All-Purpose Flour – Gives structure; bread flour makes a chewier dough, while gluten-free blends work well too.
- Salt – Enhances overall flavor and structure.
For Frying
- Vegetable Oil – Needed for frying; ensure it’s heated to 350°F to achieve crispiness.
For the Glaze
- Powdered Sugar – Key ingredient for a smooth glaze.
- Milk (for glaze) – Helps achieve the desired texture; almond milk is a great dairy-free option.
- Vanilla Extract – Adds a lovely flavor to the glaze.
Now that you have everything listed, let’s bring the sweetness of these Homemade Glazed Doughnuts to life in your kitchen!
Step‑by‑Step Instructions for Homemade Glazed Doughnuts
Step 1: Prepare Yeast
Begin by gently warming ½ cup of milk in a saucepan until it reaches about 110°F, ensuring it’s not too hot. Pour the warm milk into a bowl and sprinkle 2 teaspoons of active dry yeast over it. Let it sit for 5 minutes until it becomes foamy, indicating that your yeast is active and ready for making your Homemade Glazed Doughnuts.
Step 2: Mix Dough
In a large mixing bowl, combine ¼ cup of granulated sugar, 2 tablespoons of melted unsalted butter, 1 large egg, 3 ½ cups of all-purpose flour, and 1 teaspoon of salt. Once the yeast mixture is frothy, stir it into the bowl of dry ingredients. Mix until a shaggy dough forms, ensuring everything is well incorporated before moving on to kneading.
Step 3: Knead Dough
On a floured surface, transfer your dough and begin kneading it with your hands for about 5 to 7 minutes. You’re looking for a smooth and elastic texture, which is essential for that fluffy bite in the Homemade Glazed Doughnuts. If the dough is sticky, sprinkle a little more flour as needed while kneading.
Step 4: First Rise
Shape the kneaded dough into a ball and place it in a greased bowl, turning it to coat the surface with oil. Cover the bowl with a clean kitchen towel and let it rest in a warm spot for about 1 hour, or until it has doubled in size. This rising step is key to achieving the perfect fluffy texture.
Step 5: Shape Doughnuts
Once the dough has risen, punch it down gently to release air. Roll it out on a floured surface to about ½ inch thick. Use a doughnut cutter or round cutters to cut out the doughnuts and holes. Place the cut doughnuts on a parchment-lined tray, ensuring they are spaced apart for easy handling.
Step 6: Second Rise
Cover the shaped doughnuts with a towel and let them rise again for about 30 minutes. This step allows the doughnuts to puff up even more, ensuring a soft texture when fried. You’ll know they’re ready when they’ve visibly increased in size and look pillowy.
Step 7: Fry Doughnuts
Heat vegetable oil in a large, deep pot or fryer to 350°F, using a candy thermometer for accuracy. Carefully lower the doughnuts into the hot oil, frying them for 1-2 minutes on each side until they are golden brown. Monitor the temperature closely to maintain that crispy exterior typical of Homemade Glazed Doughnuts.
Step 8: Prepare Glaze
While the doughnuts are frying, whisk together 2 cups of powdered sugar, ¼ cup of milk, and 1 teaspoon of vanilla extract in a bowl until you achieve a smooth, pourable glaze. Adjust the consistency by adding more milk or sugar as needed, ensuring it will coat your doughnuts beautifully.
Step 9: Glaze Doughnuts
Once the doughnuts are golden brown and drained on paper towels, dip each warm doughnut into the glaze. Allow excess glaze to drip off before placing them on a wire rack to set. This final touch transforms your Homemade Glazed Doughnuts into a shiny treat that’s irresistibly inviting!
Expert Tips for Homemade Glazed Doughnuts
-
Perfect Yeast Activation: Ensure the milk is warmed to about 110°F for optimal yeast activation; too hot can kill the yeast, ruining your doughnuts.
-
Kneading Technique: Knead the dough until smooth and elastic for a fluffy texture; remember, the more you knead, the better your Homemade Glazed Doughnuts will rise.
-
Oil Temperature Matters: Use a candy thermometer to maintain the oil at 350°F during frying; too low and they won’t cook through, too high and they may burn.
-
Avoid Overcrowding: Fry in small batches to keep the oil temperature steady, ensuring each doughnut cooks evenly and achieves that perfect golden-brown color.
-
Cool Before Glazing: Let the fried doughnuts cool slightly before glazing them; this helps the glaze adhere better and gives a beautiful finish.
-
Storage Tips: Keep leftover doughnuts in an airtight container at room temperature for up to 2 days; for longer freshness, freeze and reheat when cravings hit!
What to Serve with Homemade Glazed Doughnuts?
Indulge in the pleasure of creating the perfect meal around these soft and sweet treats that make every moment delightful.
-
Rich Coffee: A strong, aromatic brew complements the sweetness, awakening your palate and enhancing the doughnut experience.
-
Fresh Fruit Salad: Vibrant, juicy fruits like strawberries, blueberries, and oranges add a refreshing contrast to the indulgent doughnuts. This balance of flavors brightens up your breakfast spread.
-
Classic Milk: Creamy milk is the ultimate pairing, adding a nostalgic touch that enhances the doughnuts’ fluffy texture, making for a comforting treat.
-
Vanilla Ice Cream: A scoop of creamy vanilla ice cream transforms the doughnuts into a delicious dessert, creating a delightful melt-in-your-mouth experience.
-
Savory Bacon Strips: Crispy bacon adds a salty crunch that perfectly balances the sweetness of the doughnuts. The contrast of flavors will leave everyone wanting more.
-
Chocolate Milkshake: Thick, rich, and indulgent, a chocolate milkshake creates a dessert masterpiece when paired with the glaze-coated doughnuts.
-
Cinnamon Coffee Cake: For a brunch feast, serve a slice of cinnamon coffee cake alongside to create a cozy, homey atmosphere, combining different textures and flavors.
-
Herbal Tea: A gentle, fragrant herbal tea can provide an inviting warmth, offering a soothing pairing that complements the sweetness of the doughnuts.
Homemade Glazed Doughnuts Variations
Feel free to get creative and personalize your doughnuts with these delightful twists that will make your taste buds dance!
-
Dairy-Free: Replace milk and butter with almond milk and coconut oil for a luscious, dairy-free treat that’s just as delicious!
-
Chocolate Glaze: Mix in cocoa powder with powdered sugar and milk for a rich, chocolatey glaze that will satisfy any sweet tooth.
-
Spiced Glaze: Add ground cinnamon or nutmeg to the glaze for warm, inviting flavors that will remind you of cozy fall evenings.
-
Fruit-Infused: Use fresh fruit purees, like strawberry or raspberry, in the glaze for a vibrant pop of color and a fruity twist.
-
Nutty Crunch: After glazing, sprinkle crushed nuts or granola on top for an irresistible crunch that adds texture to your doughnuts!
-
Coconut Delight: Toss shredded coconut into the glaze or sprinkle on top for a tropical flavor that transports you to sandy beaches.
-
Maple Syrup: Swap out vanilla extract for maple syrup in the glaze for a sweet, rustic touch that pairs perfectly with a morning cup of coffee.
-
Savory Kick: Add a hint of cayenne pepper or chili powder to your glaze for a surprising heat that contrasts beautifully with the sweetness.
For more culinary adventures, consider whipping up some Chicken Shawarma Garlic for savory bites or treat yourself to my easy Steak Bell Peppers!
Make Ahead Options
These Homemade Glazed Doughnuts are perfect for meal prep enthusiasts! You can prepare the dough up to 24 hours in advance. To do this, follow the mixing and kneading steps, then cover the dough tightly with plastic wrap and refrigerate it after the first rise. When you’re ready to enjoy, let the dough come to room temperature and rise again for about 30 minutes before shaping and frying. You can also make the glaze ahead of time and store it in the refrigerator for up to 3 days; just give it a quick stir before dipping. By prepping in advance, you’ll save time and still have delicious, fresh Homemade Glazed Doughnuts that taste just as delightful!
How to Store and Freeze Homemade Glazed Doughnuts
-
Room Temperature: Store leftover doughnuts in an airtight container for up to 2 days to maintain freshness and prevent them from becoming stale.
-
Fridge: If you prefer a slightly firmer texture, you can refrigerate them for up to 3 days, but they may lose some of their softness.
-
Freezer: For longer storage, freeze the doughnuts in a single layer on a baking sheet until solid, then transfer to a zip-top bag. They can last up to 2 months.
-
Reheating: To enjoy frozen Homemade Glazed Doughnuts, reheat them in the microwave for about 10-15 seconds or until warm. For a crisp finish, place in a preheated oven at 350°F for a few minutes.
Homemade Glazed Doughnuts Recipe FAQs
How can I tell if my yeast is still good?
To ensure your active dry yeast is fresh, dissolve it in warm milk (around 110°F) with a pinch of sugar. If it becomes foamy within 5 to 10 minutes, it’s alive and ready to use. If not, it’s time to buy a new package!
How should I store leftover doughnuts?
Store your leftover Homemade Glazed Doughnuts in an airtight container at room temperature for up to 2 days. This helps keep them soft and prevents them from becoming stale. If you want them to last longer, refrigerate for up to 3 days, although they may lose some fluffiness.
Can I freeze doughnuts, and how do I do it?
Absolutely! To freeze your doughnuts, first let them cool completely after frying. Then, arrange them in a single layer on a baking sheet and freeze until solid. After that, transfer them to a zip-top bag, and they’ll last up to 2 months. When you’re ready to enjoy them, simply reheat in the microwave for about 10-15 seconds or in a preheated oven at 350°F for a few minutes for that fresh taste.
What should I do if my dough doesn’t rise?
If your dough isn’t rising properly, check the temperature of your ingredients, especially the warm milk. It should be about 110°F – too hot can kill the yeast, while too cold won’t activate it. Also, ensure that your yeast is fresh. If the first rise fails, you can try adding more yeast (after dissolving it in warm water) and letting it rise again in a warm, draft-free area.
Are these doughnuts suitable for people with allergies?
If allergies are a concern, you can easily adapt the recipe. For a dairy-free option, substitute unsalted butter with margarine and use almond milk in the glaze. Additionally, replace the egg with ¼ cup of unsweetened applesauce for a vegan version. Always ensure cross-contamination is avoided based on specific allergy needs.
What variations can I try with my doughnuts?
The customization options are endless for Homemade Glazed Doughnuts! Feel free to add spices like cinnamon to the glaze for a warm twist or drizzle chocolate for a decadent dessert. Experiment with toppings like sprinkles, nuts, or coconut flakes for an extra touch of flavor and fun!
Homemade Glazed Doughnuts - Soft, Sweet, and Totally Customizable
Ingredients
Equipment
Method
- Prepare Yeast: Warm ½ cup of milk to about 110°F, sprinkle 2 teaspoons of yeast over it, and let sit for 5 minutes until foamy.
- Mix Dough: In a bowl, combine ¼ cup sugar, 2 tablespoons melted butter, 1 egg, 3 ½ cups flour, and 1 teaspoon salt. Mix in yeast mixture until shaggy dough forms.
- Knead Dough: Knead dough on a floured surface for 5-7 minutes until smooth and elastic.
- First Rise: Shape into a ball, place in a greased bowl, cover, and let rise in a warm spot for about 1 hour until doubled.
- Shape Doughnuts: Punch down the dough, roll to ½ inch thick, cut out doughnuts and holes, and place on parchment-lined tray.
- Second Rise: Cover shaped doughnuts and let rise for 30 minutes until puffed.
- Fry Doughnuts: Heat oil to 350°F and fry doughnuts for 1-2 minutes on each side until golden brown.
- Prepare Glaze: Whisk together 2 cups powdered sugar, ¼ cup milk, and 1 teaspoon vanilla until smooth.
- Glaze Doughnuts: Dip warm doughnuts into glaze, allow excess to drip off, and place on wire rack to set.
Leave a Reply