
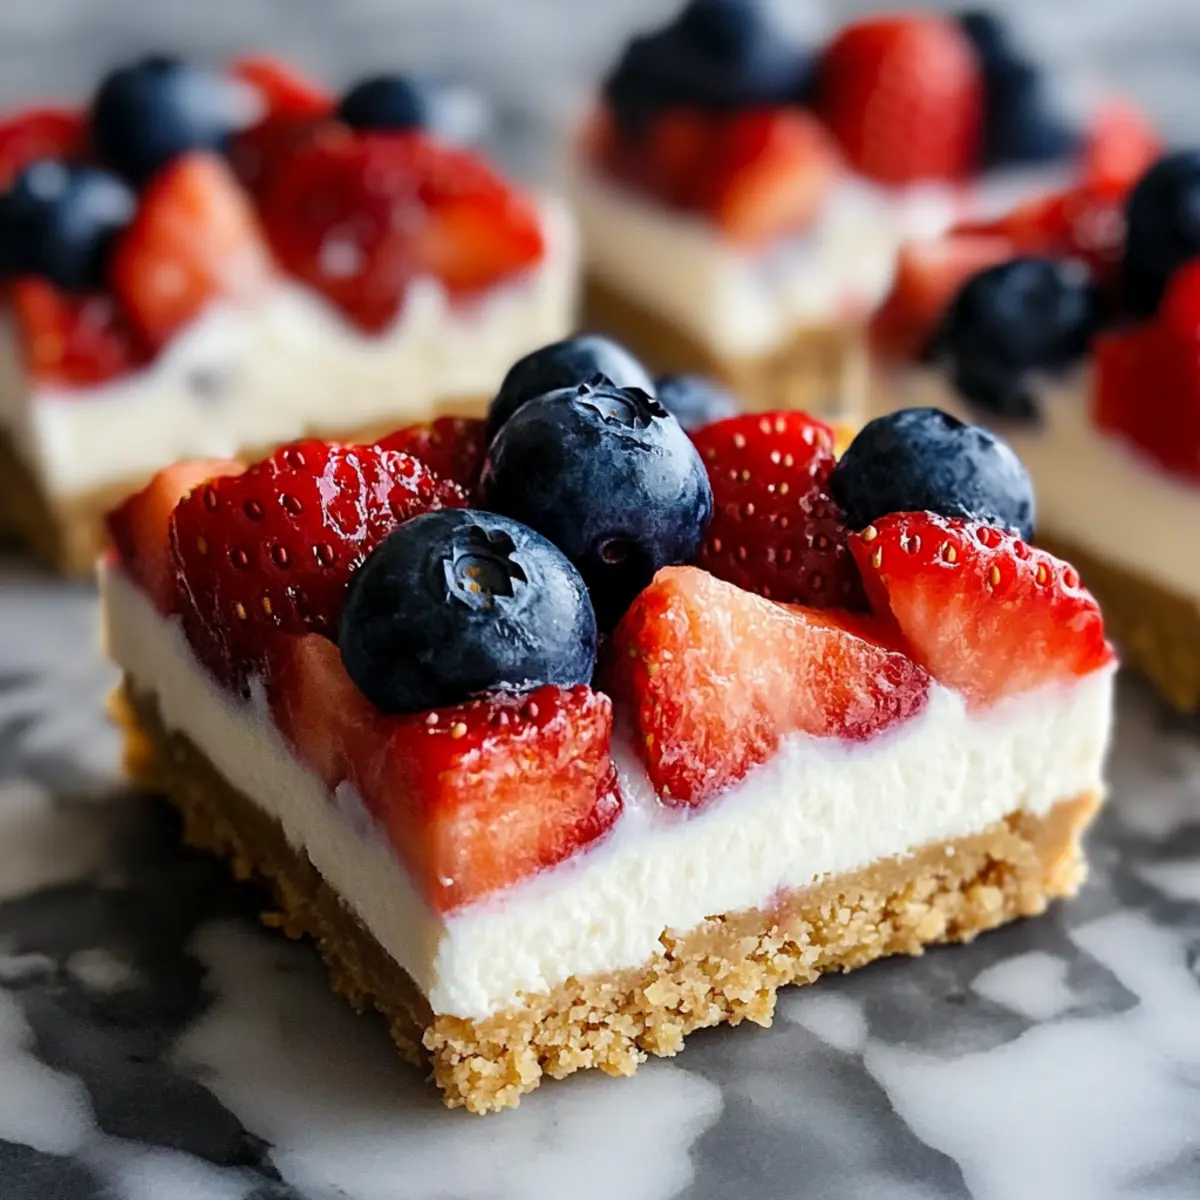
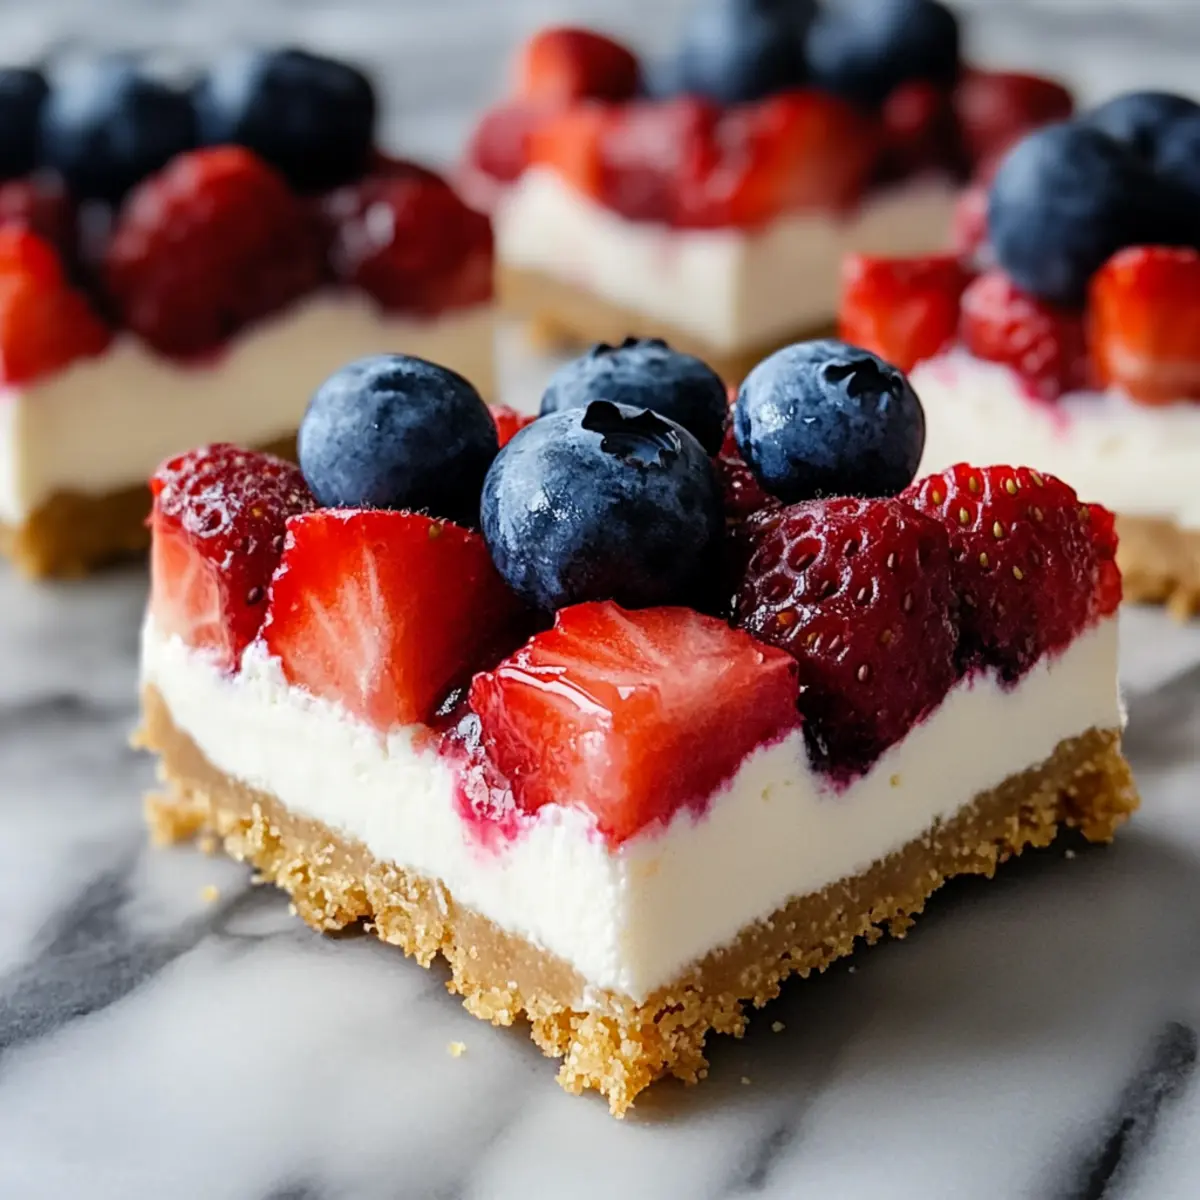
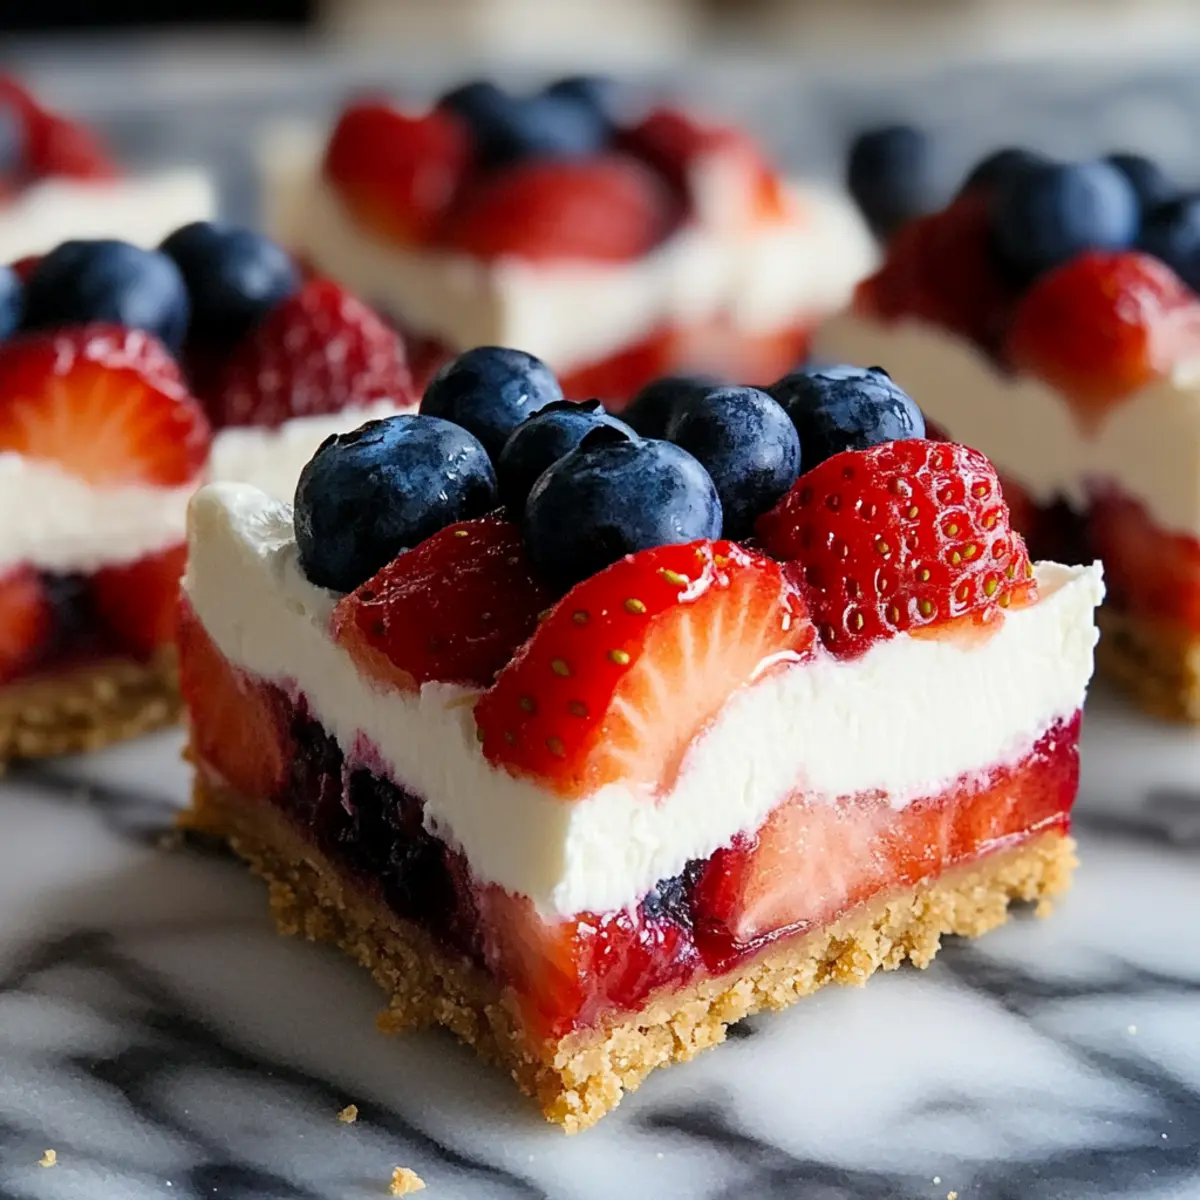
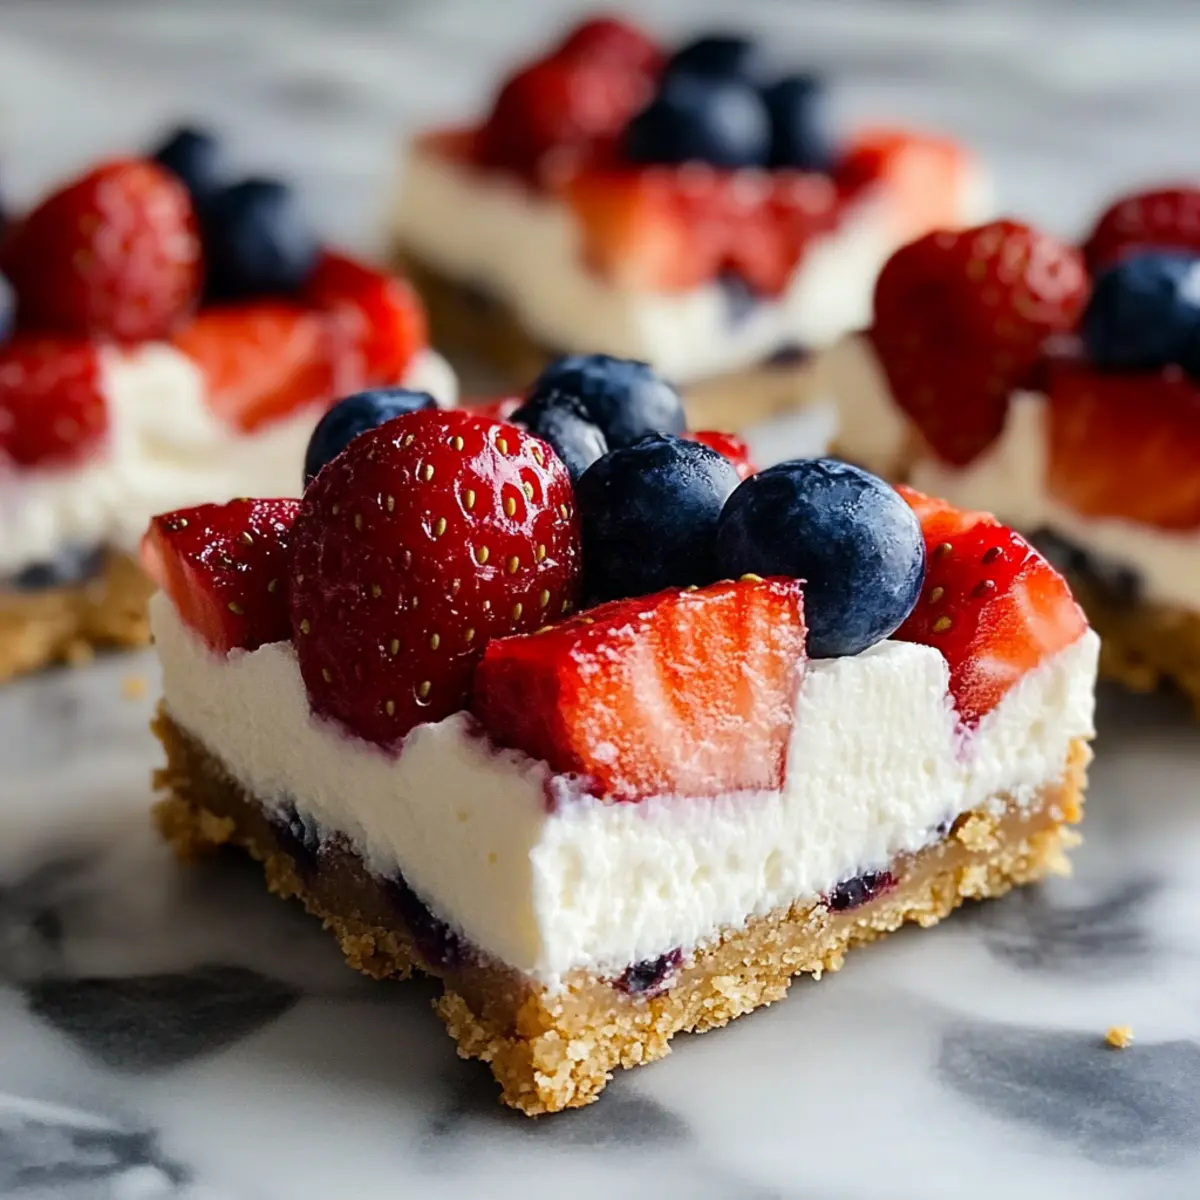
As I strolled through the vibrant summer farmers’ market, the sight of freshly-picked strawberries and juicy blueberries caught my eye, igniting a wave of inspiration. That’s when the idea for these No-Bake Flag Cheesecake Bars struck me—a perfect treat for the warm weather ahead! Whipping up this delightful dessert takes just 20 minutes, making it an irresistible option for anyone looking to impress their guests without spending hours in the kitchen. Plus, with a creamy, dreamy filling and a gluten-free option for those who need it, they’ll satisfy every sweet tooth at your summer gatherings. Ready to transform those berries into an eye-catching, festive bar that’s sure to steal the show? Let’s dive into this deliciously simple recipe!
Why are No-Bake Flag Cheesecake Bars a must-try?
Simplicity, enjoy a decadent dessert without needing to turn on the oven! Quick Prep, these bars come together in just 20 minutes, allowing you to spend more time enjoying your summer party. Festive Appeal, the stunning fruit design mimics the American flag, making them ideal for celebrations. Flavorful, the creamy cheesecake filling paired with fresh berries delivers a delightful taste explosion. Plus, Versatile, easily swap ingredients to accommodate gluten-free diets or mix up the fruit toppings! Whether it’s a picnic or a barbecue, these bars are bound to impress.
No-Bake Flag Cheesecake Bars Ingredients
For the Crust
• Graham Cracker Crumbs – Provides structure for the crust; consider using gluten-free graham crackers for a gluten-free version.
• Granulated Sugar – Adds sweetness to the crust, enhancing its flavor.
• Unsalted Butter (melted) – Binds the crust ingredients together; using unsalted butter helps control the overall saltiness.
For the Cheesecake Filling
• Cream Cheese (softened) – The creamy base for your no-bake cheesecake; make sure it’s at room temperature for a smooth texture.
• Powdered Sugar – Gives sweetness and a velvety finish to the cheesecake layer.
• Vanilla Extract – Enhances the flavor of the filling; pure vanilla extract is best for richer taste.
• Heavy Whipping Cream – Lightens the filling and creates a fluffy texture; whip until stiff peaks form for optimal results.
For the Decoration
• Blueberries – Adds a pop of blue for the flag design; feel free to use other berries if you desire.
• Strawberries (sliced) – Provides the red stripes; alternative berries like raspberries can also be a good choice.
Each bite of these No-Bake Flag Cheesecake Bars combines the richness of cheesecake with the vibrant freshness of summer fruits!
Step‑by‑Step Instructions for No-Bake Flag Cheesecake Bars
Step 1: Prepare Crust
In a medium bowl, combine graham cracker crumbs, melted unsalted butter, and granulated sugar until evenly mixed, resembling wet sand. Press this mixture firmly into the bottom of a 9×13 inch baking pan, creating a smooth, even layer. Refrigerate the crust for about 10 minutes to help it set firmly before adding the cheesecake filling.
Step 2: Make Cheesecake Filling
In a large mixing bowl, beat the softened cream cheese with powdered sugar and vanilla extract using an electric mixer on medium speed until the mixture is creamy and free of lumps, about 2-3 minutes. Ensure you scrape down the sides of the bowl for a smooth consistency. Once creamy, set aside while you prepare the whipped cream.
Step 3: Whip Cream
In a separate chilled bowl, pour in the heavy whipping cream and whisk using an electric mixer on high speed until stiff peaks form, which should take about 3-5 minutes. The cream should hold its shape well without collapsing. Ensure not to over-whip, as this can lead to a grainy texture, affecting the No-Bake Flag Cheesecake Bars’ creaminess.
Step 4: Combine Mixtures
Gently fold the whipped cream into the cream cheese mixture using a spatula, incorporating it in thirds for a light and airy consistency. Be careful not to deflate the mixture; your goal is a fluffy texture that balances the richness of the cream cheese with the lightness of the whipped cream.
Step 5: Assemble Bars
Spread the luscious cheesecake filling evenly over the chilled graham cracker crust, using an offset spatula for a smooth surface. Make sure to reach the corners of the pan for even layering. Return the assembled bars to the refrigerator for a minimum of 30 minutes to allow them to set further before decorating.
Step 6: Decorate
Once set, carefully arrange fresh blueberries and sliced strawberries on top of the cheesecake filling to create a design reminiscent of the American flag. Aim for rows of blueberries in the top left corner and alternating stripes of strawberries for an eye-catching effect on your No-Bake Flag Cheesecake Bars.
Step 7: Chill
Cover the pan with plastic wrap and refrigerate the decorated cheesecake bars for at least 4 hours, or preferably overnight, to achieve the best flavor melding and firm texture. After chilling, you can easily cut the bars into squares, making them perfect for serving at summer gatherings.
How to Store and Freeze No-Bake Flag Cheesecake Bars
Fridge: Keep your No-Bake Flag Cheesecake Bars covered in an airtight container to maintain their delightful freshness for up to 5 days.
Freezer: For longer storage, freeze uncut cheesecake bars wrapped tightly in plastic wrap and then in aluminum foil. They can be kept for up to 2 months.
Thawing: When ready to enjoy, thaw the bars in the fridge overnight for optimal texture and flavor before serving.
Serving After Freezing: Once thawed, feel free to garnish with fresh berries again for a vibrant presentation!
What to Serve with No-Bake Flag Cheesecake Bars?
Elevate your summer gatherings by pairing these delightful cheesecake bars with tasty side dishes and refreshing beverages.
-
Fresh Fruit Salad: A medley of seasonal fruits adds brightness and balance. Their natural sweetness complements the cheesecake’s rich flavors beautifully.
-
Minty Cucumber Salad: This crisp salad brings a refreshing crunch to your meal, offering a palate-cleansing effect between bites of the creamy bars.
-
Grilled BBQ Chicken Skewers: Smoky, savory skewers provide a hearty contrast, making your dessert feel even more indulgent after a savory feast.
-
Classic Lemonade: This tart, refreshing drink is a wonderful way to wash down the sweetness of your cheesecake bars, enhancing the summer vibes.
-
Chocolate-Dipped Strawberries: For an extra touch of elegance, serve these alongside your cheesecake bars. Their rich chocolate flavor pairs perfectly with the fresh fruit toppings.
-
Load of Ice Cream: A scoop of airy vanilla ice cream adds a creamy texture and elevates the dessert experience, creating a delightful contrast to the cheesecake bars.
No-Bake Flag Cheesecake Bars Variations
Feel free to get creative and customize these No-Bake Flag Cheesecake Bars to suit your taste and dietary needs!
- Gluten-Free: Use gluten-free graham cracker crumbs to create a delicious crust that everyone can enjoy!
- Dairy-Free: Swap cream cheese for a dairy-free alternative and use coconut cream instead of heavy whipping cream for a creamy texture.
- Fruit Twist: Instead of blueberries, try mixing in fresh raspberries or kiwi for a new flavor profile that’s just as colorful.
- Even More Sweetness: Add a swirl of strawberry puree on top before chilling for a delightful fruity flavor that elevates the bars.
- Nutty Touch: Incorporate crushed nuts, like pecans or almonds, into the crust for an added crunch that brings a new texture.
- Chocolate Drizzle: Drizzle melted dark chocolate over the top to add an indulgent twist that will thrill chocolate lovers.
- Lemon Zest: Mix in a teaspoon of lemon zest into your cheesecake filling to add a refreshing citrus zing that brightens each bite.
- Layered Delight: Create layers by adding a flavored gel like raspberry or lemon between the cheesecake and the fruit decor for a beautiful surprise.
These variations allow for endless creativity in the kitchen, ensuring that your No-Bake Flag Cheesecake Bars are a hit at every gathering. And if you’re ever craving a different cheesecake flavor altogether, consider trying my Iced Blueberry Cheesecake or the delightful Forest Blackberry Cheesecake for even more delicious inspiration!
Make Ahead Options
These No-Bake Flag Cheesecake Bars are perfect for meal prep, saving you time on busy celebration days! You can prepare the graham cracker crust up to 24 hours in advance; simply press it into the pan and refrigerate until you’re ready to fill it. Make the cheesecake filling ahead as well; it can stay in the fridge for up to 3 days. To maintain the creamy texture, keep the filling covered tightly in the mixing bowl. When you’re ready to serve, gently fold in the whipped cream, assemble the bars, and refrigerate until set. By prepping these components ahead of time, you’ll ensure that your dessert is just as delicious without all the last-minute hassle!
Expert Tips for No-Bake Flag Cheesecake Bars
-
Chill Time Matters: Allowing the cheesecake bars to chill overnight significantly enhances their flavor, giving the ingredients time to meld beautifully together.
-
Soften Cream Cheese: Make sure your cream cheese is at room temperature; this prevents lumps in the filling and ensures a smooth, creamy consistency.
-
Right Whipping: Whip the heavy cream to stiff peaks, but don’t over-whip; this can lead to a grainy texture instead of the light fluffiness you want for your No-Bake Flag Cheesecake Bars.
-
Test for Thickness: If your filling feels too thick while mixing, add a splash of milk or cream to loosen it to the desired consistency.
-
Covering Leftovers: Store any leftover bars in an airtight container in the fridge to keep them fresh and delicious for up to five days.
No-Bake Flag Cheesecake Bars Recipe FAQs
How do I choose ripe berries for my No-Bake Flag Cheesecake Bars?
Absolutely! When selecting blueberries and strawberries, look for vibrant colors and firm textures. For blueberries, avoid any with dark spots all over, as they may be overripe. Strawberries should be bright red and free from white or green patches, ensuring optimal sweetness. If possible, buy organic for the best flavor and quality!
How should I store leftover No-Bake Flag Cheesecake Bars?
To keep your delicious cheesecake bars fresh, store them in an airtight container in the fridge for up to 5 days. This method retains their lovely texture and taste. If you’ve got a large batch leftover, you can even cover them with plastic wrap or foil before sealing for extra protection.
Can I freeze No-Bake Flag Cheesecake Bars?
Absolutely! To freeze these bars, wrap the entire set in plastic wrap, then cover it tightly with aluminum foil. This helps prevent freezer burn. You can keep them frozen for up to 2 months. When you’re ready to enjoy, simply transfer them to the fridge to thaw overnight for the best results!
What can I do if my cheesecake filling is too thick?
No worries! If you find the filling too thick while mixing, just add a splash of milk or heavy cream to loosen it up. Start with a tablespoon and mix until you reach the desired consistency. It’s all about achieving that perfect, airy fluffiness that makes these No-Bake Flag Cheesecake Bars so delightful!
Are these cheesecake bars safe for people with allergies?
Great question! While the ingredients are vegetarian and you can easily make them gluten-free with the right crust, be cautious with allergies. For those with dairy allergies, there are dairy-free cream cheese and whipped cream options available. Always check labels to ensure your substitutions are safe for those with specific dietary restrictions!
No-Bake Flag Cheesecake Bars: Summer's Sweetest Treat
Ingredients
Equipment
Method
- In a medium bowl, combine graham cracker crumbs, melted unsalted butter, and granulated sugar until evenly mixed. Press mixture firmly into the bottom of a 9x13 inch baking pan and refrigerate for about 10 minutes to set.
- In a large mixing bowl, beat the softened cream cheese with powdered sugar and vanilla extract until creamy, about 2-3 minutes.
- In a separate chilled bowl, whisk the heavy whipping cream until stiff peaks form, about 3-5 minutes.
- Gently fold the whipped cream into the cream cheese mixture in thirds to achieve a fluffy texture.
- Spread the cheesecake filling evenly over the chilled graham cracker crust and refrigerate for a minimum of 30 minutes.
- Carefully arrange blueberries and sliced strawberries on top to create a flag design.
- Cover with plastic wrap and refrigerate for at least 4 hours, or preferably overnight, before serving.
Leave a Reply