
The aroma of sizzling chicken and toasty corn tortillas fills the air like a warm hug, instantly transporting me to cozy family gatherings. Today, I’m excited to share my recipe for Pastel Azteca, a delicious Mexican chicken casserole that’s sure to become a cherished favorite in your kitchen. This hearty dish is not only quick to prepare, making it perfect for busy weeknights, but it’s also incredibly adaptable—whether you’re accommodating dietary preferences or looking for a fun twist on a classic. Imagine creamy layers of smoky chicken, zesty salsa, and crispy tortillas melding together in every mouthful. Honestly, who wouldn’t want to dive into something so delightful? Are you ready to cook up some memories with me?

What Makes Pastel Azteca Irresistible?
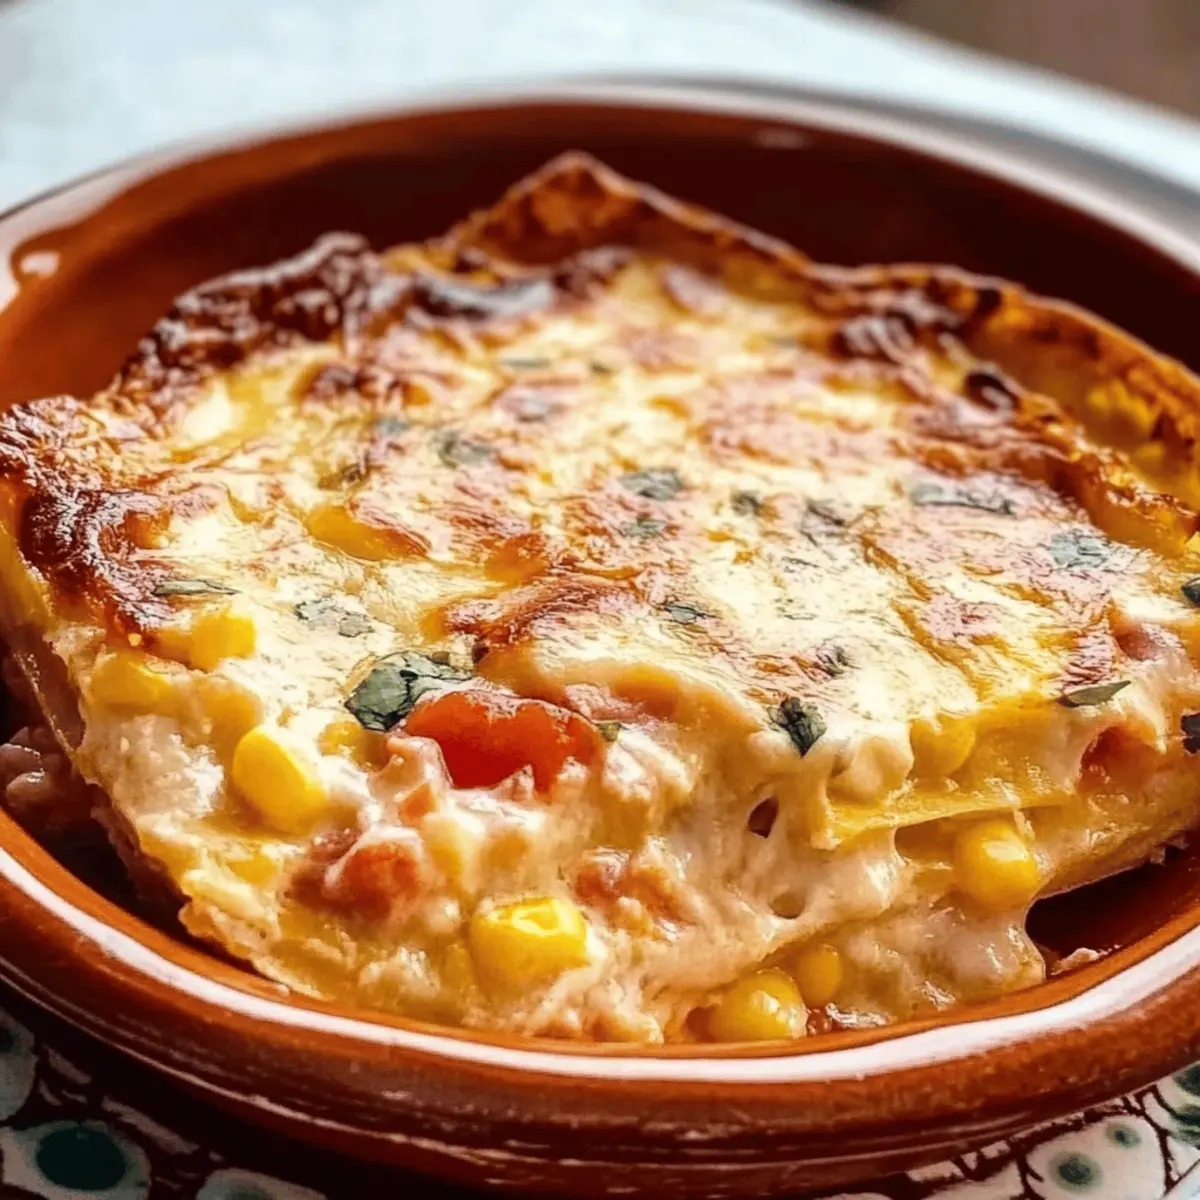
Comforting Layers: Each bite of Pastel Azteca brings together savory chicken and crispy tortillas that create a satisfying experience perfect for family dinners.
Quick and Easy: With a straightforward preparation method, you can have this casserole ready in no time—perfect for busy weeknights.
Adaptable Delight: From vegetarian to low-carb options, this dish easily adjusts to fit any dietary needs, ensuring everyone can enjoy it.
Crowd-Pleasing Flavor: The blend of creamy salsa and melted cheese is a flavor combination that will have your guests coming back for seconds.
No matter how you choose to make it, Pastel Azteca promises comfort and joy at your table, allowing you to gather around delicious memories like never before.
Pastel Azteca Ingredients
• Delight in the layers that come together beautifully and make this comforting dish unforgettable.
For the Casserole
- Shredded Chicken – The main protein providing richness and flavor; you can easily substitute with leftover rotisserie chicken.
- Corn Tortillas – The essential base that maintains authenticity; lightly frying them adds a delightful crispness.
- Shredded Cheese (Oaxaca or Mozzarella) – Adds creaminess and a lovely stretch; feel free to mix and match with other cheeses for extra flavor.
- Salsa Verde or Roja – Imparts moisture and depth; opt for thicker salsa to keep your casserole from becoming too soupy.
- Mexican Crema or Sour Cream – Offers creaminess and tang; Greek yogurt works well for a lighter twist.
- Roasted Poblano Pepper – Delivers a wonderful smokiness; substitute with bell peppers for a milder flavor if preferred.
Optional Additions
- Fresh Cilantro – Adds a pop of color and freshness; perfect for garnishing just before serving.
- Avocado Slices – Adds creaminess and healthy fats; provide a delicious contrast to the casserole’s warm, cheesy layers.
- Lime Wedges – A squeeze of lime elevates the flavors and brings a zesty brightness to every bite.
Get ready to immerse yourself in the delicious layers of Pastel Azteca—it’s a winner that promises to be a regular at your dinner table!
Step‑by‑Step Instructions for Pastel Azteca
Step 1: Preheat the Oven
Begin by preheating your oven to 375°F (190°C). This step is crucial as it ensures that your Pastel Azteca bakes evenly and reaches that perfect bubbly, golden crust. While the oven heats, you can prepare your ingredients, so everything is ready when it’s time to layer.
Step 2: Prepare the Tortillas
Next, heat a skillet over medium heat and lightly fry the corn tortillas for about 30 seconds on each side until they are pliable and slightly crispy. This adds a delightful texture to your Pastel Azteca, preventing the tortillas from becoming too soggy during baking. Set them aside on a paper towel to absorb any excess oil.
Step 3: Layer the Ingredients
In a 9×13 inch baking dish, start layering your Pastel Azteca. Begin with a generous layer of salsa on the bottom, followed by a layer of tortillas. Then, sprinkle a portion of the shredded chicken, drizzle with crema, and add a layer of cheese. Repeat this process until all ingredients are used, finishing with a top layer of salsa and a generous amount of cheese for that irresistible bubbly finish.
Step 4: Bake the Casserole
Cover the baking dish with foil to keep the moisture in, and place it in the preheated oven. Bake for 25 minutes, allowing the flavors to meld beautifully. After 25 minutes, carefully remove the foil and continue baking for an additional 10-15 minutes, or until the cheese is bubbling and turns a lovely golden brown color, indicating your Pastel Azteca is ready.
Step 5: Let it Rest
Once baked, remove the Pastel Azteca from the oven and let it rest for about 10-15 minutes. This resting time is essential as it allows the layers to set, making it easier to slice and serve. The tantalizing aroma will fill your kitchen, promising a hearty meal full of comforting flavors.
Expert Tips for the Best Pastel Azteca
-
Layer Smartly: Ensure even distribution of ingredients. Overstuffing layers will lead to uneven cooking and soggy tortillas.
-
Fry Tortillas Lightly: Light frying makes corn tortillas crispy, preventing them from becoming mushy during baking. Don’t skip this step!
-
Use Quality Salsa: Always prefer thicker salsa for better flavor and texture. A runny salsa can make your Pastel Azteca too watery.
-
Experiment with Cheese: Mixing different types of cheese like Oaxaca and Monterey Jack adds delicious complexity to the dish. Balance is key!
-
Let it Rest: Allowing the casserole to rest before slicing helps maintain its structure and makes serving much easier.
-
Choose the Right Dish: A 9×13 inch baking dish is ideal for maintaining the comfort food experience with proper layer depth for your Pastel Azteca.
Storage Tips for Pastel Azteca
- Fridge: Store leftover Pastel Azteca in an airtight container for up to 4 days. Make sure it cools completely to preserve its delicious layers.
- Freezer: For longer storage, freeze individual portions wrapped tightly in plastic wrap and then placed in a freezer bag for up to 3 months.
- Reheating: When ready to enjoy, reheat in the oven uncovered at 350°F (175°C) for about 20-25 minutes until heated through and the top is crisp again.
- Cooling: Always allow the casserole to cool completely before storing to maintain its structure and texture.
Make Ahead Options
These Pastel Azteca layers beautifully lend themselves to meal prep! You can prepare the entire casserole up to 24 hours in advance by layering the ingredients in your baking dish but holding off on baking it until you’re ready to serve. Simply cover it tightly with plastic wrap and refrigerate to maintain freshness. To ensure the best quality, consider adding the final layer of cheese just before baking, as it will melt and bubble more enticingly. When you’re ready, bake it straight from the fridge, adding an extra 5-10 minutes to the total baking time. This way, you’ll have the comforting flavors of Pastel Azteca ready to enjoy with minimal effort on busy weeknights!
What to Serve with Pastel Azteca
Enhance your dining experience by pairing delightful sides that perfectly complement the layers of flavor in this warm casserole.
- Mexican Rice: This fluffy side adds a comforting touch and helps soak up the rich salsa from the casserole.
- Refried Beans: Smooth and creamy, refried beans bring a hearty texture that balances the crunchy tortillas. Serve them on the side for a complete meal.
- Crispy Taco Salad: A burst of fresh veggies and crunchy tortilla strips brings a refreshing contrast to the savory casserole, making every bite exciting.
- Chips and Guacamole: The zesty guacamole refreshes your palate between bites of the rich Pastel Azteca with its creamy texture and bright flavor.
- Corn Elote: This grilled corn dish, topped with cheese, lime, and spices, adds a fun, festive element that enhances the overall meal aesthetic.
- Margaritas: The tangy lime and refreshing flavor of margaritas can elevate the dining experience, making it a true fiesta!
- Flan: For dessert, a rich, creamy flan offers a deliciously sweet finish, balancing the savory notes of your casserole perfectly.
Each pairing enriches your meal and allows you to savor the comfort and excitement of Pastel Azteca together with loved ones.
Pastel Azteca Variations & Substitutions
Feel free to get creative with Pastel Azteca—let your taste buds lead the way to delicious adaptations!
- Vegetarian: Substitute shredded chicken with sautéed mushrooms and spinach, and add black beans for added protein and heartiness. The rich, earthy flavors will be a delightful twist!
- Low-Carb: Try zucchini slices instead of corn tortillas for a deconstructed version that’s just as flavorful but lighter. It’s a great way to enjoy the essence of the dish without the carbs!
- Spicy: Add chipotle in adobo sauce to the salsa for a smoky kick. This spicy addition will elevate the flavor profile and deliver a satisfying heat.
- Cheese Lovers: Mix in cream cheese or ricotta along with your cheese layers for extra creaminess that melts beautifully—perfect for a comforting touch!
- Dairy-Free: Replace cheese with a plant-based cheese alternative and use coconut yogurt instead of crema for a silky, dairy-free version that everyone can enjoy, without losing that beloved creaminess.
- Salsa Variations: Swap out salsa verde for a fruity salsa, like mango or pineapple, for a sweet contrast to the savory chicken—a delightful burst of tropical flavor!
- Herb-Infused: Mix in chopped fresh herbs like cilantro or basil into your layers for an aromatic twist that brightens the dish. It’s a simple way to add a refreshing touch!
- Crunchy Toppings: Add crushed tortilla chips or panko bread crumbs atop the casserole before baking for an extra-crispy topping that takes this comfort food to the next level.
Don’t forget, these variations allow your creativity to shine while ensuring you whip up a comforting dish that you’ll want to serve again and again! If you’re interested in more delicious twists, check out my vegetarian comfort food recipes or try making low-carb casseroles for more inspiration!

Pastel Azteca Recipe FAQs
How do I select ripe ingredients for Pastel Azteca?
Absolutely! For the best flavors, choose ripe avocados that yield slightly to gentle pressure for garnish. Look for firm corn tortillas without dark spots or signs of mold. For peppers, select firm, shiny poblano peppers; avoid any that are soft or wrinkled.
How long can I store leftover Pastel Azteca in the refrigerator?
You can store your leftover Pastel Azteca in an airtight container for up to 4 days. Make sure to let the dish cool completely before sealing it, as this helps maintain its delicious layers and prevents sogginess.
Can I freeze Pastel Azteca, and how should I do it?
Very! To freeze, allow the casserole to cool completely. Then, wrap individual portions tightly in plastic wrap and place them in a freezer bag. This way, they’ll stay fresh for up to 3 months. When you’re ready to enjoy, reheat in the oven uncovered at 350°F (175°C) for about 20-25 minutes until heated through and the top is crispy again.
What if my Pastel Azteca turns out too soupy?
If your casserole ends up soupy, it might be due to using runny salsa or insufficiently fried tortillas. For troubleshooting, try adding a layer of crushed tortilla chips to help absorb excess moisture. In the future, opt for thicker salsa and double-check that the tortillas are lightly fried for the best texture.
Is Pastel Azteca suitable for people with dietary restrictions?
Absolutely! This dish is incredibly adaptable; you can easily make a vegetarian version by swapping the chicken for sautéed mushrooms or beans. For a low-carb option, substitute the corn tortillas with grilled zucchini slices. Adjust seasonings and ingredients to cater to different allergies and dietary needs.
Can I give leftover Pastel Azteca to my pets?
While it’s okay for pets to have small bites of plain chicken or cooked veggies, it’s best not to share Pastel Azteca with them. The cheese, spices, and salsa might upset their stomachs, so stick to their regular pet food for safety.

Mouthwatering Pastel Azteca: Your New Comfort Food Classic
Ingredients
Equipment
Method
- Preheat your oven to 375°F (190°C) to ensure even baking.
- Heat a skillet over medium heat and lightly fry the corn tortillas for about 30 seconds on each side.
- In a 9x13 inch baking dish, layer salsa, tortillas, shredded chicken, crema, and cheese. Repeat until all ingredients are used.
- Cover with foil and bake for 25 minutes. Then remove the foil and bake for an additional 10-15 minutes until cheese is bubbling.
- Let the casserole rest for 10-15 minutes before slicing and serving.
Leave a Reply