
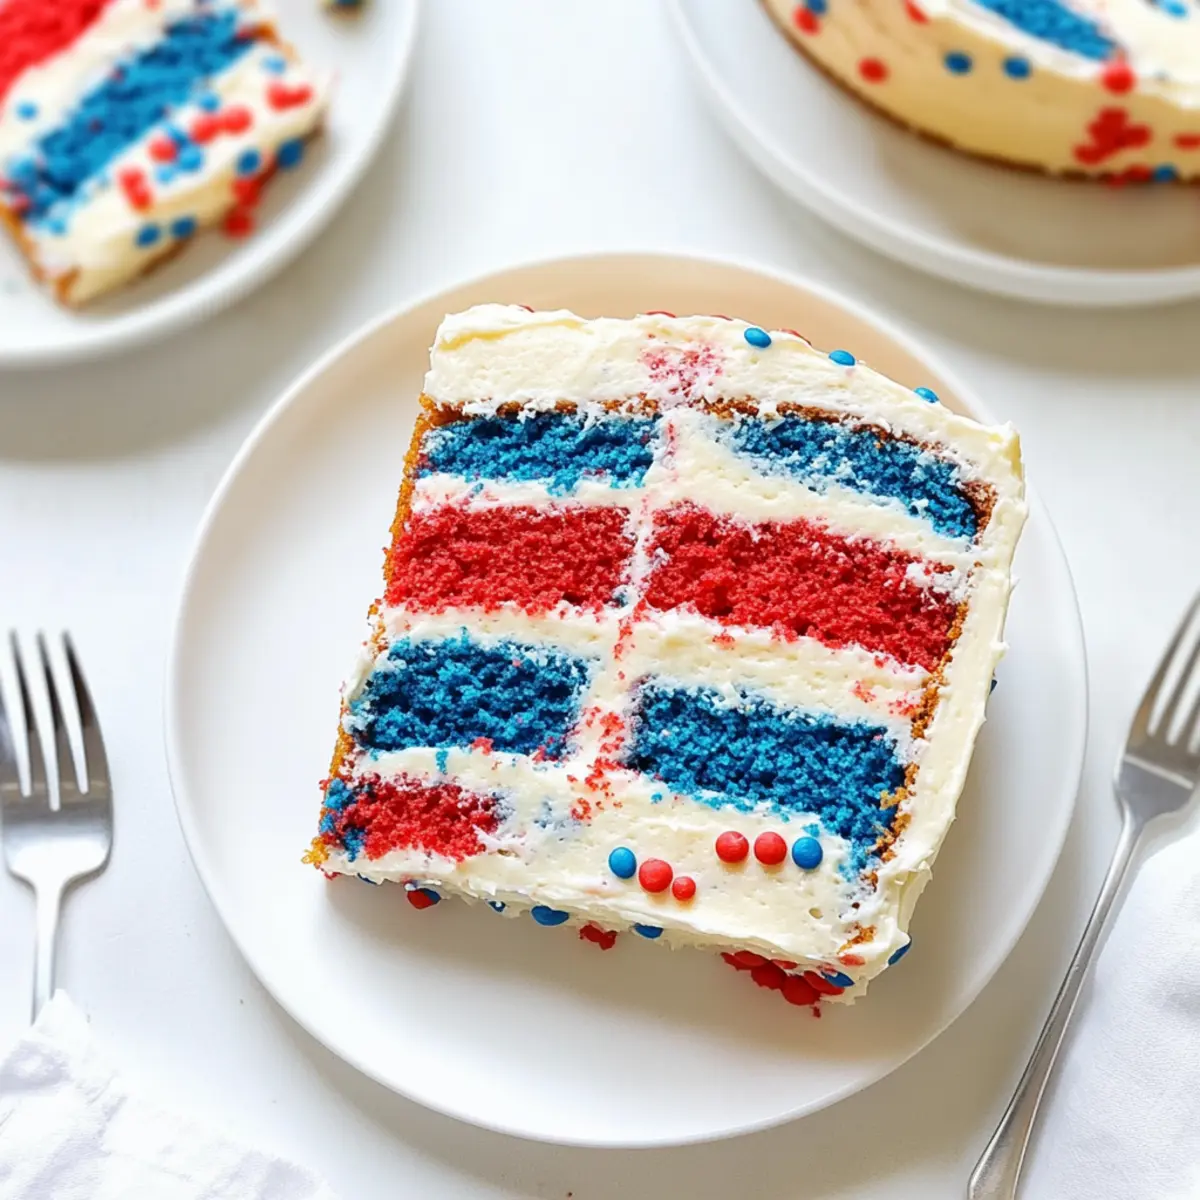
As I packed my picnic basket to celebrate the 4th of July, I couldn’t help but recall those mesmerizing rainbow desserts from childhood—a joyful sight that always brought smiles all around. Inspired by those memories, I decided to create this stunning Red, White and Blue Marble Layer Cake, the perfect festive centerpiece for the summer celebrations. Not only is this cake a feast for the eyes, but it offers a glorious, moist texture that pairs beautifully with fluffy vanilla buttercream frosting. Plus, it’s a simple dessert to whip up, making it an easy go-to for any gathering or BBQ. Are you ready to make your summer celebrations unforgettable with this delightful masterpiece? Let’s dive in!
Why is This Cake a Summer Essential?
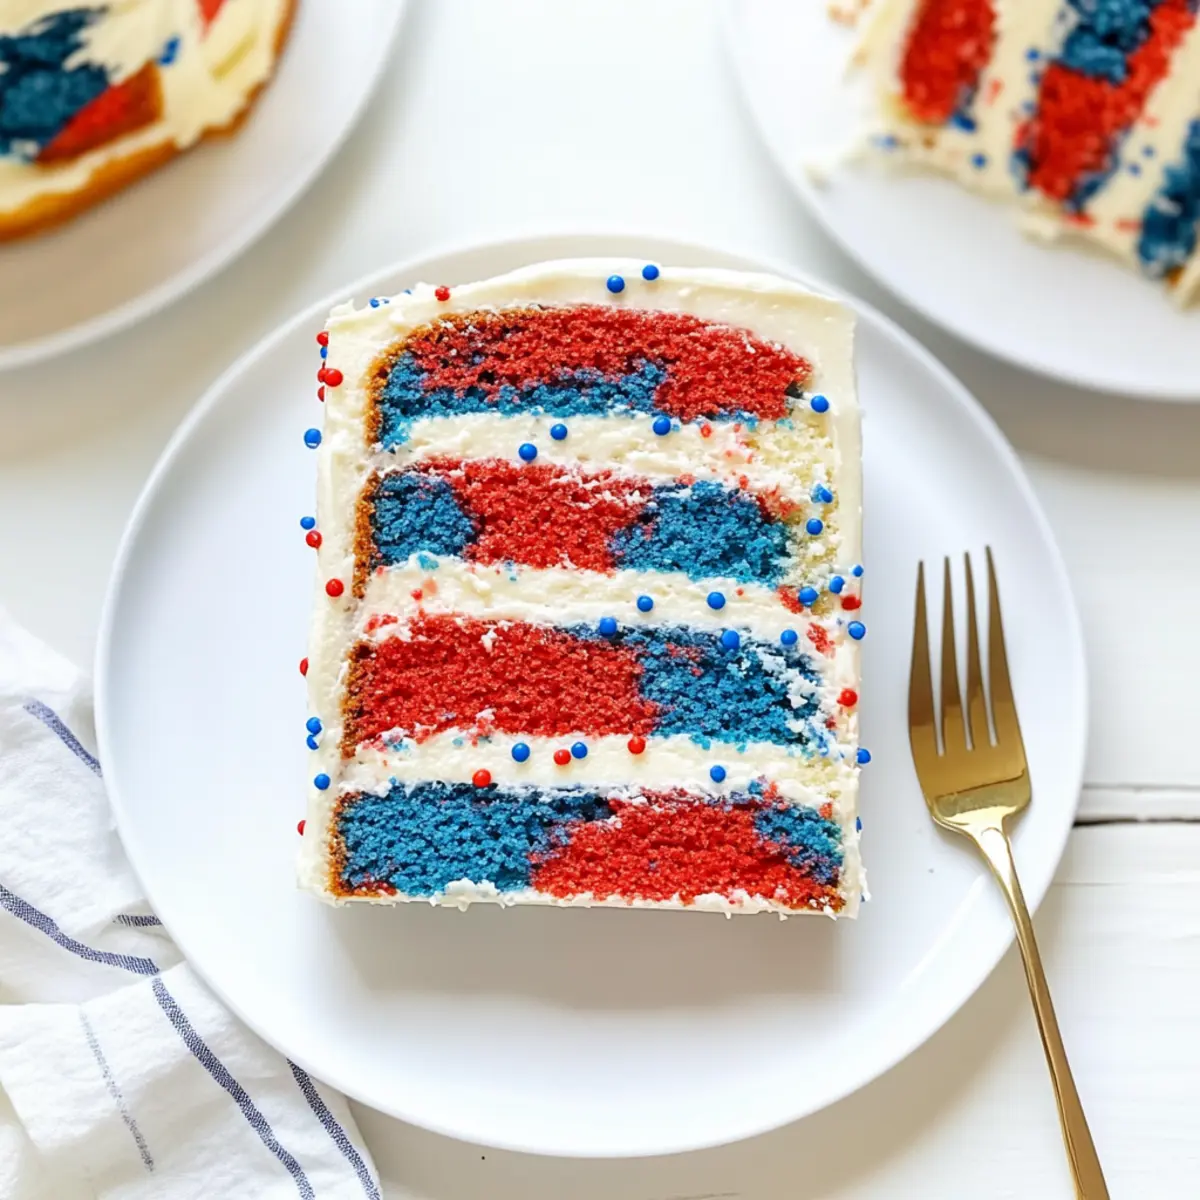
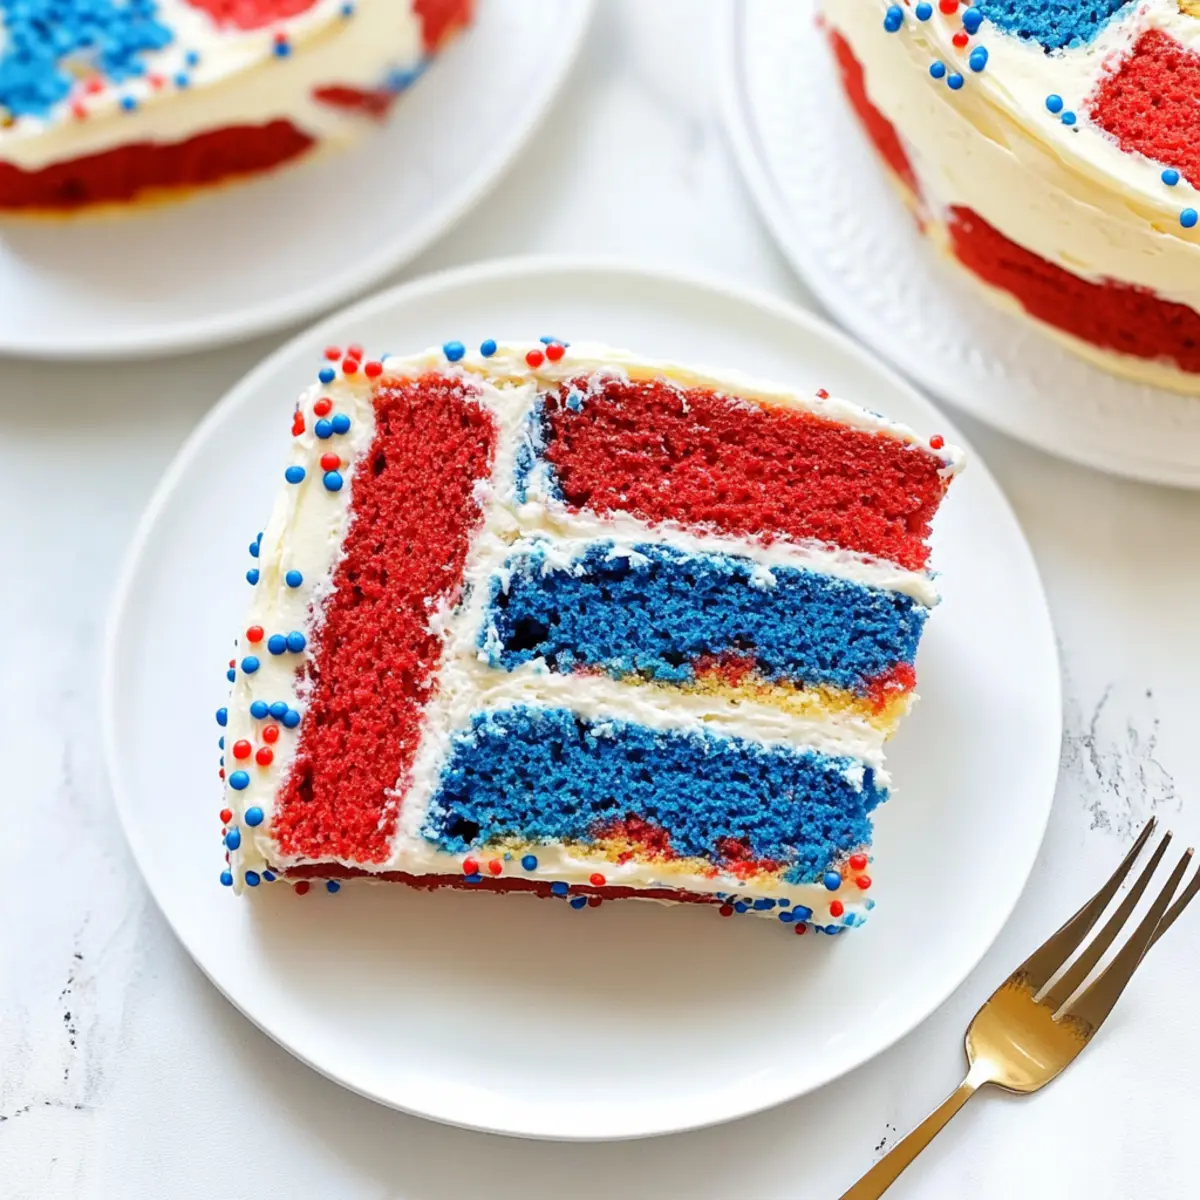
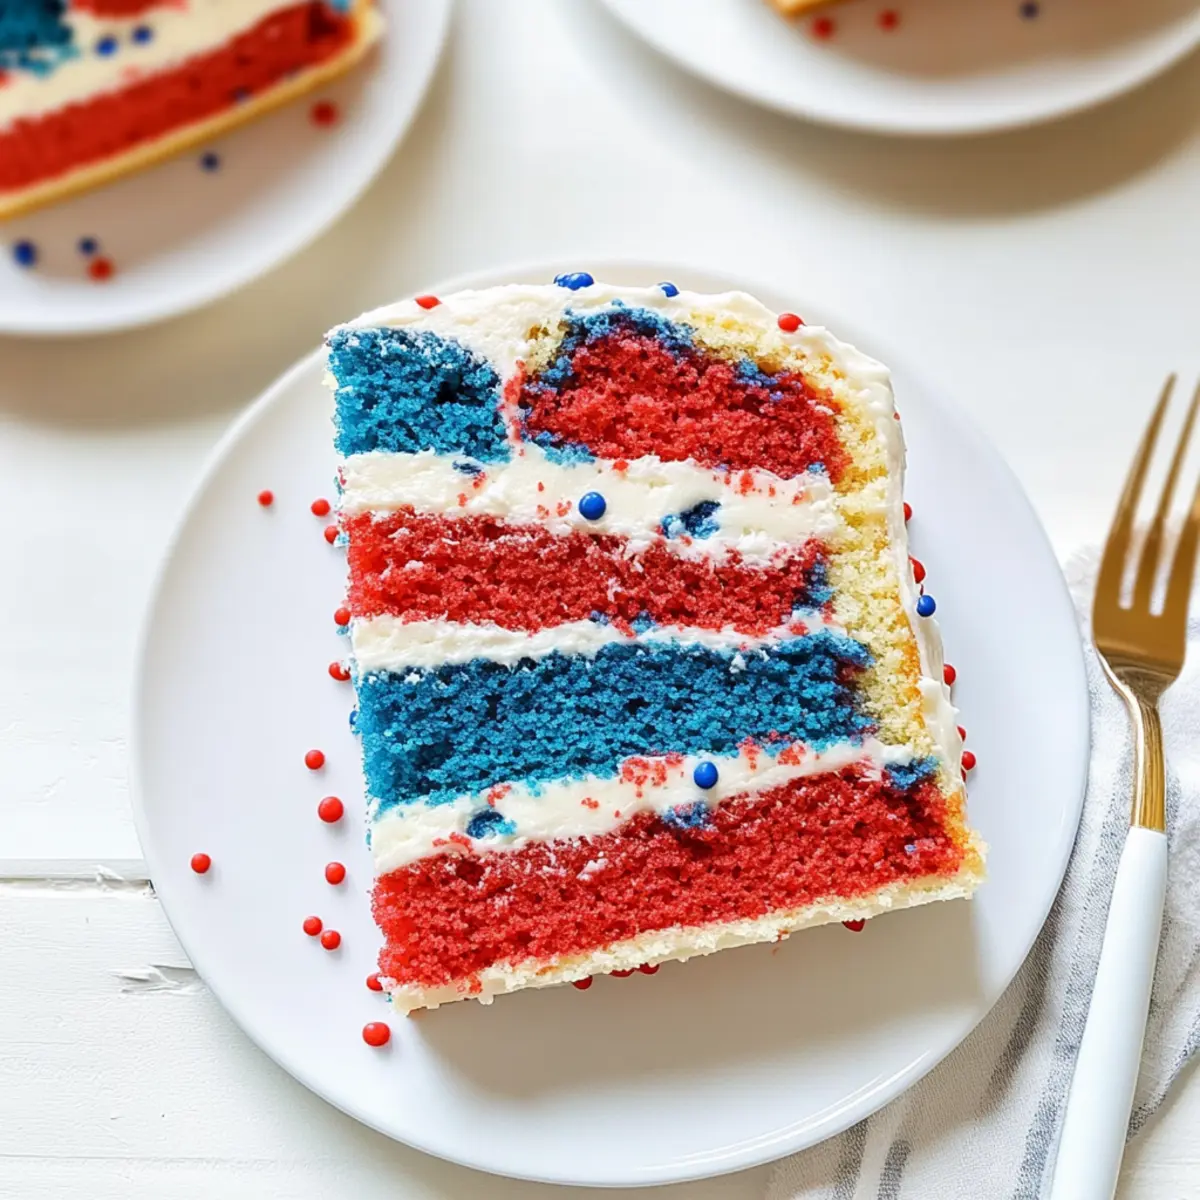
Vibrant Colors: The stunning layers of red, white, and blue make this cake a showstopper at any gathering, instantly capturing attention.
Easy to Make: With straightforward steps, even novice bakers can successfully recreate this delightful dessert, perfect for summer celebrations.
Moist & Tasty: The soft, fluffy cake paired with rich buttercream frosting delivers a deliciously satisfying experience that everyone will adore.
Customizable: Feel free to experiment with flavors by adding lemon zest or chocolate layers, ensuring a unique twist at your celebrations!
Memorable Experience: This cake evokes nostalgia for heartfelt moments spent with family and friends, making it a cherished centerpiece for your summer festivities.
Elevate your dessert game this season with this festive Red, White and Blue Marble Layer Cake, and for more delightful options, check out our Iced Blueberry Cheesecake and Berry Peach Cheesecake.
Red, White and Blue Marble Layer Cake Ingredients
For the Cake
- Unsalted Butter – Provides moisture and richness; substitute with margarine for a dairy-free version.
- Granulated Sugar – Sweetens the cake and helps achieve a light texture; can be replaced with coconut sugar for a healthier option.
- Egg Whites – Vital for creating a fluffy cake structure; whole eggs can be used but will alter the color.
- Vanilla Extract – Adds depth of flavor; opt for pure vanilla extract for the best aroma.
- Salt – Enhances flavor balance; essential for all baked goods.
- Baking Powder – Helps the cake rise; always use fresh for best results.
- Cake Flour – Provides a softer texture; can substitute with all-purpose flour, though results may vary.
- Milk – Adds moisture and enhances overall flavor; use any plant-based milk for a dairy-free cake.
- Americolor Super Red Food Gel Color – For vibrant red color; gel food coloring is recommended for intensity.
- Americolor Royal Blue Food Gel Color – For vibrant blue color; crucial for the patriotic theme.
For the Frosting
- Unsalted Butter – Main fat for the buttercream, providing creaminess; can use vegan butter for a dairy-free option.
- Shortening – Optional but improves piping and stabilizes the frosting for a smooth texture.
- Powdered Sugar – Sweetens and thickens the frosting; substitute with confectioner’s sweetener for a low-sugar option.
- Heavy Cream – Adds lightness to the frosting; can replace with milk or a dairy-free cream alternative.
- Non-pareils (optional) – For decorative flair that adds visual appeal without altering the flavor.
With all these ingredients, you’ll create a delightful Red, White and Blue Marble Layer Cake that’s perfect for your summer celebrations!
Step‑by‑Step Instructions for Red, White and Blue Marble Layer Cake
Step 1: Preheat and Prepare Pans
Begin by preheating your oven to 350°F (175°C). While it heats up, take two 8-inch square baking pans and line them with parchment paper to ensure easy removal of your cake later. This step is crucial for making your Red, White and Blue Marble Layer Cake effortlessly.
Step 2: Cream Butter and Sugar
In a stand mixer, combine softened unsalted butter with granulated sugar. Beat together on medium speed until the mixture is light and fluffy, which should take about 3-5 minutes. Adding air during this step ensures a light texture for your cake. Then, add the egg whites and vanilla extract, mixing thoroughly to incorporate everything well.
Step 3: Combine Dry Ingredients
Take a mixing bowl and whisk together the salt and baking powder with half of your cake flour. Gradually alternate adding this dry mixture and the milk into your creamed butter and sugar. Mix until just combined, being careful not to overmix, as this could impact the cake’s tender crumb.
Step 4: Color the Batter
Divide the batter evenly into three separate bowls. In the first bowl, add Americolor Super Red food gel color to create a vibrant red hue. In the second bowl, mix in Americolor Royal Blue food gel color for a striking blue, leaving the third bowl untouched for the white layer. Ensure each batter is well mixed before proceeding.
Step 5: Marble the Batter in Pans
Spoon dollops of each colored batter into the prepared pans. Start with alternating colors while filling to create a random marble effect, using a knife to gently swirl the colors together. This technique allows vibrant streaks of red, white, and blue to emerge in your Red, White and Blue Marble Layer Cake.
Step 6: Bake the Cakes
Place the pans in the preheated oven and bake for 30-32 minutes. You’ll know they’re done when a toothpick inserted into the center comes out clean or with a few moist crumbs. Keep an eye on them during the last few minutes to avoid overbaking—let the cakes rise and develop a slight golden crown.
Step 7: Cool and Layer
Once baked, remove the pans from the oven and allow the cakes to cool in the pans for about 10 minutes. After that, gently transfer them to wire racks to cool completely. Once cooled, use a serrated knife to slice each cake horizontally in half, giving you four layers in total for your masterpiece.
Step 8: Make the Buttercream Frosting
For the frosting, beat together unsalted butter and shortening in a mixing bowl until fluffy. Gradually add powdered sugar, mixing well, then blend in the heavy cream and vanilla extract. This should give you a creamy, smooth frosting that will perfectly complement your Red, White and Blue Marble Layer Cake.
Step 9: Assemble the Cake
Start assembling your cake by placing one layer on a serving plate. Spread a generous amount of frosting between each cake layer, ensuring smooth coverage. Once all layers are stacked, apply a crumb coat over the entire cake with frosting to seal in any crumbs, and chill the cake in the refrigerator for about 30 minutes.
Step 10: Final Frosting and Decoration
After chilling, retrieve your cake and use the remaining frosting to decorate the outside as desired. Feel free to create swirls or smooth it out for a clean look. For a festive touch, sprinkle non-pareils on top, adding visual appeal to your Red, White and Blue Marble Layer Cake that’s sure to impress!
Make Ahead Options
These Red, White and Blue Marble Layer Cake are perfect for meal prep enthusiasts! You can bake the cake layers up to 24 hours in advance, allowing for easy assembly on the day of your celebration. Once cooled, wrap each layer tightly in plastic wrap and store them in the refrigerator to maintain moisture and prevent drying. The buttercream frosting can also be prepared ahead of time and kept in an airtight container, refrigerated for up to 3 days. When ready to serve, simply bring the layers and frosting to room temperature, assemble your cake with frosting between layers, and finish decorating it. This approach saves time and ensures delicious results with minimal last-minute effort!
How to Store and Freeze Red, White and Blue Marble Layer Cake
Room Temperature: Store this delicious Red, White and Blue Marble Layer Cake in an airtight container at room temperature for up to 3 days to maintain its moist texture.
Fridge: If not consumed within 3 days, refrigerate the cake in an airtight container for up to a week. This will help preserve the flavors and freshness.
Freezer: For longer storage, wrap slices tightly in plastic wrap and place them in a sealed freezer bag. The cake can be frozen for up to 3 months without compromising its taste.
Reheating: To enjoy frozen slices, allow them to thaw in the fridge overnight and bring to room temperature before serving. Alternatively, warm slices briefly in the microwave for a cozy treat!
Expert Tips for Red, White and Blue Marble Layer Cake
-
Room Temperature Butter: Ensure your butter is at room temperature for easy creaming, leading to a light and fluffy cake texture.
-
Avoid Overmixing: Don’t overmix once you add flour and milk; this preserves the tender crumb while giving your Red, White and Blue Marble Layer Cake a moist finish.
-
Mix Colors Well: For vibrant color separation, be sure each gel food color is fully mixed into the batter before you start swirling.
-
Leveling Layers: Use a serrated knife to level your cake layers for perfect stacking, enabling a straight and impressive final presentation.
-
Cool Cakes Completely: Let the cakes cool completely before slicing and frosting; this prevents melting and ensures better layer adhesion.
-
Experiment with Flavors: Feel free to tweak your recipe by adding flavors like lemon zest or chocolate layers for a fun twist on this festive cake!
Red, White and Blue Marble Layer Cake Variations
Feel free to sprinkle your creativity into this delightful recipe, making it uniquely yours!
-
Citrus Zest: Add zest from 1 lemon or orange to the batter for a refreshing citrus twist. The tangy notes will brighten each bite.
-
Chocolate Layers: Incorporate chocolate by adding cocoa powder to one of the three portions, creating a sweet contrast alongside the colors. Chocolate lovers will adore this decadent twist!
-
Nut-Free Flavor Explosion: Use almond extract instead of vanilla for an intriguing flavor depth. Almond complements the buttercream beautifully, adding a nutty richness without any nuts.
-
Vegan Delight: Substitute eggs with chia gel (1 tbsp chia seeds + 3 tbsp water) for a vegan version. This way, everyone can enjoy your festive creation!
-
Different Color Themes: Change up the food colors to match other holidays, like pink and green for spring celebrations or pastel shades for Easter.
-
Fruity Addition: Fold in a cup of fresh berries (like blueberries or raspberries) into the batter for a fruity surprise. They’ll add a burst of flavor and additional moisture.
-
Spicy Kick: For a warm touch, add 1 tsp of cinnamon or a pinch of cayenne pepper to the batter. It introduces a subtle heat that plays beautifully against the sweetness.
-
Frosting Flavors: Experiment with the frosting by substituting some vanilla extract with mint or coconut extract. This twist will provide an extra layer of flavor that will amaze your guests.
These variations not only provide flavor and excitement to your Red, White and Blue Marble Layer Cake but also invite you to make it a personalized masterpiece! While you’re exploring, you might also enjoy other wonderful desserts like our Berry Peach Cheesecake or indulge in the rich layers of Black Velvet Cupcakes.
What to Serve with Red, White and Blue Marble Layer Cake
Indulge your guests with a complete festive spread that enhances every bite of this vibrant cake.
-
Fresh Berries: A mix of strawberries, blueberries, and raspberries adds a refreshing tartness that pairs beautifully with the cake’s sweetness.
-
Whipped Cream: Light and airy, whipped cream is the perfect companion, adding richness and a delightful texture contrast to each slice.
-
Lemon Sorbet: The zesty flavor of lemon sorbet cleanses the palate, providing a refreshing complement to the rich buttercream frosting.
-
Ice Cream Sundae Bar: Set up a DIY sundae station with vanilla and chocolate ice creams, toppings like sprinkles and nuts, creating an interactive dessert experience.
-
Patriotic Punch: Create a fun, themed beverage by mixing lemonade and blue sports drink, garnished with fresh fruit for a festive flair that enhances the celebration.
-
Chocolate-Dipped Strawberries: These delectable treats offer a sweet and slightly bitter note, enhancing the festive tones of the cake while providing a textural delight.
-
Mini Fruit Tarts: Delicate and colorful, these tarts add a touch of elegance and freshness to the dessert table, making every bite a treat.
-
Red, White, and Blue Salad: A light salad bursting with seasonal fruits and a citrus dressing can balance the sweetness of the cake while adding a touch of healthiness to the feast.
Red, White and Blue Marble Layer Cake Recipe FAQs
How do I select the right ingredients for my cake?
Choosing fresh, high-quality ingredients is key to a successful Red, White and Blue Marble Layer Cake! Look for unsalted butter that’s at room temperature for easy creaming. Check that the eggs are fresh, and if using milk or any alternative, make sure it’s within the expiration date. For the food colors, I recommend gel over liquid as it provides a richer, more vibrant hue without altering the cake’s consistency.
How should I store my leftover cake?
To keep your cake fresh, store it in an airtight container at room temperature for up to 3 days. If you still have some left after that, it can be refrigerated for up to a week. Just remember to cover it well to prevent it from drying out! The flavors will still be lovely after chilling, and it can also enhance the taste a bit.
Can I freeze the Red, White and Blue Marble Layer Cake?
Absolutely! To freeze your cake, first slice it into portions if you’d like. Wrap each piece tightly in plastic wrap and then place them in a sealed freezer bag. It can be stored this way for up to 3 months. When you’re ready to enjoy, just thaw the slices in the fridge overnight and let them come to room temperature before serving for that freshly baked taste!
What should I do if my cake doesn’t rise properly?
If your cake doesn’t rise as expected, it may be due to stale baking powder or not creaming the butter and sugar enough. Always check the expiration date on your baking powder before using it, and ensure the butter-sugar mixture is light and fluffy—this usually takes about 3-5 minutes of mixing. Another tip is not to open the oven door too early; this can cause your cake to collapse.
Can I make this cake nut-free and what about allergies?
Yes, this Red, White and Blue Marble Layer Cake is ideal for a nut-free treat! Just ensure the baking powder and any additional ingredients are labeled as nut-free, especially those like shortening or any decorative toppings. Always read labels carefully if allergies are a concern, and inform your guests if any substitutes are made. You can use margarine or vegan butter to keep it dairy-free, if needed.
What if I want to customize the flavors of my cake?
The more the merrier when it comes to customization! You can easily elevate your Red, White and Blue Marble Layer Cake by adding lemon zest to the batter for a fresh, citrusy twist or incorporating chocolate layers to create a delightful marble effect. Don’t hesitate to experiment with different gel colors too; it’s a fun way to tailor the cake to any occasion!
Delicious Red, White and Blue Marble Layer Cake for Celebrations
Ingredients
Equipment
Method
- Preheat your oven to 350°F (175°C) and prepare two 8-inch square baking pans by lining them with parchment paper.
- Cream softened unsalted butter and granulated sugar in a stand mixer until light and fluffy, then add egg whites and vanilla extract.
- Whisk together salt and baking powder with half of the cake flour, then alternately add this dry mixture and milk to the creamed mixture.
- Divide batter into three bowls; color one with Americolor Super Red and another with Americolor Royal Blue, leaving one plain.
- Spoon dollops of each colored batter into prepared pans and swirl gently using a knife.
- Bake for 30-32 minutes until a toothpick inserted comes out clean; monitor closely to avoid overbaking.
- Cool the cakes in pans for 10 minutes, then transfer to wire racks to cool completely and slice each cake in half.
- Beat together unsalted butter and shortening for frosting, then gradually add powdered sugar, heavy cream, and vanilla extract.
- Stack cake layers with frosting between each, adding a crumb coat around the outside and chill for 30 minutes.
- Decorate the chilled cake with remaining frosting and sprinkle with non-pareils if desired.
Leave a Reply