
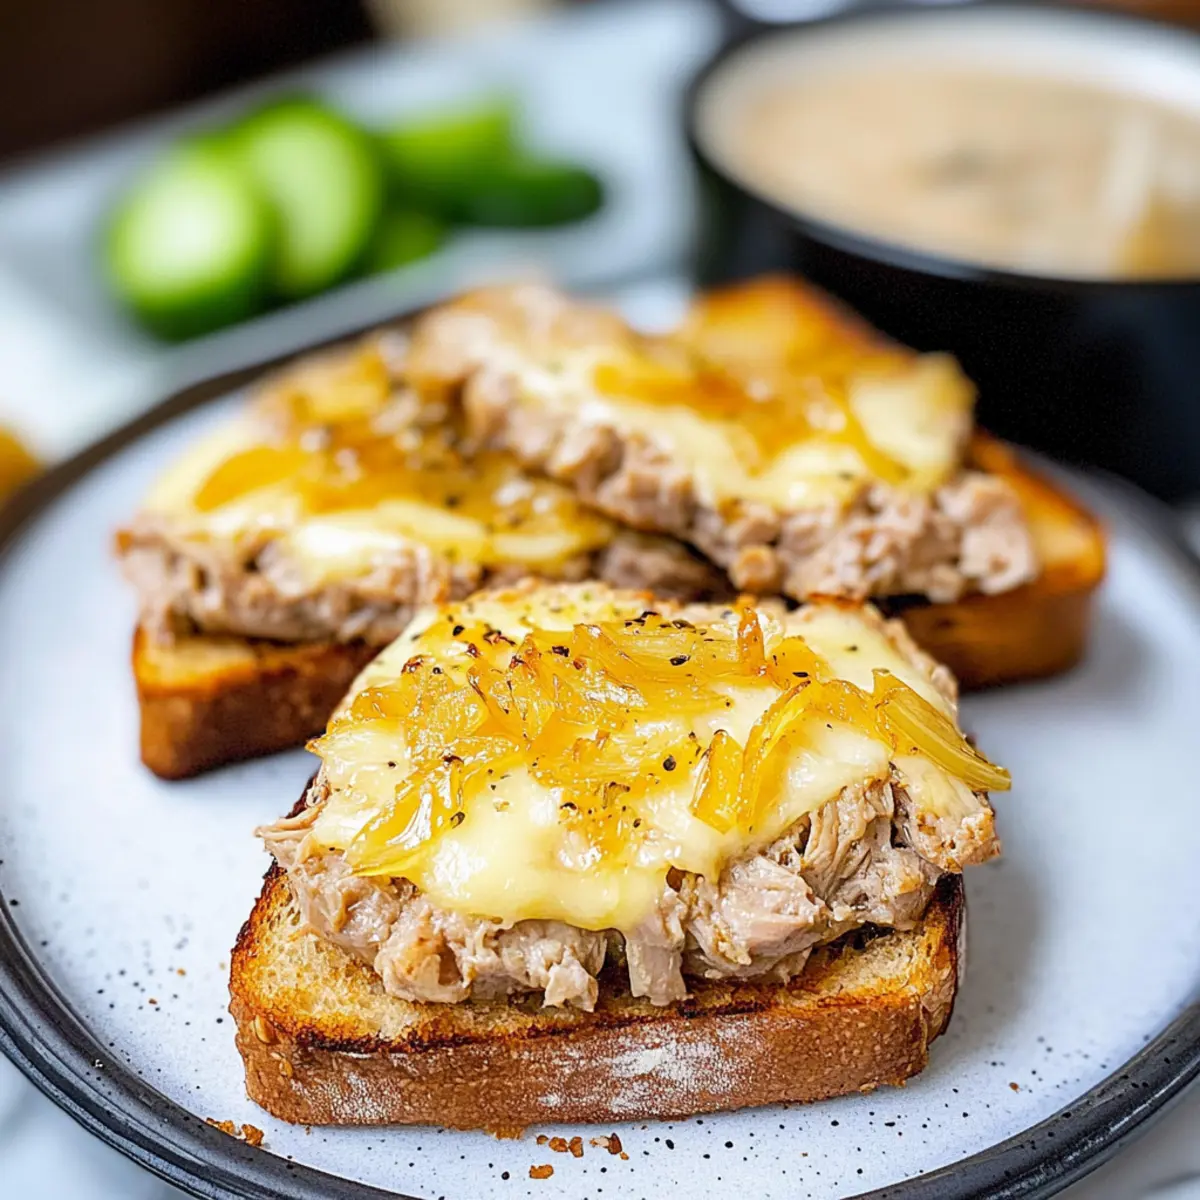
Just the other day, as I rummaged through my pantry, I stumbled upon a can of tuna and a loaf of hearty sourdough bread. Suddenly, I had an idea that was not only quick but also destined to become a new favorite: the Ultimate Open-Faced Tuna Melt! This delightful twist on a classic sandwich combines tender tuna with sharp onions and a zingy wholegrain mustard, all topped with a generous layer of gooey melted cheddar. The best part? It’s a high-protein recipe that caters to both busy weeknights and leisurely lunches. Plus, you can easily adapt it for a low-carb or keto-friendly version! Are you ready to discover the joy of crafting a scrumptious tuna melt that’s guaranteed to satisfy your hunger? Let’s dive in!
Why Is This Tuna Melt So Irresistible?
Quick Preparation: This recipe takes no time at all, perfect for those nights when you want something delicious without spending hours in the kitchen.
High-Protein Delight: Packed with tuna and cheese, this melt delivers a satisfying protein punch to keep you full and energized.
Versatile Twist: Whether you opt for the classic version or try the low-carb alternative, it’s a dish that caters to everyone’s preferences.
Flavor Explosion: The combination of creamy mayonnaise, zesty mustard, and sharp onions brings depth to every bite, making it an instant favorite.
Crowd-Pleasing Goodness: Serve it at gatherings or for family dinners, and watch how quickly everyone goes back for seconds! If you love creative tuna dishes, check out my Spicy Tuna Sushi for another delightful option.
Tuna Melt Ingredients
For the Sandwich
• Sourdough Bread – This chewy base is perfect for toasting; gluten-free or paleo options work well, too.
• Canned Tuna – Opt for tuna in brine for the best flavor and moisture; it’s the heart of your tuna melt!
• White or Red Onion – These add a delightful crunch and sharpness; shallots can provide a milder flavor if preferred.
• Wholegrain Mustard – It gives a zingy kick that enhances the tuna’s taste; any mustard works, or use Dijon for a smoother texture.
• Mayonnaise – This creamy binder merges all the flavors beautifully; Greek yogurt is a lighter sub if desired.
• Grated Cheese (Cheddar/Tasty) – Melts into that gooey topping we crave; swap for Swiss or mozzarella for different flavor notes.
• Sea Salt & Black Pepper – Essential for enhancing all the flavors; adjust according to your taste preferences.
For Low-Carb Variation
• Eggs – Whisked and cooked, they create a satisfying base for your tuna and cheese topping—great for a keto-friendly meal!
Elevate your craving for a Tuna Melt with these fabulous ingredients that promise a delightful experience!
Step‑by‑Step Instructions for Tuna Melt
Step 1: Prepare the Bread
Begin by pre-toasting slices of hearty sourdough bread on the lowest setting of your toaster. This initial toasting helps create a sturdy base for your tuna melt. Once lightly toasted, arrange the slices neatly on a baking tray lined with parchment paper, ensuring they won’t stick during grilling.
Step 2: Preheat the Grill
Next, preheat your oven’s grill setting to a medium-high temperature (around 375°F/190°C). This ensures that your cheese melts perfectly while giving the bread a lovely golden crisp. Keep an eye on the temperature, as grill settings can vary, and you want a balanced melt without burning.
Step 3: Make the Tuna Filling
In a mixing bowl, combine the drained canned tuna, finely diced onions, creamy mayonnaise, and tangy wholegrain mustard. Mash the mixture gently with a fork until fully combined, creating a dense and flavorful filling. Ensure the tuna is well-coated, with all ingredients harmoniously blended for that perfect tuna melt experience.
Step 4: Assemble the Tuna Melts
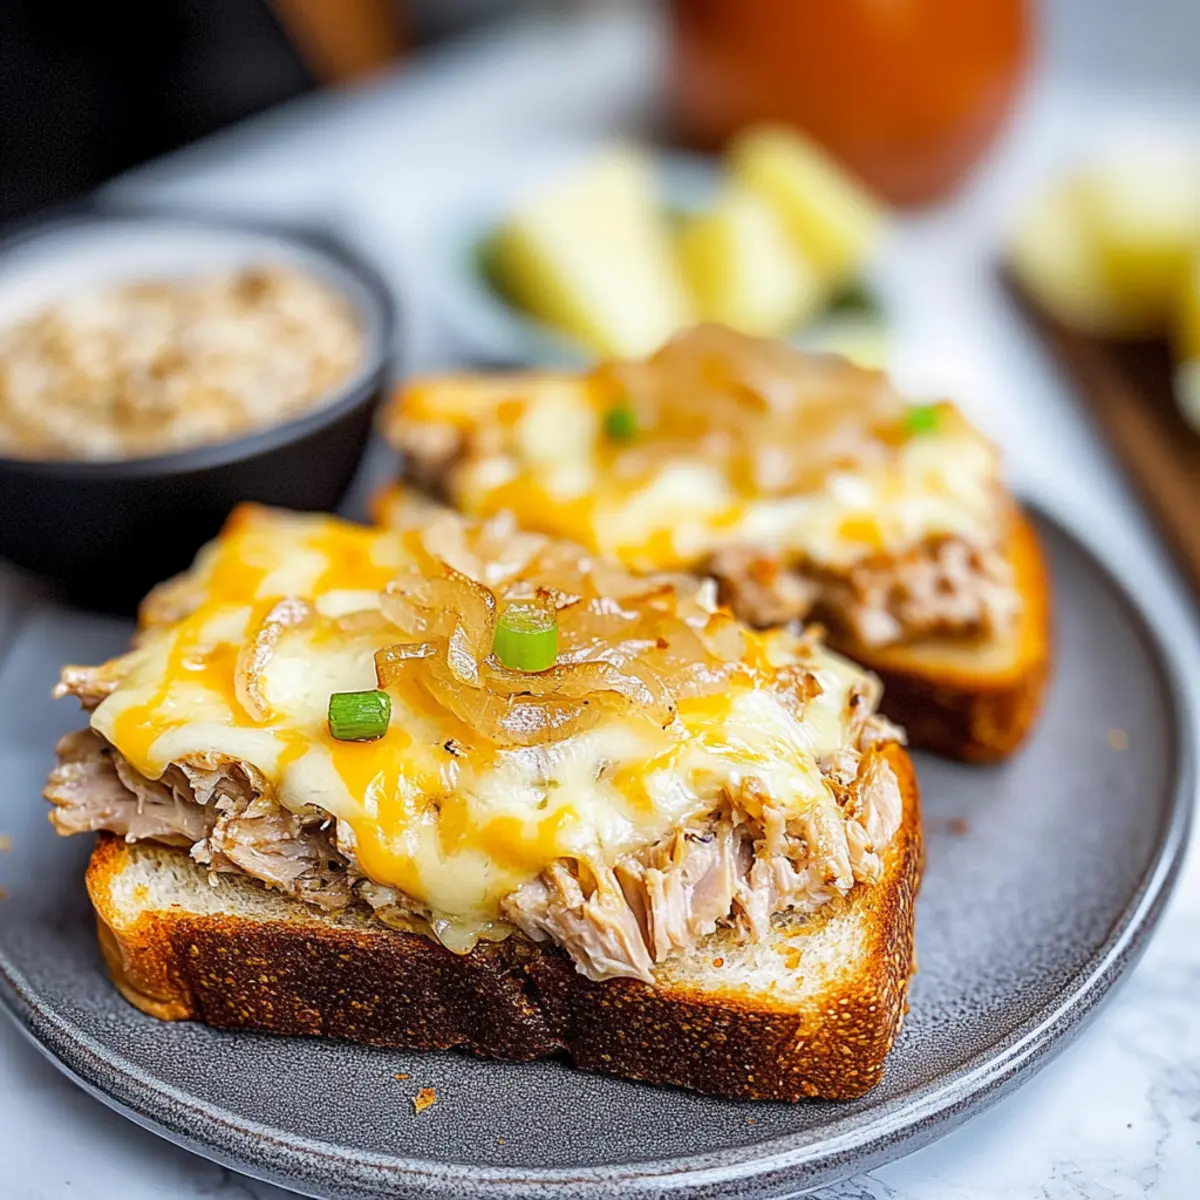
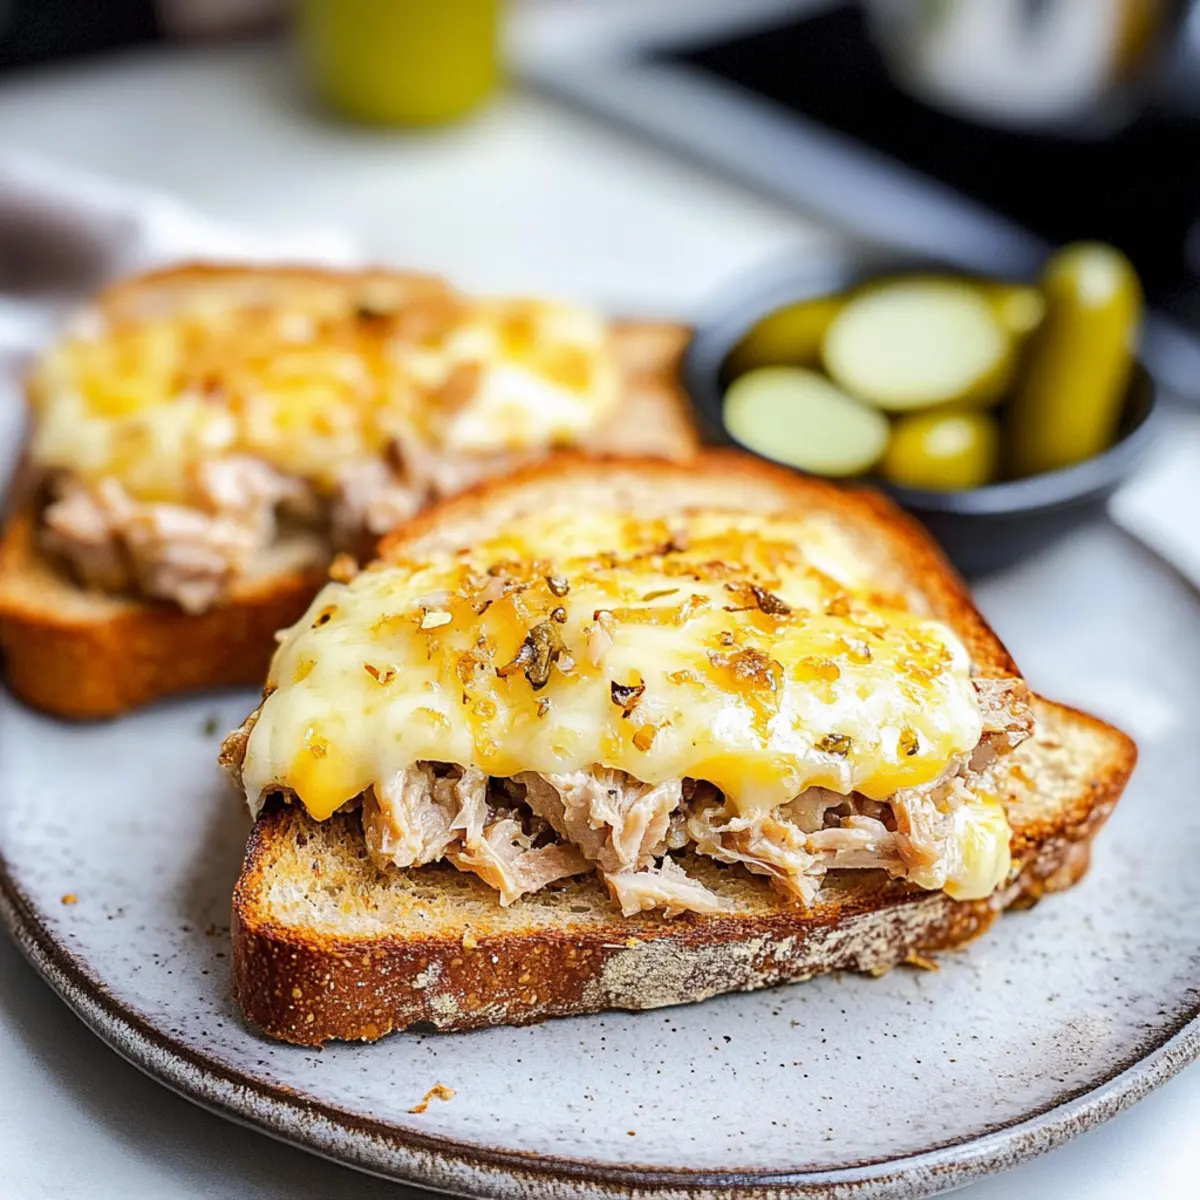
Spread an even layer of the creamy tuna mixture generously over each slice of toasted sourdough. Make sure to cover the entire surface for a delicious bite in every mouthful. This delightful combination of flavors is what brings your tuna melt to life, setting the stage for that ooey-gooey topping!
Step 5: Add the Cheesy Topper
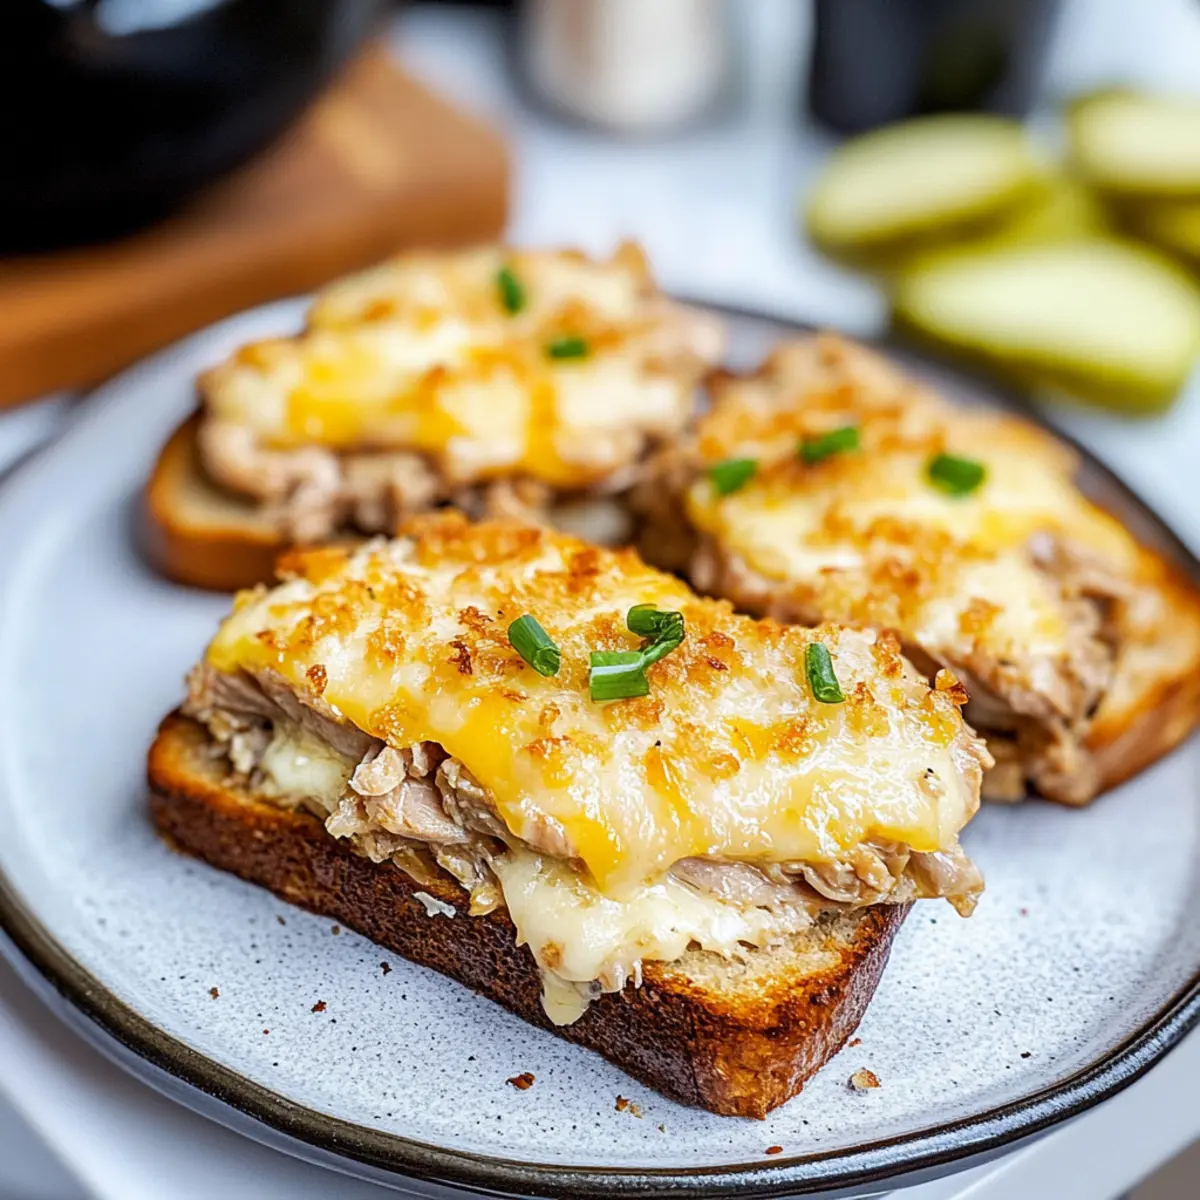
Now it’s time to sprinkle a generous amount of grated cheddar cheese over the tuna mixture on each slice. This melty layer will become the star of your open-faced tuna melt. Make sure to spread the cheese evenly, encouraging it to melt beautifully and create that classic, irresistible gooey texture.
Step 6: Grill to Perfection
Carefully place the prepared tray under the preheated grill, maintaining enough distance to avoid burning the bread. Grill for about 3-5 minutes, watching closely as the cheese begins to melt and turn a luscious golden brown. This is the moment your kitchen fills with the mouthwatering aroma of your tuna melt!
Step 7: Final Touches
Once the cheese has melted to your desired doneness, carefully remove the tray from the oven. Allow the tuna melts to rest for a minute as they cool slightly. After that, season them with a pinch of sea salt and freshly cracked black pepper to enhance the flavors even further before serving.
What to Serve with Ultimate Open-Faced Tuna Melt
Nothing enhances the joy of a warm, cheesy melt quite like the perfect sides that bring balance to your meal.
-
Crispy Dill Pickles: These crunchy, tangy bites add a refreshing contrast to the rich flavors of the tuna melt.
-
Garden Salad: A light mix of greens, cucumbers, and cherry tomatoes dressed in a simple vinaigrette complements the hearty sandwich beautifully.
-
Sweet Potato Fries: Crispy on the outside and soft on the inside, their natural sweetness pairs well with the savory melt, creating a delightful flavor combo.
-
Steamed Broccoli: This vibrant vegetable provides both color and a nutritious crunch, making it a perfect health-conscious side alongside your tuna melt.
-
Chilled Cucumber Salad: Lightly dressed with vinegar and herbs, this salad offers a coolness that balances the warm, cheesy tuna.
-
Tomato Soup: The classic pairing of a warm tomato soup provides a comforting dip for your melt, enhancing the overall comfort food experience.
-
Sparkling Lemonade: A refreshing drink that’s both tangy and sweet, it cleanses the palate beautifully after every cheesy bite.
-
Chocolate Chip Cookies: End on a sweet note with these classic treats. Their sweetness offers a perfect contrast to the savory flavors of the meal.
Choose any combination of these delightful pairings to elevate your culinary experience and savor every bite!
Make Ahead Options
These Tuna Melts are perfect for meal prep enthusiasts looking to save time during busy weeknights! You can prepare the tuna filling (made from canned tuna, onions, mayonnaise, and mustard) up to 3 days in advance; just store it in an airtight container in the refrigerator. To keep the quality intact, be sure to mix it well before using. When you’re ready to enjoy your tuna melt, simply spread the prepped tuna mixture on toasted sourdough and top it with grated cheese. Grill as directed until golden and bubbly, and enjoy a delightful, homemade meal with minimal effort!
Storage Tips for Tuna Melt
Fridge: Store the assembled tuna melts in an airtight container for up to 1-2 days for best flavor. Keep in mind that the bread may lose its crispness during storage.
Refrigerate Tuna Mix: The prepared tuna mixture can be refrigerated for up to 4 days, which is perfect for meal prepping. Just stir before using to regain creaminess.
Freezer: Freezing is not recommended for the final cooked tuna melt due to texture changes in the bread and cheese. However, you can freeze the tuna mixture for future use in recipes.
Reheating: Reheat leftover tuna melts in the oven at 350°F (175°C) for about 10 minutes until warmed through, ensuring the cheese gets gooey again.
Expert Tips for the Best Tuna Melt
-
Avoid Sogginess: Toast the sourdough well before adding the tuna mixture to prevent a soggy base. Use light bread if preferred for a crunchy base.
-
Cheese Matters: Choose a cheese that melts beautifully; cheddar is ideal, but try pepper jack for a spicy kick in your tuna melt.
-
Don’t Rush the Grill: Monitor your grilling carefully, as cheese can go from melted to burnt quickly. Keep an eye on it for perfect results!
-
Experiment Boldly: Don’t hesitate to customize your tuna mixture with extras like chopped pickles or capers for a unique flavor twist in your tuna melt.
-
Prep Ahead: The tuna mixture can be prepared and stored in the fridge for up to 4 days, making this recipe a great option for meal prep.
Tuna Melt Variations You’ll Love
Feel free to customize this delightful tuna melt to suit your taste or dietary preferences!
-
Low-Carb Delight: Substitute the bread with a base of whisked eggs cooked in a skillet for a satisfying, keto-friendly twist. It’s a phenomenal way to savor all the flavors without the carbs!
-
Spicy Heat: Swap cheddar cheese for pepper jack to add a fiery kick. If you love spice, consider mixing in some diced jalapeños directly in the tuna mixture for an extra layer of heat.
-
Creamy Avocado: Add sliced avocado to your tuna mix for a creamy texture and added nutrition. Avocado not only enhances flavor but also gives your melt a delightful richness.
-
Herb Boost: Mix in fresh herbs like dill or parsley with the tuna for a fresh, aromatic flavor that elevates the classic melt. The herbs will add a garden-fresh essence that beautifully complements the savory elements.
-
Extra Crunch: Toss in some chopped pickles or capers for a tangy crunch that contrasts beautifully with the creamy tuna. You’ll be amazed at how much these little additions transform your melt!
-
Savory Tomato: Add a slice of fresh tomato on top of the tuna before adding cheese. This layer of juiciness brightens the dish, making it feel lighter and adding a refreshing burst.
-
Dairy-Free Option: Use dairy-free cheese alternatives to maintain the gooey melted goodness while making it suitable for dairy-sensitive eaters. There are plenty of creamy options that melt beautifully!
-
Try Something New: For a unique twist, serve your tuna melt open-faced on a bed of greens, drizzled with balsamic vinaigrette. This unexpected way turns a comfort food classic into a fresh, lighter meal!
With these ideas, you’re sure to discover a new favorite version of the classic tuna melt! And if you’re looking to explore more amazing recipes, don’t miss out on my Seared Tuna Deliciously and experiment with another fantastic seafood twist!
Tuna Melt Recipe FAQs
How do I choose the best canned tuna?
Absolutely! When selecting canned tuna, I recommend going for tuna packed in brine for the best flavor and moisture. Look for cans that have a recognizable brand and check the expiration date. Also, avoid cans with any visible dents or rust.
How can I store leftover tuna melts?
To ensure the best taste, store the assembled tuna melts in an airtight container for up to 1-2 days. Keep in mind that the bread may lose its crispness during storage. For the tuna mixture, you can refrigerate it for up to 4 days. Stir it well before using to regain its creamy texture.
Can I freeze the tuna mixture?
Absolutely! You can freeze the tuna mixture for up to 3 months. Simply store it in a freezer-safe container. When you’re ready to use it, thaw in the refrigerator overnight, then stir before assembling your tuna melts. Avoid freezing the assembled melts to maintain proper texture.
What should I do if my tuna melt turns out soggy?
Very! To avoid a soggy tuna melt, make sure to toast the sourdough bread thoroughly before adding the tuna mixture. You can also bake the tuna melt directly on a baking tray lined with parchment paper, allowing excess moisture to escape. Pre-toasting the bread is key to a crispy base.
Are there any dietary considerations for this recipe?
The tuna melt is high in protein but be mindful of dietary restrictions. If you’re preparing this for someone with gluten intolerance, substitute the sourdough with gluten-free or paleo bread options. For a lower-fat alternative, you can replace mayonnaise with Greek yogurt. Always check tuna labels to ensure there are no allergens present.
Heavenly Tuna Melt: Comfort Food for Your Quick Fix Cravings
Ingredients
Equipment
Method
- Prepare the Bread: Pre-toast slices of sourdough bread on the lowest toaster setting, then arrange on a baking tray lined with parchment paper.
- Preheat the Grill: Set your oven’s grill to medium-high temperature (around 375°F/190°C). Monitor temperature closely.
- Make the Tuna Filling: In a mixing bowl, combine drained canned tuna, diced onions, mayonnaise, and mustard. Mash gently until fully combined.
- Assemble the Tuna Melts: Spread the tuna mixture evenly over toasted sourdough slices.
- Add the Cheesy Topper: Sprinkle grated cheddar cheese on top of the tuna mixture.
- Grill to Perfection: Place tray under the grill for 3-5 minutes until cheese is melted and golden brown.
- Final Touches: Remove from the oven, season with salt and pepper, and let cool slightly before serving.
Leave a Reply