Go Back
+ servings
Sweet & Spicy Korean-Inspired Sticky Salmon Rice Bowls

Sweet & Spicy Korean-Inspired Sticky Salmon Rice Bowls Bliss

Enjoy these Sweet & Spicy Korean-Inspired Sticky Salmon Rice Bowls bursting with flavor and goodness.
Prep Time 15 minutes
Cook Time 30 minutes
Marinating Time 15 minutes
Total Time 1 hour
Servings: 2 bowls
Course: Dinner
Cuisine: Korean
Calories: 540

Ingredients
  

For the Marinade
  • 3 tablespoons Dark Soy Sauce Substitute with tamari for gluten-free option
  • 2 tablespoons Light Soy Sauce Adjust to taste based on preference for saltiness
  • 2 tablespoons Rice Wine Vinegar White wine vinegar can be used as a substitute
  • 1 tablespoon Honey Maple syrup serves as a vegan alternative
  • 1 tablespoon Sesame Oil Can be omitted if allergic
  • 2 tablespoons Gochujang Paste Sriracha can be used but lacks depth
  • 1 teaspoon Garlic Puree Fresh minced garlic can be used instead
  • 1 teaspoon Ginger Puree Fresh grated ginger is a suitable substitute
  • 1 teaspoon Korean Red Pepper Flakes (Gochugaru) Crushed red pepper can be an alternative
  • 1 tablespoon Lime Juice Can swap for lemon juice as well
For the Bowl
  • 2 fillets Salmon Fillets Alternatives include grilled chicken, shrimp, or tofu
  • 1 cup Basmati Rice Quinoa can be used for a different texture
  • 1 cup Pak Choi Can use seasonal vegetables as substitutes
  • 1 cup Green Beans
  • 1 cup Bell Peppers
  • 1 Red Chili
  • 2 cloves Garlic Fresh garlic adds intensity
  • 1 medium Avocado Can replace with Greek yogurt if desired
  • 2 tablespoons Spring Onions Chives can work as an alternative
  • 1 tablespoon Black Sesame Seeds Toasted sliced almonds can be an interesting substitution
For the Drizzle
  • 2 tablespoons Sriracha
  • 2 tablespoons Light Mayo Substitute with yogurt for a healthier option

Equipment

  • Frying pan
  • pot
  • mixing bowl
  • fork

Method
 

Instructions
  1. In a large bowl, whisk together dark soy sauce, light soy sauce, rice wine vinegar, honey, sesame oil, gochujang paste, garlic puree, ginger puree, Korean red pepper flakes, and lime juice until smooth.
  2. Add the salmon fillets, ensuring they are fully coated and set aside to marinate for at least 15 minutes.
  3. While the salmon marinates, rinse 1 cup of basmati rice under cold water until the water runs clear. In a pot, bring water to a boil, adding a pinch of salt. Pour in the rinsed rice and water so it sits approximately 1 cm above the rice level. Cover and reduce the heat to medium-low, cooking for 11-13 minutes until all the water is absorbed.
  4. Fluff the rice with a fork after cooking.
  5. Heat a large frying pan over medium heat. Once hot, place the marinated salmon fillets skin-side down in the pan. Sear for about 3 minutes until the skin is crispy.
  6. Carefully flip the salmon and continue cooking for another 6 minutes, basting occasionally with the marinade.
  7. In a separate pot, bring water to a boil and blanch the green beans for about 2 minutes, then drain.
  8. In the same frying pan used for the salmon, add a splash of sesame oil, then toss in the drained green beans, pak choi, bell peppers, and red chili. Stir-fry for 3-4 minutes, adding any remaining marinade for flavor.
  9. While the salmon and vegetables are cooking, halve an avocado, remove the pit, and scoop the flesh into a small bowl. Add lime juice, a pinch of salt, and a sprinkle of chili flakes, mashing until creamy but still slightly chunky.
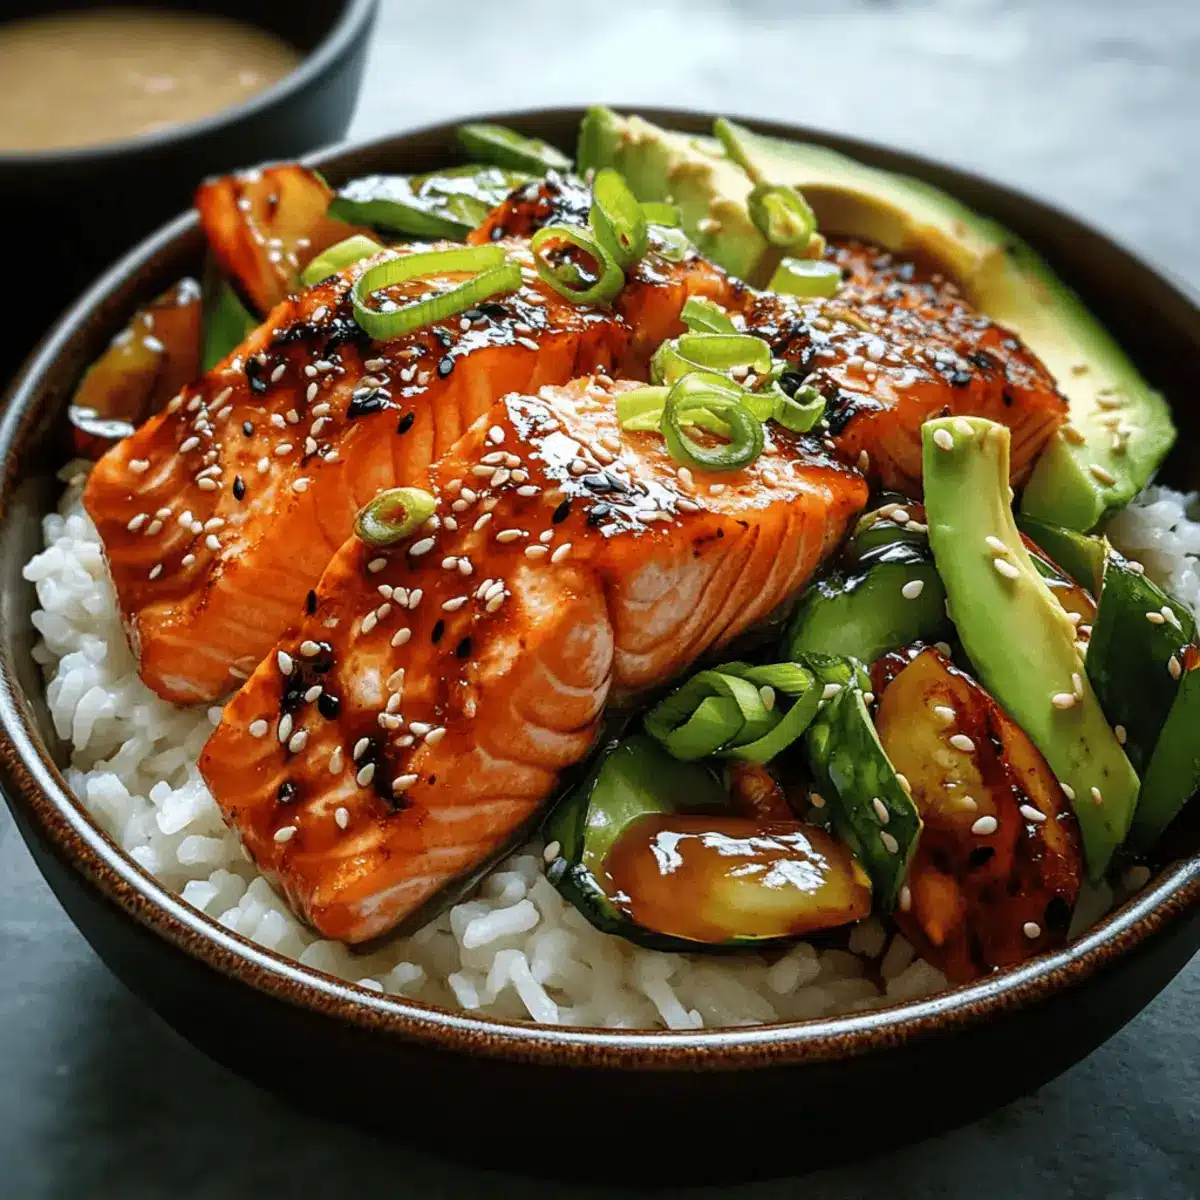
  10. To assemble the bowls, start by dividing the fluffy basmati rice among serving bowls. Top each portion with the sticky salmon fillets and vibrant stir-fried vegetables. Add a dollop of the mashed avocado and garnish with sliced spring onions, black sesame seeds, and drizzle with sriracha and light mayo.

Nutrition

Serving: 1bowlCalories: 540kcalCarbohydrates: 45gProtein: 30gFat: 20gSaturated Fat: 3gPolyunsaturated Fat: 4gMonounsaturated Fat: 10gCholesterol: 60mgSodium: 800mgPotassium: 800mgFiber: 5gSugar: 8gVitamin A: 1600IUVitamin C: 35mgCalcium: 70mgIron: 2mg

Notes

Store leftovers in an airtight container for up to 3 days, keeping components separate if possible.

Tried this recipe?

Let us know how it was!