
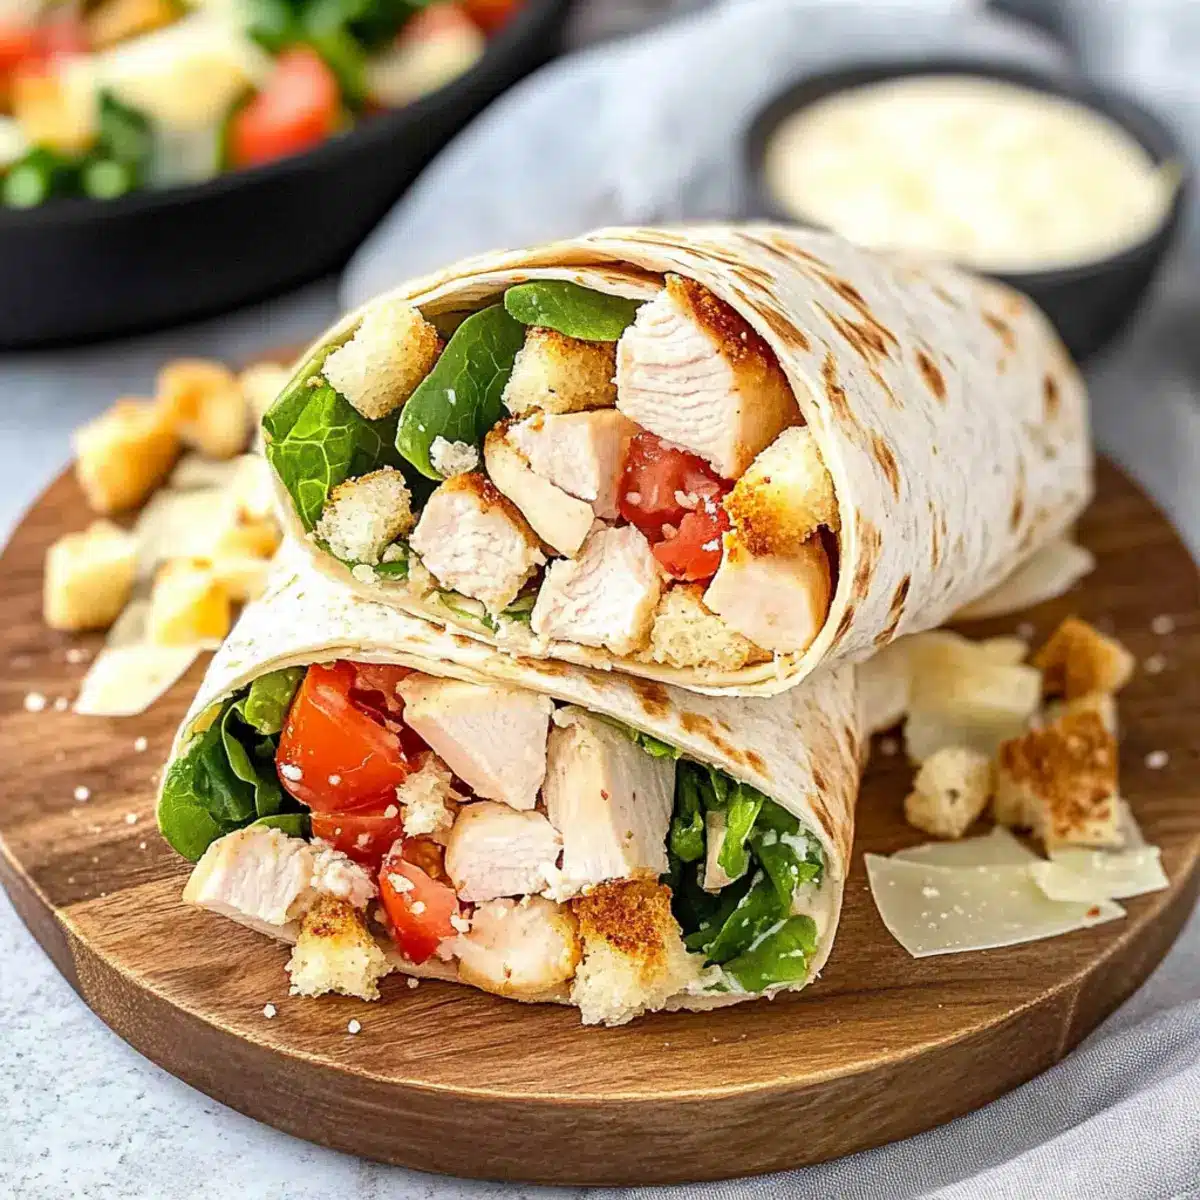
As I flipped through my cookbook, a familiar hit of nostalgia washed over me—the memory of sunny picnics and bustling family gatherings where Chicken Caesar Wraps made their grand debut. These quick meals combine tender chicken, crisp romaine lettuce, and juicy tomatoes all nestled in a soft tortilla, making them a perfect grab-and-go option that’s not just family-friendly but also fully customizable. Whether you’re in need of a lively lunch or a satisfying dinner, these wraps turn ordinary ingredients into something special, proving that delicious doesn’t have to mean complicated. And if you’re short on time, using rotisserie chicken makes preparation a breeze! Ready to roll up some goodness? Let’s dive in.
Why are Chicken Caesar Wraps a must-try?
Simplicity in preparation: These Chicken Caesar Wraps come together quickly, making them an ideal choice for busy days.
Flavor-Packed experience: With juicy chicken, crisp lettuce, and creamy dressing, each bite delivers a delightful contrast that your taste buds will appreciate.
Customizable options: Feel free to swap ingredients—use rotisserie chicken or substitute with turkey for a twist. You can ditch the tortillas for lettuce wraps if you’re going low-carb!
Family-Friendly appeal: Perfect for lunchboxes or family dinners, everyone will enjoy these wraps, ensuring happy smiles around the table.
Freshness guaranteed: Including vibrant veggies and herbs, these wraps are not only tasty but also nourishing, making them a healthier alternative to fast food options.
Pair these wraps with a side of fresh fruit or consider serving them alongside our delicious Wonton Rotisserie Chicken for a complete meal!
Chicken Caesar Wraps Ingredients
Ready to make your own delicious Chicken Caesar Wraps? Here’s what you need:
For the Wraps
- Large Flour Tortillas – These serve as the perfect base; switch to whole wheat for added nutrition.
- Boneless Skinless Chicken Breasts – The star protein; using rotisserie chicken makes preparation a breeze.
For the Seasoning
- Salt and Pepper – Essential to enhance each bite’s flavor; adjust to your liking.
- Olive Oil – Great for cooking chicken, adding richness; any cooking oil can work in a pinch.
For the Fillings
- Romaine Lettuce (chopped) – Provides crunch and freshness; mix it up with spinach for a different taste.
- Medium Tomatoes (finely chopped) – Adds juiciness; cherry tomatoes can sweeten the deal!
- Caesar Dressing – Offers creaminess and flavor; opt for a low-fat version to lighten it up.
- Grated Parmesan Cheese – Adds that salty richness; nutritional yeast is a solid dairy-free substitute.
- Crushed Croutons – For that extra crunchy texture; omit for a gluten-free option or use nuts/seeds if desired.
- Lemon Wedges – Brightens flavors when served; these are optional but highly recommended!
Get ready to wrap up these ingredients into something extraordinary—your lunchtime will never be the same!
Step‑by‑Step Instructions for Chicken Caesar Wraps
Step 1: Season the Chicken
Begin by seasoning the boneless skinless chicken breasts with salt and pepper on both sides. This simple step enhances the flavor of your Chicken Caesar Wraps. Allow the chicken to sit for a few minutes while you prepare your cooking equipment.
Step 2: Cook the Chicken
Heat a tablespoon of olive oil in a skillet over medium-high heat. Once the oil is shimmering, add the seasoned chicken breasts and cook for about 5 minutes on each side, or until they’re golden brown and cooked through. The chicken should reach an internal temperature of 165°F before removing it from the heat. Allow it to cool before slicing it into bite-sized pieces.
Step 3: Warm the Tortillas
To ensure your tortillas are pliable and easy to roll, warm them briefly. Place the tortillas in a clean kitchen towel, wrap them up, and microwave for about 20 seconds. Alternatively, you can place them in a dry skillet over low heat for a minute on each side, just until warmed and soft.
Step 4: Prepare the Tortillas
Spread a generous amount of Caesar dressing evenly over each warm tortilla, ensuring to cover the surface completely. This creamy dressing not only adds flavor but also helps hold the ingredients together, setting the stage for your delicious Chicken Caesar Wraps.
Step 5: Assemble the Wraps
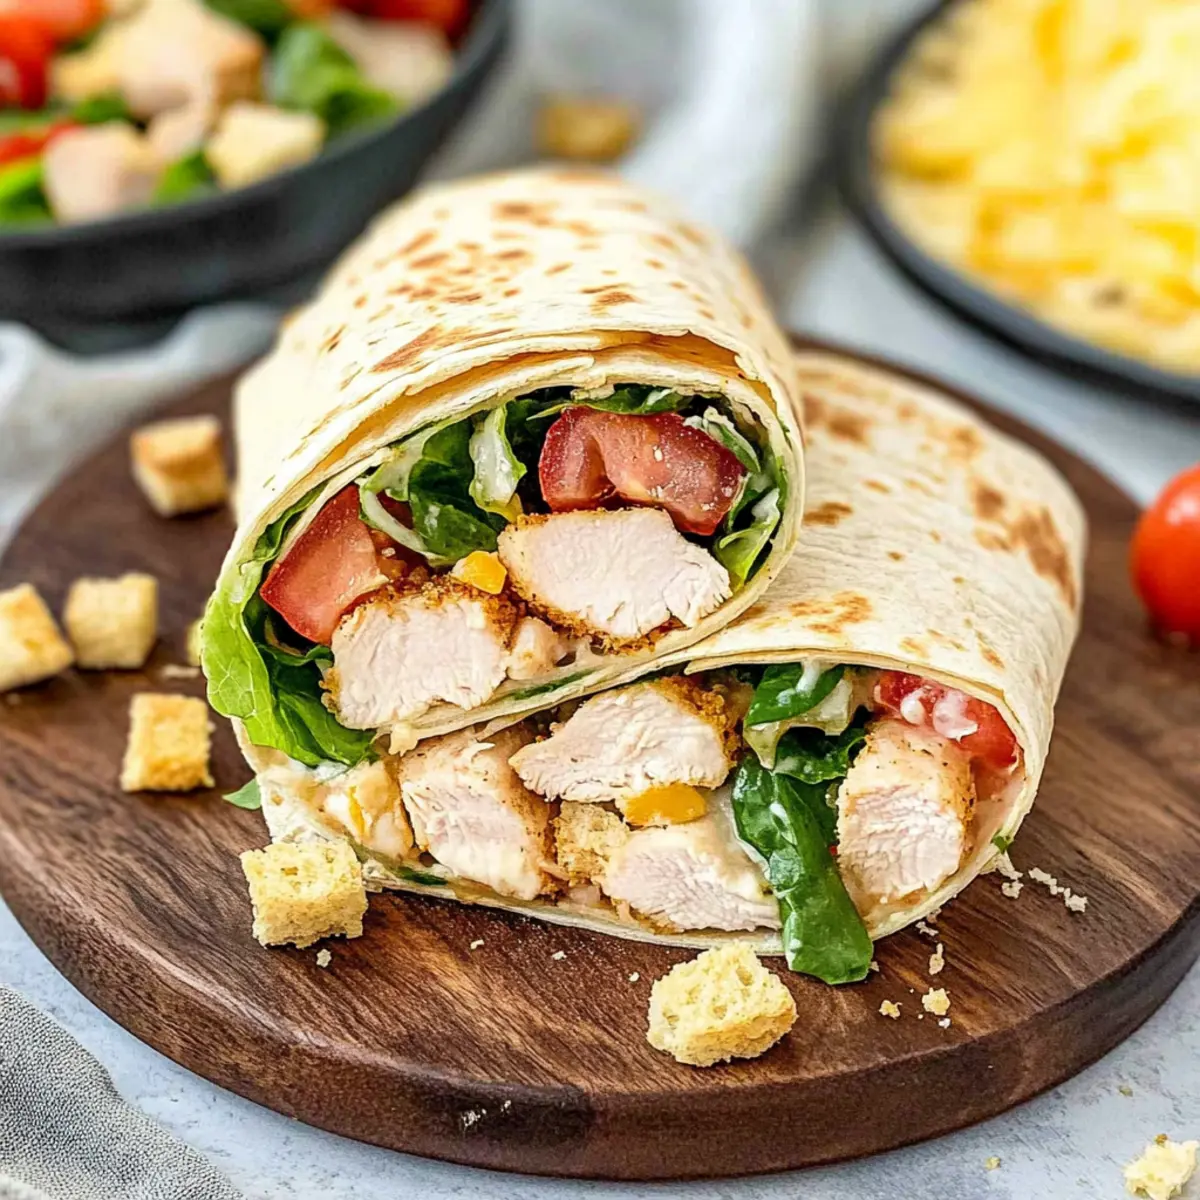
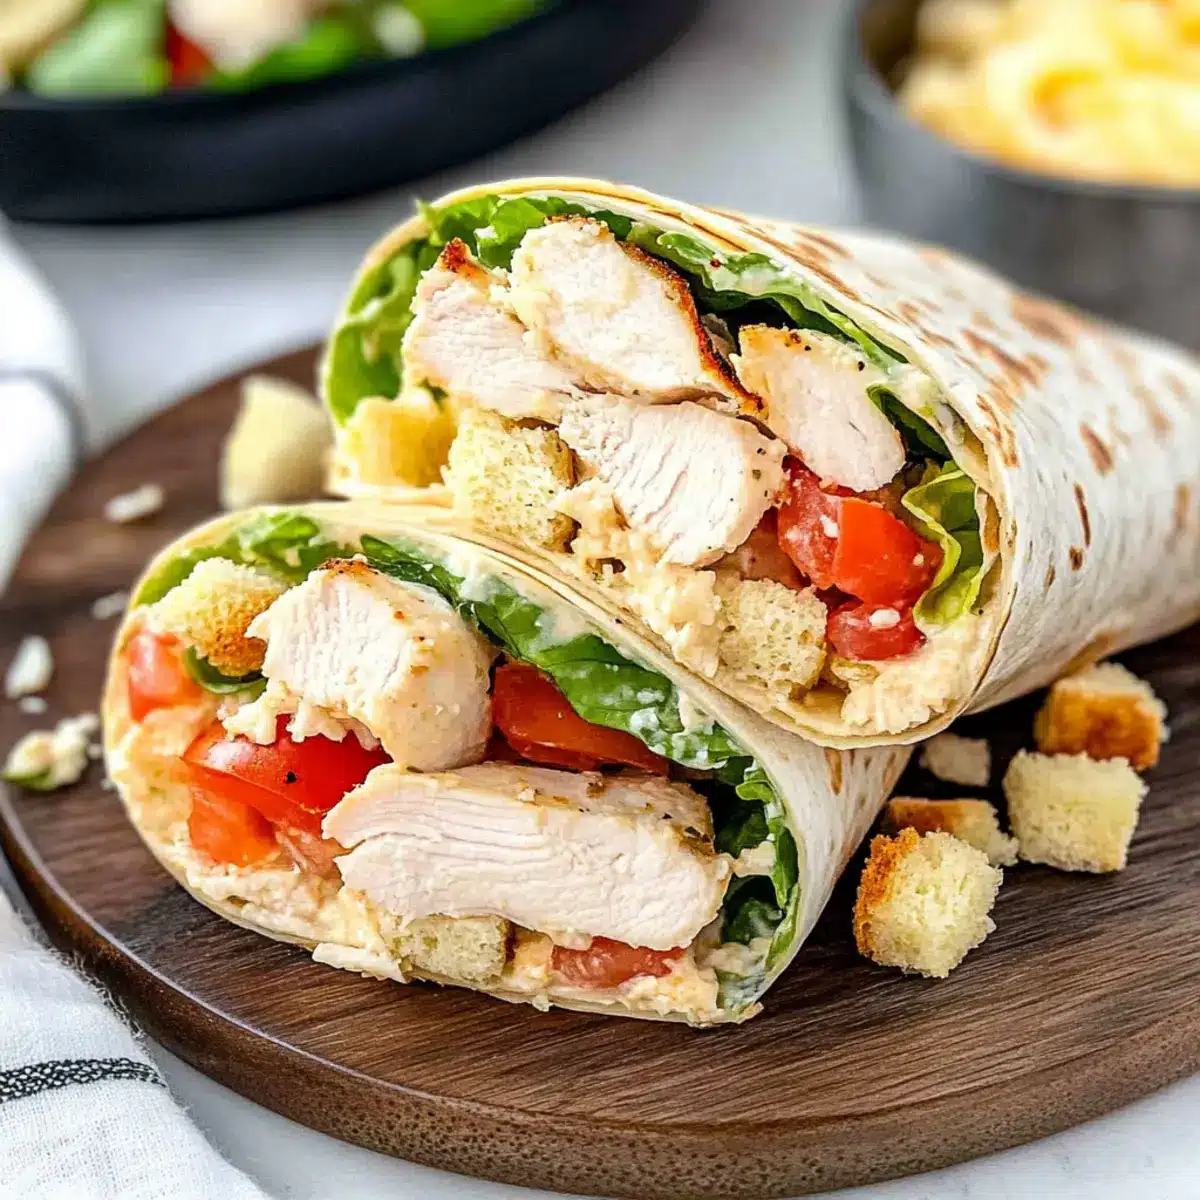
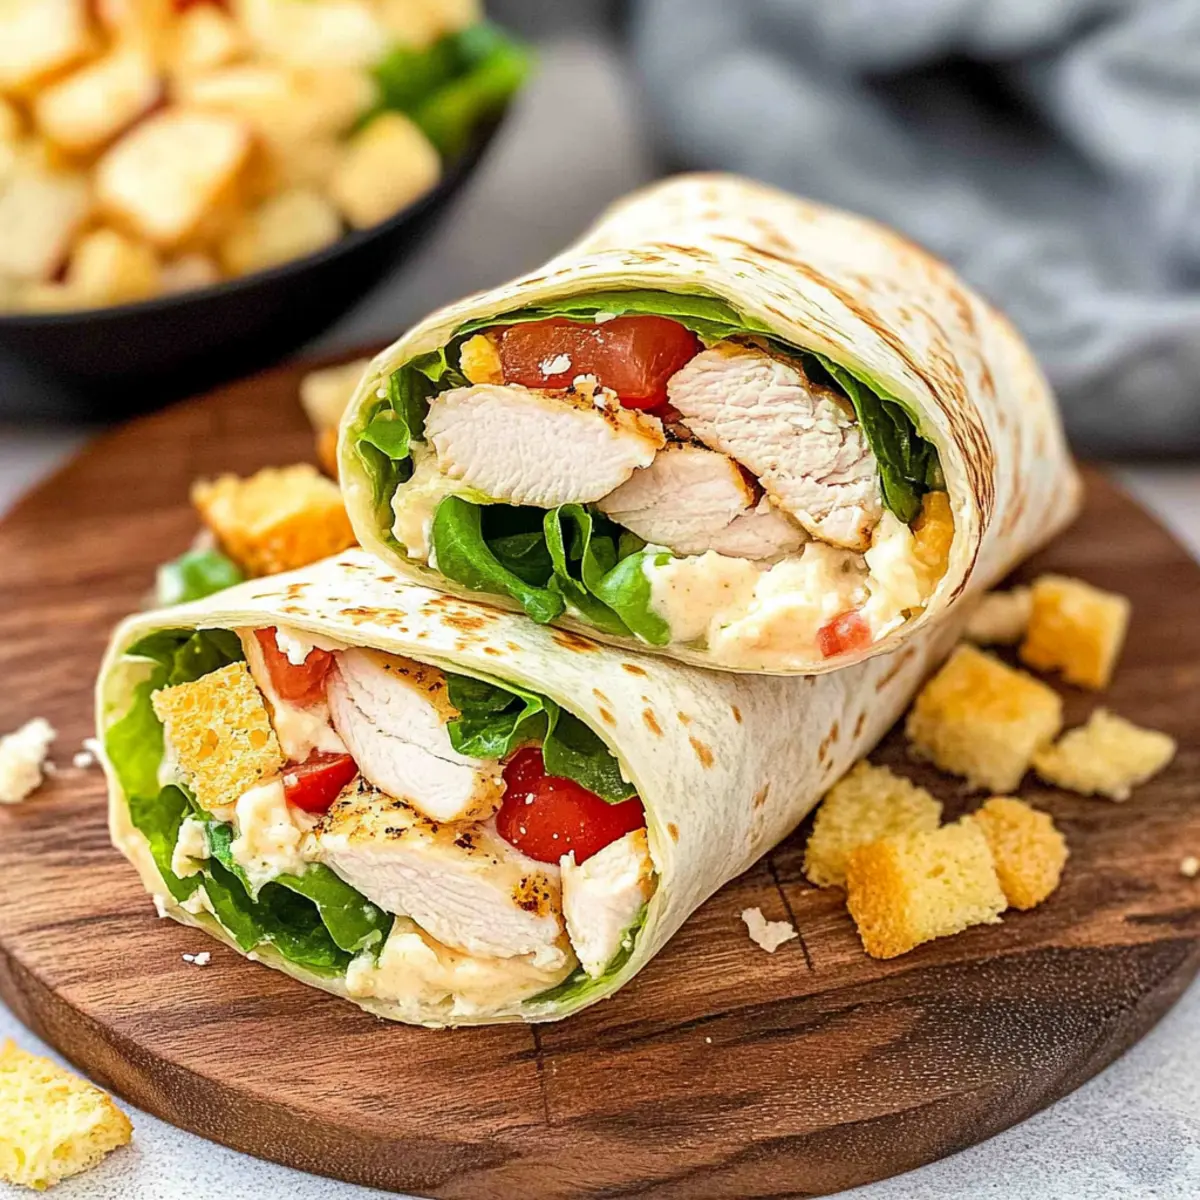
Now it’s time to layer your fillings! Begin by placing the sliced chicken in the center of the tortillas, followed by the chopped romaine lettuce, finely chopped tomatoes, grated Parmesan cheese, and a sprinkle of crushed croutons for added crunch. Be sure to distribute the ingredients evenly for a flavorful bite every time.
Step 6: Roll the Wraps
Carefully roll the tortillas tightly from the edge closest to you, tucking in the sides as you go to create a secure wrap. Make sure to roll tightly, but not so much that the fillings spill out. Once rolled, slice each wrap diagonally in half for a beautiful presentation.
Step 7: Serve and Enjoy
Serve your Chicken Caesar Wraps immediately with fresh lemon wedges on the side for squeezing. The bright acidity of the lemon enhances the creamy flavors. If desired, provide extra Caesar dressing for dipping to elevate the experience. Enjoy this quick and tasty meal with family and friends!
How to Store and Freeze Chicken Caesar Wraps
Fridge: Store assembled Chicken Caesar Wraps in an airtight container for up to 2 days to maintain freshness. Assemble just before eating to prevent sogginess.
Freezer: Wrap individual Chicken Caesar Wraps in plastic wrap and place in a freezer-safe bag. They can be frozen for up to 3 months. Thaw in the fridge before enjoying.
Reheating: If preferred warm, reheat wraps in a skillet over low heat until warmed through. You can also microwave them for about 30 seconds, but this may soften the tortilla.
Leftovers: Keep leftover ingredients, like chicken and veggies, in separate containers to prolong freshness if not consuming immediately.
Make Ahead Options
These Chicken Caesar Wraps are perfect for meal prep enthusiasts! You can cook and slice the chicken up to 3 days in advance, storing it in an airtight container in the fridge to keep it fresh and juicy. Additionally, you can wash and chop the romaine lettuce and tomatoes the night before, placing them in separate containers to maintain their crunch. When you’re ready to assemble, simply warm the tortillas for about 20 seconds in the microwave, spread the Caesar dressing, and layer the prepped ingredients. This way, your Chicken Caesar Wraps will be just as delicious, providing a quick and satisfying meal in no time, making your busy weeknights a breeze!
What to Serve with Chicken Caesar Wraps
Elevate your Chicken Caesar Wraps into a complete meal that dazzles the senses and satisfies the whole family.
- Crispy Sweet Potato Fries: A delightful contrast in texture, these fries offer a sweet and savory flavor that complements the wraps perfectly.
- Fresh Fruit Salad: Bursting with vibrant colors and natural sweetness, this refreshing side balances the richness of the wraps beautifully.
- Classic Caesar Salad: Keep the flavors consistent by serving a side of Caesar salad topped with crunchy croutons for that extra crunch.
- Zesty Coleslaw: The tangy crunch of coleslaw adds a refreshing element, making each bite of the wrap even more enjoyable.
- Garlic Breadsticks: With their irresistible aroma and buttery flavor, these breadsticks bring a cozy feel and are perfect for dipping in leftover dressing.
- Iced Lemonade: Quench your thirst with this refreshing drink; its citrusy zing enhances the flavors in the wraps.
- Oven-Roasted Vegetables: A medley of roasted seasonal veggies adds healthful bite and a warm, comforting touch to the meal.
- Chocolate Chip Cookies: Complete your meal with a sweet finish; these beloved treats make any family gathering feel special.
Expert Tips for Chicken Caesar Wraps
-
Prep Ahead: Prepare the chicken in advance to make assembly a breeze on busy days. This will save time when you’re eager for quick meals.
-
Use Rotisserie Chicken: For ultimate convenience and flavor, consider using rotisserie chicken instead of cooking it from scratch—no one will notice!
-
Avoid Sogginess: Assemble wraps just before serving to keep them from getting soggy. Store ingredients separately if preparing in advance.
-
Customize Wisely: Feel free to swap out the romaine for other leafy greens, but keep the chicken Caesar wraps’ flavor balance in mind—ensure ingredients complement each other.
-
Experiment with Dressings: Don’t limit yourself to just Caesar dressing! Try different dressings to find new flavor combinations that your family will love.
-
Stay Fresh: Squeeze lemon juice over your finished wraps for a burst of freshness, enhancing the overall flavor of your Chicken Caesar Wraps.
Chicken Caesar Wraps Variations
Feel free to get creative with these Chicken Caesar Wraps; customizing them is half the fun!
- Dairy-Free: Substitute grated Parmesan with nutritional yeast to keep the cheesy flavor while making it dairy-free.
- Vegetarian Delight: Use grilled or roasted veggies instead of chicken, such as zucchini and bell peppers, for a vibrant twist.
- Spicy Kick: Add sliced jalapeños or a drizzle of hot sauce for those who love a bit of heat in their wraps.
- Low-Carb: Swap out tortillas for large lettuce leaves, making it a fresh and crunchy alternative for those watching carbs.
- Flavorful Additions: Toss in some avocado slices for creaminess, or add sliced cucumbers for a refreshing crunch.
- Herb-Infused: Mix in some fresh herbs like basil or cilantro into the wrap for a lovely herbal twist that brightens each bite.
- Mixed Greens: Use a combination of romaine, spinach, and arugula to elevate the freshness and texture of the wraps.
- Protein Swap: Try using grilled shrimp or turkey in place of chicken for a delicious alternative, appealing to seafood lovers or a leaner option.
For even more delightful options, don’t miss our Healthy Sticky Chicken or consider adding a hearty side like Mummy Chicken Pot to complement your wraps!
Chicken Caesar Wraps Recipe FAQs
How do I choose ripe ingredients for my Chicken Caesar Wraps?
Absolutely! When selecting tomatoes, look for ones that are firm with a rich color. Avoid any with dark spots or wrinkles, as they indicate overripeness. For lettuce, choose heads that are sturdy and crisp without any brown patches. If you go for rotisserie chicken, pick one that’s freshly cooked, ideally from a deli, to ensure maximum flavor.
How should I store leftover Chicken Caesar Wraps?
To keep your Chicken Caesar Wraps fresh, store them in an airtight container in the fridge for up to 2 days. However, I recommend assembling the wraps just before eating to avoid sogginess from the dressing and veggies. If you’ve got leftover chicken and veggies, keep them in separate containers to maintain their freshness longer.
Can I freeze Chicken Caesar Wraps, and what’s the best way to do it?
Yes, you can freeze Chicken Caesar Wraps for future enjoyment! To freeze them, first wrap each individual wrap tightly in plastic wrap, then place them in a freezer-safe bag. They can be frozen for up to 3 months. When you’re ready to eat, simply thaw in the fridge overnight, and for a warm treat, reheat in a skillet over low heat or microwave for about 30 seconds.
What if my wraps are too soggy after assembly?
If your wraps are soggy, it’s likely from the dressing interacting with the veggies and tortillas. To avoid this, assemble your wraps just before serving. Another great tip is to add the dressing on the inside of the wrap only. You can provide extra dressing on the side for dipping!
Are Chicken Caesar Wraps suitable for people with dietary restrictions?
Definitely! For those sensitive to gluten, you can simply omit the tortillas and use large lettuce leaves as a low-carb alternative. If you have a dairy allergy, try substituting grated Parmesan with nutritional yeast, which offers a similar flavor without the dairy. Always check the ingredients in the Caesar dressing too, as some brands may contain allergens.
Can I add other ingredients to customize my Chicken Caesar Wraps?
Very much so! The beauty of Chicken Caesar Wraps is in their versatility. You can swap chicken for grilled shrimp or turkey, and add extra vegetables like cucumbers or bell peppers for added crunch and nutrition. Feel free to experiment with different dressings—balsamic vinaigrette or ranch could give your wraps a refreshing twist!
Delicious Chicken Caesar Wraps That Make Lunchtime Fun
Ingredients
Equipment
Method
- Season the chicken breasts with salt and pepper on both sides and let sit for a few minutes.
- Heat olive oil in a skillet over medium-high heat, add chicken, and cook for about 5 minutes on each side until golden brown.
- Warm tortillas briefly in a microwave for about 20 seconds or in a skillet over low heat for a minute on each side.
- Spread Caesar dressing evenly over each warm tortilla.
- Layer sliced chicken, chopped romaine, tomatoes, Parmesan cheese, and crushed croutons on each tortilla.
- Roll the tortillas tightly from the edge closest to you, tucking in the sides to secure the wrap.
- Serve immediately with fresh lemon wedges for squeezing and extra Caesar dressing for dipping if desired.
Leave a Reply