
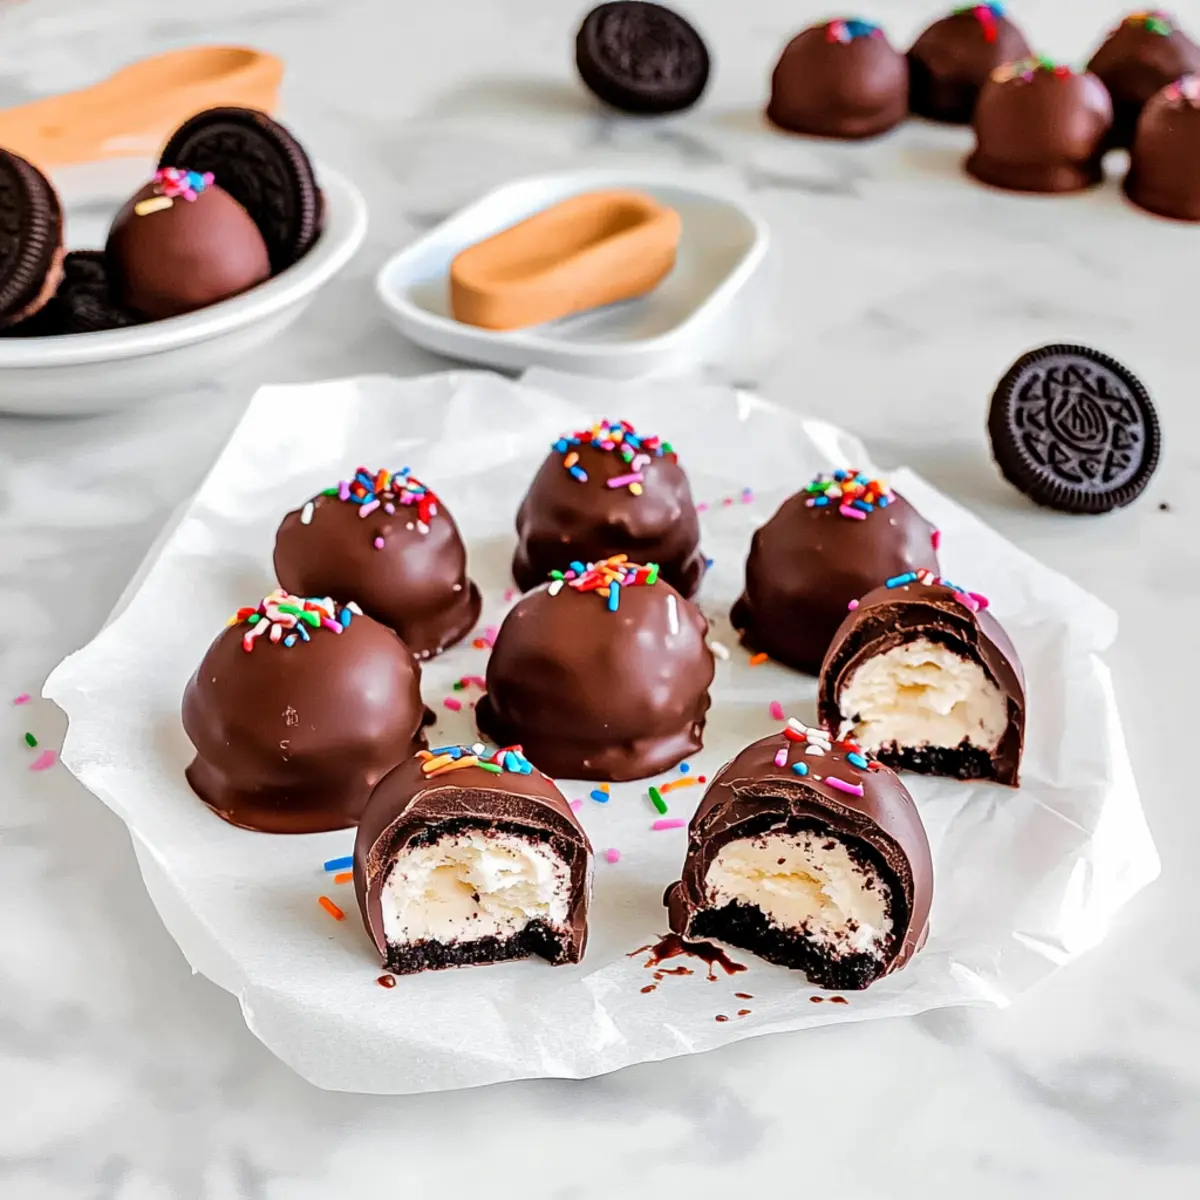
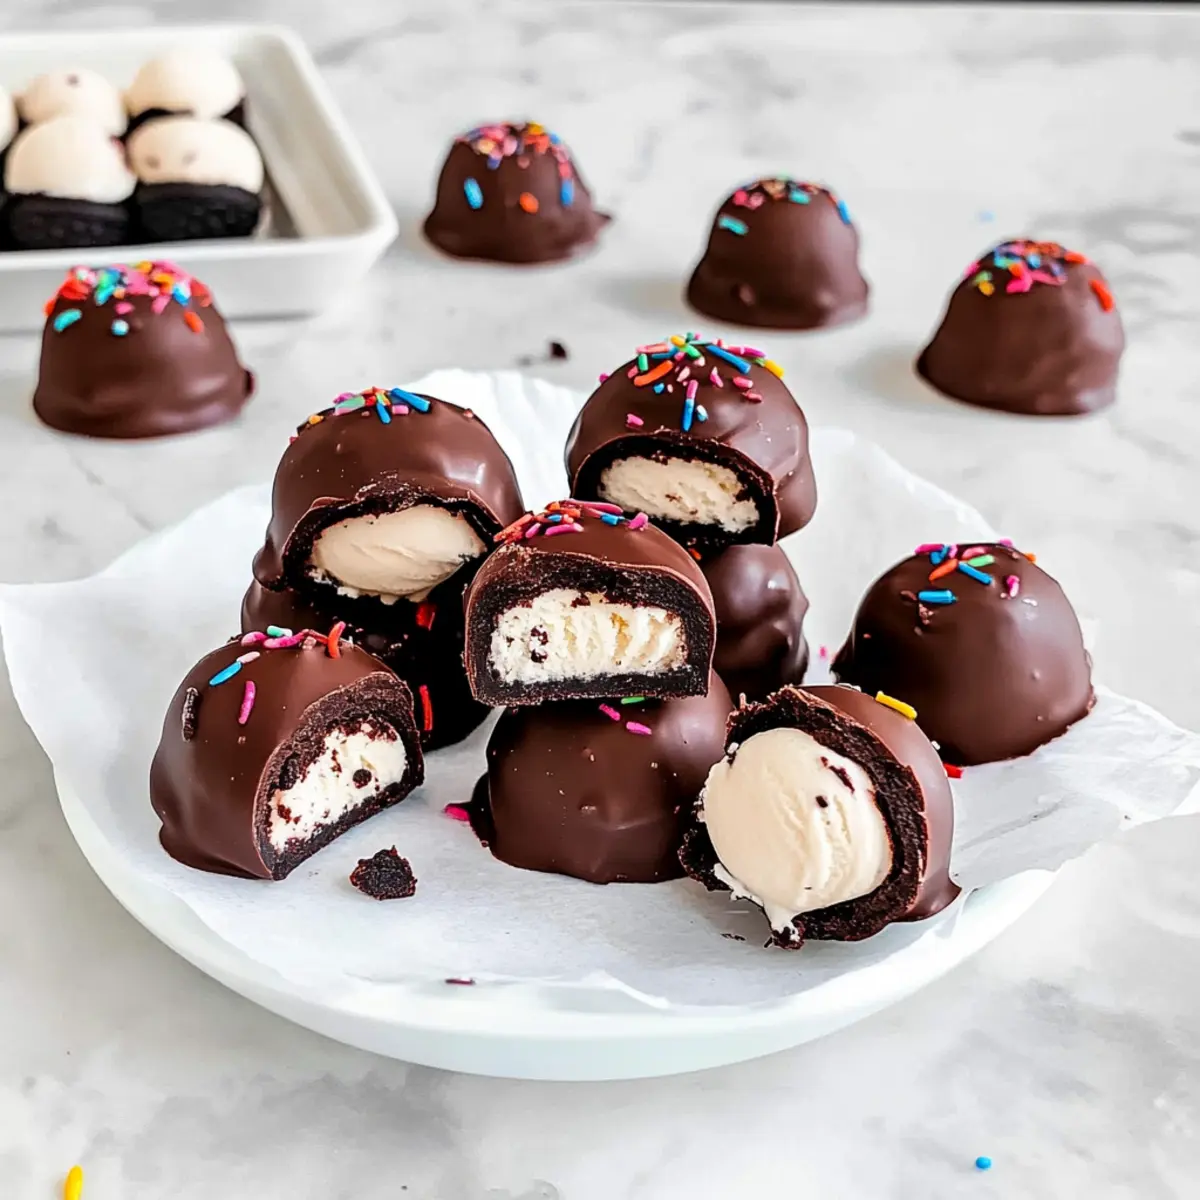
As I rummaged through the freezer looking for a sweet escape, I stumbled upon a truly delightful concoction just waiting to be whipped up: Chocolate-Covered Oreo Ice Cream Bites! These no-bake wonders come together in no time, making them an ideal treat for last-minute gatherings or cozy movie nights at home. Picture a creamy scoop of your favorite ice cream nestled atop a crunchy Oreo, all wrapped in a rich chocolate shell. Not only are they a quick and fun recipe, but they also offer endless customization with toppings—perfect for impressing your friends or satisfying your cravings. What flavor combination will you create for your first batch?
Ready for a No-Bake Delight?
Simplicity at Its Finest: This recipe is a no-bake wonder, allowing you to whip up something special without turning on the oven.
Endless Customization: Choose any ice cream flavor and toppings to make each batch truly your own, appealing to every palate.
Perfect for Gatherings: Whether it’s a party or a cozy night in, these bites are guaranteed to impress your guests, just like my Berry Yogurt Bites.
Quick & Easy: With minimal prep time, these treats can come together in a flash, letting you focus on enjoying the moment.
Decadent Flavor & Texture: Crunchy Oreos paired with creamy ice cream and rich chocolate create an irresistible combination you won’t want to miss!
Chocolate-Covered Ice Cream Bites Ingredients
• Get ready to indulge in these delightful treats with the key ingredients that make them shine!
For the Base
- Oreo cookies – The perfect crunchy base; choose between classic chocolate or golden Oreos for a twist.
- Ice Cream – Adds creaminess and flavor; feel free to use your favorite flavor for a personal touch.
For the Coating
- Dark Chocolate – Provides a rich and indulgent shell; opt for high-quality chocolate for the best results.
- Coconut Oil – Essential for achieving that delightful, firm chocolate coating that snaps perfectly when you bite in.
For the Toppings (Optional)
- Nuts – Adds extra crunch and flavor; consider chopped almonds or walnuts for a gourmet touch.
- Crushed Cookies – Use additional Oreo crumbs or other cookies for textural contrast.
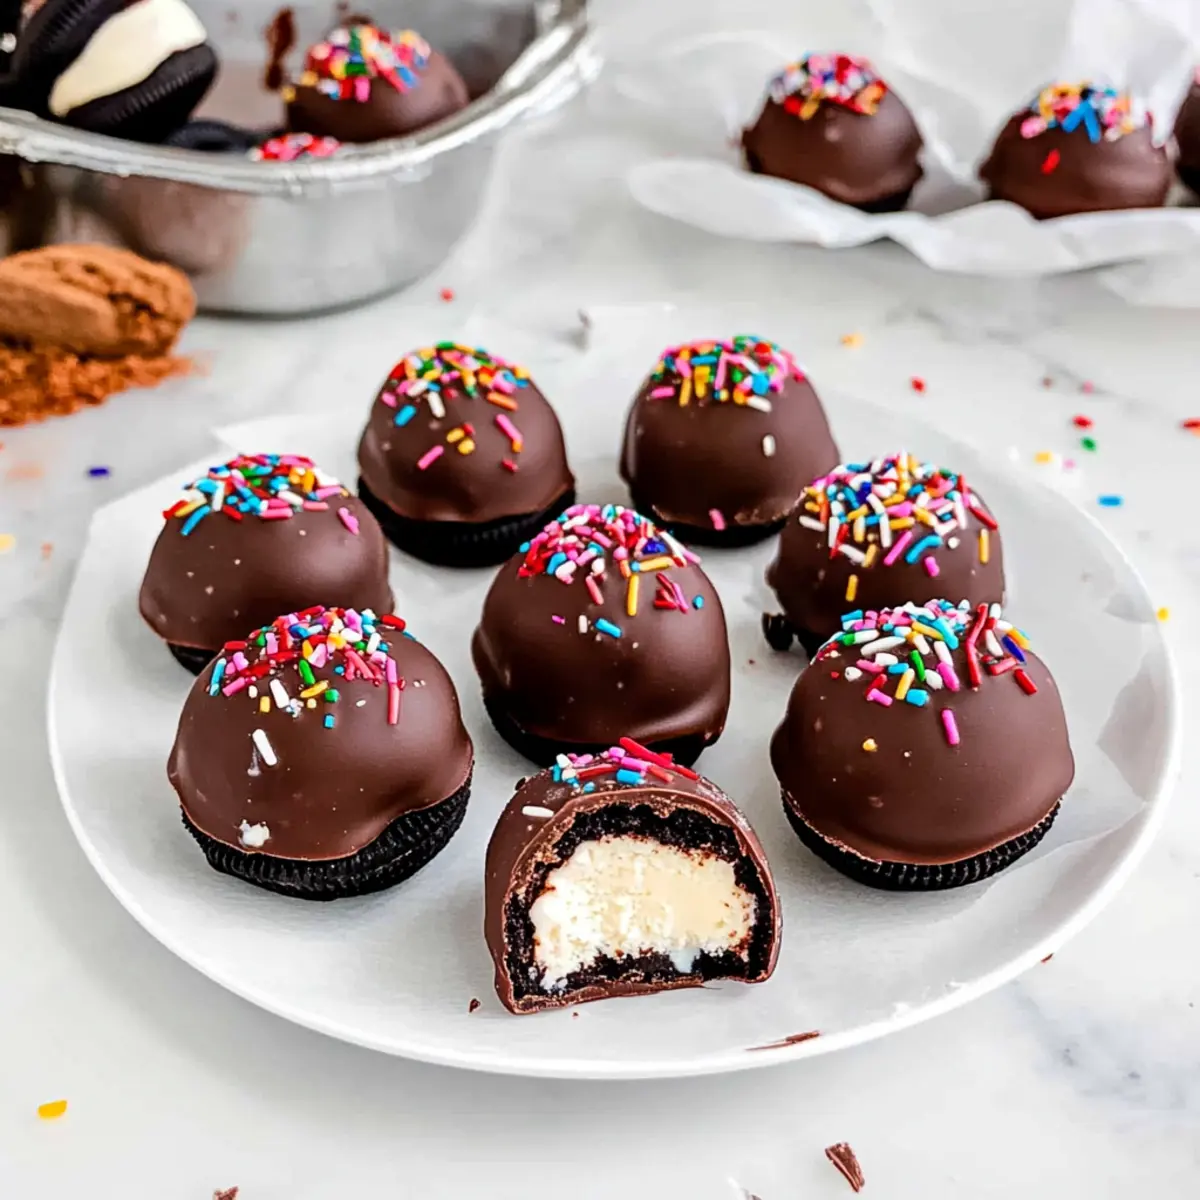
- Sprinkles – Brighten up your bites with colorful sprinkles, perfect for celebrations.
- Graham Cracker Crumbs – These lend a delightful crunch and a touch of nostalgia to your treats.
Dive into these Chocolate-Covered Ice Cream Bites and let your creativity take flight!
Step‑by‑Step Instructions for Chocolate-Covered Oreo Ice Cream Bites
Step 1: Prepare Ice Cream Bites
Using a tablespoon-sized scoop, carefully create rounded balls of your favorite ice cream and place each one atop an Oreo cookie. Arrange these ice cream-filled Oreos on a tray lined with parchment paper. Once completed, transfer the tray to the freezer and allow the bites to freeze for at least 2 hours or until they are firm to the touch, ensuring the ice cream holds its shape during the coating process.
Step 2: Melt Chocolate
In a microwave-safe bowl, combine dark chocolate chips and a tablespoon of coconut oil for a glossy finish. Microwave the mixture in 30-second intervals, stirring after each, until fully melted and smooth. This should take about 1 to 2 minutes in total. Allow the chocolate to cool slightly before using, as overly hot chocolate can melt the ice cream more quickly on contact.
Step 3: Coat Ice Cream Bites
Remove the frozen ice cream bites from the freezer, working with a few at a time to keep them firm. Dip each Oreo with the ice cream into the melted chocolate, ensuring it is fully coated. Allow any excess chocolate to drip back into the bowl; this step creates that delightful, hard shell for your Chocolate-Covered Oreo Ice Cream Bites. Make sure the chocolate completely seals the ice cream to prevent melting.
Step 4: Add Toppings
While the chocolate coating is still wet, quickly sprinkle your choice of toppings over the surface for added texture and flavor. Options such as crushed nuts, sprinkles, or cookie crumbs work beautifully here. This step allows you to customize each Chocolate-Covered Oreo Ice Cream Bite according to your taste. Get creative and have fun making each bite unique!
Step 5: Freeze Again
Once all bites have been coated and decorated, return them to the tray and place them back in the freezer. Allow your Chocolate-Covered Oreo Ice Cream Bites to freeze for at least 1 hour, or until the chocolate shell is firm and ready for serving. This final freeze will ensure each bite is a delightful surprise of creamy ice cream and crunchy cookie goodness!

Make Ahead Options
These Chocolate-Covered Oreo Ice Cream Bites are perfect for busy home cooks looking to streamline their sweet indulgences! You can prepare the ice cream balls and sandwich them on the Oreos up to 24 hours in advance by storing them in an airtight container in the freezer. This keeps them firm and ready for coating. When you are ready to enjoy, simply melt the chocolate, coat the frozen bites, and top with your favorite toppings. If you’re making them more than a day ahead, you can fully assemble the bites (coated and topped) and store them in the freezer for up to 3 months. Just remember to allow them to freeze completely before serving; they’ll be just as delicious, providing a crunchy and creamy delight that saves you precious time on a busy day!
Expert Tips for Chocolate-Covered Ice Cream Bites
Keep Ice Cream Firm: Ensure the ice cream balls are well-frozen before dipping to maintain their shape during the chocolate coating process.
Use a Deep Bowl: Opt for a deep bowl when melting the chocolate, as it makes dipping the bites much easier and less messy.
Plan Freezer Space: Set aside enough freezer space to lay your bites flat on a tray for quick and even freezing, ensuring they don’t stick together.
Reuse Leftover Chocolate: Don’t let leftover melted chocolate go to waste! It can be reused for additional bites or drizzled over other desserts.
Experiment with Customization: Don’t hesitate to try different ice cream flavors or toppings—these Chocolate-Covered Ice Cream Bites are perfect for personalizing your sweet treats!
Chocolate-Covered Ice Cream Bites Variations
Feel free to let your imagination run wild with these delightful variations to make the recipe truly yours!
- Flavor Swaps: Try different ice cream flavors like mint chocolate chip or cookies and cream for a unique twist.
- Cookie Alternatives: Substitute Oreo cookies with peanut butter or lemon sandwich cookies for an exciting flavor boost.
- White Chocolate: Use white chocolate instead of dark chocolate for a sweeter, creamy coating everyone will love.
- Nutty Addition: Add a sprinkle of chopped almonds or pistachios on top for an extra crunchy texture.
- Spicy Surprise: Incorporate a pinch of cayenne or chili powder into the chocolate for a surprising kick in each bite.
- Tasty Sprinkles: Show off your festive spirit by adding seasonal sprinkles, perfect for birthdays or holidays.
- Syrupy Glaze: Drizzle caramel or chocolate syrup over the frozen bites before serving for an indulgent treat.
- Dairy-Free Option: Swap regular ice cream with dairy-free versions and use dairy-free chocolate for a guilt-free delight!
As you craft your own delectable variations, you might also love checking out my Pumpkin Cream Cheese or add a savory twist to your gathering with some Sticky Steak Bites. The joy of customizing is all about exploring new flavors!
What to Serve with Chocolate Covered Oreo Ice Cream Bites
What pairs best with these irresistible bites?
Indulging in Chocolate-Covered Oreo Ice Cream Bites is a delightful experience on its own, but enhancing your dessert table with a few complementary treats makes for the perfect gathering.
-
Fresh Fruit Salad: Juicy berries and tropical fruits bring brightness and freshness, balancing the rich flavors of the bites. It’s a refreshing contrast that your guests will love.
-
Whipped Cream: A dollop of fluffy whipped cream adds a light and airy texture, perfect for dipping or topping these decadent bites, inviting everyone to savor more.
-
Coffee or Espresso: The bold notes of coffee create a wonderful pairing with the sweetness of the chocolate and ice cream. It’s the perfect pick-me-up after a sweet feast!
-
Chocolate Chip Cookies: Classic cookies offer a nostalgic touch that complements the bites beautifully. Their chewy texture and extra chocolate make the dessert table irresistible!
-
Chocolate Milk: This creamy, chocolatey drink is a delightful and nostalgic pairing, especially for kids and adults alike, making each bite even more decadent.
-
Chilled Milkshakes: Pair your bites with a classic milkshake that mirrors the ice cream flavor you chose. It’s a fun, frosty way to elevate your dessert experience.
-
Mini Cheesecakes: Indulging in a slice of mini cheesecake adds a creamy and tart contrast that balances out the sweetness of the bites. Perfect for those who love layers of flavor.
-
Sparkling Water: For something light and bubbly, sparkling water with a splash of lime makes a refreshing quencher that cleanses the palate between the rich bites.
Let your imagination run wild as you combine these suggestions for a memorable dessert spread!
How to Store and Freeze Chocolate-Covered Ice Cream Bites
Fridge: Store any leftover bites in an airtight container in the fridge for up to 3 days, but best enjoyed chilled.
Freezer: Keep chocolate-covered ice cream bites in an airtight container or tightly wrapped in plastic wrap for up to 3 months. This preserves their delightful texture and taste.
Reheating: If they become too hard, let them sit at room temperature for a few minutes before enjoying for the best flavor and texture experience.
Serving Tip: To retain their delicious chocolate coating when serving, take them out of the freezer shortly before serving!
Chocolate Covered Oreo Ice Cream Bites Recipe FAQs
How do I choose the best ice cream for this recipe?
Absolutely! For the best results, opt for a high-quality ice cream that’s well-frozen before use. The creamier the ice cream, the better the texture of your Chocolate-Covered Oreo Ice Cream Bites. Avoid using ice cream that’s too soft or has been partially melted, as this can cause issues during the dipping process.
How long can I store the chocolate-covered ice cream bites?
You can store these delicious treats in an airtight container in the freezer for up to 3 months. Make sure they are well-wrapped to prevent ice crystal formation, which can affect their texture. I often label my containers with the date to keep track!
Can I freeze leftover chocolate after coating the bites?
Yes, you can! If you have any melted chocolate left after coating your bites, let it cool, then pour it into a sealed container. Store it in the refrigerator for up to 2 weeks. When you’re ready to use it again, simply reheat it in short bursts in the microwave until it’s melted and smooth.
What should I do if my chocolate coating is too thick?
If you find your chocolate is too thick to dip the Oreo bites, try adding a little more coconut oil or shortening to the melted chocolate. This will help achieve a smoother consistency that coats better. Additionally, make sure the chocolate isn’t too hot, as this can cause the ice cream to melt prematurely when they meet.
Are there any dietary considerations I should keep in mind?
Very! If you’re making these bites for someone with allergies, be sure to check the ingredients on the Oreo cookies and chocolate. Both can contain allergens like gluten and dairy. For a dairy-free option, consider using non-dairy ice cream varieties and ensure to select dark chocolate that’s dairy-free as well.
How can I tell when the ice cream is firm enough to dip?
To check if your ice cream is firm enough, press gently into one of the ice cream balls. If it holds its shape and feels solid, you’re all set! Ideally, you’ll want to let them freeze for at least 2 hours. This will ensure each bite maintains its form once dipped, creating that perfect texture you crave in your Chocolate-Covered Oreo Ice Cream Bites.
Irresistible Chocolate-Covered Ice Cream Bites You’ll Love
Ingredients
Equipment
Method
- Using a tablespoon-sized scoop, create rounded balls of your favorite ice cream and place each atop an Oreo cookie. Arrange on a tray lined with parchment paper and freeze for at least 2 hours.
- In a microwave-safe bowl, combine dark chocolate chips and coconut oil. Microwave in 30-second intervals until fully melted and smooth. Allow to cool slightly before use.
- Remove ice cream bites from the freezer. Dip each into the melted chocolate, ensuring complete coating, and allow any excess chocolate to drip back into the bowl.
- While the coating is wet, quickly sprinkle your choice of toppings over the surface for added texture and flavor.
- Return the coated bites to the tray and freeze again for at least 1 hour, or until the chocolate shell is firm.
Leave a Reply