
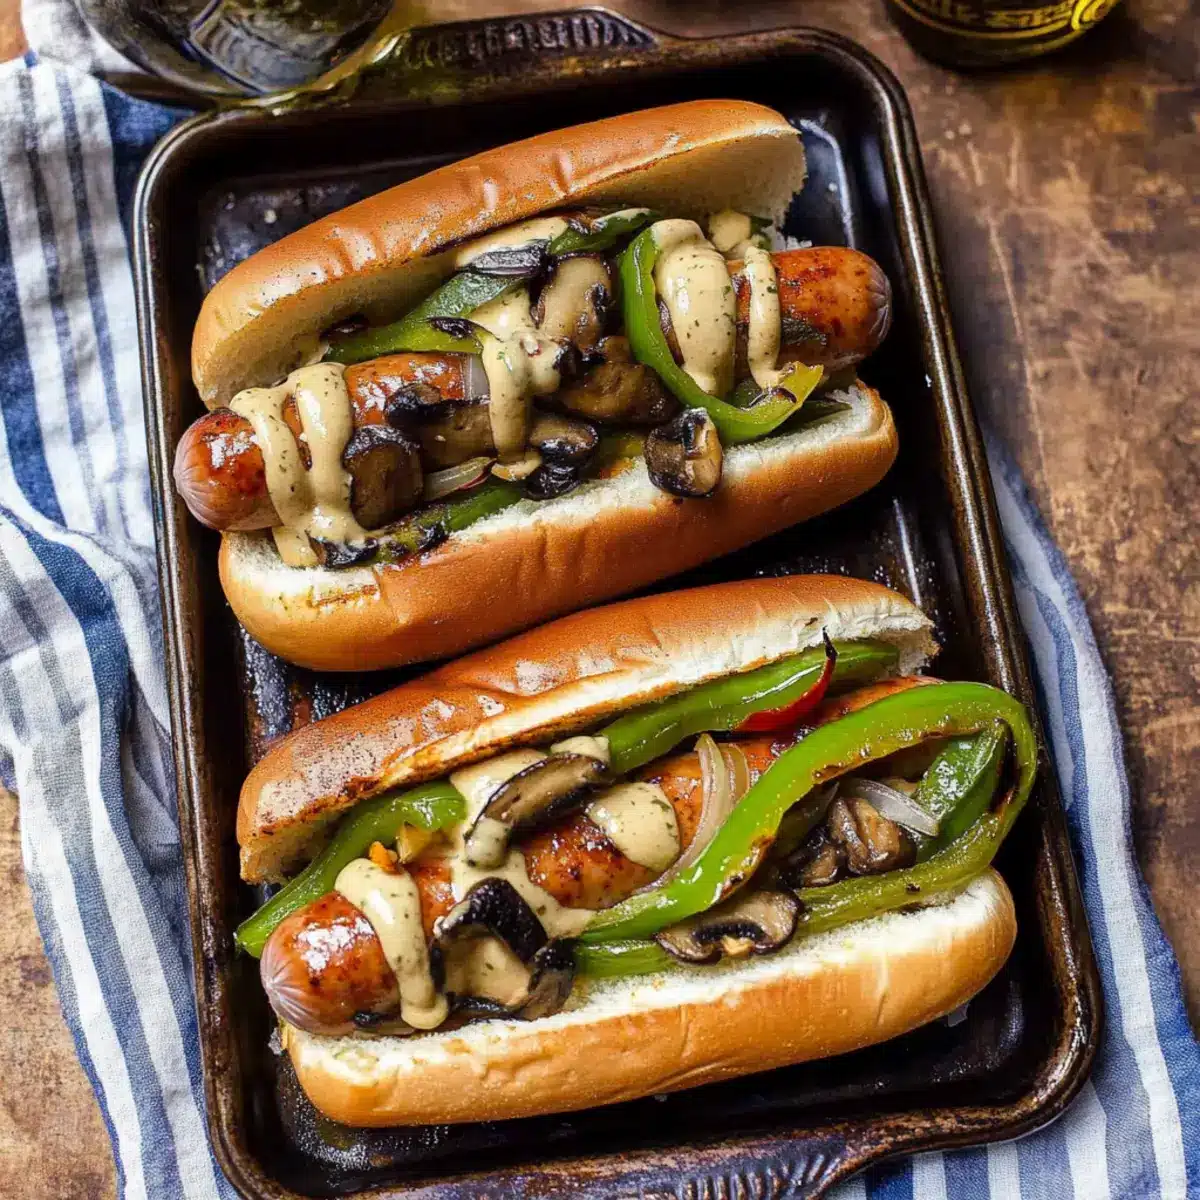
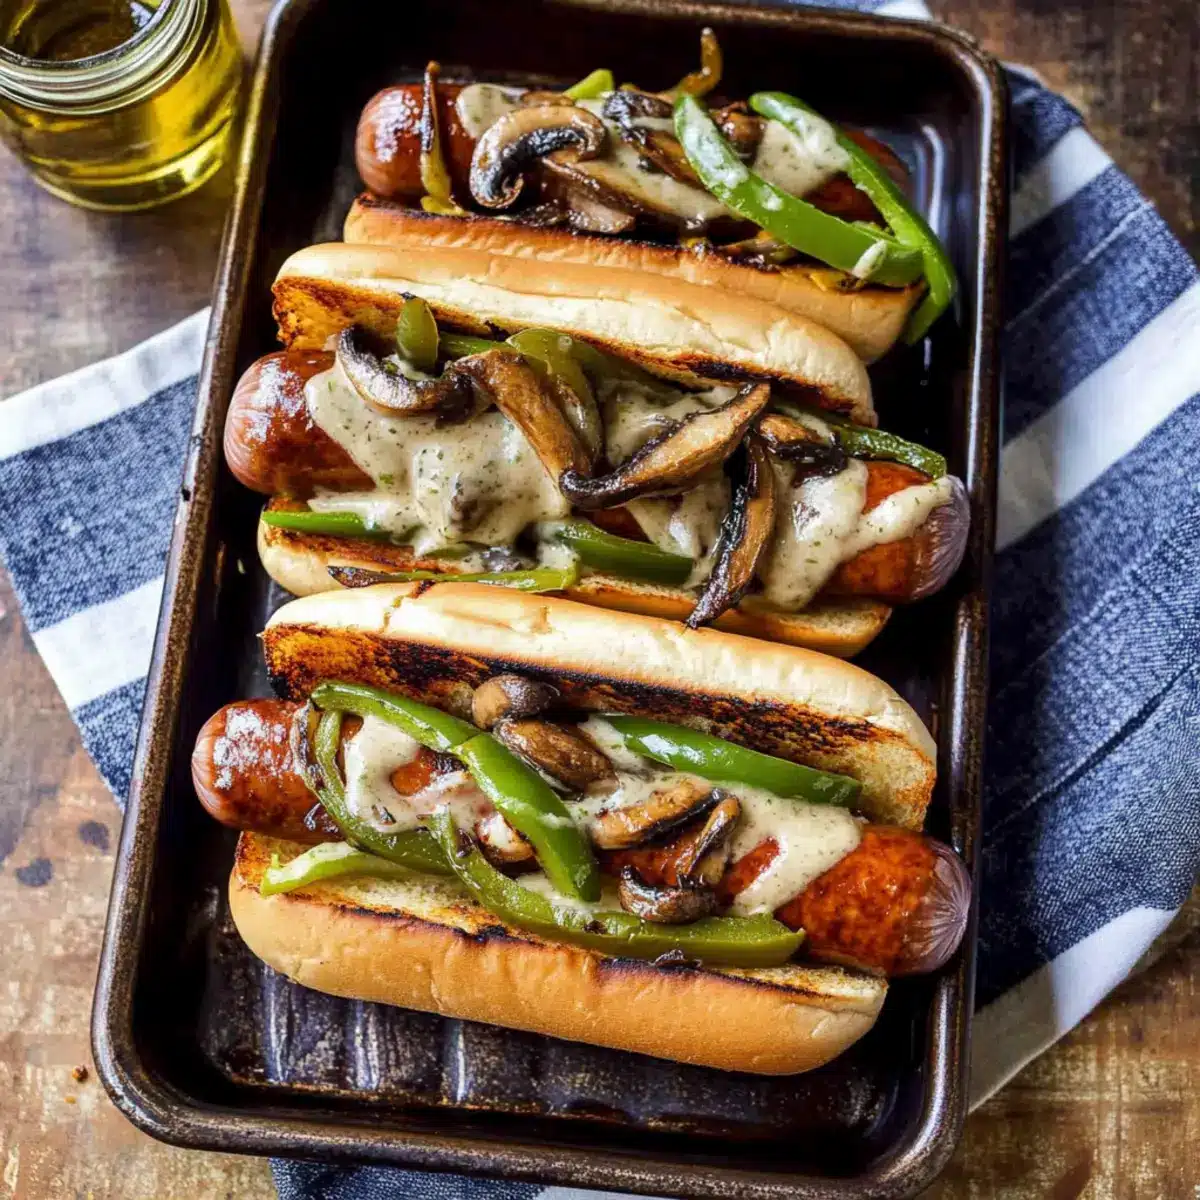
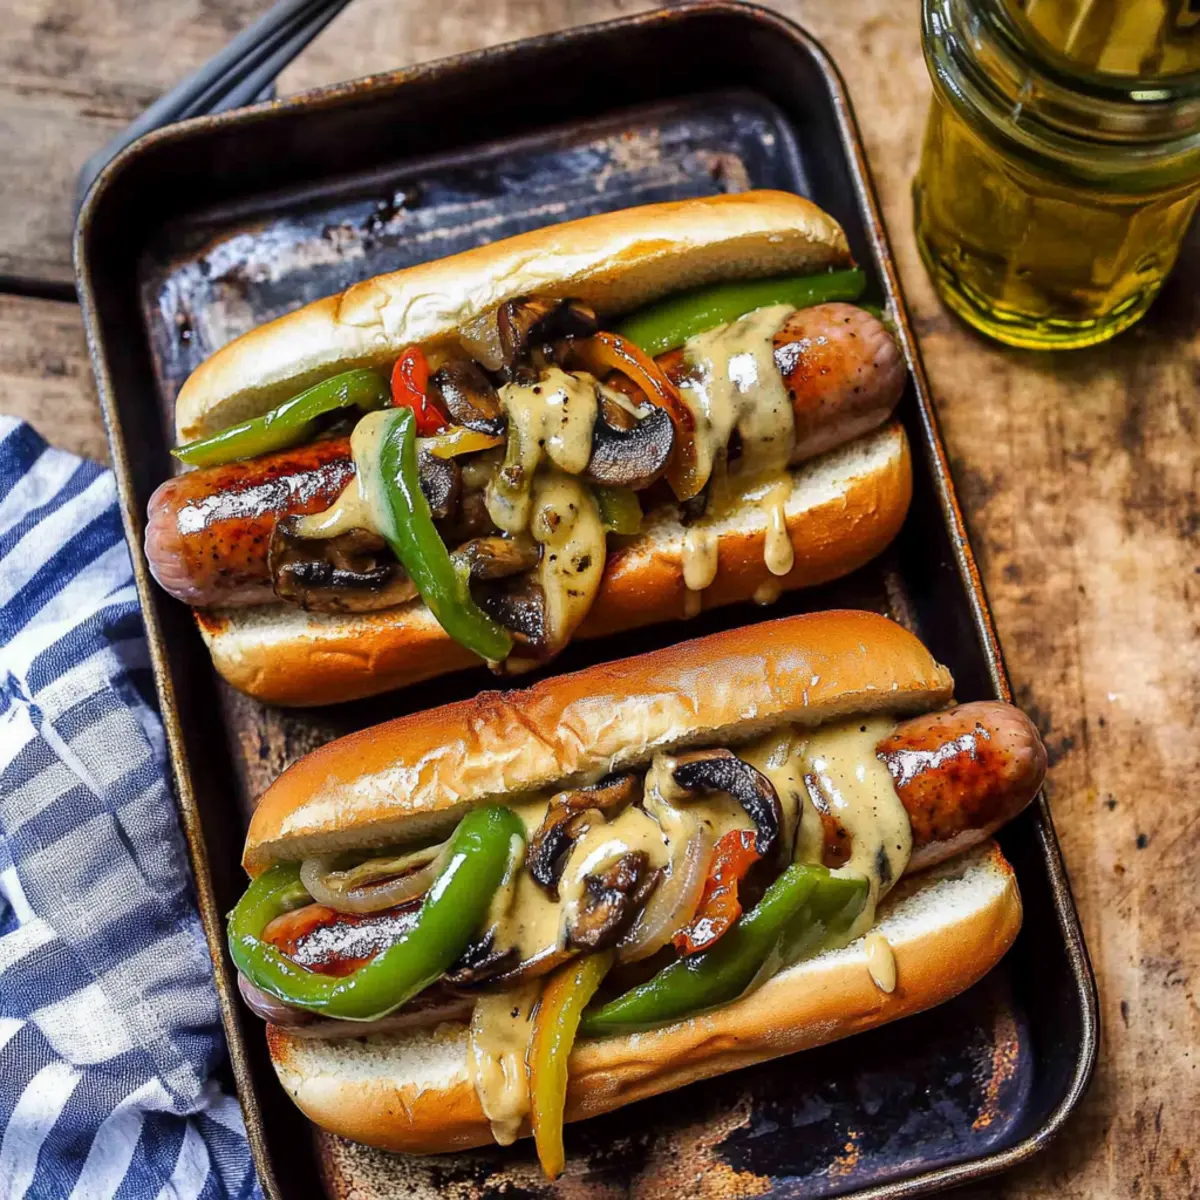
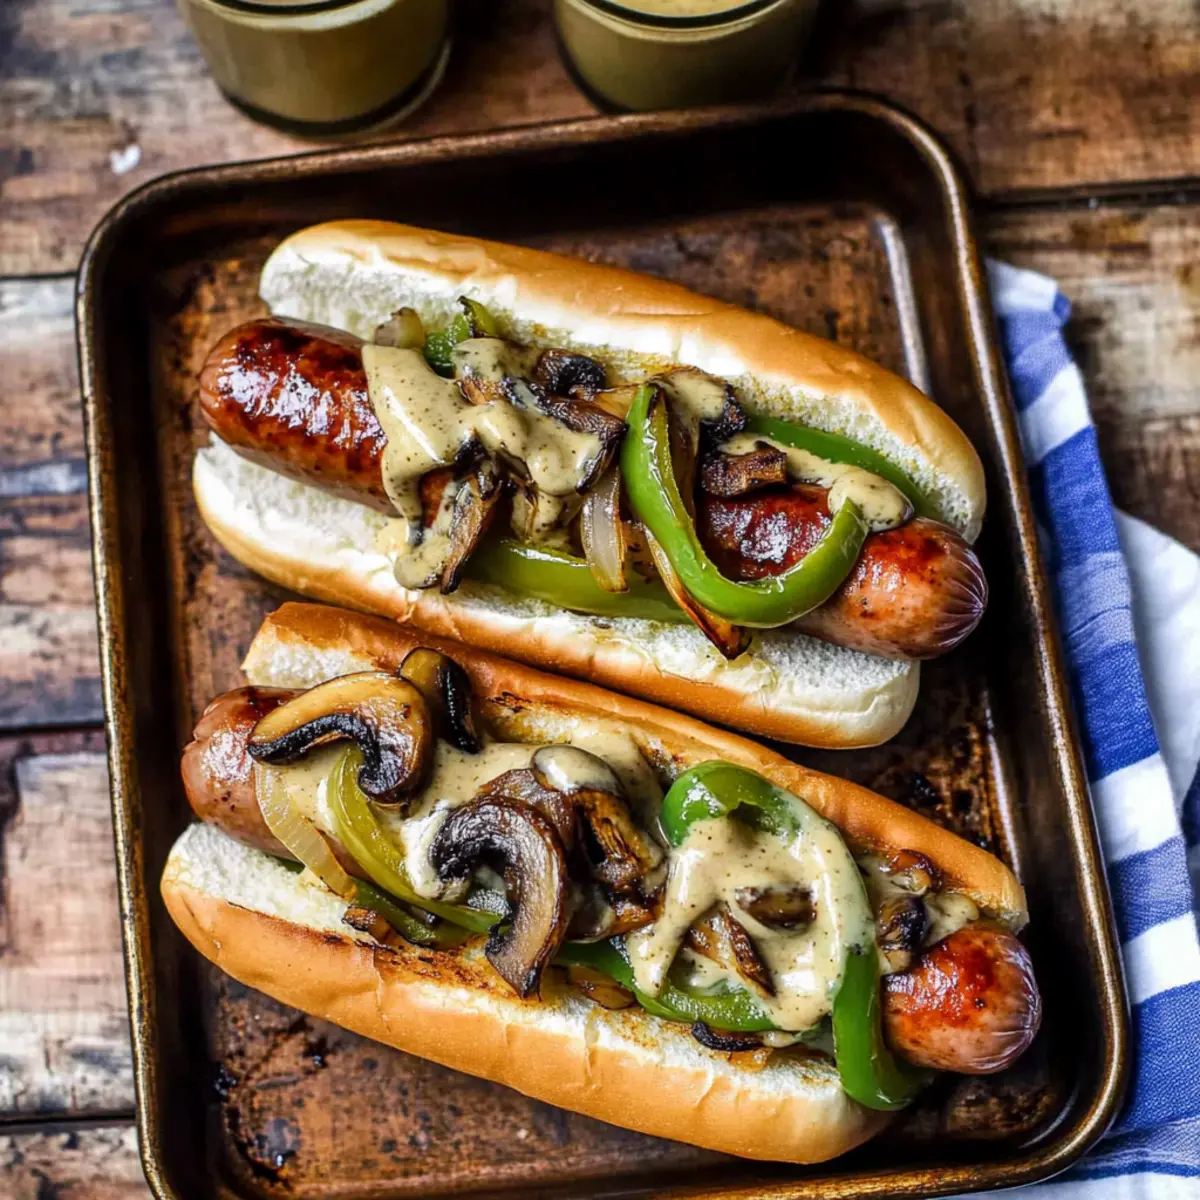
Underneath the sizzle of the grill lies a mouthwatering blend of summer bliss that’s hard to resist. My latest obsession? Grilled Philly Cheese Brats! These delightful brats, filled with juicy turkey bratwurst, are not just a delicious meal; they’re a great excuse to gather friends and family for a backyard feast. What’s even better is that they come topped with a creamy cheese sauce and vibrant grilled veggies, making them a fun and flavorful twist on the classic BBQ. This recipe not only brings a lighter touch to your summer meal but also promises a crowd-pleasing experience that you can whip up in no time. Are you ready to elevate your grilling game and wow your loved ones with these mouthwatering delights? Let’s dive in!
Why are Philly Cheese Brats irresistible?
Savor the flavor: Every bite is a delightful explosion of savory, cheesy goodness with hints of smokiness, thanks to the juicy turkey bratwurst and rich cheese sauce.
Unforgettable gatherings: Perfect for backyard barbecues, these brats bring everyone together, making summer meals a celebration of flavor and fun.
Quick and easy: With just a few simple steps, you can have this flavorful dish ready in no time, perfect for busy weeknights or last-minute cookouts.
Versatile delights: Customize your brats with a variety of toppings; add jalapeños for heat or avocado for creaminess, making each meal unique.
Comfort food redefined: Enjoy the classic taste of a cheesesteak infused into a brat format that keeps the love for summer grilling alive!
For a refreshing side, you can pair them with a light Greek Pasta Salad to balance out the richness of the cheese sauce.
Philly Cheese Brats Ingredients
For the Brats
• Turkey Bratwurst – Perfect for a lower-fat option that doesn’t compromise flavor.
• Brat Buns – A soft, hearty vessel; gluten-free bread is a great alternative.
For the Vegetables
• Olive Oil – Adds moisture and promotes even cooking; vegetable oil can work too.
• Green Pepper – Adds sweetness and crunch; substitute with red or yellow bell pepper if preferred.
• Yellow Onions – Grilled for a sweet, caramelized flavor; shallots are a nice alternative.
• Sliced Mushrooms – Provides an umami blast; try cremini or any favorite mushroom variety.
• Salt and Pepper – Essential for enhancing flavor; adjust to your liking.
For the Cheese Sauce
• Butter – Creates a rich sauce base; opt for olive oil for a lighter version.
• Flour – Thickens the cheese mixture; cornstarch is a gluten-free substitute.
• Whole Milk – Ensures a creamy consistency; dairy-free milk works well for a vegan option.
• Cream Cheese – Adds richness; Neufchâtel cheese can help reduce fat content.
• Smoked Provolone Cheese – Rich in flavor depth; feel free to use any smoked cheese you enjoy.
• White American Cheese – Melts beautifully to give creaminess; swap with cheddar for a sharper taste.
This collection of Philly Cheese Brats ingredients will transform your summer grilling experience into a feast of flavor!
Step‑by‑Step Instructions for Philly Cheese Brats
Step 1: Preheat the Grill
Begin by preheating your grill to medium-high heat, aiming for around 375°F to 400°F. This temperature ensures perfect cooking and that delightful char on your Philly Cheese Brats. Allow the grill to heat up for about 10-15 minutes, giving you time to prepare your ingredients while you wait.
Step 2: Prepare the Vegetables
In a spacious bowl, toss together sliced green peppers, onions, and mushrooms with a drizzle of olive oil, along with salt and pepper to taste. This adds flavor and moisture to your vegetables. You should coat them evenly to ensure they grill perfectly. Set aside as you prepare to grill.
Step 3: Grill the Vegetables
Place the seasoned vegetables in a grill basket or wrap them in heavy-duty foil, then place them directly on the grill. Cook for about 10-12 minutes, using tongs to stir occasionally until they become tender and have lovely grill marks. This vibrant mix will add delicious flavor to your Philly Cheese Brats.
Step 4: Cook the Brats
While the veggies are grilling, it’s time to cook your turkey bratwurst. Lay them directly on the grill grates, ensuring they’re not overcrowded. Grill each brat for 6-7 minutes, flipping them halfway through until they achieve a beautiful golden-brown color and an internal temperature of 160°F.
Step 5: Combine and Finish Grilling
Leave the brats on the grill while continuing to cook the vegetables until they are charred and softened, which typically takes about 3-5 more minutes. This synchronized cooking allows the flavors to enhance each other, creating a satisfying blend that complements the Philly Cheese Brats.
Step 6: Make the Cheese Sauce
In a medium saucepan over medium heat, melt butter and whisk in flour to form a roux, cooking for about 2-3 minutes until it turns golden. Slowly whisk in warmed milk, ensuring there are no lumps, while keeping the mixture bubbling gently for about 5 minutes until it thickens.
Step 7: Add Cheese for Creaminess
Stir in cream cheese, followed by the smoked provolone and white American cheese, mixing until the sauce is smooth and creamy. This should take another 2-3 minutes. Add salt and pepper to taste, ensuring that your cheese sauce will be a delightful addition to your Philly Cheese Brats.
Step 8: Assemble and Serve
To plate, take each grilled brat and nestle it into a bun, then generously top with grilled veggies. Drizzle the warm cheese sauce over the top, allowing it to melt beautifully into the bun for that perfect finish. Enjoy your flavorful Philly Cheese Brats at your next summer gathering!
What to Serve with Philly Cheese Brats
Elevate your summer meal experience by pairing these grill-packed delights with sides that offer a balance of flavors and textures.
- Creamy Coleslaw: A crunchy, tangy coleslaw provides a refreshing crunch that cuts through the richness of the cheese sauce.
- Potato Salad: The creamy comfort of potato salad complements the grilled brat flavor, adding a familiar touch to your outdoor feast.
- Grilled Corn on the Cob: Sweet and smoky, grilled corn adds the perfect charred contrast and a lovely sweetness to the meal.
- Greek Pasta Salad: This light and colorful salad adds a burst of zest that perfectly balances the hearty brats, making each bite a delight.
- Watermelon Feta Salad: A refreshing watermelon and feta combo can cleanse the palate, offering a sweet and salty burst in between bites.
- Lemonade or Iced Tea: Quench your thirst with a chilled glass of lemonade or iced tea, their bright flavors enhancing the overall summer vibe.
- Fruit Skewers: These cheerful and colorful skewers provide a sweet finish, making dessert a fun and light afterthought.
- Chips and Guacamole: The creamy richness of guacamole alongside crispy chips creates a satisfying snack that pairs wonderfully with the brats.
Philly Cheese Brats Variations & Substitutions
Get ready to personalize your Philly Cheese Brats for a flavor journey that’s entirely your own!
-
Turkey Alternative: Swap turkey bratwurst for chicken bratwurst for a slightly different flavor that’s equally juicy.
You can also try pork bratwurst if you want something richer! -
Cheese Choices: Use sharp cheddar or pepper jack for the cheese sauce to add a spicy kick to your melty goodness.
Experimenting with cheese can completely change the dish’s flavor profile while keeping it delicious! -
Veggie Medley: Incorporate zucchini or asparagus for a fresh twist with added nutrients.
Grilled veggies bring vibrance and nutrition to your cheese brats, enhancing both taste and presentation! -
Bun Options: Substitute the brat buns for lettuce wraps or gluten-free bread to cater to dietary preferences.
This keeps the essence of the dish while offering a lighter, gluten-free alternative! -
Toppings Galore: Add jalapeños for heat or avocado for creaminess; both elevate the flavor profile!
The array of toppings allows for personal expression, ensuring every bite feels unique! -
Creamy Sauce Variations: For a vegan version, replace dairy cheese with cashew cheese or nutritional yeast in the sauce.
These alternatives provide the creamy texture you crave without the dairy! -
Herb Medley: Sprinkle fresh herbs like cilantro or parsley on top for added flavor and freshness.
Fresh herbs not only enhance taste but also add a touch of color, making your dish visually appealing! -
Spicy Kick: Drizzle hot sauce over your assembled brats for an extra layer of excitement!
A touch of spice can elevate all of your ingredients, making every bite an adventure!
These variations ensure that your Philly Cheese Brats always remain exciting and cater to your taste preferences. For another delightful dish, consider pairing them with a light Greek Pasta Salad to balance the richness of your creamy sauce!
Make Ahead Options
These Philly Cheese Brats are a fantastic option for busy home cooks looking to save time during hectic weekdays! You can prep the grilled vegetables and the creamy cheese sauce up to 3 days in advance. Simply chop the green pepper, onions, and mushrooms, toss them with olive oil, salt, and pepper, and store in an airtight container in the refrigerator. For the cheese sauce, prepare it completely, let it cool, and refrigerate as well. When you’re ready to serve, grill the turkey brats (which can also be prepared in advance) and reheat the veggies and cheese sauce gently until warm. This way, you’ll enjoy delicious, satisfying Philly Cheese Brats with minimal hassle, making meal planning a breeze!
Expert Tips for Philly Cheese Brats
-
Grill Temperature: Keep the grill at medium-high heat to achieve a nice sear on your brats, preventing them from drying out.
-
Vegetable Preparation: Avoid overcrowding the grill with veggies; this ensures even cooking and beautiful char marks for your Philly Cheese Brats.
-
Cheese Sauce Smoothness: Warm your milk before adding it to the cheese sauce to prevent lumps, ensuring a silky texture in your final dish.
-
Timing is Key: Grill the brats and veggies simultaneously to infuse flavors—this pairing enhances the overall taste of your meal.
-
Personalize Your Toppings: Don’t hesitate to get creative with toppings; explore spices, sauces, or extra cheese to make your Philly Cheese Brats unique.
Storage Tips for Philly Cheese Brats
Fridge: Store leftovers in airtight containers for up to 3 days to keep the brats and grilled vegetables fresh and flavorful.
Freezer: For longer storage, freeze the brats and cheese sauce separately for up to 2 months. Wrap tightly to prevent freezer burn.
Reheating: Thaw overnight in the fridge before reheating; warm brats and veggies on the grill or in the oven, and reheat the cheese sauce gently on the stovetop.
Assembly Storage: If storing assembled Philly Cheese Brats, consume within 1 day for optimal freshness as the bun may become soggy.
Philly Cheese Brats Recipe FAQs
What type of bratwurst should I use?
Absolutely! I recommend using turkey bratwurst for a leaner option without sacrificing flavor. If you prefer a richer taste, feel free to use pork or chicken bratwurst instead, as they’ll provide a different texture and flavor profile that you might enjoy.
How should I store leftovers?
To keep your Philly Cheese Brats fresh, store the leftovers in separate airtight containers for up to 3 days. This method maintains the texture of the brats and grilled veggies, preventing them from becoming soggy. When reheating, warm the brats and veggies on the grill or in the oven, and gently reheat the cheese sauce on the stovetop.
Can I freeze the Philly Cheese Brats?
Definitely! To freeze, wrap the grilled brats and cheese sauce separately in plastic wrap or aluminum foil and place them in freezer-safe bags for up to 2 months. This method helps prevent freezer burn. When you’re ready to enjoy them, thaw overnight in the refrigerator before reheating them.
What if my cheese sauce is lumpy?
Very good question! If your cheese sauce turns out lumpy, don’t worry; it happens to the best chefs. Next time, ensure to warm the milk before adding it to the roux, whisking continuously as you pour. If lumps form, simply use an immersion blender to smooth it out or strain the sauce to achieve a silky texture.
Are there any dietary considerations for my guests?
Absolutely! If you have guests with dietary restrictions, consider using gluten-free buns for those who avoid gluten. For a dairy-free option, substitute the milk and cheese with dairy-free alternatives, and for a vegetarian dish, simply omit the bratwurst or replace them with grilled portobello mushrooms for a hearty twist.
How do I know when the brats are fully cooked?
For safety, always cook turkey bratwurst until they reach an internal temperature of 160°F. Use a meat thermometer to check this. The brats should be golden brown on the outside, and juices should run clear. Remember, grilling is all about timing and temperature control, so keep a close eye on them!
Philly Cheese Brats: Summer’s Ultimate Flavor Explosion
Ingredients
Equipment
Method
- Preheat your grill to medium-high heat, around 375°F to 400°F, for about 10-15 minutes.
- Toss sliced green peppers, onions, and mushrooms with olive oil, salt, and pepper. Set aside.
- Grill the seasoned vegetables for about 10-12 minutes until tender with grill marks.
- Grill the turkey bratwurst for 6-7 minutes until golden-brown and at an internal temperature of 160°F.
- Continue cooking the brats while the veggies finish charring for another 3-5 minutes.
- Melt butter in a saucepan, whisk in flour to create a roux for about 2-3 minutes.
- Slowly whisk in warmed milk and cook for about 5 minutes until thickened.
- Add cream cheese, smoked provolone, and white American cheese, mixing until smooth.
- Assemble the brats in buns, top with grilled veggies and cheese sauce. Serve warm.
Leave a Reply